 14
14
Lian Li Lancool II Mesh Performance Review - Taking It to New Heights
Assembly & Finished Looks »A Closer Look - Inside
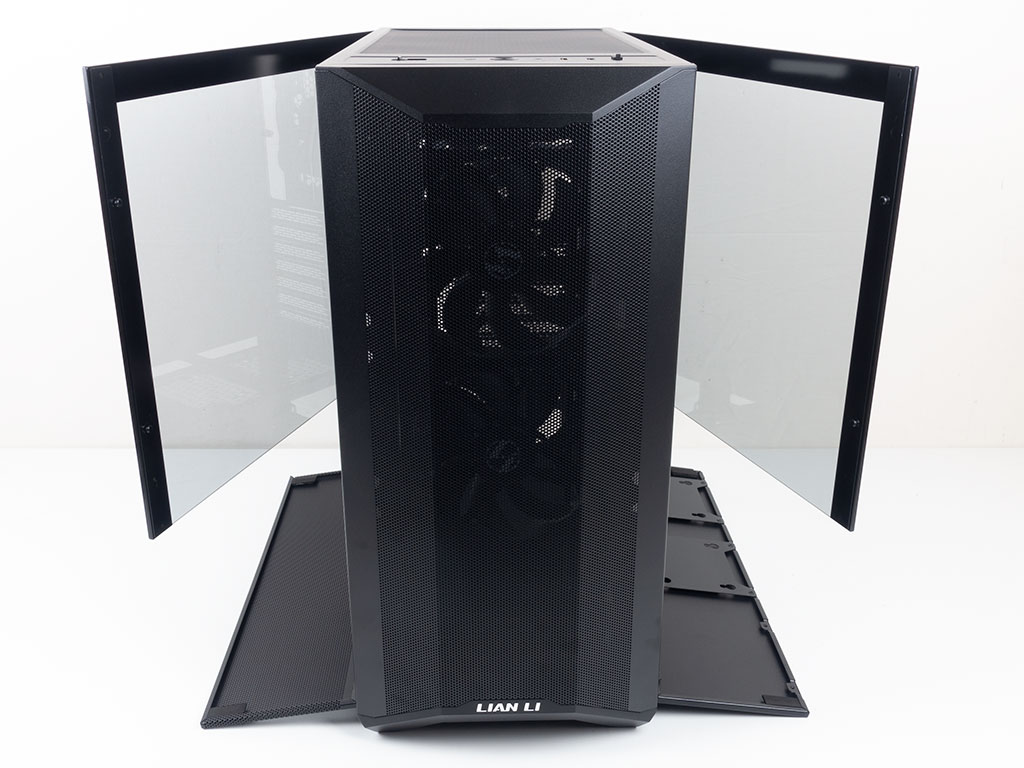
To access the interior of the Lancool II Mesh Performance simply flip down the metal covers and swing the doors open. You may remove the glass to keep things simple during assembly.

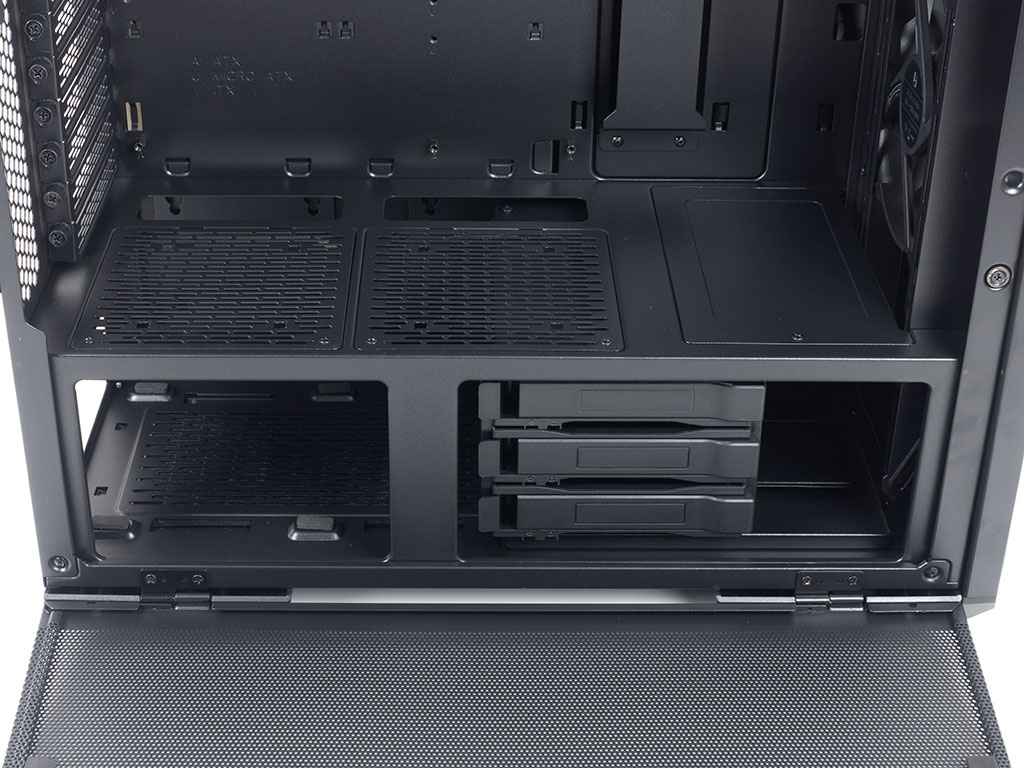
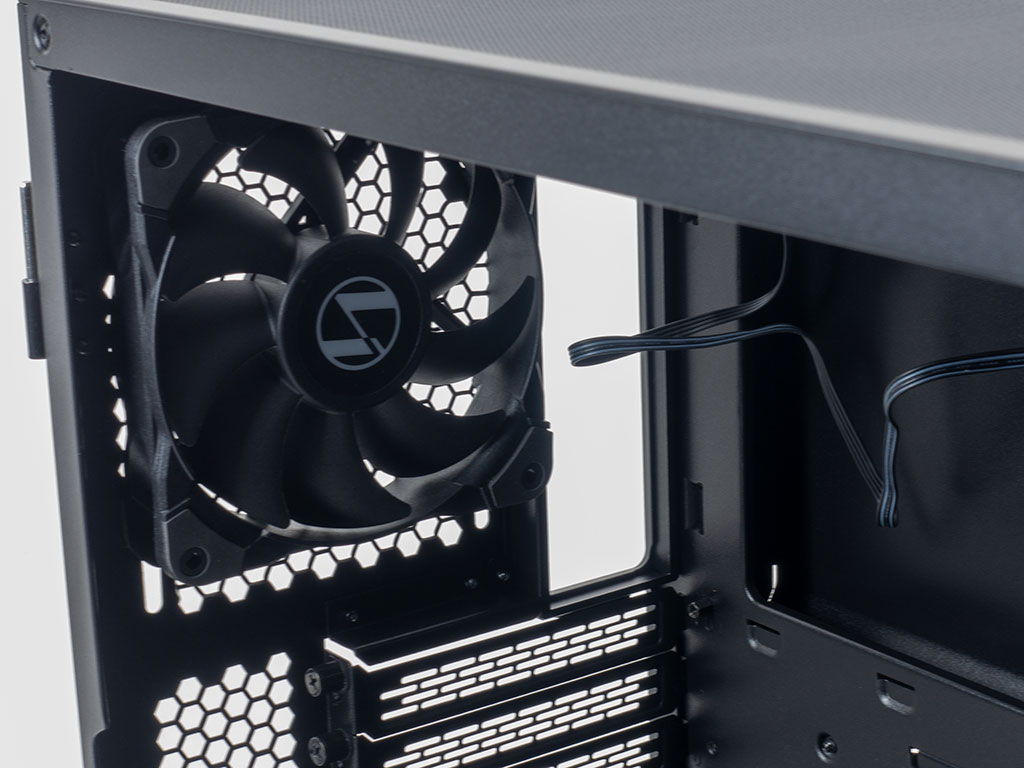
Looking into the chassis interior, things looks pretty traditional with a lack of drive bays in the main compartment. Even the shroud has familiar elements, like the two openings for cable routing and the larger cover which may be removed to allow for thick radiators in the front of the Lancool II Mesh Performance. In addition, you may install up to two 120 mm fans here if you like. While doing so will essentially prevent easily accessing the bottom edge of your motherboard, the shroud is actually up high enough to allow for a little airflow due to the vent on the side of the chassis. Alternatively, these two spots could also hold 2.5" storage drives. As soon as you flip down this side, you will notice that this isn't really a shroud, but more of a thermal barrier.
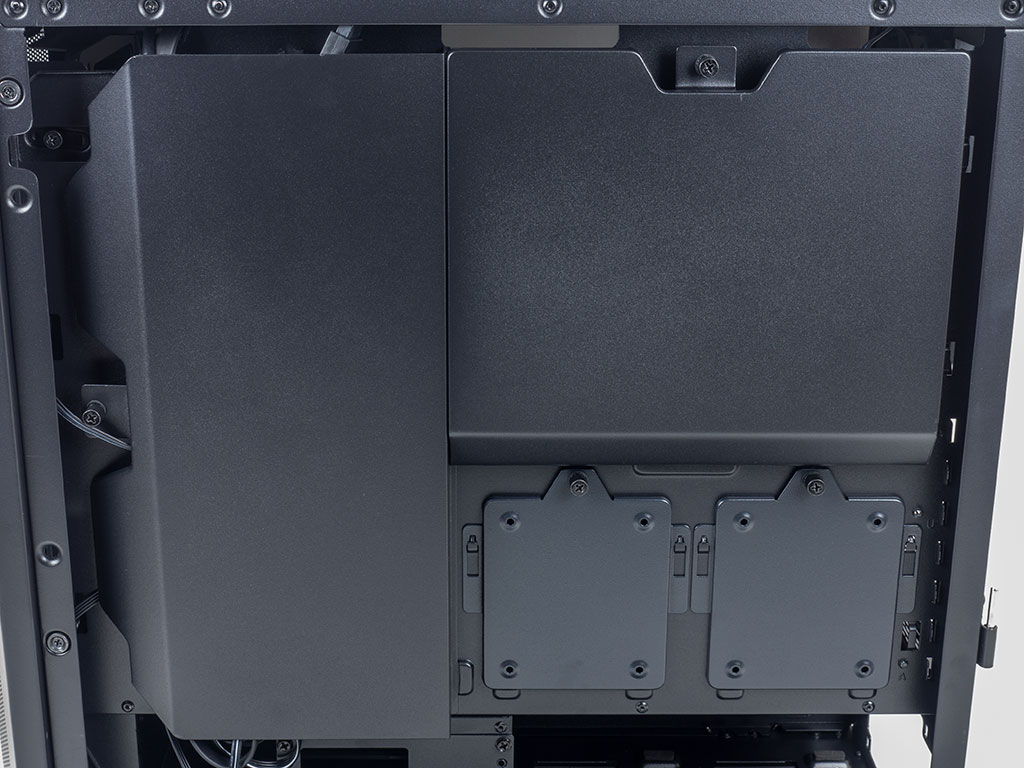
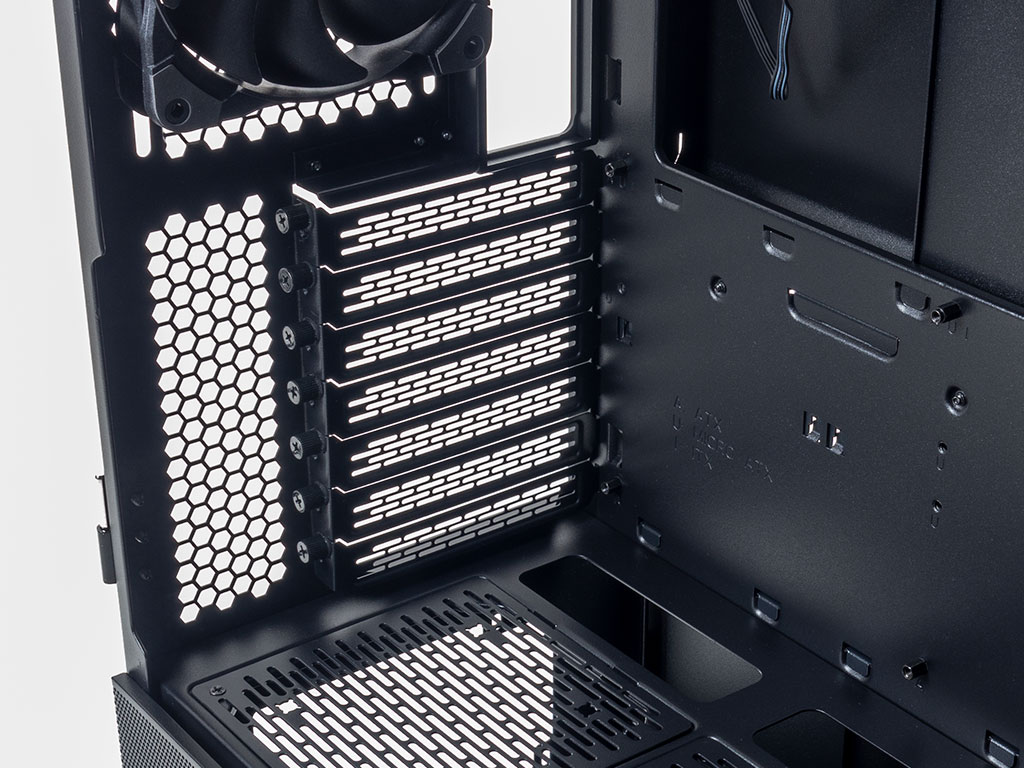
Once you remove the glass panel on the opposite side of the Lian Li Lancool II Mesh Performance, the two separate metal cable covers can clearly be seen. The bigger of the two towards the front of the enclosure actually extends below the window, so you have to flip the bottom cover down to reveal all of it.
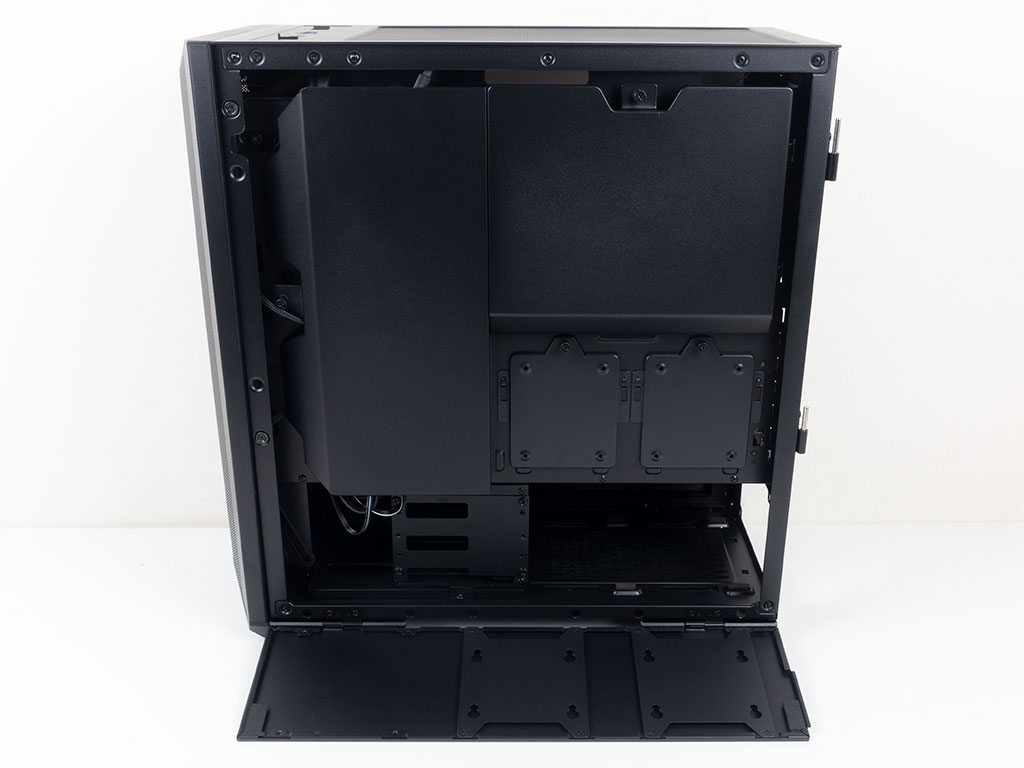
Once the two covers are removed, you can clearly see all the traditional elements, like cable-routing opportunities and openings for the CPU cooler area of the motherboard.
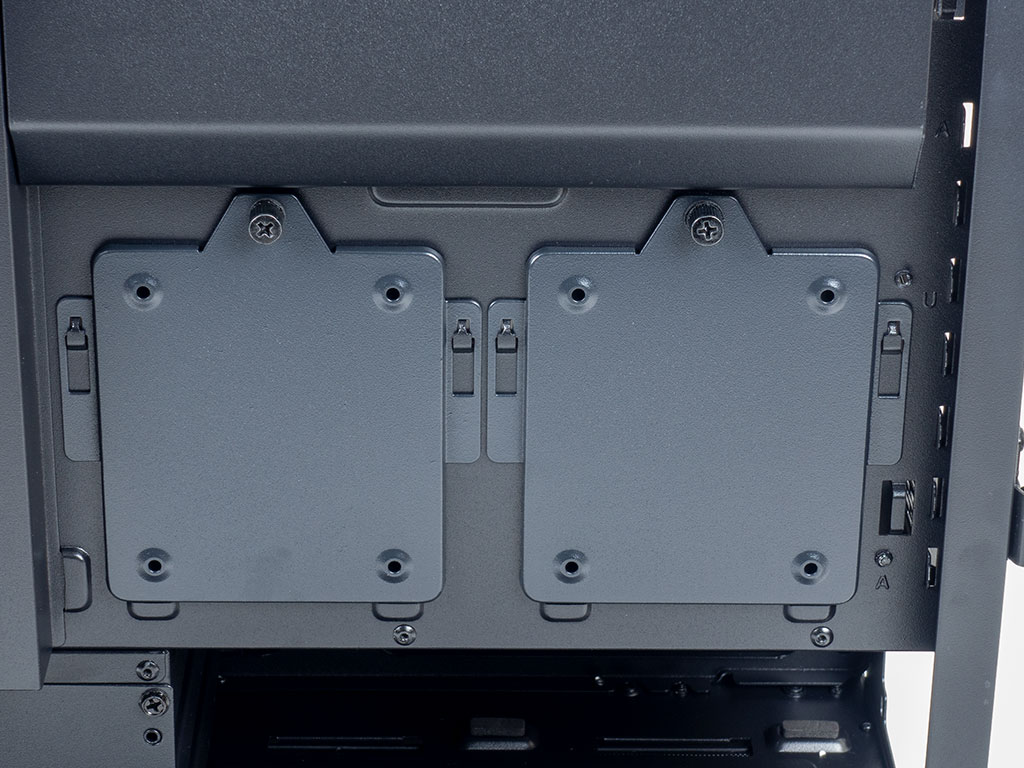

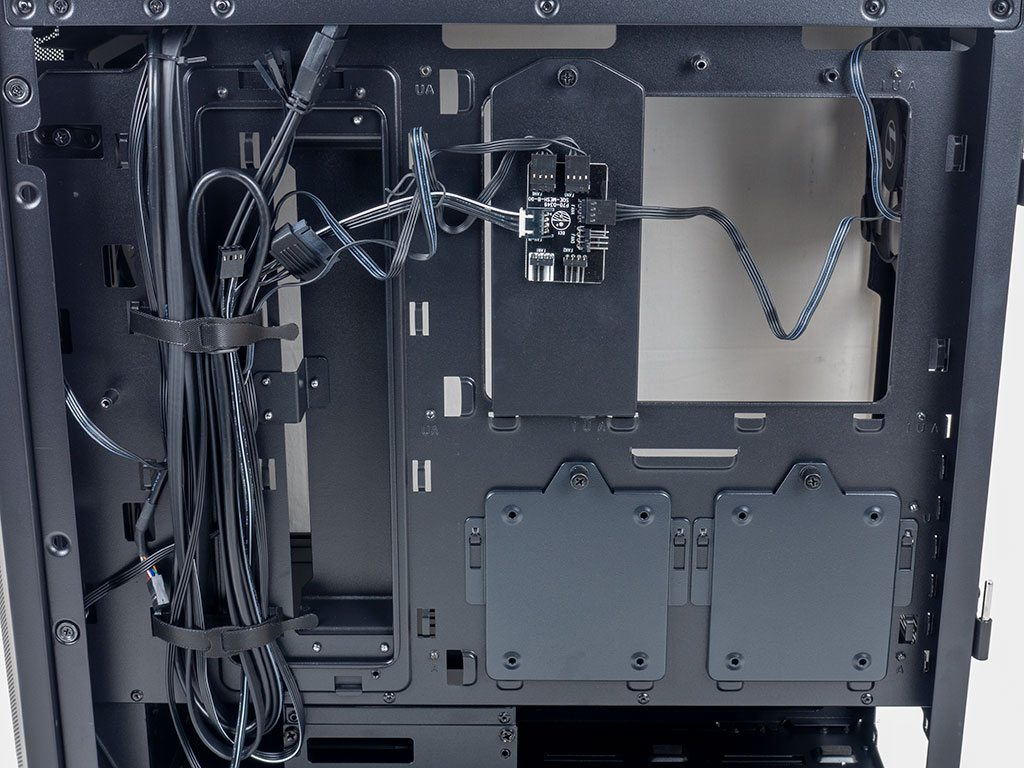
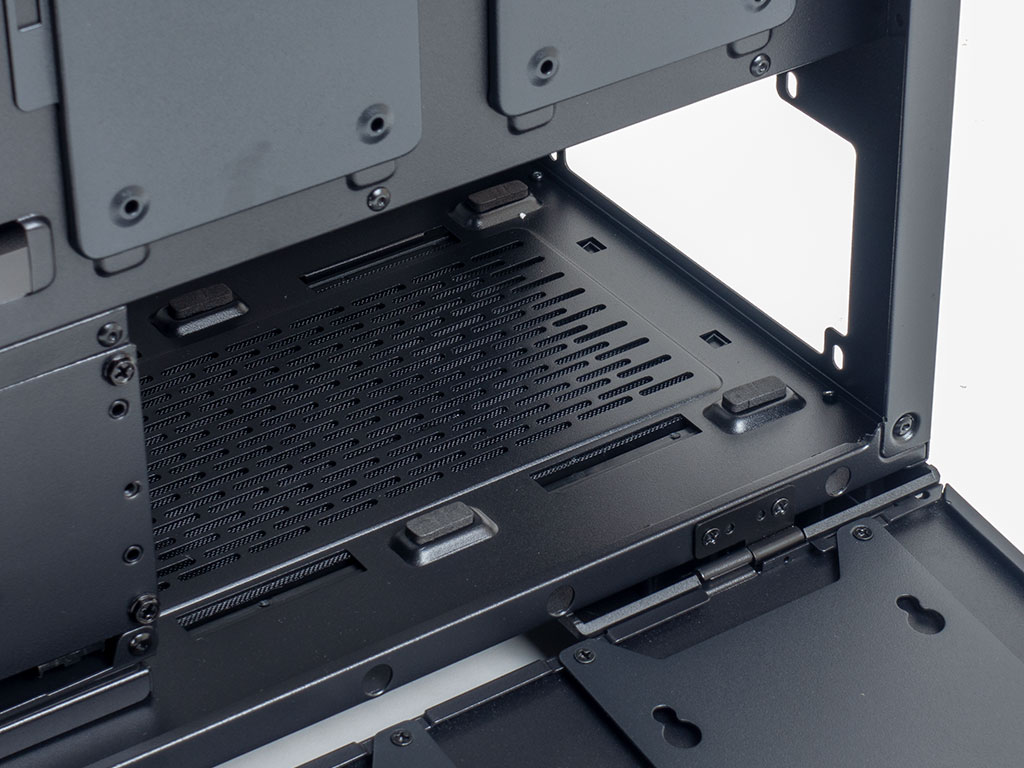
There are two visible mounting possibilities for SSDs on the backside of the motherboard tray, with two more hidden on the flip-down panel itself. This brings the total number of possible 2.5" drive mounting possibilities to an excellent six.
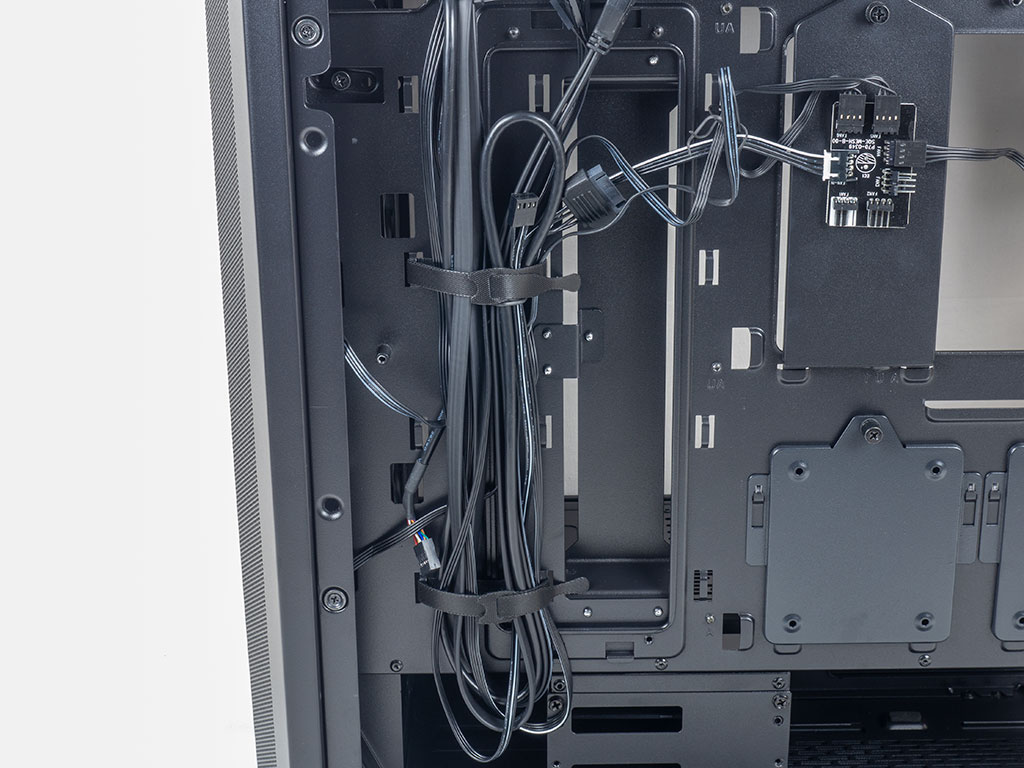
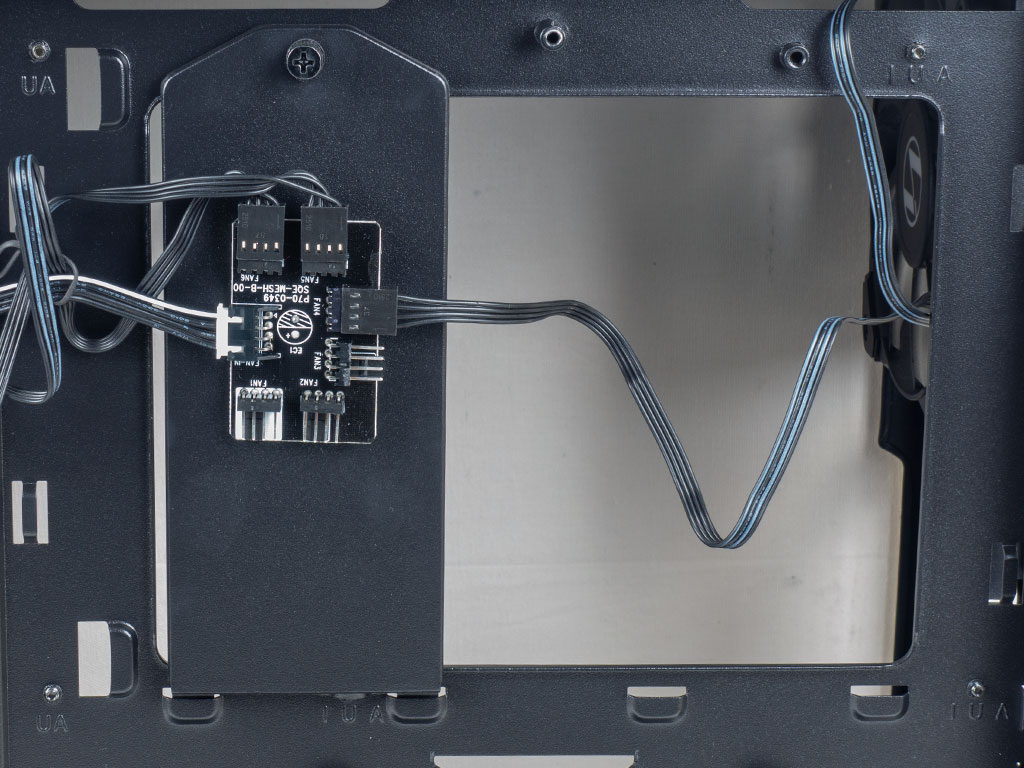
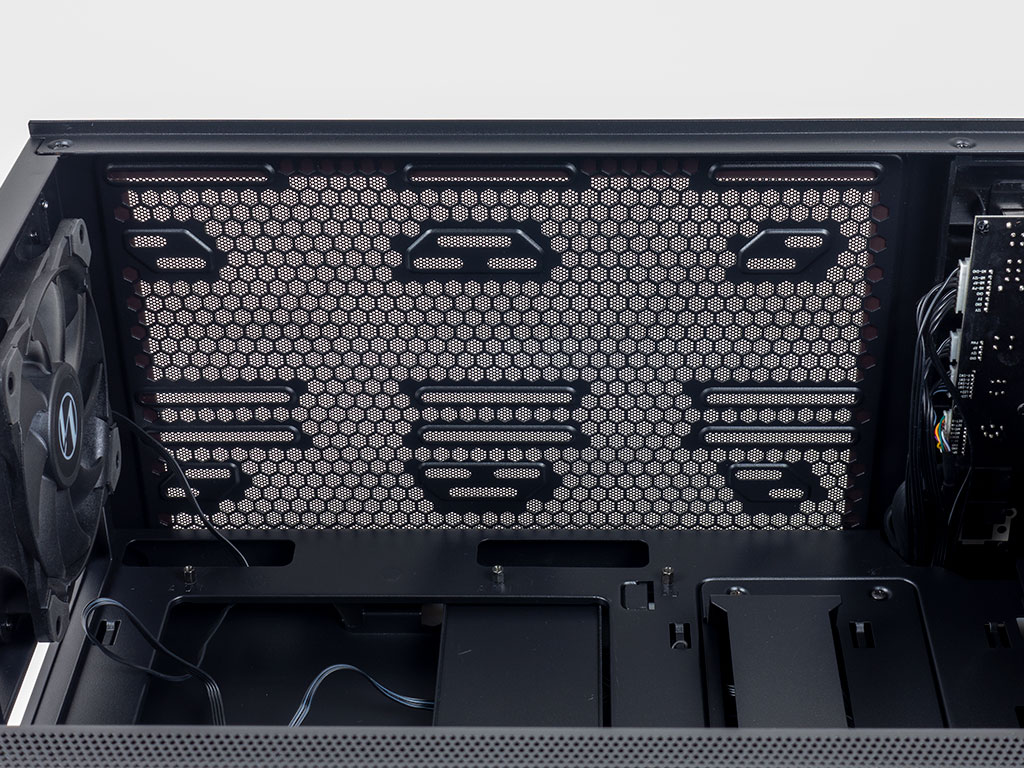
A covered opening acts as a cable-routing duct to ensure the interior of your Lancool II Mesh Performance stays nice and clean. You may rotate it 180° if that suits your cable-management better, but in our review, we simply left it as is. You will also find a solid mounting plate across the CPU cooler opening of the motherboard tray, which now holds the built-in fan controller PCB that allows for up to six PWM units to be controlled through the slider at the top of the chassis.
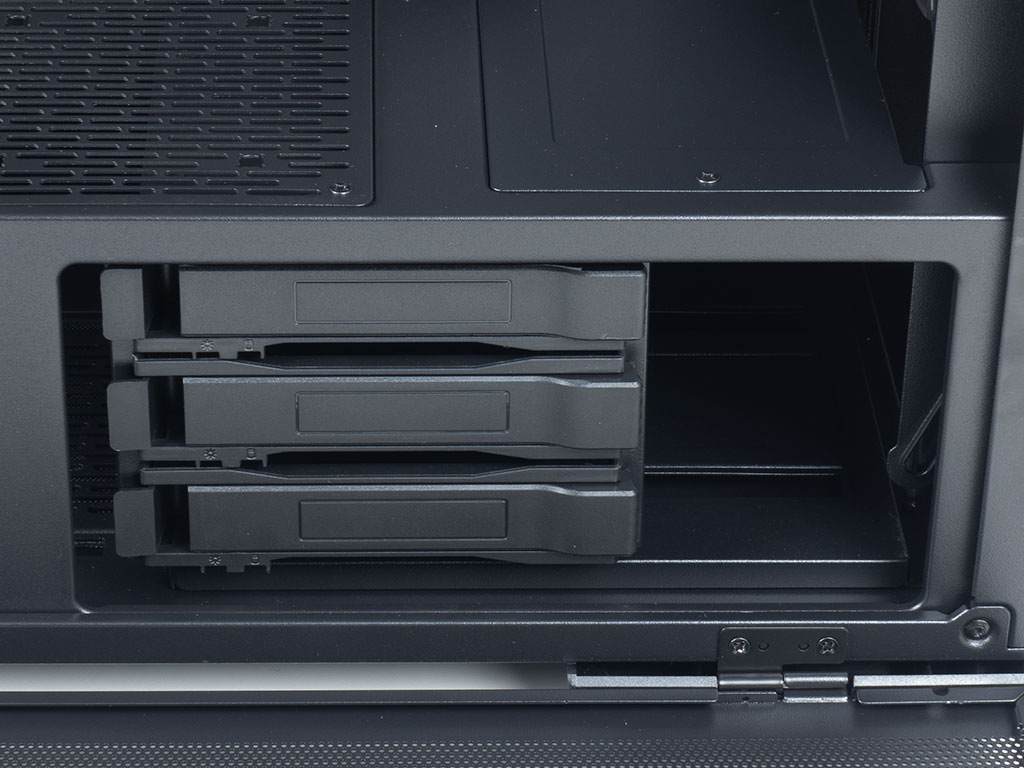

In the front, underneath the shroud, you will find three 3.5" hard-drive cages, which results in nine storage bays in total—more than most of us will ever utilize. The area above that is purely meant for cooling, be it in the form of up to three 120 or 140 mm fans or even a 420 mm radiator. At this stage, you could pop out the whole mounting frame and flip it around to maximize compatibility, for example.
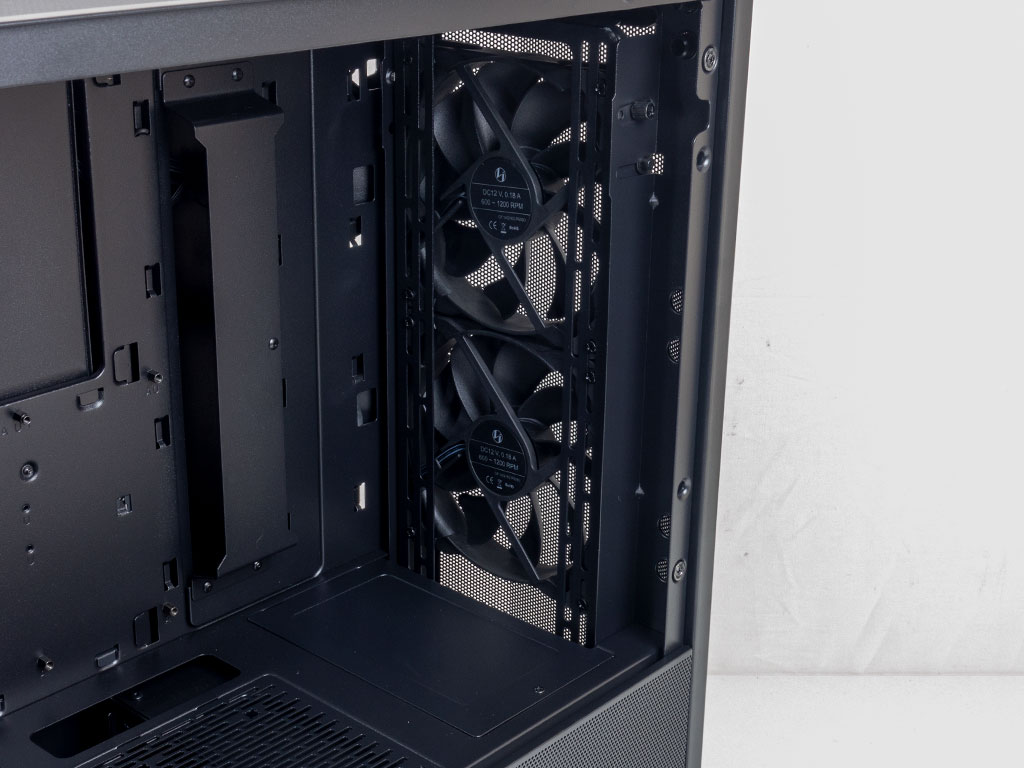
In the rear, the PSU bay is pretty straightforward, with four foam-equipped pads as an anti-vibration measure. Above that, the seven expansion slots covers are held in place with thumb screws for easy removal, with the 120 mm exhaust fan situated in the very top.
Looking closely at the ceiling, you will see that Lian Li has included two sets of mounting holes for 120/140 mm units, allowing you to pick if you need to offset your cooling assembly to make room for larger motherboard components that would otherwise collide with center-mounted elements.
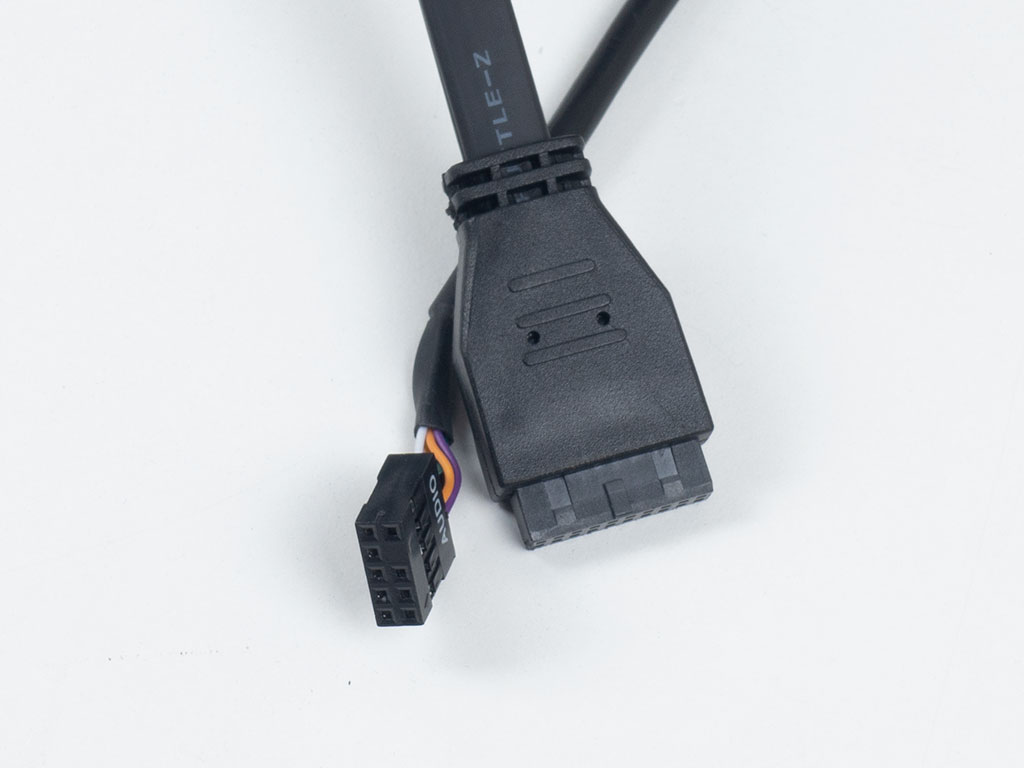
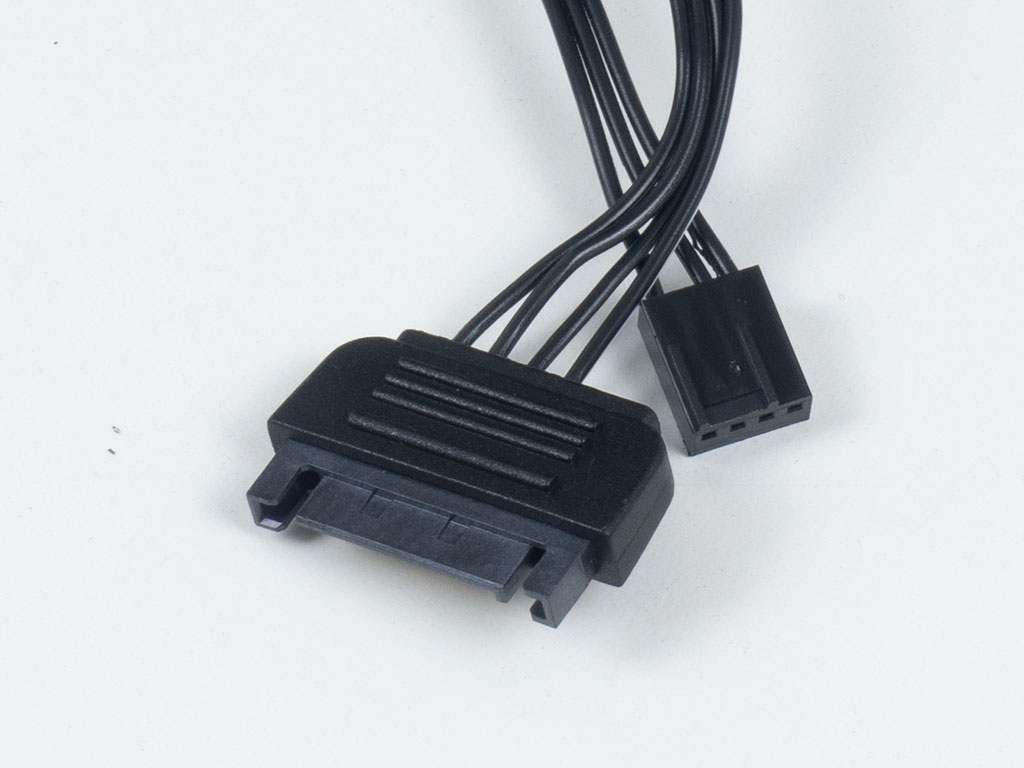
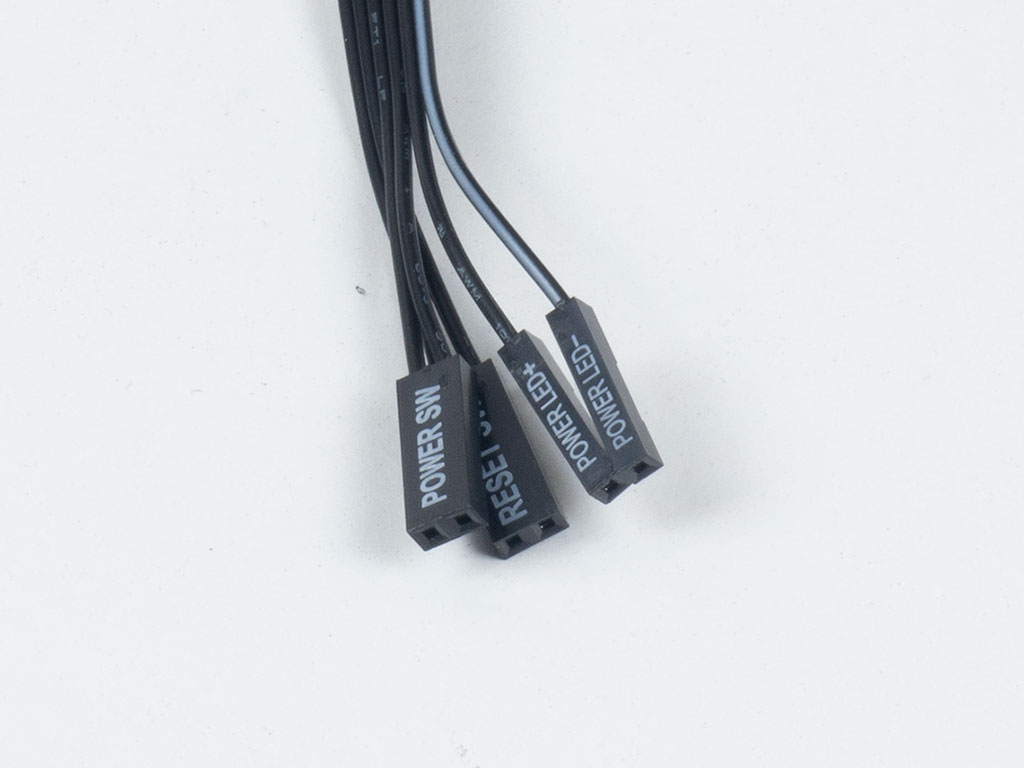
All the cables within the Lian Li Lancool II Mesh Performance are of the default variety and sleeved black to fit the interior of the chassis nicely. The built-in fan controller gets a SATA power cable and a PWM lead, which allows you to control the attached fans via a single header on the motherboard.
May 23rd, 2024 18:18 EDT
change timezone
Latest GPU Drivers
New Forum Posts
- Been away from PC gaming, a bit lost... (85)
- NEED HELP! Dvi-d dual link to HDMI showing no signal (0)
- High end PC game stuttering causing by DPI setting conflict (Witcher 3) need help (0)
- MSI laptop i9-13980HX limited to 3.7Ghz/115W! NO LIMITS, NO THROTTLING in TS (6)
- Help! Black Screen When I Close Certain Games (R9 290) (9)
- Post your Speedometer 3.0 Score (40)
- What phone you use as your daily driver? And, a discussion of them. (1526)
- Can anyone ID this fan? (prop only, no markings - super challenge!) (29)
- Intel Arc Revisited? (1)
- Removing the 12v sensing line on the thor 1200 (oringial) (18)
Popular Reviews
- Ghost of Tsushima Performance Benchmark Review - 35 GPUs Tested
- Senua's Saga: Hellblade II Performance Benchmark Review
- Ghost of Tsushima: DLSS vs. FSR vs. XeSS Comparison Review
- CHERRY XTRFY M68 Pro Review
- PNY XLR8 Gaming EPIC-X RGB DDR5-6400 CL32 32 GB Review
- PMG Audio Apx In-Ear Monitors Review - $6500 Flagship!
- Upcoming Hardware Launches 2023 (Updated Feb 2024)
- Quick Look: Huion Kamvas Pro 24 (4K) Graphics Tablet
- TerraMaster D8 Hybrid Review
- Homeworld 3 Performance Benchmark Review - 35 GPUs Tested
Controversial News Posts
- Intel Statement on Stability Issues: "Motherboard Makers to Blame" (272)
- AMD to Redesign Ray Tracing Hardware on RDNA 4 (227)
- Windows 11 Now Officially Adware as Microsoft Embeds Ads in the Start Menu (173)
- NVIDIA to Only Launch the Flagship GeForce RTX 5090 in 2024, Rest of the Series in 2025 (154)
- AMD Hits Highest-Ever x86 CPU Market Share in Q1 2024 Across Desktop and Server (140)
- AMD RDNA 5 a "Clean Sheet" Graphics Architecture, RDNA 4 Merely Corrects a Bug Over RDNA 3 (139)
- AMD's RDNA 4 GPUs Could Stick with 18 Gbps GDDR6 Memory (114)
- AMD Ryzen 9 7900X3D Now at a Mouth-watering $329 (104)