 21
LYNK+ GeForce RTX 5090 Modular AIO Review
(21 Comments) »Introduction

LYNK+ is a brand-new entrant to the PC cooling space, and wants to chart a middle-path between DIY liquid cooling solutions and preinstalled all-in-one (AIO), closed-loop options. We have with us their pioneering GeForce RTX 5090 Modular AIO cooling kit, and can't wait to show you how to put one together and benefit from significantly lower temperatures on NVIDIA's feisty flagship GPU.
About a decade ago, replacing stock cooling with custom for high-end graphics cards almost always led you to classic liquid cooling loops, needing you to buy its various components and put them together. Then came AIO liquid cooling, making its way from closed-loop CPU coolers (CLCs), to closed-loop VGA coolers, only these weren't as readily available as aftermarket kits. Rather, graphics card manufacturers would come up with premium custom-design cards based on their flagship GPUs that packed factory-fitted AIO cooling solutions. AMD was the first to use an AIO CLC for a reference-design graphics card with its Radeon R9 Fury X, but this was a decade ago. Over the years we've also seen various AIO coolers integrated with custom GPUs, the like STRIX LC, Suprim Liquid and Astral Liquid series.

Fast-forward to 2025, and a pattern is emerging where NVIDIA's halo-segment GPUs tend to be extreme in terms of power and thermal requirements, and the price difference between the cheapest, air-cooled RTX 5090 and the most expensive custom-design RTX 5090 with liquid cooling solutions being as wide as $1000—a whopping 50% premium! This creates ample room for aftermarket cooling solutions like the LYNK+ Modular AIO. Make no mistake, the solution isn't cheap, it will still set you back by $380 for the kit that includes the block unit and the radiator, but it's still a compelling alternative to forking out that $1000 premium.
So what is it? LYNK+ is a custom-design board-specific all-in-one liquid cooling solution that comes with modularity. The tubes that connect the block with the radiator are easily detachable without coolant spillages. This modularity allows you to expand the loop with additional first-party components from LYNK+ in the future, such as CPU blocks or secondary radiators. The kit we have is for an Inno3D-branded RTX 5090 iChill X3 card, which is Inno3D's lowest-priced RTX 5090 product. Our sample includes a 360 mm radiator, three Arctic fans were included as well.
Your biggest draw to this product is how the card looks once everything is put together, and the innovative quick-disconnect fittings that the company patented. Besides a tightly integrated slim form factor, LYNK+ is promising significant drops in temperatures rivaling DIY liquid cooling loops, allowing you to overclock your RTX 5090 further, thanks to lower temperatures.
The cooler comes with a gorgeous ARGB illumination set that connects to your motherboard or LED controller. The cooler takes a PWM signal from your motherboard for the fans and pump, instead of relying on the card's own fan control, fan-stop is supported. The pump will always run at a minimum RPM, even if the fan signal is in fan-stop mode, or missing for any other reason.
At the moment, LYNK+ is offering the block—specific to your RTX 5090 model—at $180, and the 360 mm radiator + pump unit at $200, bringing the kit's cost up to $380. You may also purchase a RTX 5090 from the various retailers, and the LYNK+ kit will arrive preinstalled, with warranty on all components. In the near future, the company plans to launch smaller 240 mm radiators and CPU water blocks. You should be able to combine this set with that CPU block and 240 mm radiator to have one continuous liquid cooling loop for both the CPU and GPU, with two radiators.
| Price | Cores | ROPs | Core Clock | Boost Clock | Memory Clock | GPU | Transistors | Memory | |
|---|---|---|---|---|---|---|---|---|---|
| RTX 4070 | $500 | 5888 | 64 | 1920 MHz | 2475 MHz | 1313 MHz | AD104 | 35800M | 12 GB, GDDR6X, 192-bit |
| RX 7800 XT | $470 | 3840 | 96 | 2124 MHz | 2430 MHz | 2425 MHz | Navi 32 | 28100M | 16 GB, GDDR6, 256-bit |
| RTX 4070 Super | $600 | 7168 | 80 | 1980 MHz | 2475 MHz | 1313 MHz | AD104 | 35800M | 12 GB, GDDR6X, 192-bit |
| RX 7900 GRE | $550 | 5120 | 160 | 1880 MHz | 2245 MHz | 2250 MHz | Navi 31 | 57700M | 16 GB, GDDR6, 256-bit |
| RTX 4070 Ti | $700 | 7680 | 80 | 2310 MHz | 2610 MHz | 1313 MHz | AD104 | 35800M | 12 GB, GDDR6X, 192-bit |
| RTX 5070 | $540 | 6144 | 80 | 2325 MHz | 2512 MHz | 1750 MHz | GB205 | 31100M | 12 GB, GDDR7, 192-bit |
| RTX 4070 Ti Super | $750 | 8448 | 96 | 2340 MHz | 2610 MHz | 1313 MHz | AD103 | 45900M | 16 GB, GDDR6X, 256-bit |
| RX 7900 XT | $620 | 5376 | 192 | 2000 MHz | 2400 MHz | 2500 MHz | Navi 31 | 57700M | 20 GB, GDDR6, 320-bit |
| RX 9070 | $530 | 3584 | 128 | 2070 MHz | 2520 MHz | 2518 MHz | Navi 48 | 53900M | 16 GB, GDDR6, 256-bit |
| RX 9070 XT | $600 | 4096 | 128 | 2400 MHz | 2970 MHz | 2518 MHz | Navi 48 | 53900M | 16 GB, GDDR6, 256-bit |
| RTX 5070 Ti | $750 | 8960 | 96 | 2295 MHz | 2452 MHz | 1750 MHz | GB203 | 45600M | 16 GB, GDDR7, 256-bit |
| RX 7900 XTX | $750 | 6144 | 192 | 2300 MHz | 2500 MHz | 2500 MHz | Navi 31 | 57700M | 24 GB, GDDR6, 384-bit |
| RTX 4080 | $850 | 9728 | 112 | 2205 MHz | 2505 MHz | 1400 MHz | AD103 | 45900M | 16 GB, GDDR6X, 256-bit |
| RTX 4080 Super | $1000 | 10240 | 112 | 2295 MHz | 2550 MHz | 1438 MHz | AD103 | 45900M | 16 GB, GDDR6X, 256-bit |
| RTX 5080 | $1000 | 10752 | 112 | 2295 MHz | 2617 MHz | 1875 MHz | GB203 | 45600M | 16 GB, GDDR7, 256-bit |
| RTX 4090 | $1800 | 16384 | 176 | 2235 MHz | 2520 MHz | 1313 MHz | AD102 | 76300M | 24 GB, GDDR6X, 384-bit |
| RTX 5090 | $2600 | 21760 | 176 | 2017 MHz | 2407 MHz | 1750 MHz | GB202 | 92200M | 32 GB, GDDR7, 512-bit |
| LYNK+ RTX 5090 (Inno3D) | $2980 | 21760 | 176 | 2017 MHz | 2467 MHz | 1750 MHz | GB202 | 92200M | 32 GB, GDDR7, 512-bit |
Packaging

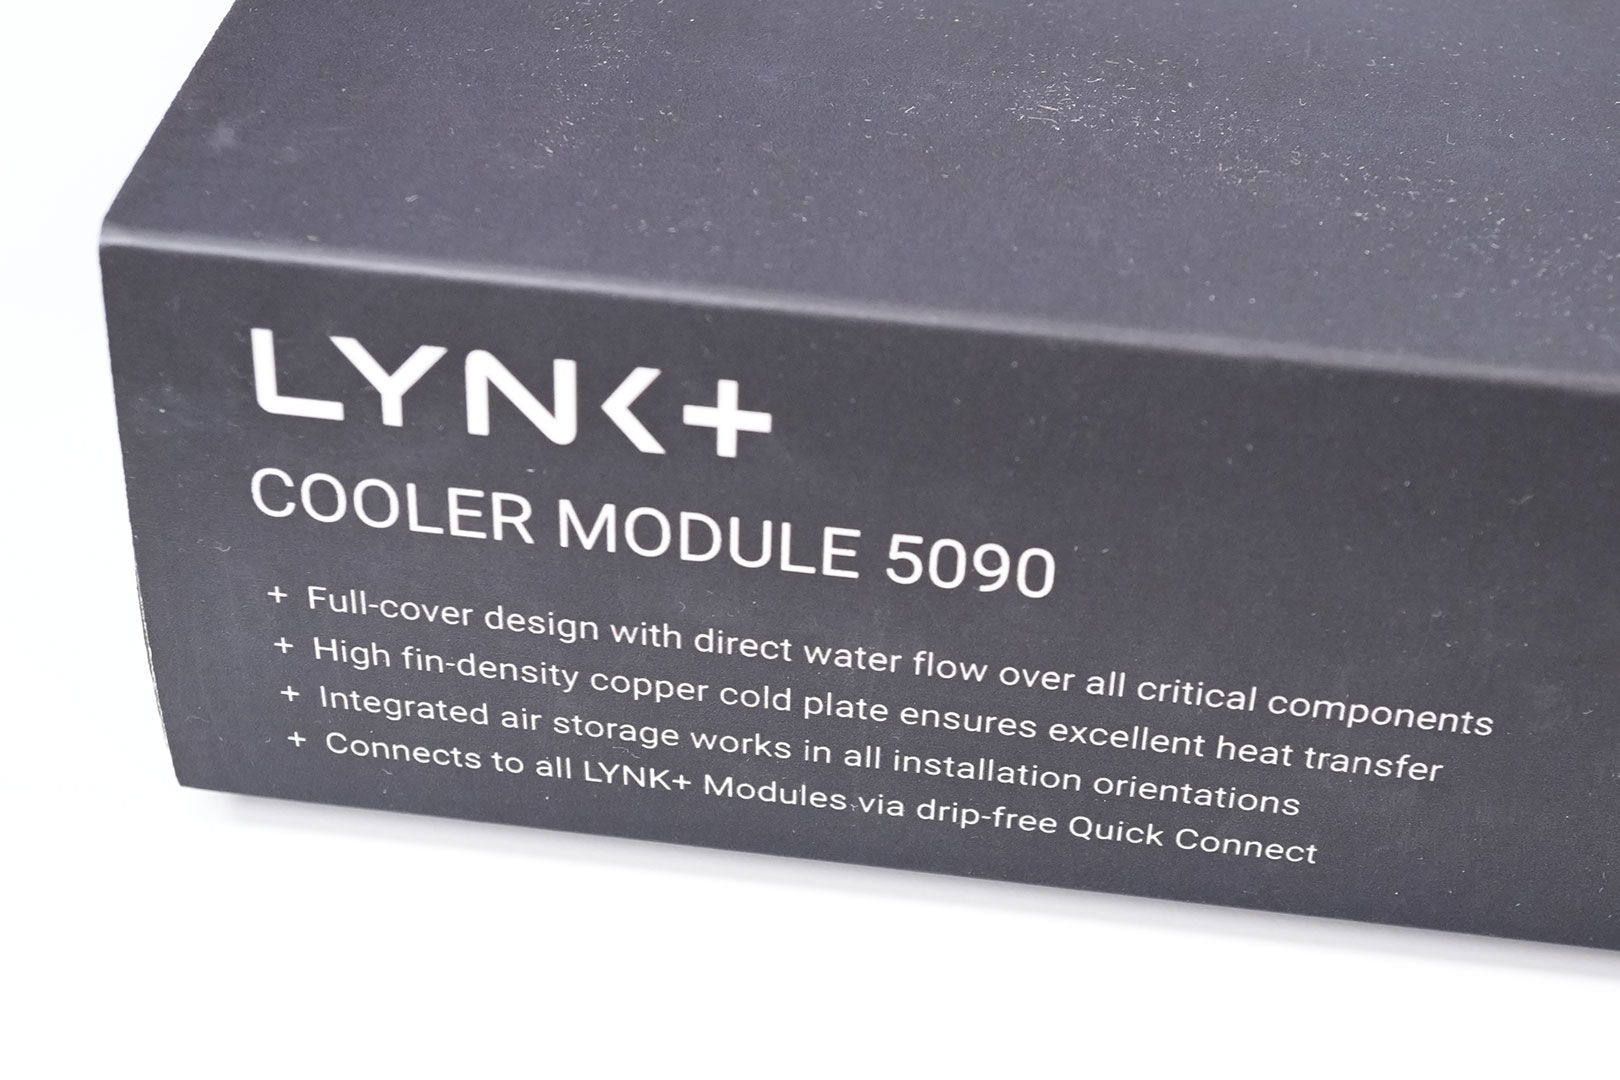
LYNK+ is available as separate components that you can combine yourself. For our testing, I was provided with the "Cooler Module 5090," which came preinstalled on a RTX 5090 from Inno3D. This is how you can purchase it too; preinstalled on a GPU, so you don't have to deal with the installation of the cooling block yourself, and this way it comes with a three-year warranty.
The block is compatible with all RTX 5090 models that use the NVIDIA reference PCB (not the Founders Edition PCB).
- Gainward RTX 5090 Phantom (4878 / NE7509019R5-GB2020P)
- Gainward RTX 5090 Phantom GS (4861 / NE7509019R5-GB2020P)
- Inno3D RTX 5090 iChill Frostbite (C50903-32D7X-1759FB)
- Inno3D RTX 5090 iChill X3 (C50903-32D7X-175967H)
- Inno3D RTX 5090 X3 (N50903-32D7-17593928)
- Inno3D RTX 5090 X3 OC (N50903-32D7-17593928)
- MSI RTX 5090 Ventus 3X OC 32G (MS-V530 VER:1.1)
- Palit RTX 5090 GameRock (NE7509019R5-GB2020G)
- Palit RTX 5090 GameRock OC (NE7509019R5-GB2020G)
- PNY RTX 5090 ARGB EPIC-X RGB Triple Fan
- PNY RTX 5090 ARGB EPIC-X RGB Triple Fan OC
- PNY RTX 5090 Overclocked Triple Fan (1B0-1G145-DFAA-A02)
- PNY RTX 5090 Triple Fan
- Zotac RTX 5090 AMP Extreme Infinity (ZT-B50900B-10P)
- Zotac RTX 5090 Solid (ZT-B50900D-10P)
- Zotac RTX 5090 Solid OC (ZT-B50900J-10P)

Inside the package we find a QR code that leads to the instruction manual, the 16-pin power adapter cable and the GPU itself.
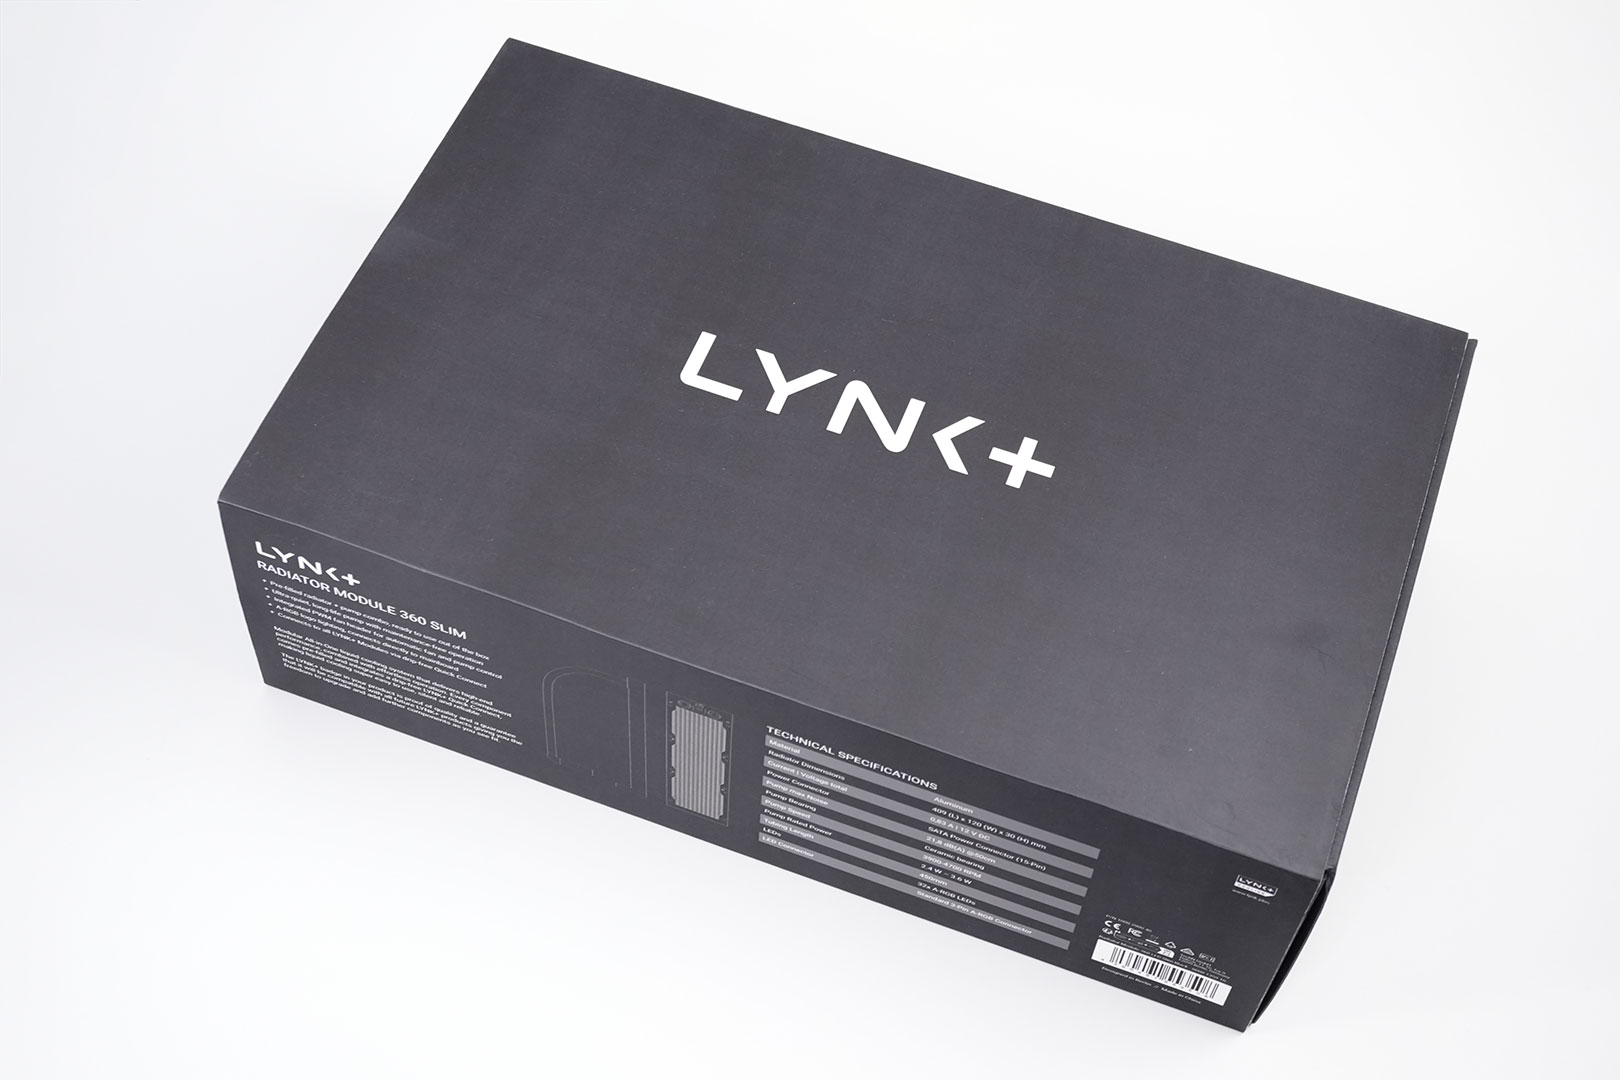
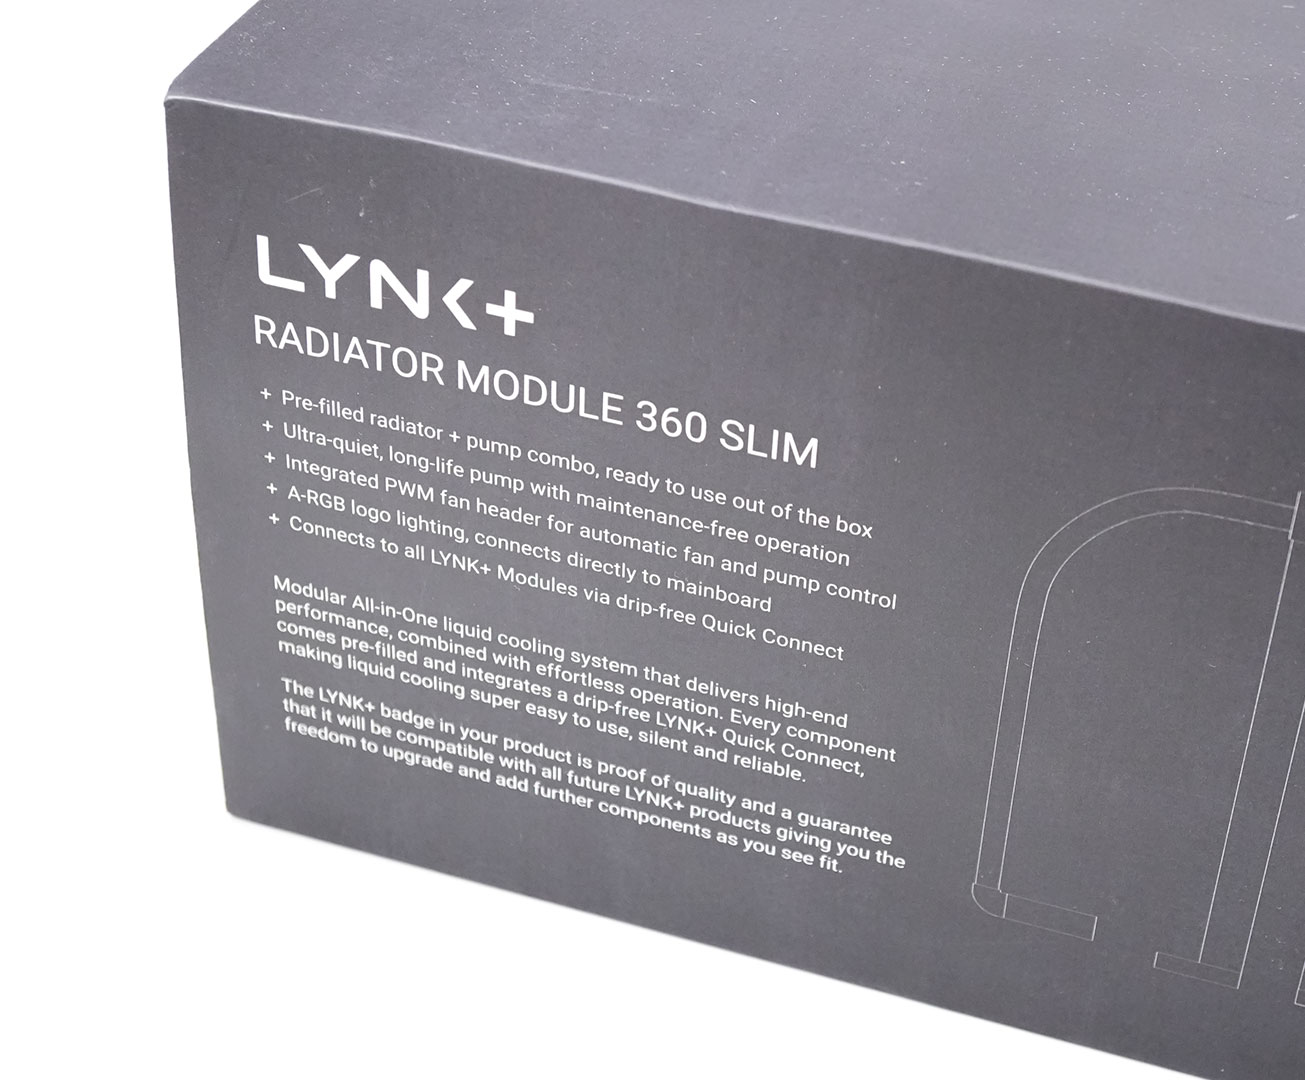
The second package is the "Radiator Module 360 SLIM," which contains the radiator with integrated pump and three Arctic fans.
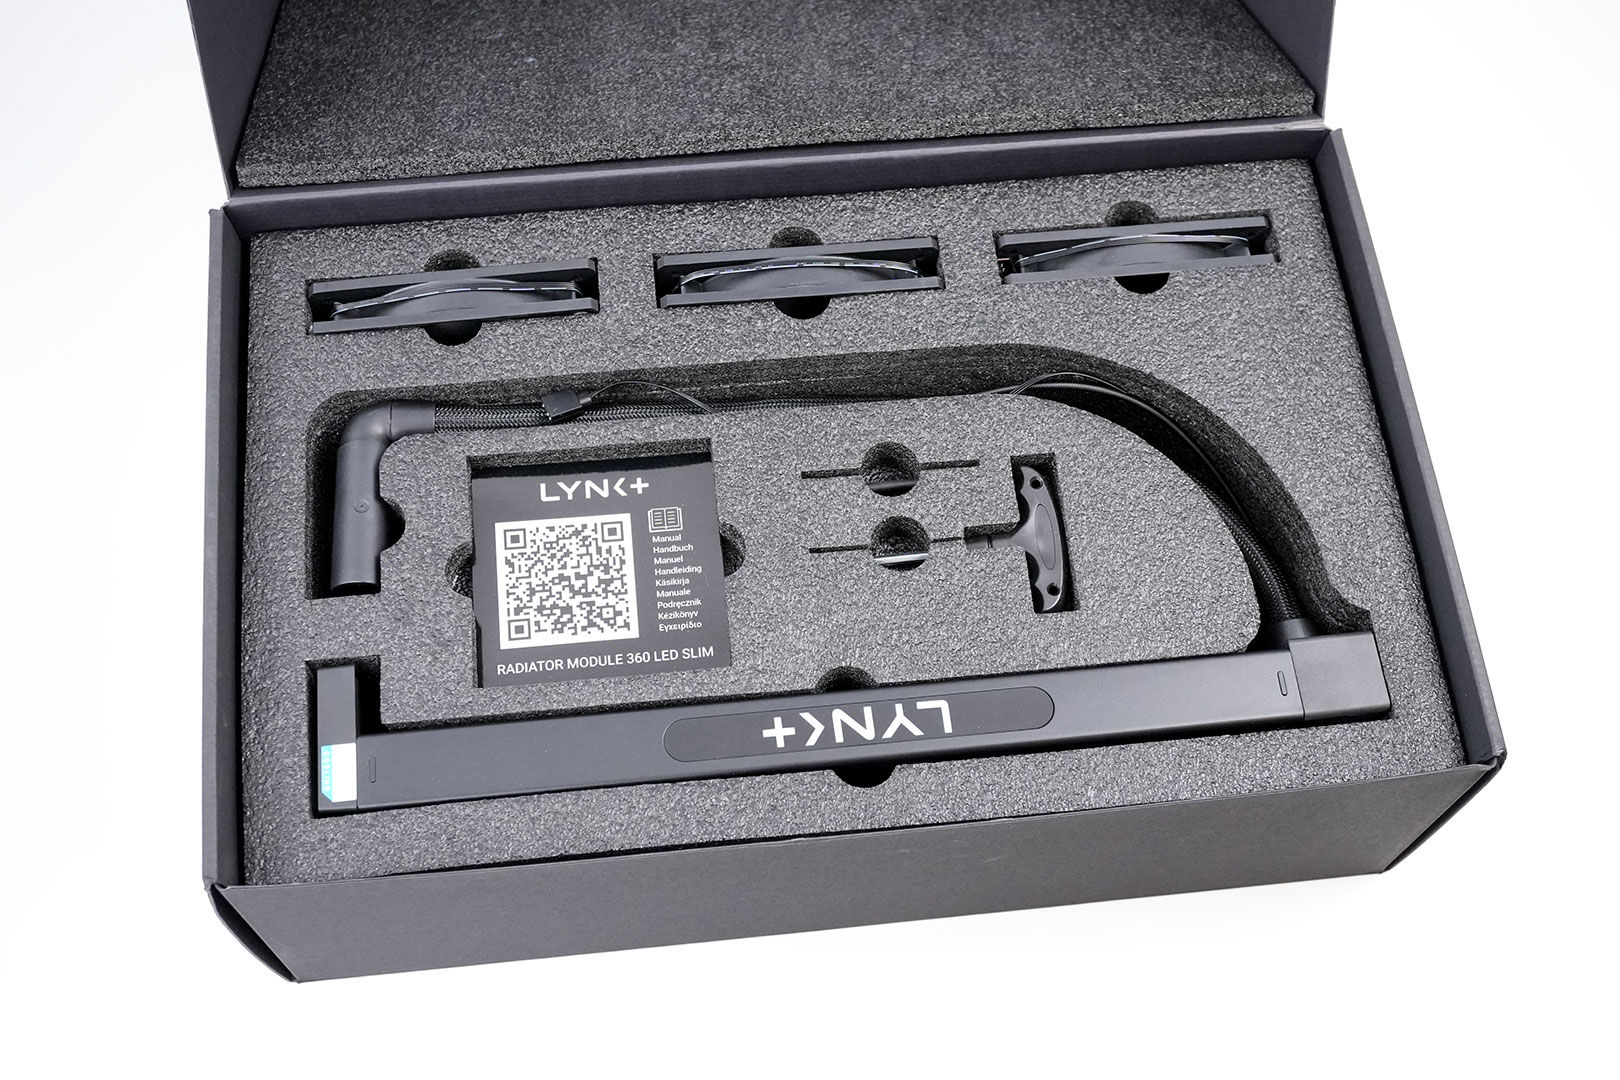
Everything is arranged neatly, but somehow I feel that for the price, I would have preferred that the fans are already cleanly preinstalled, with nice cable routing.
The Card
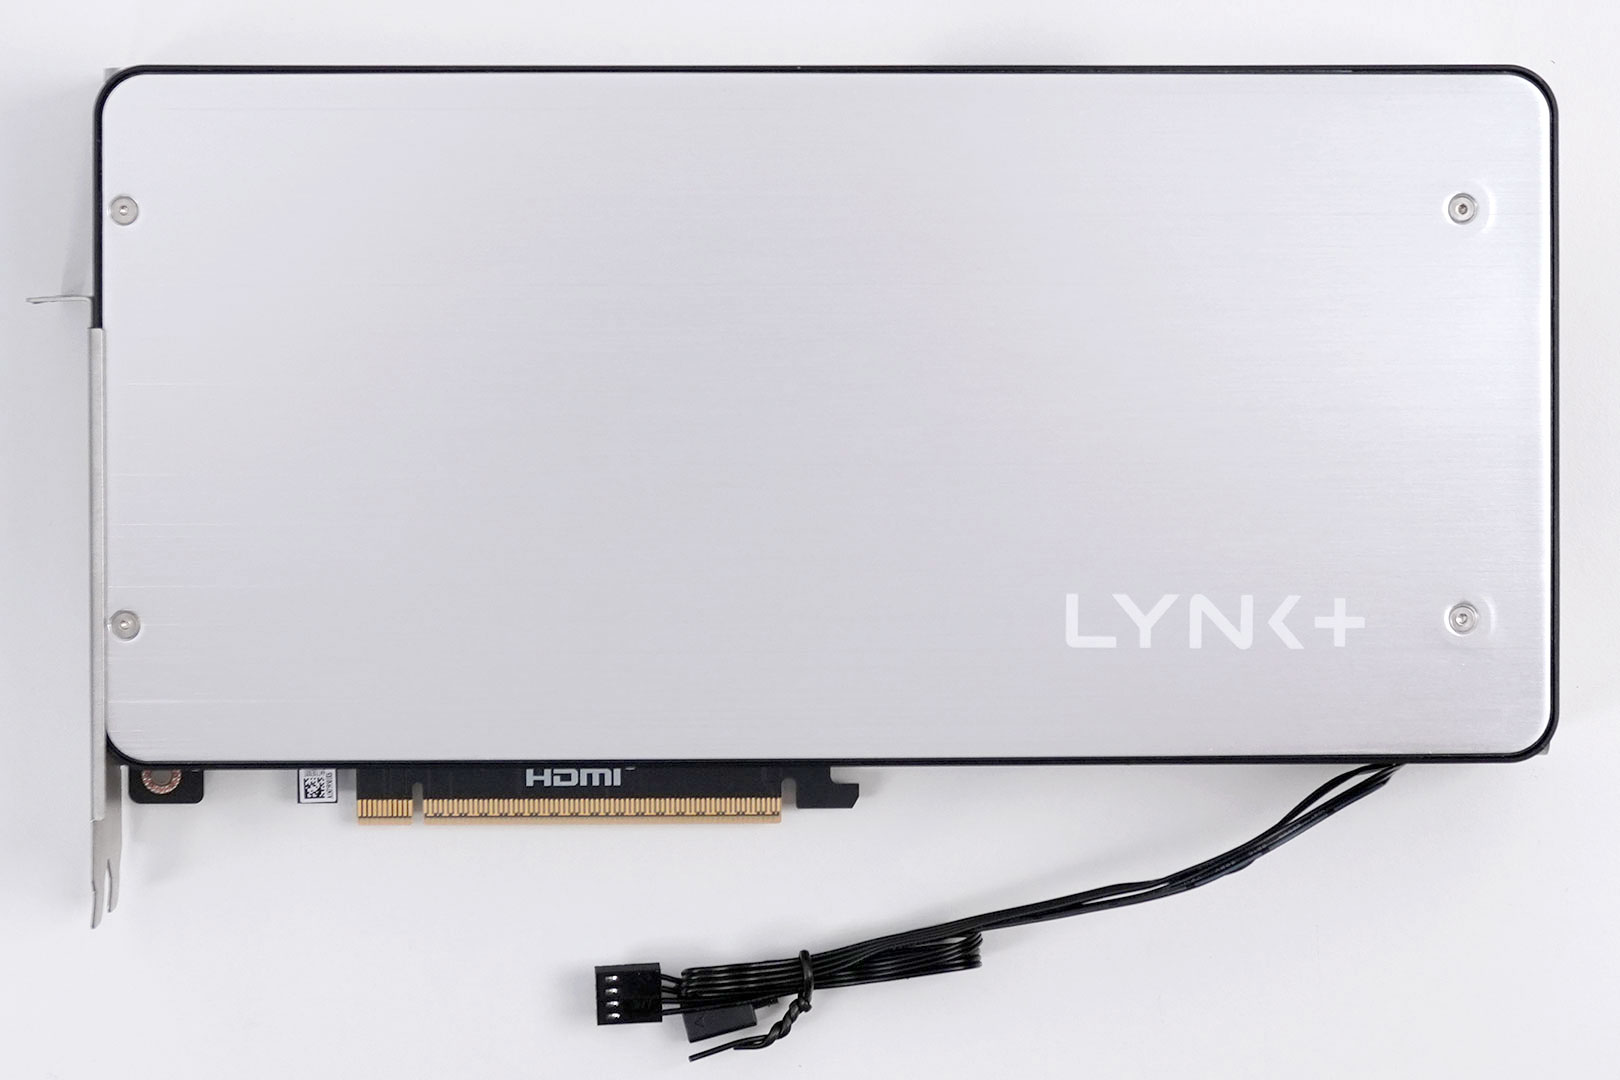

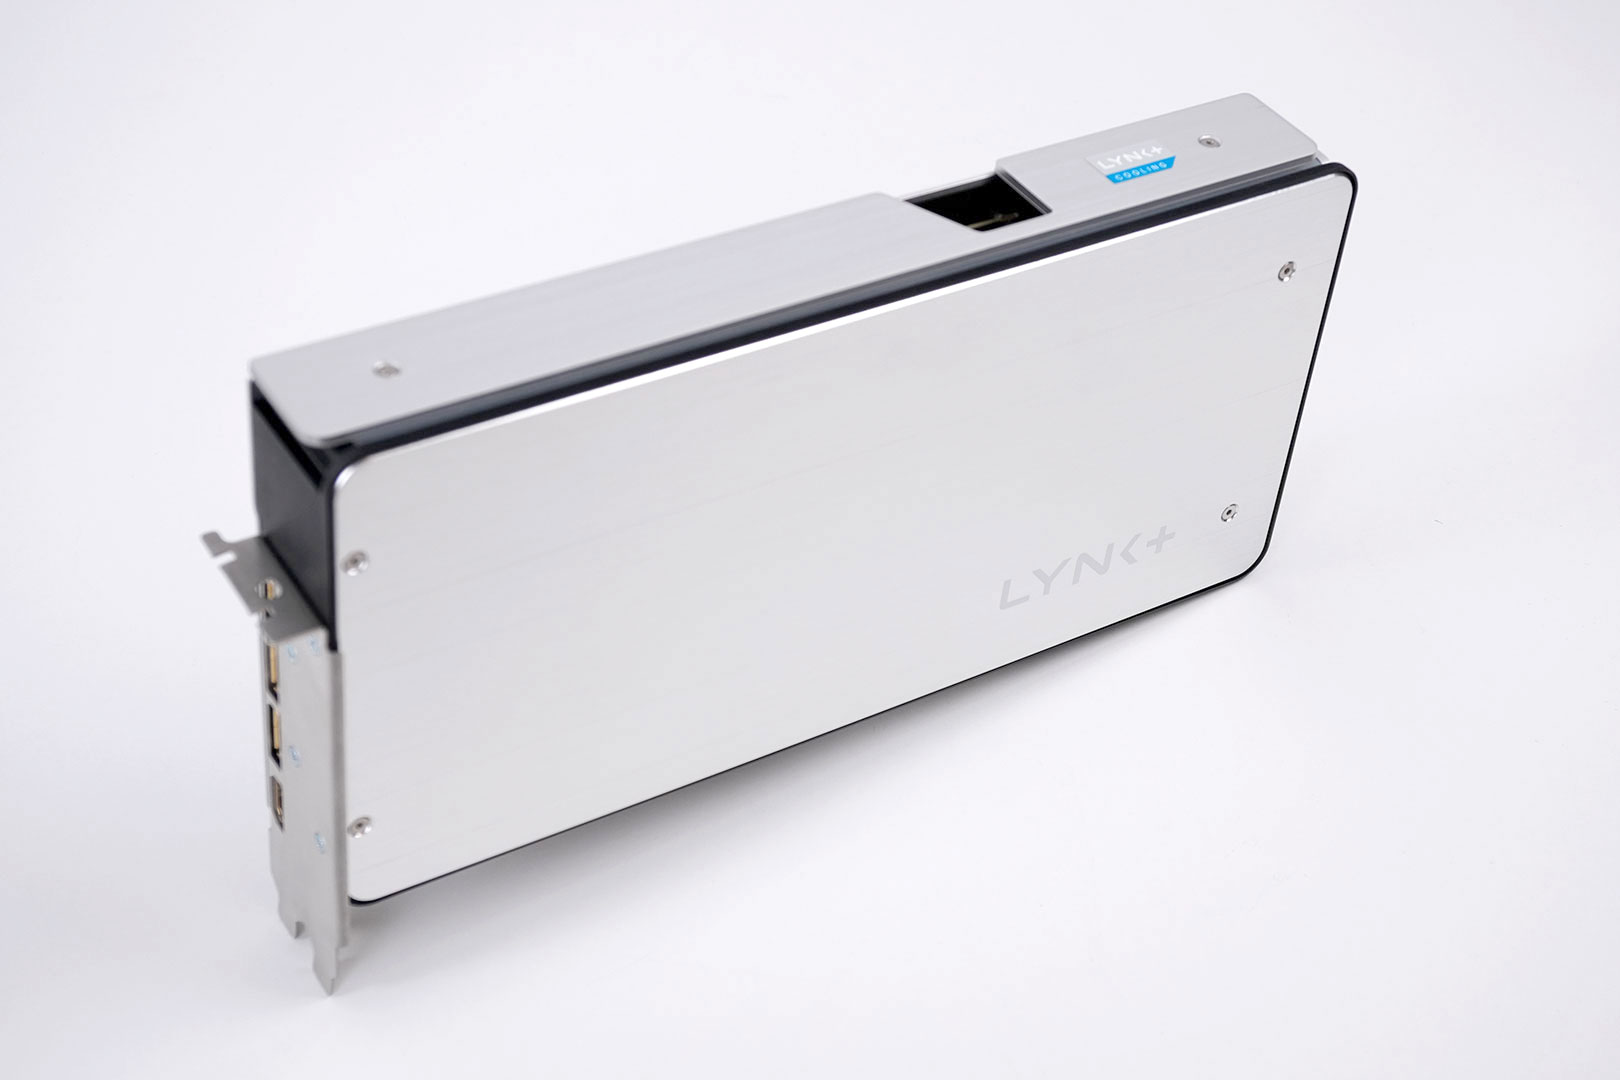
The LYNK+ "block" certainly looks appealing on the card. Its surface has a nice shine while maintaining a slightly brushed texture, which helps reduce fingerprints. On the back of the card there are no cutouts, because there are no moving parts and the block covers all components—GPU, memory and VRM, so no additional cooling is needed.

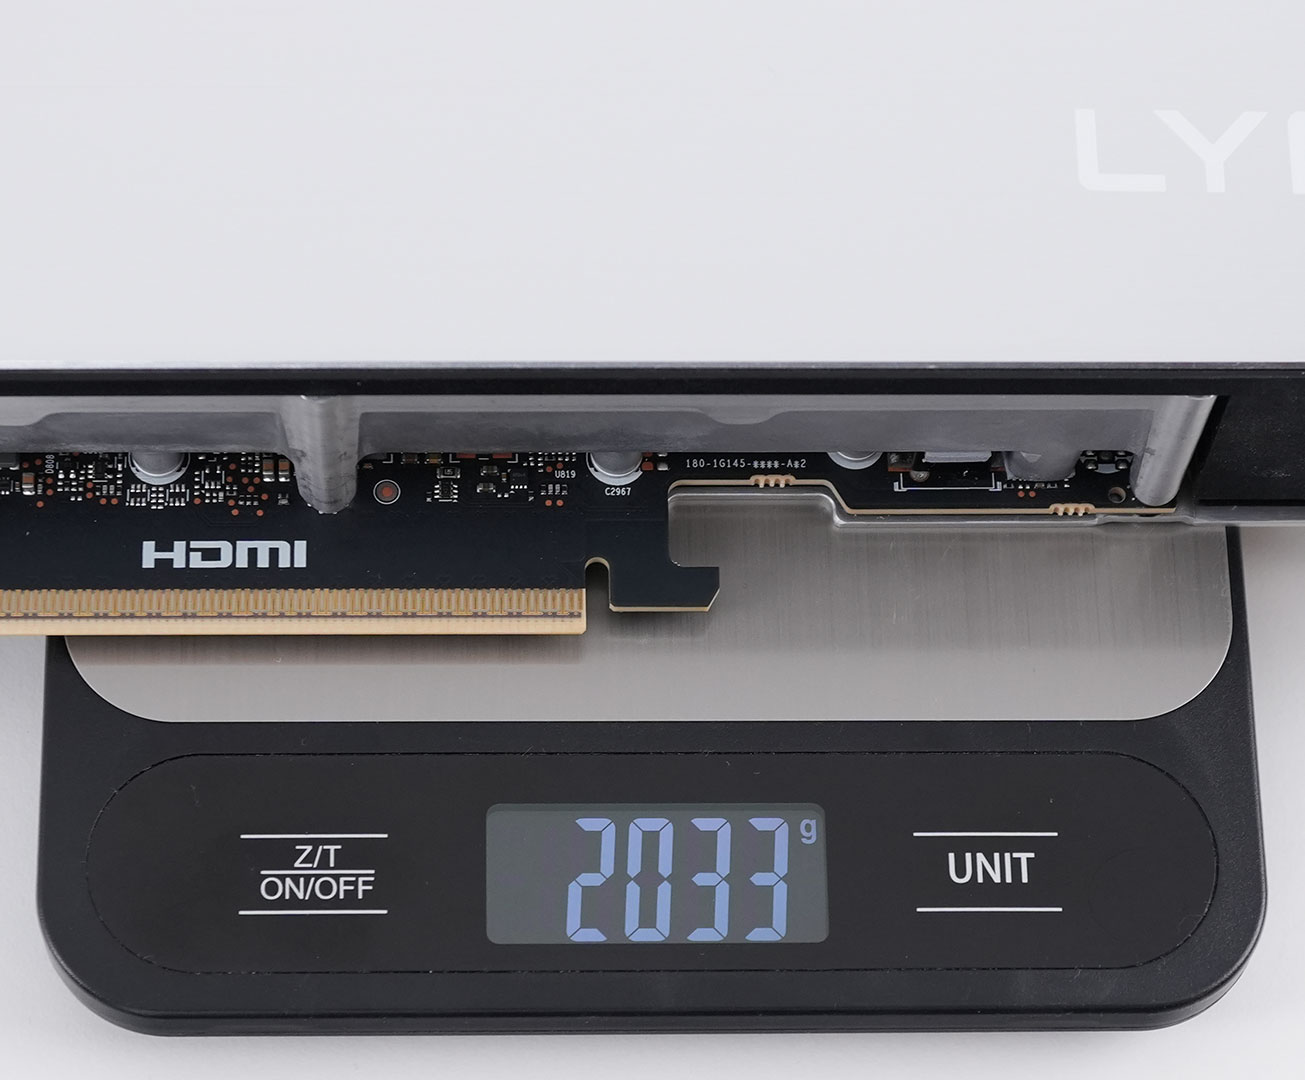
Dimensions of the card are 28.0 x 15.0 cm, and it weighs 2033 g (without the radiator).
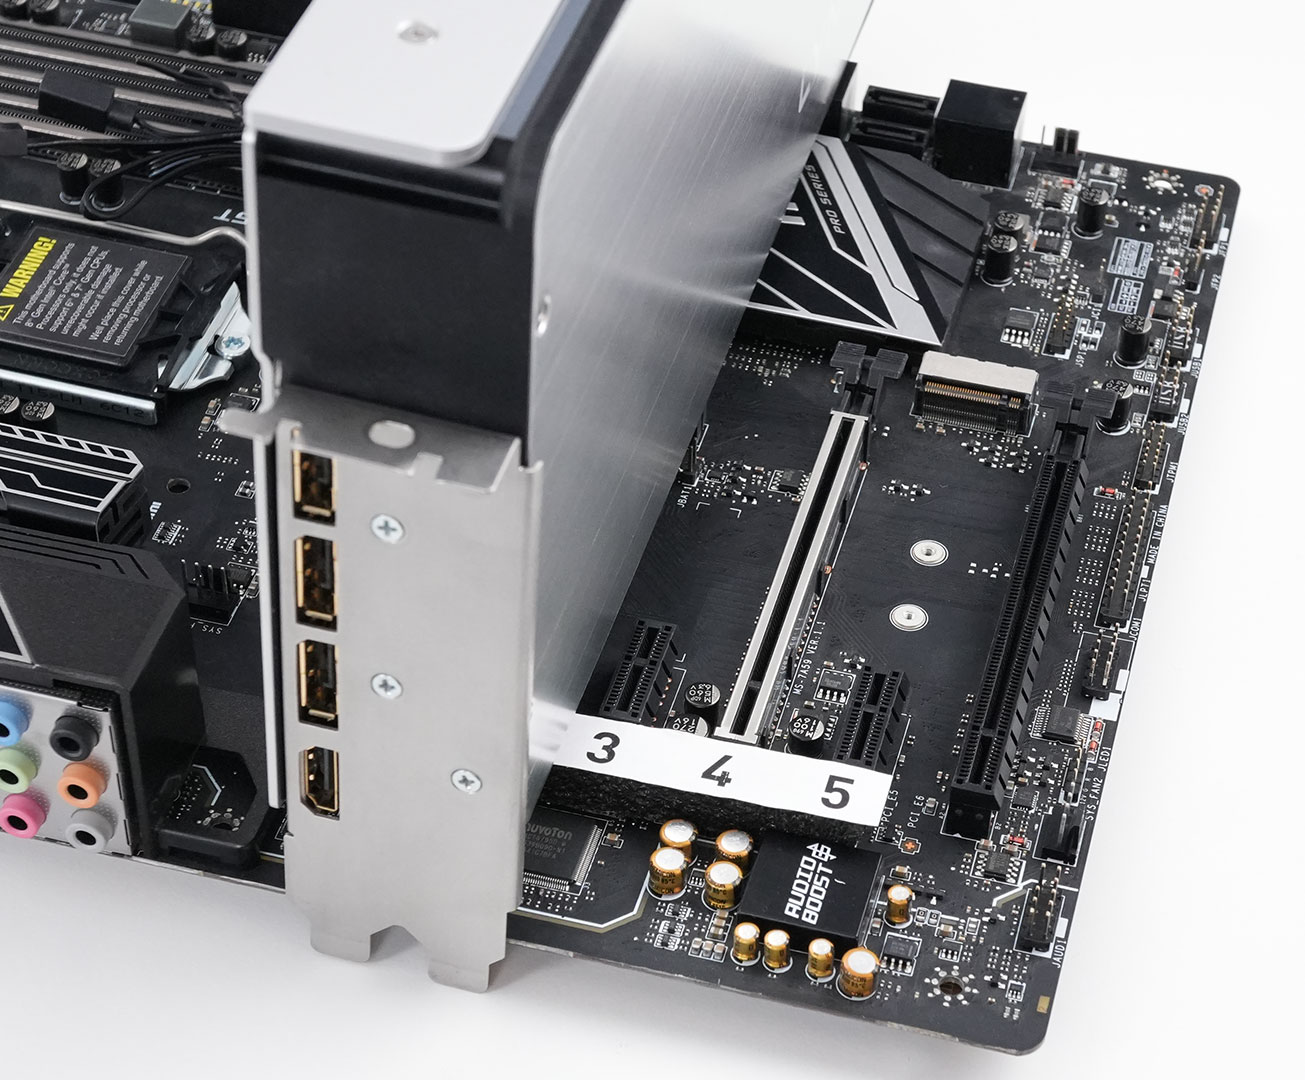
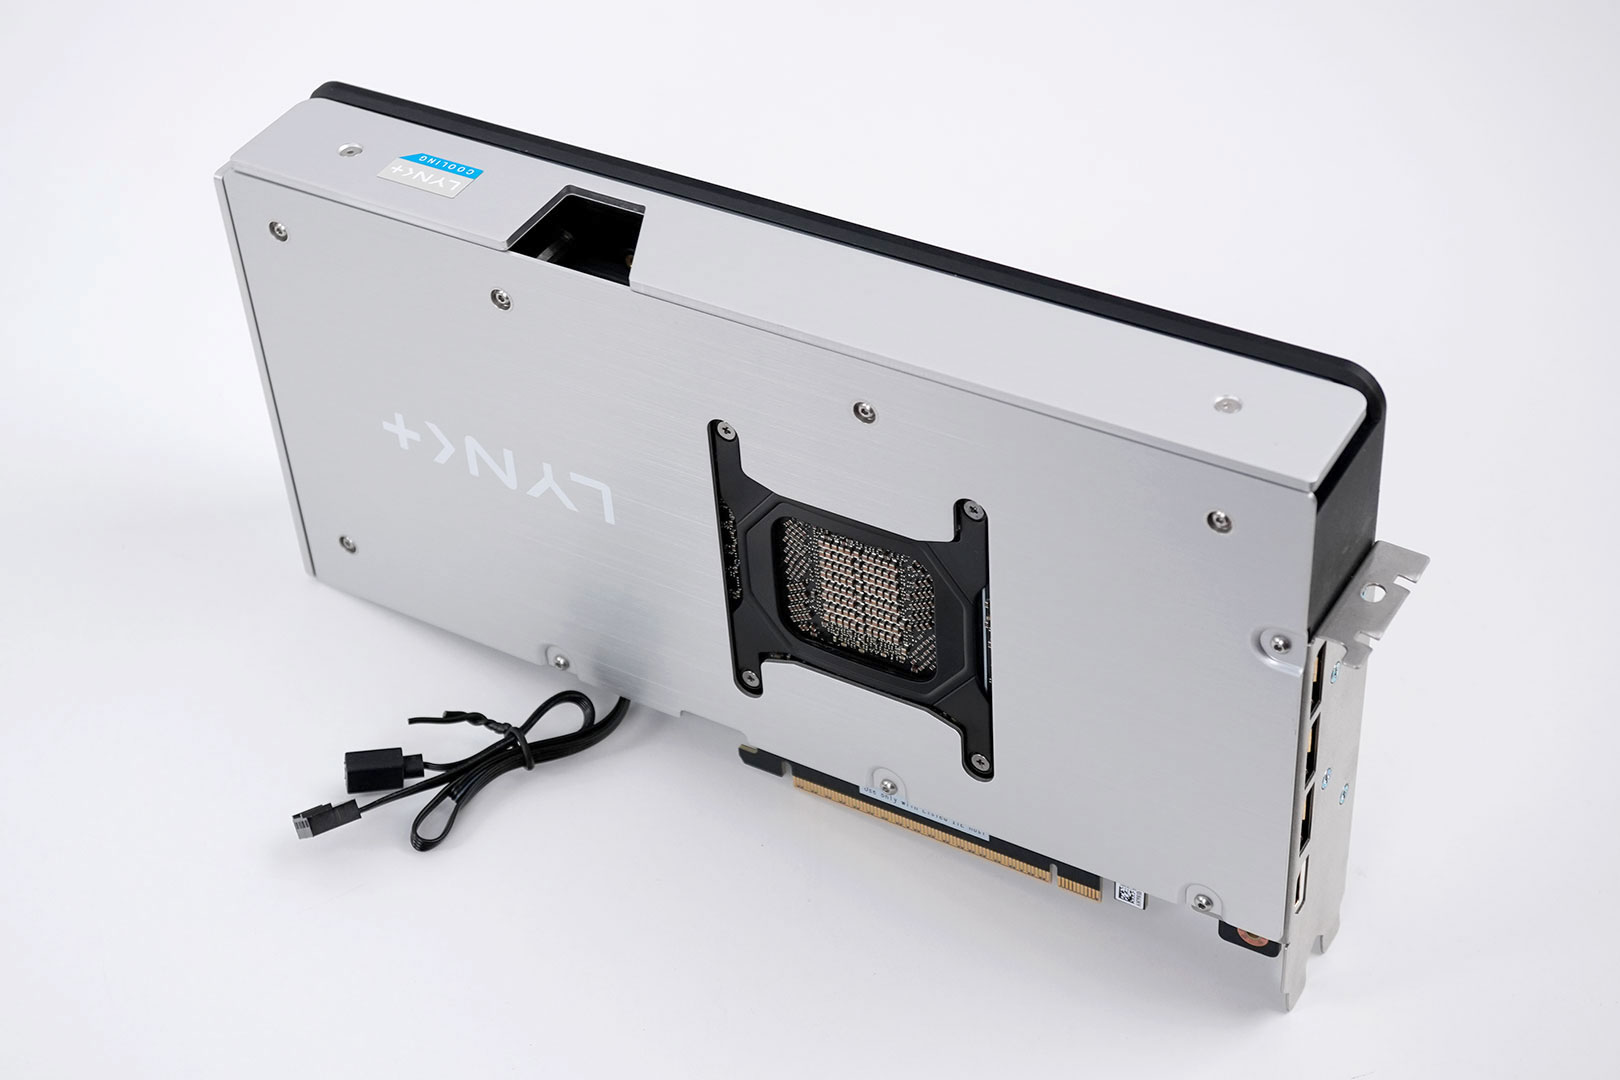
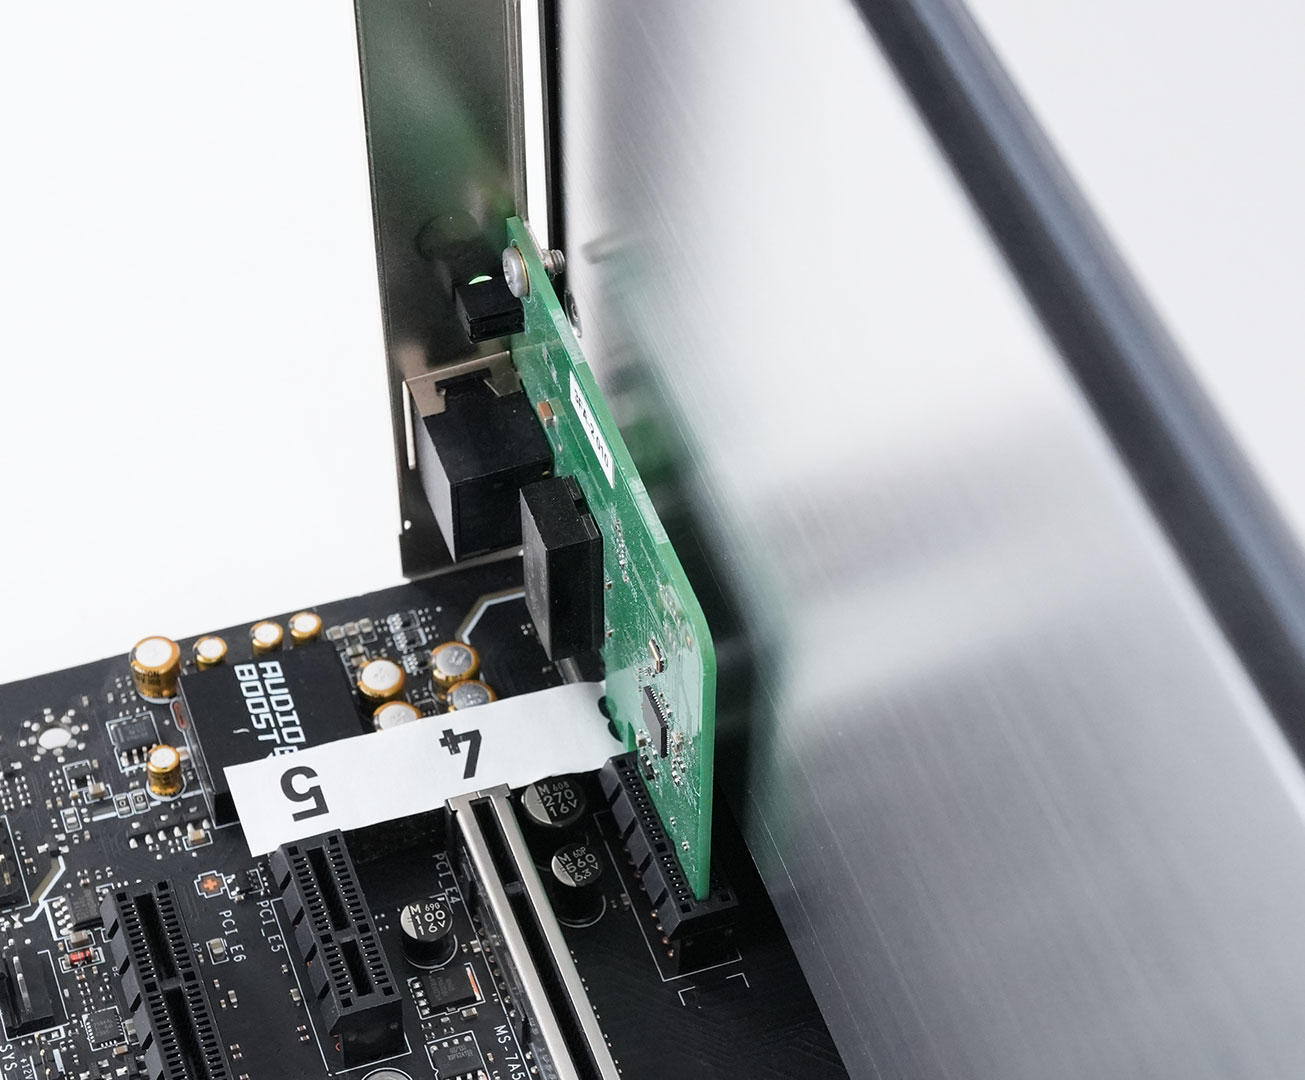
Installation requires two slots in your system. We measured the card's width to be 40 mm. You can definitely plug in another card next to it, but plugging in a second LYNK+ card will be tight, because of the tubing connectors on the back.

Display connectivity includes three standard DisplayPort 2.1b and two HDMI 2.1b.
All GeForce RTX 50-series Blackwell cards feature a new display engine supporting DisplayPort 2.1b with UHBR20, as well as HDMI 2.1a. Both interfaces support DSC (display stream compression). With DSC enabled, a single DisplayPort on this card can drive 4K 12-bit HDR at 480 Hz; or 8K 12-bit HDR at up to 165 Hz. The RTX 5090 features an updated media acceleration engine with support for 4:2:2 video formats, AV1 UHQ, and MV-HEVC. There are three independent NVENC units, and two NVDEC.
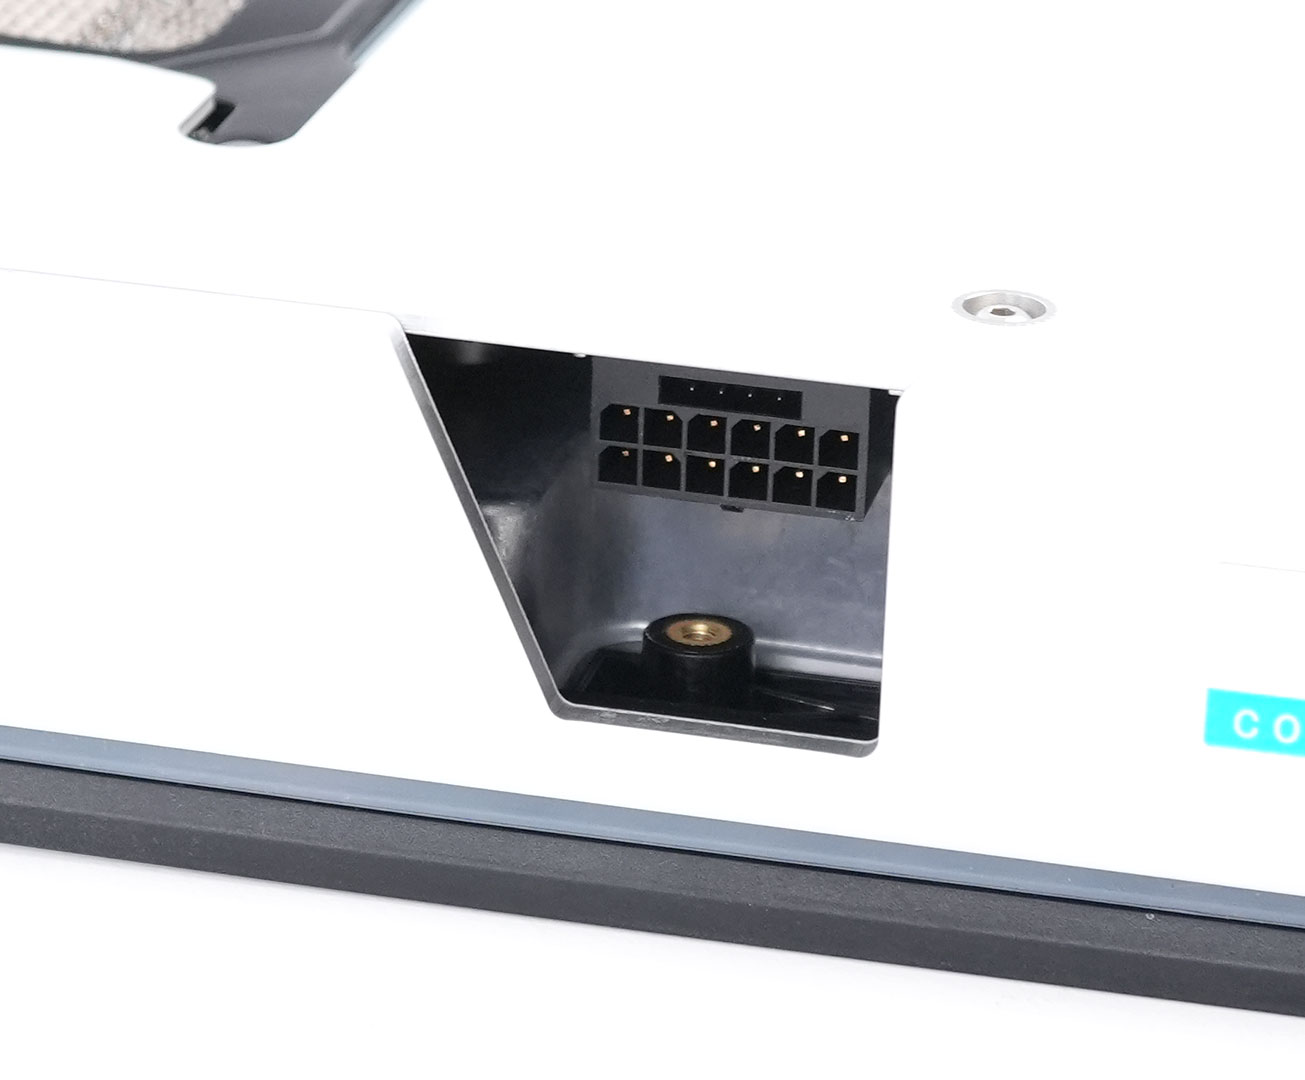
The card uses a single 16-pin connector, which allows a maximum power draw of 600 W. Additionally, the LYNK+ cooling system is powered by a SATA power connector coming out of the radiator.
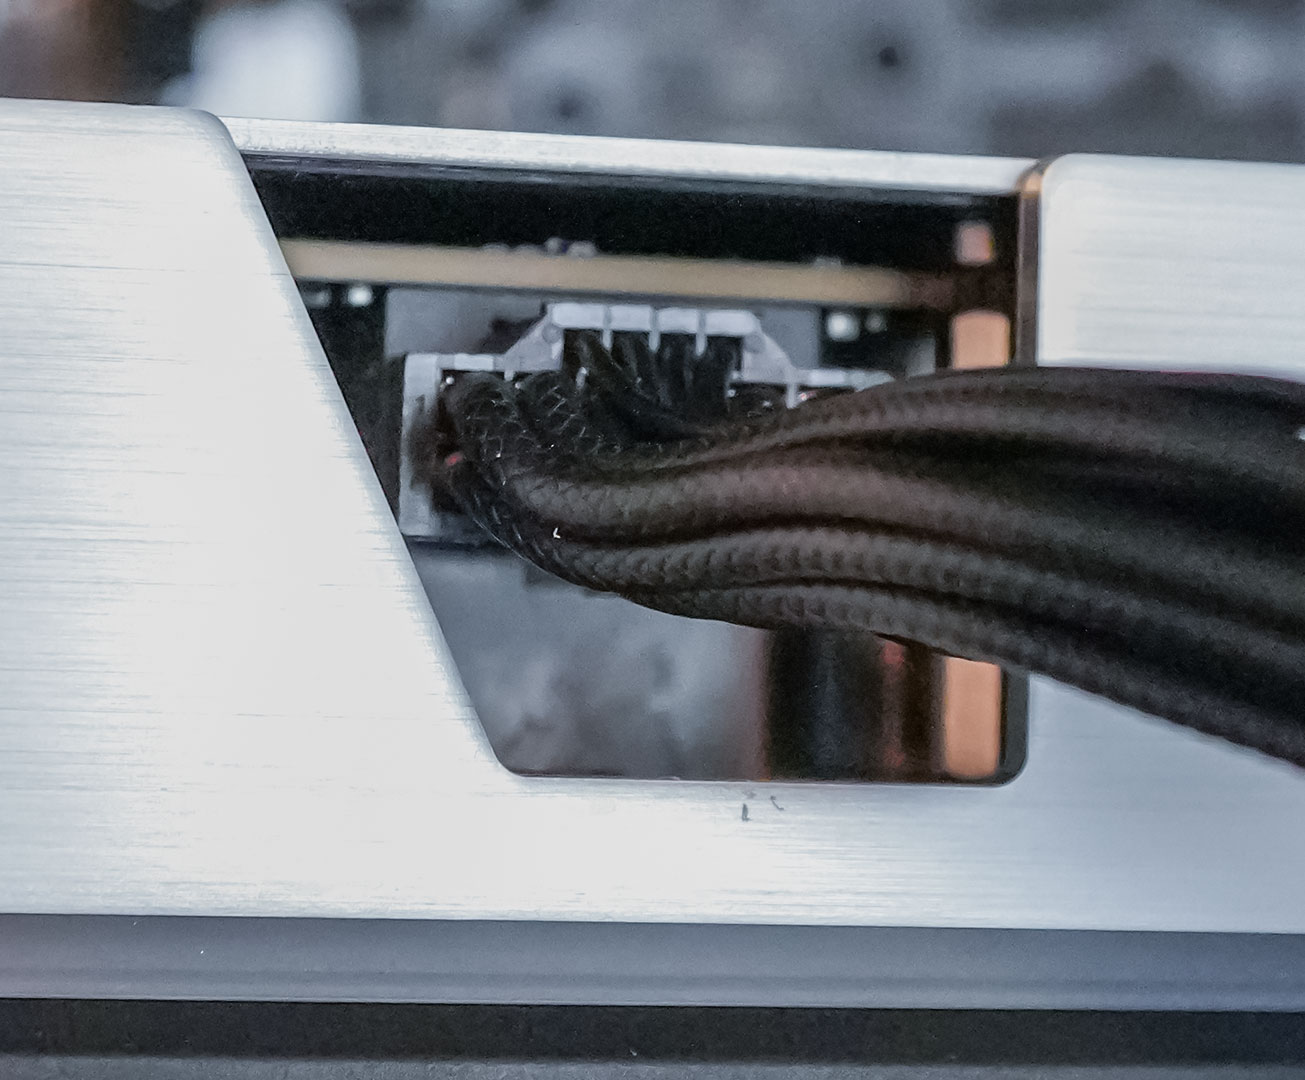
Notice how small the cutout is. While plugging the cable in is easy, removing it requires you to push your finger in or use a tool to press down on the connector. It is possible, but more fiddly than it should be.
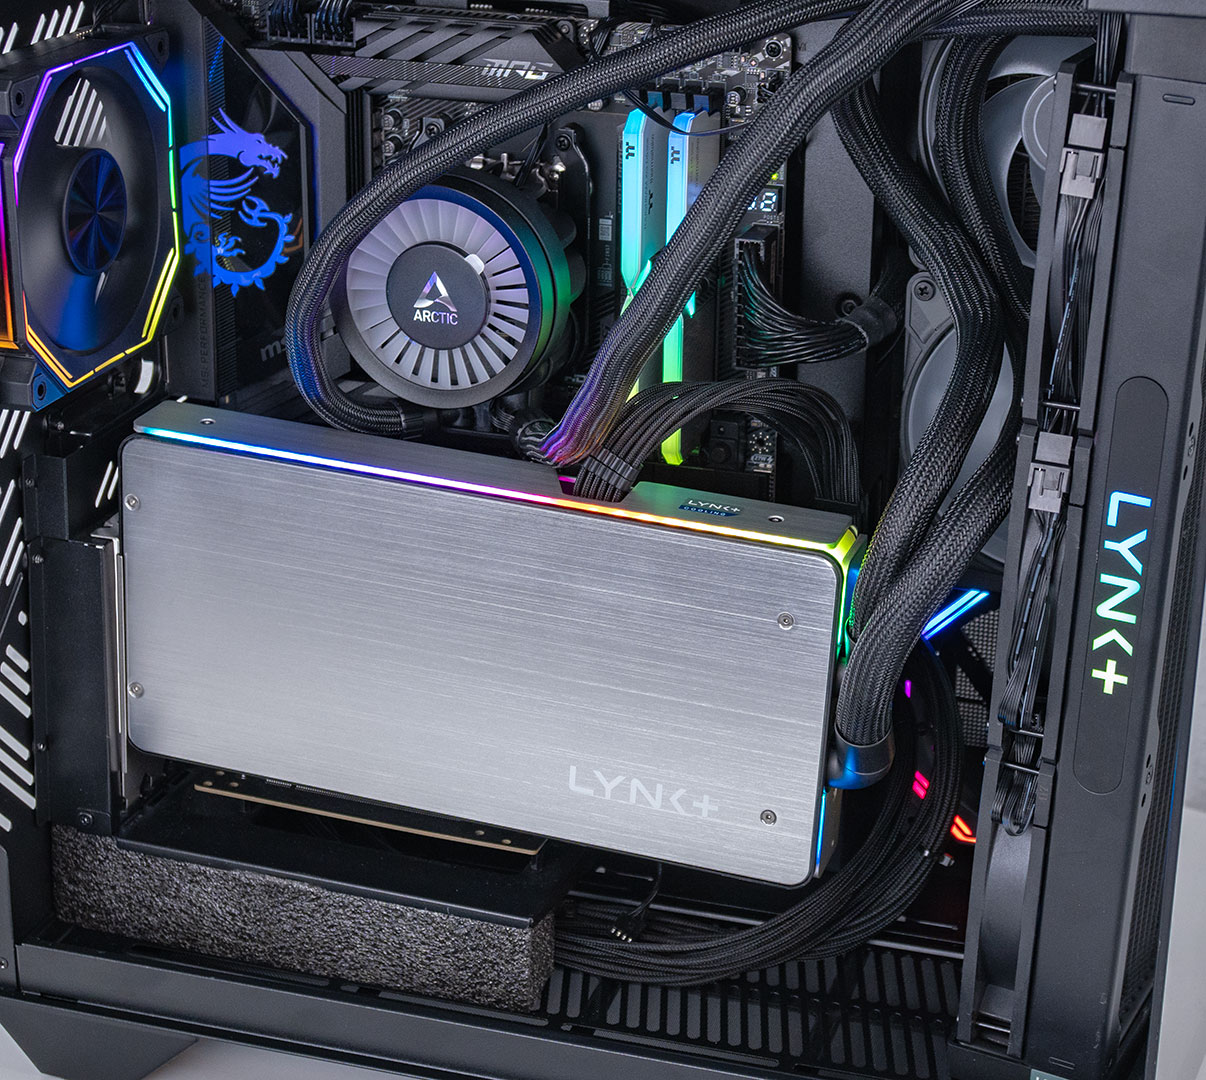
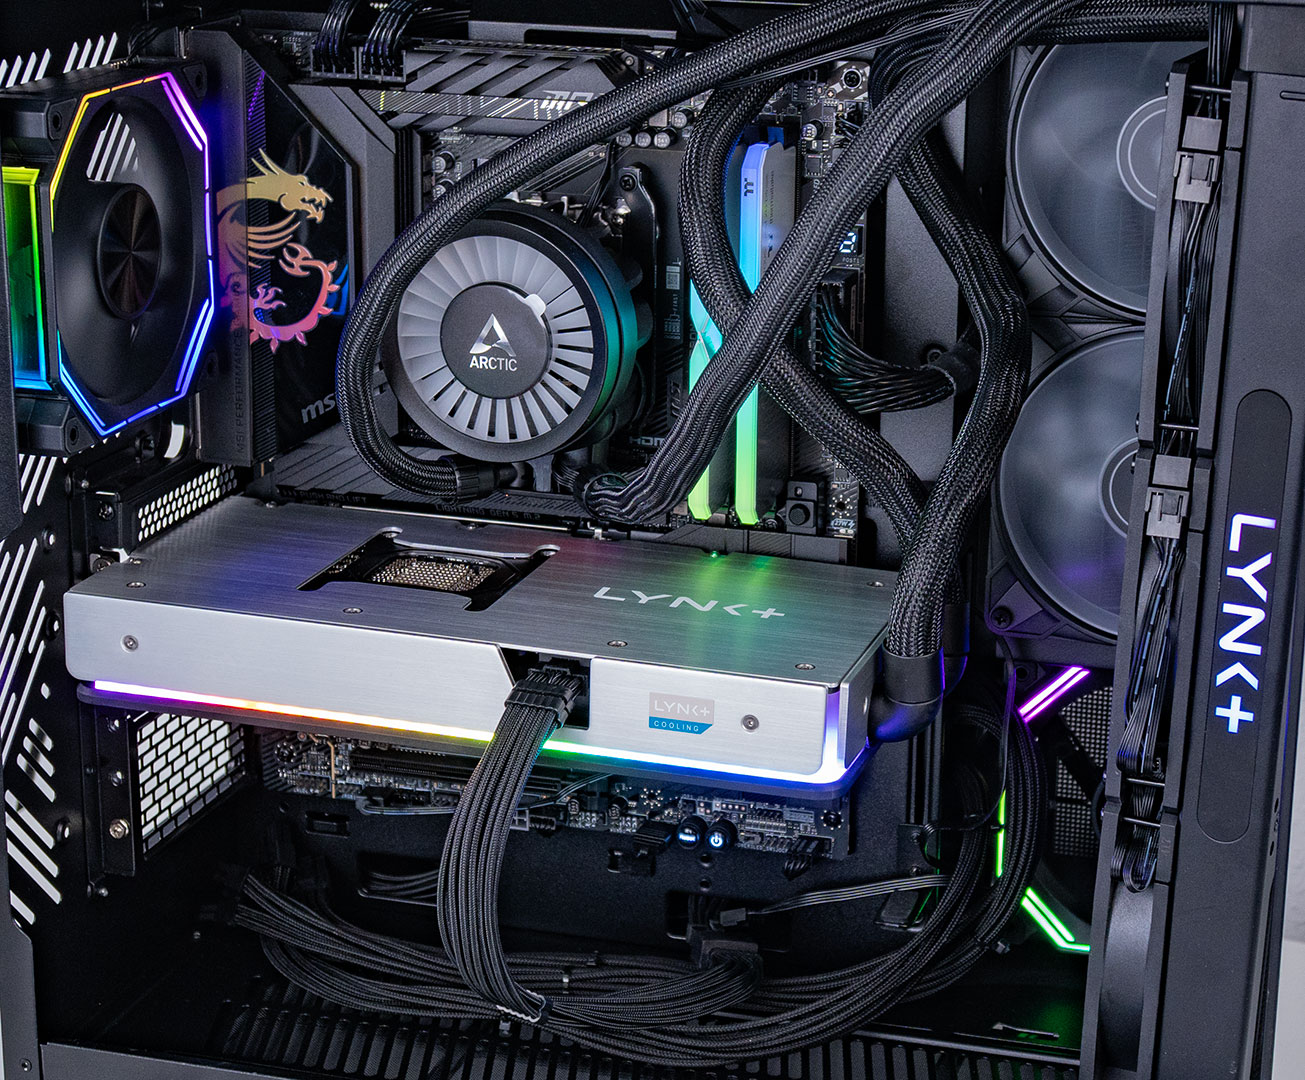
RGB zones have been installed on the block and on both sides of the radiator, illuminating the LYNK+ logo.
Teardown
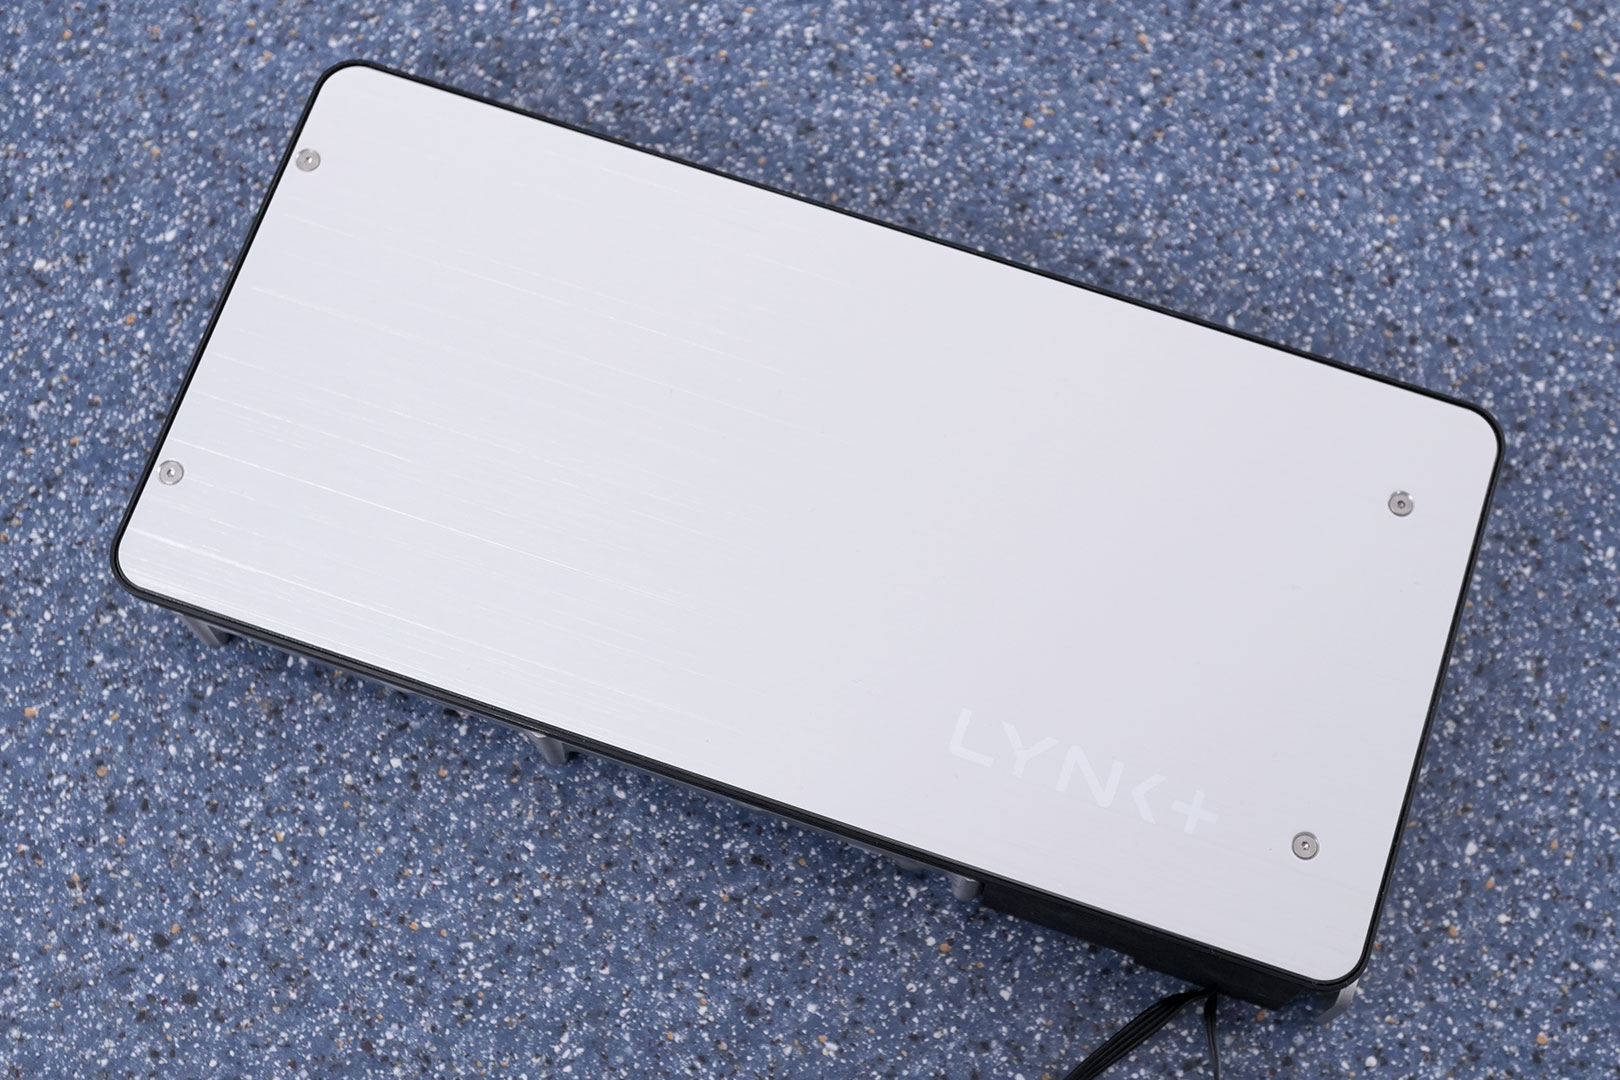
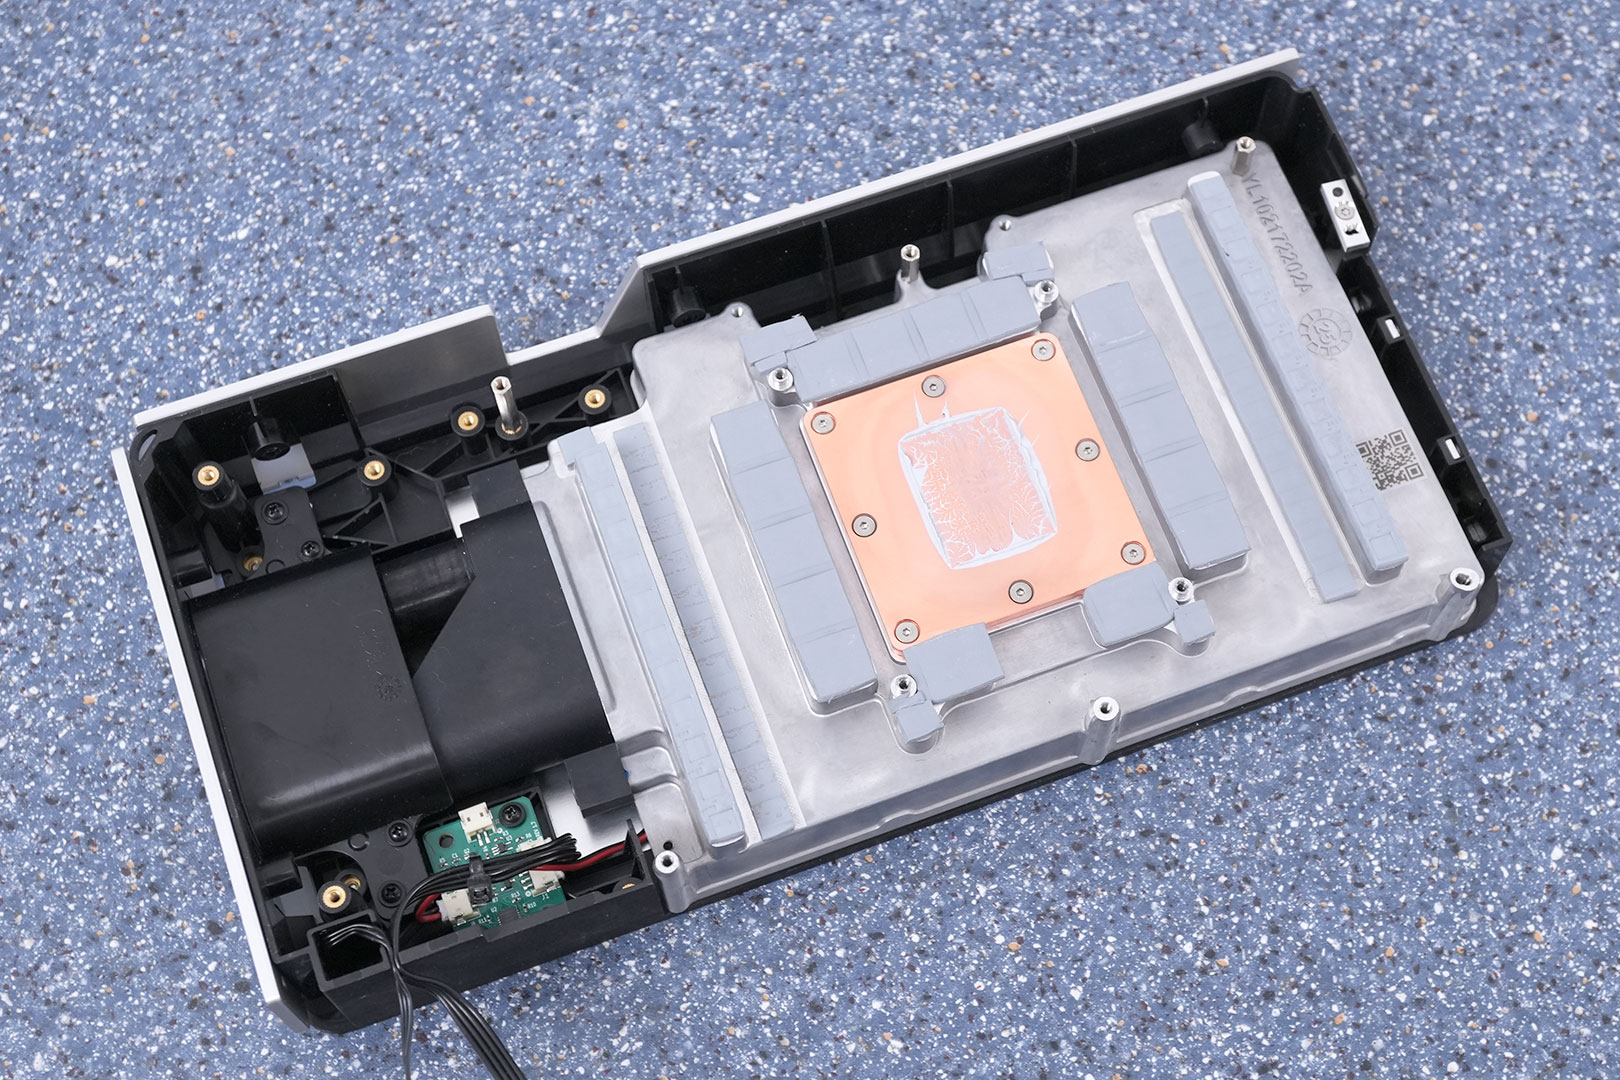

The waterblock covers all components that need cooling: GPU, memory chips and VRM circuitry.
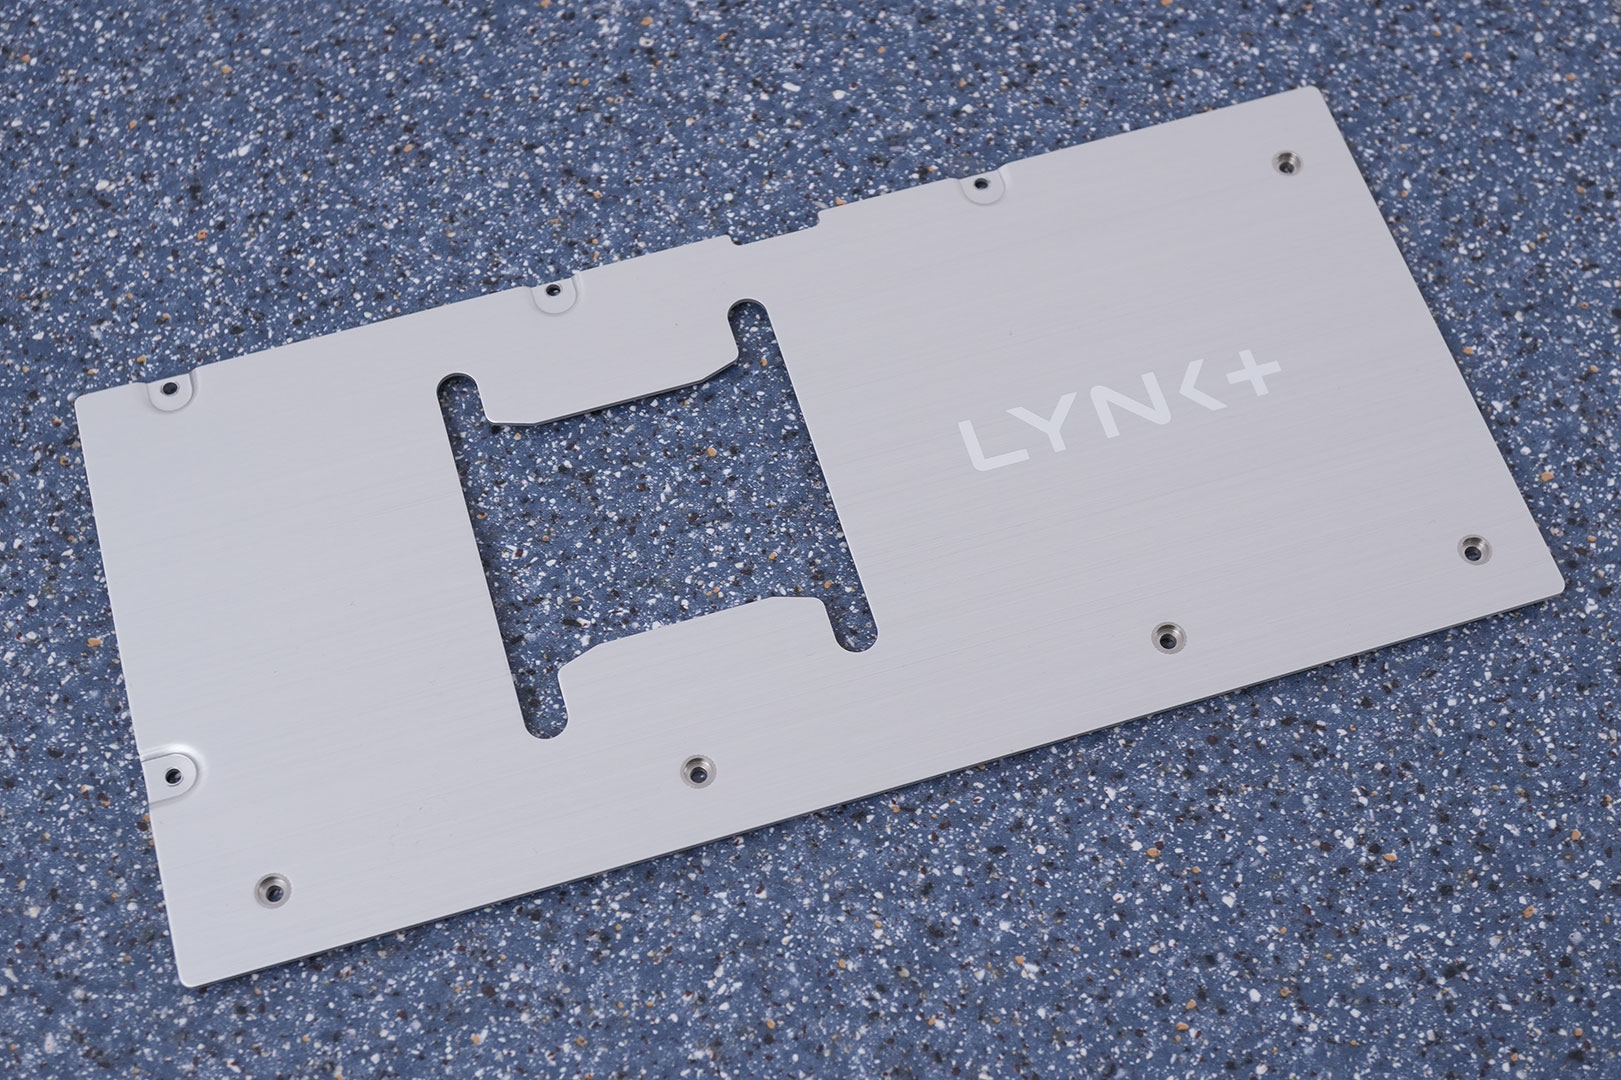
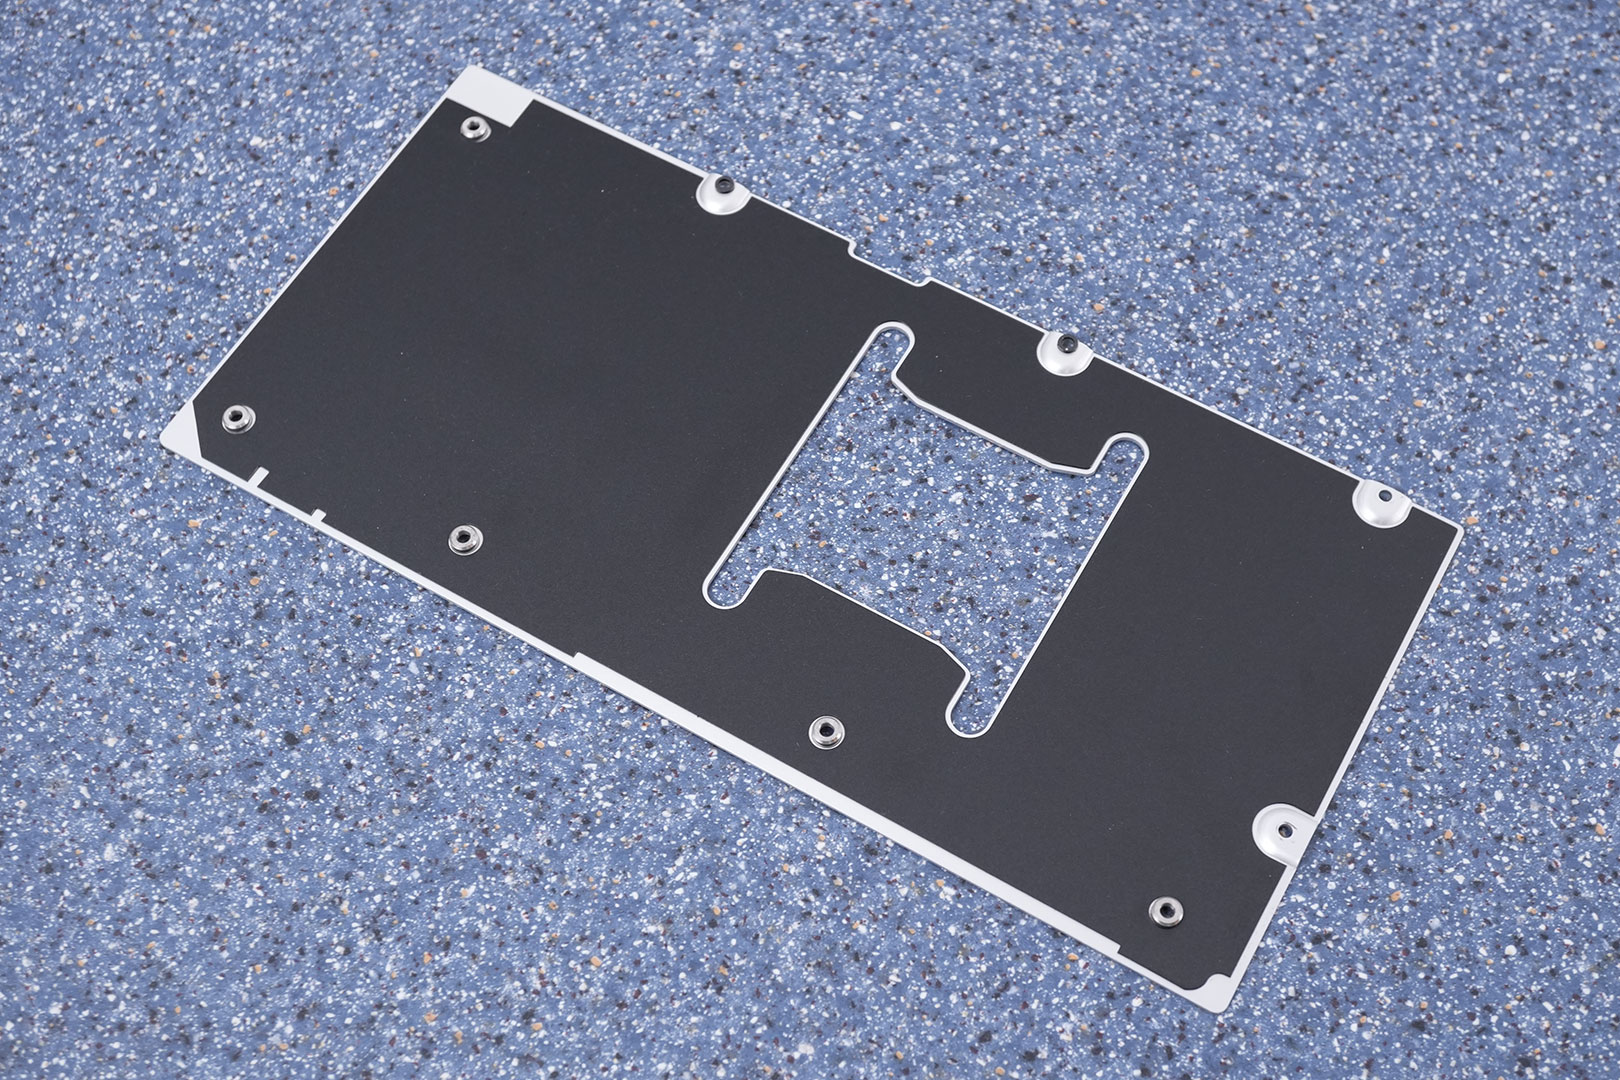
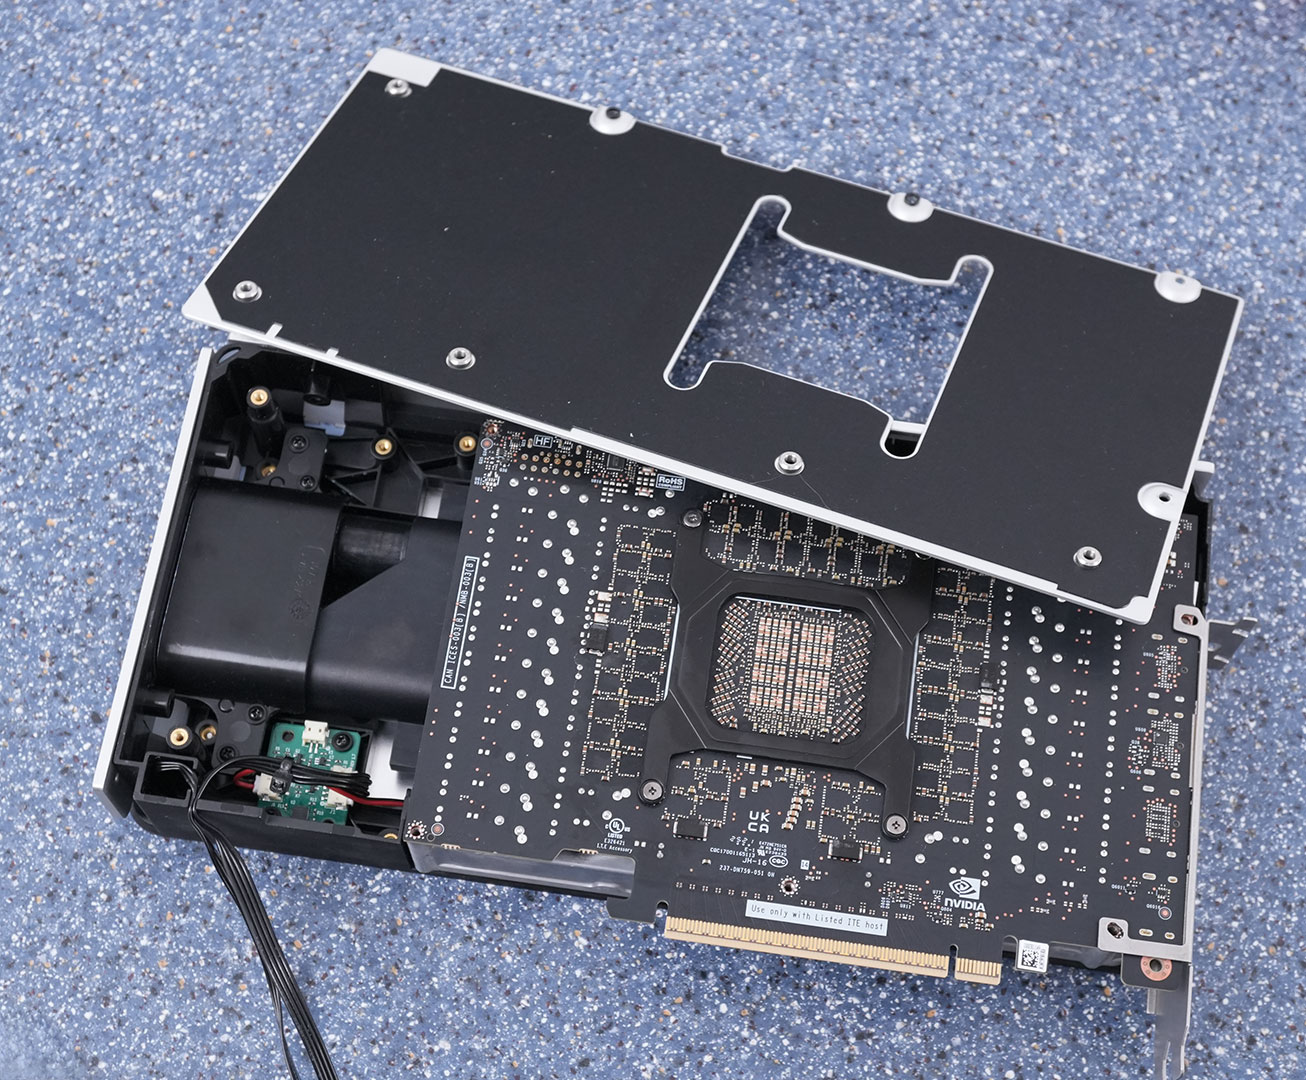
The backplate is made from thick metal, it comes off easily and gives you access to the back of the card, without having to disturb the thermal paste.

Here we can see how the tubing on the left connects to the system, and there's also a small PCB at the bottom that takes care of controlling and monitoring the speeds of the fans and pump.
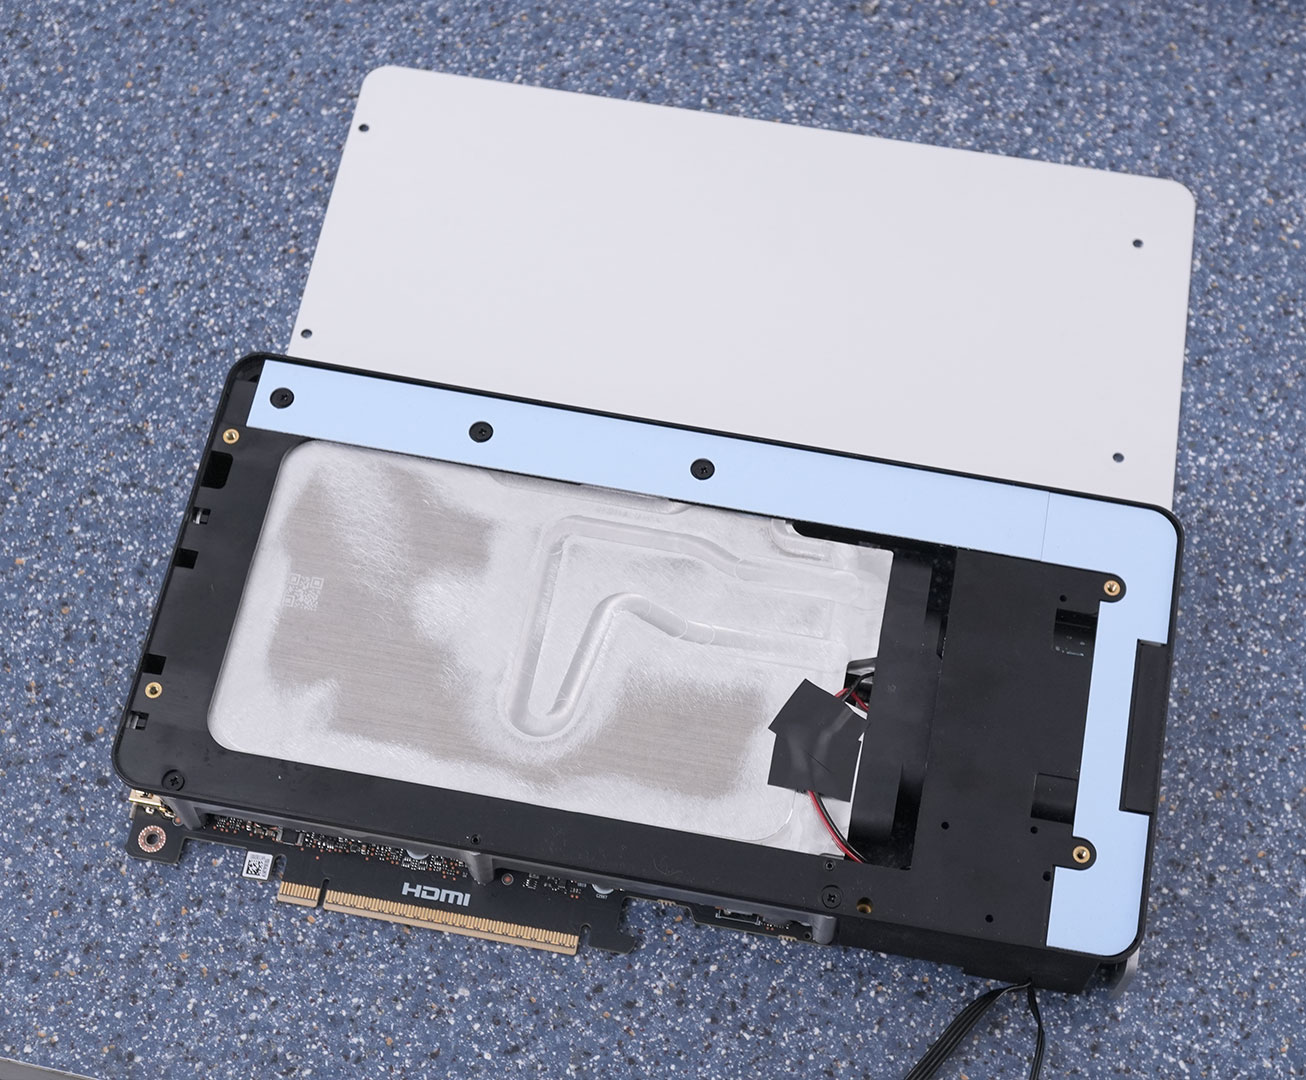
Removing the front plate doesn't get you anything.
The Radiator

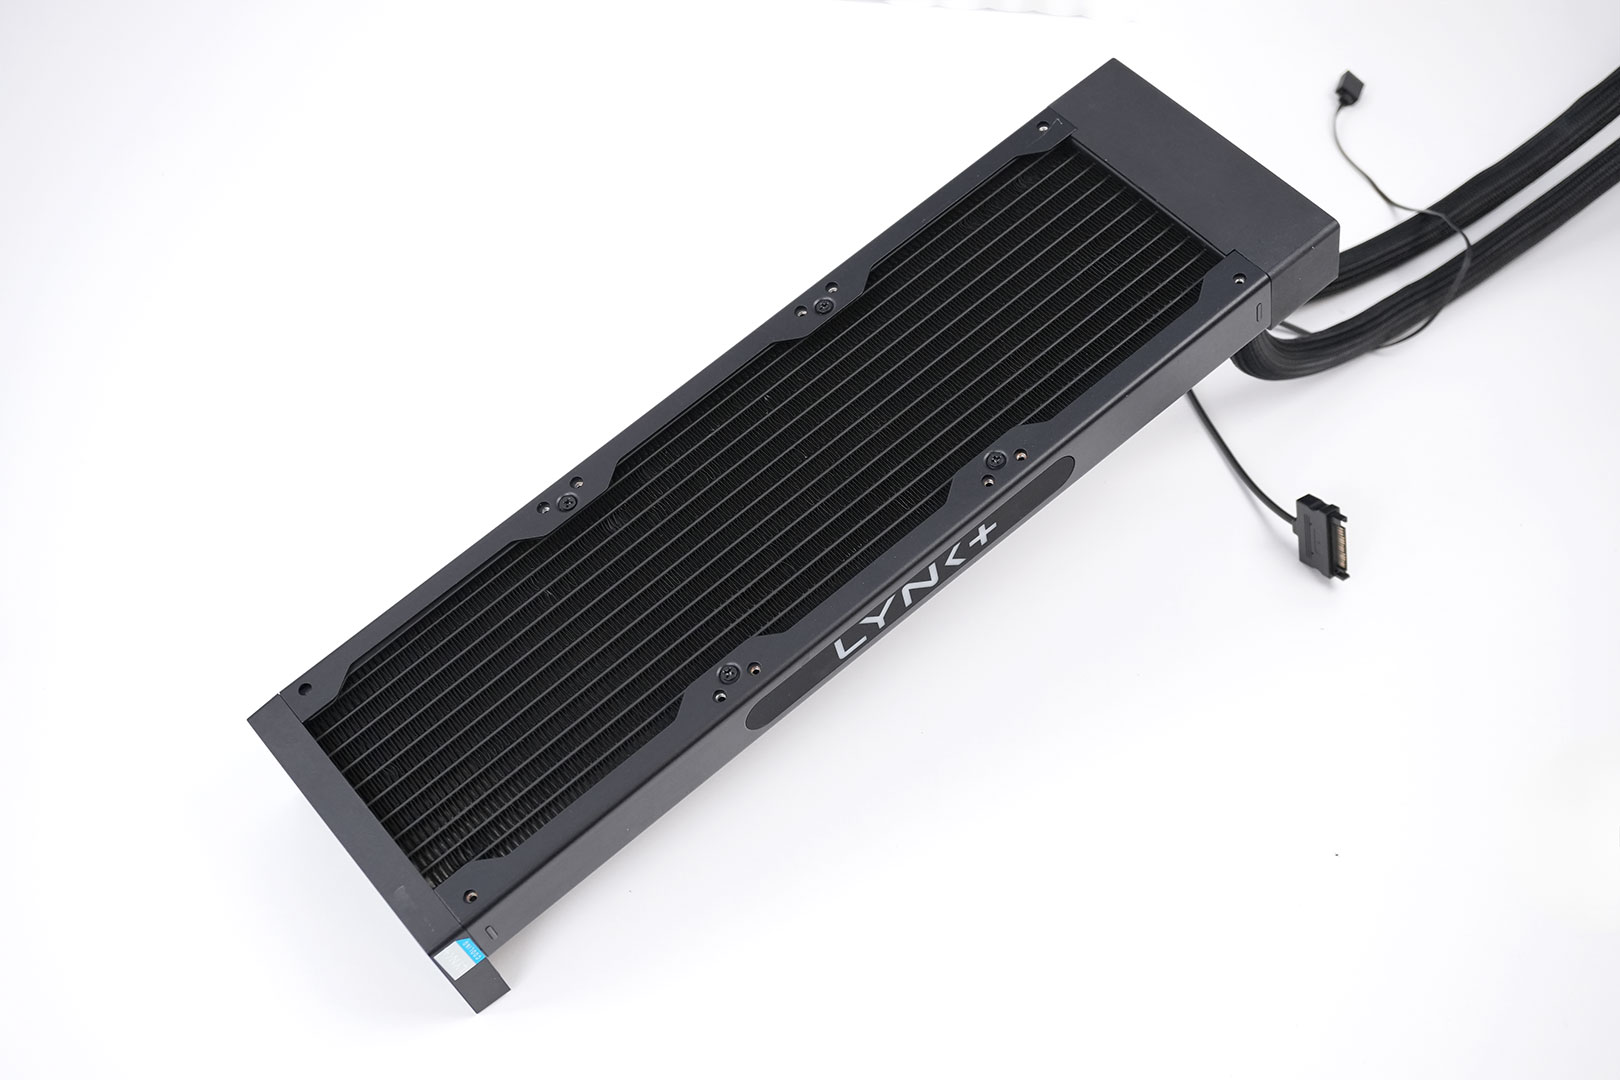
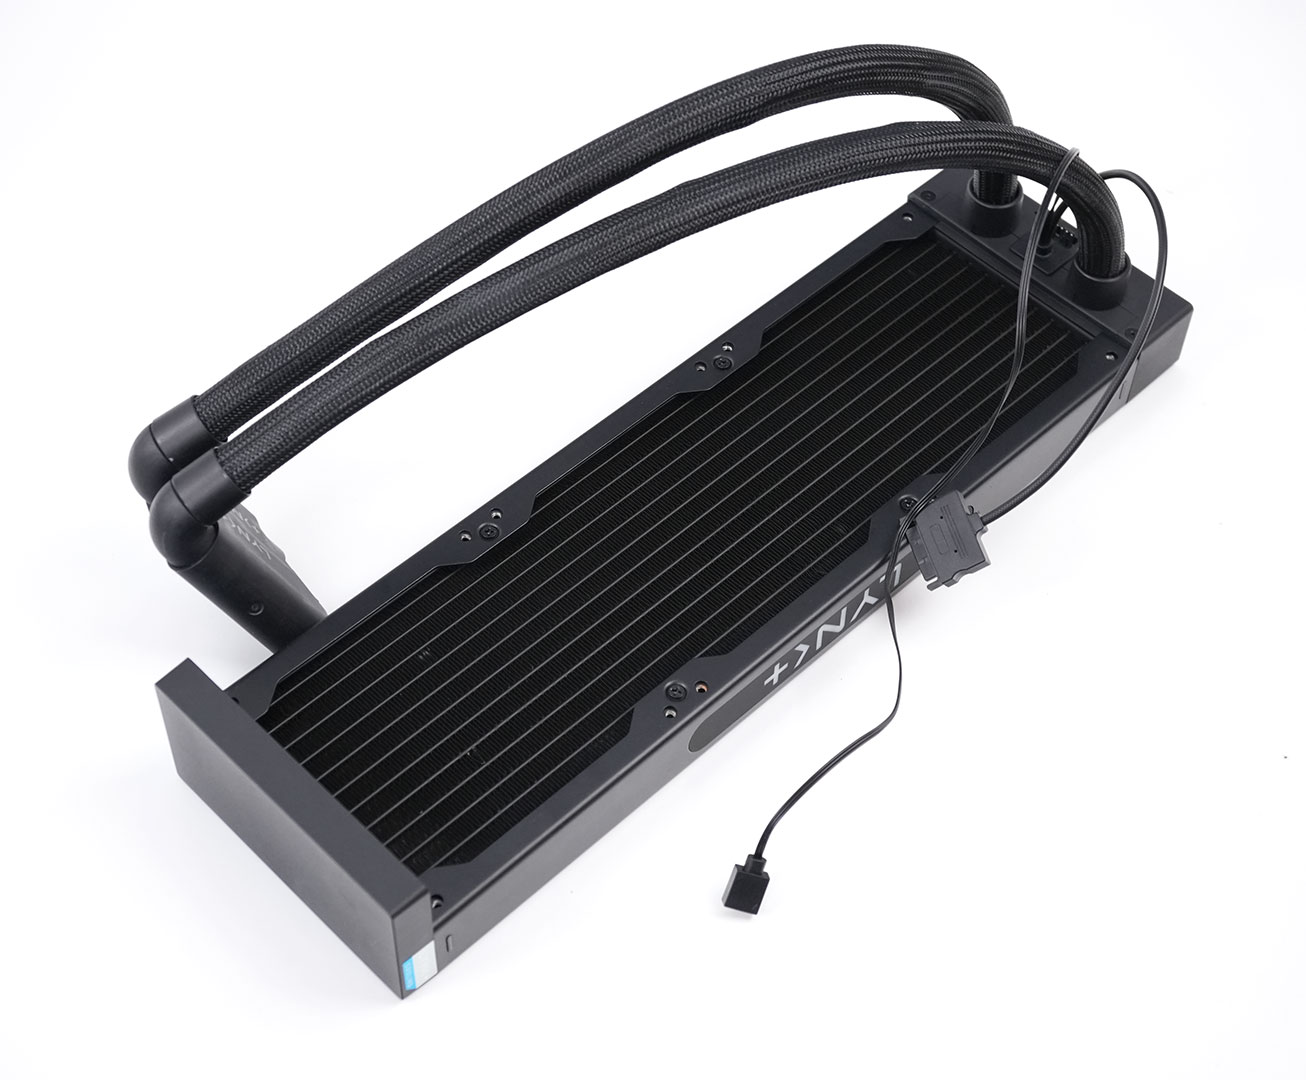
The radiator is a standard 360 mm radiator with a housing that contains the pump. Note the SATA power cable here and the RGB cable, which is optional. Not connecting the RGB will keep the lighting off.

There is a single fan header available, which you can use to connect the three fans on the radiator in a daisy-chained configuration. Right next to that, marked in red, is a little LED that is constant white when everything is working properly, but it can flash, too, to indicate various error states.
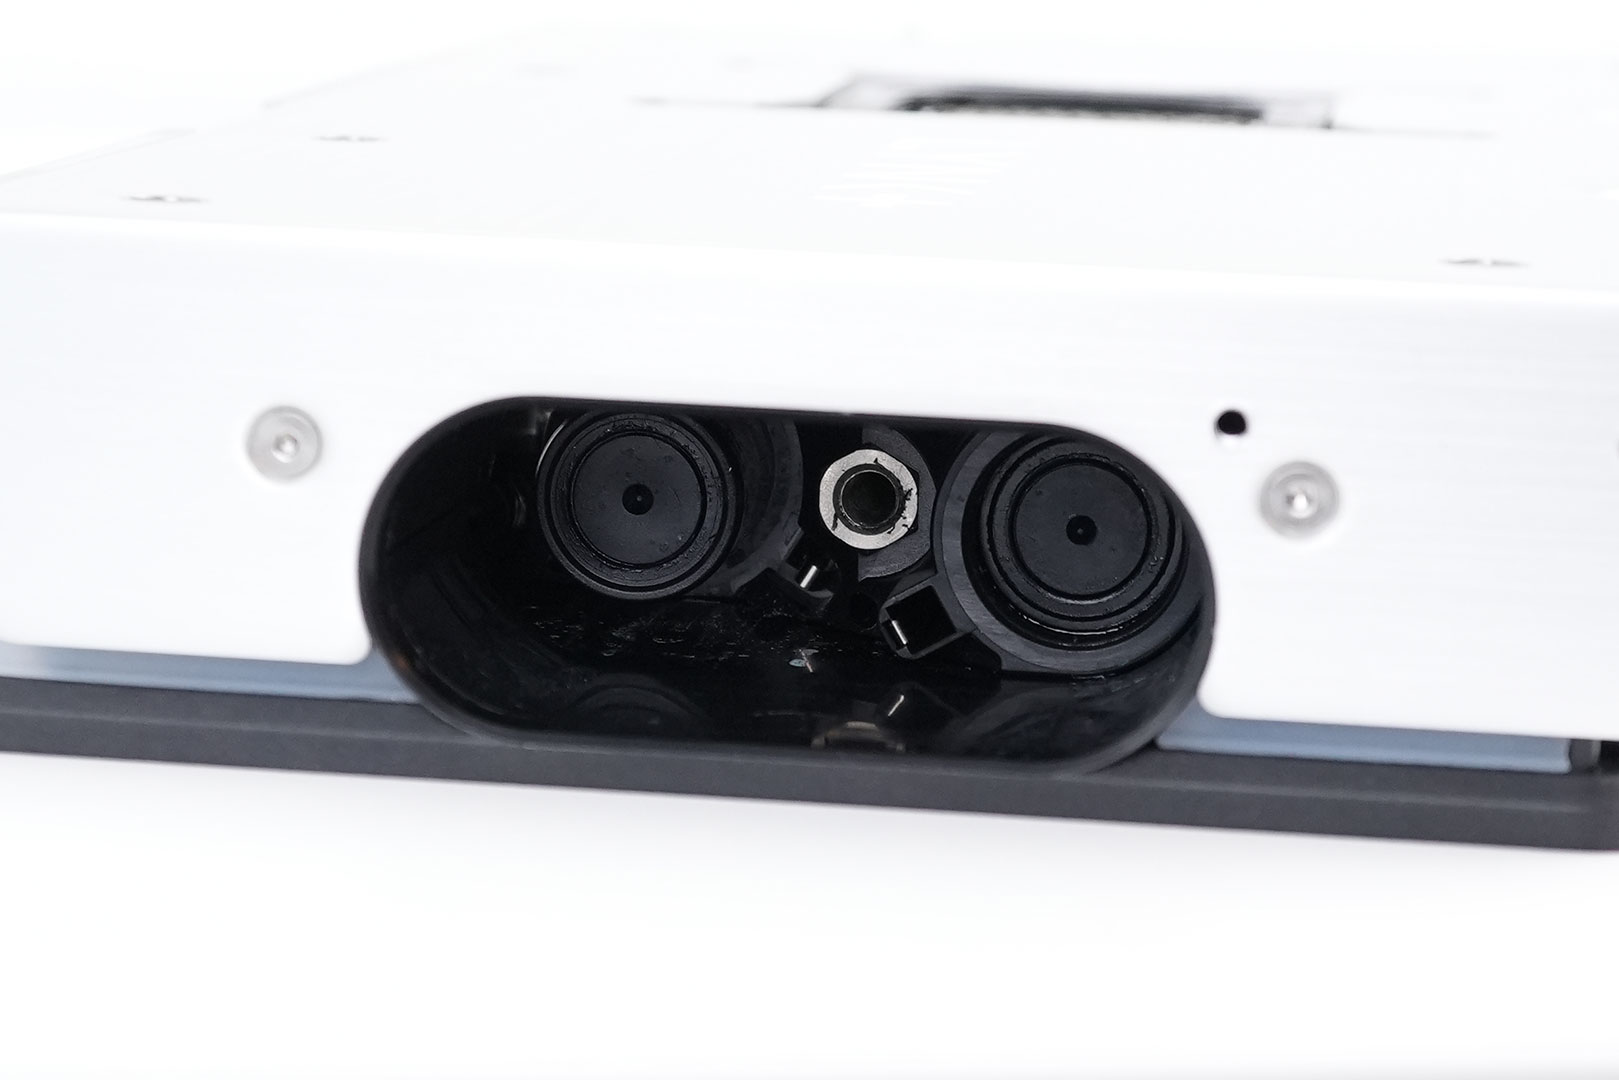
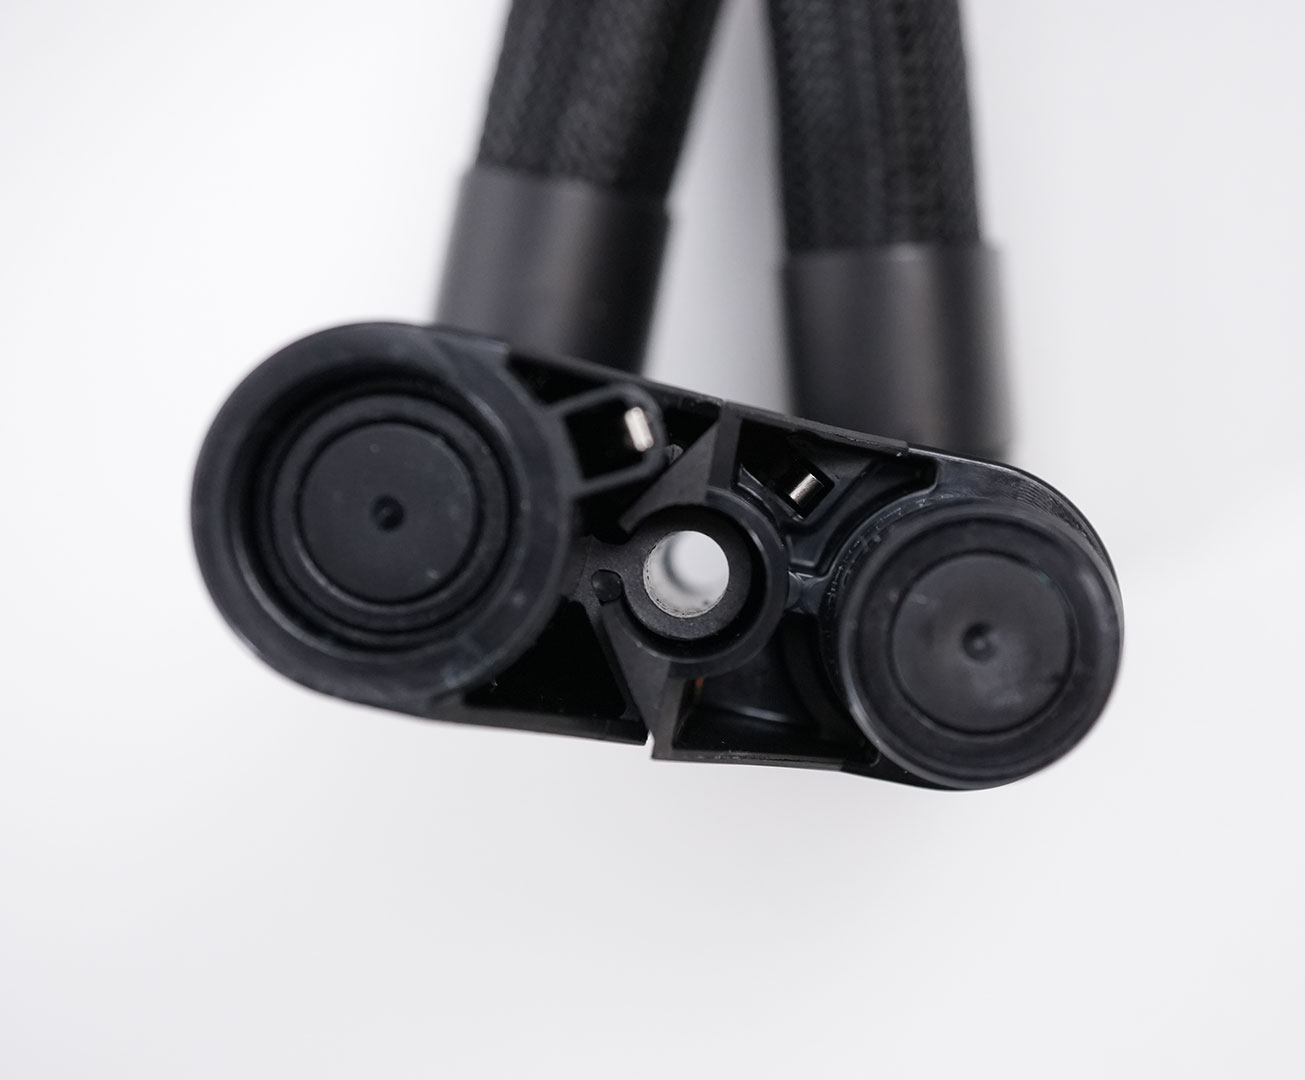

This is where the magic happens. The quick connects are designed to not leak any liquid, so you can just remove them during installation and nothing will spill or have to be refilled. The liquid is not water: "The coolant is specially developed by us; everything comes prefilled and no refilling necessary."
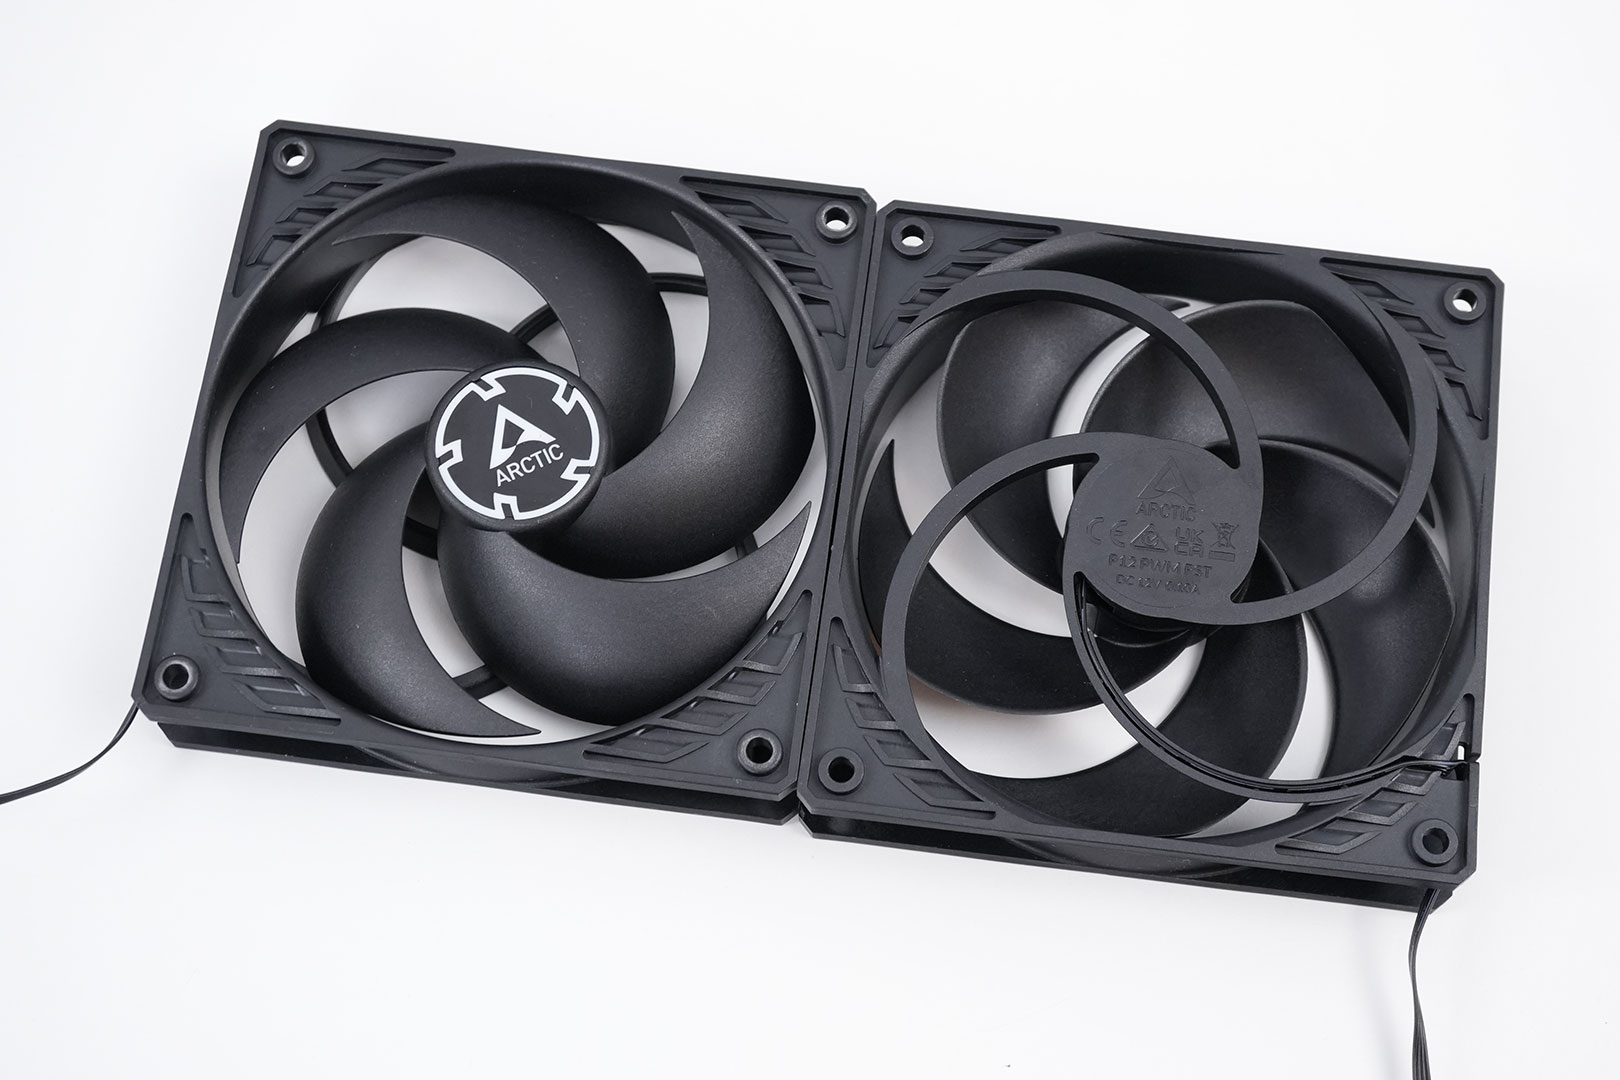
Included with my review sample were three Arctic P12 PWM fans, but you can really use any other 120 mm fan.
Installation
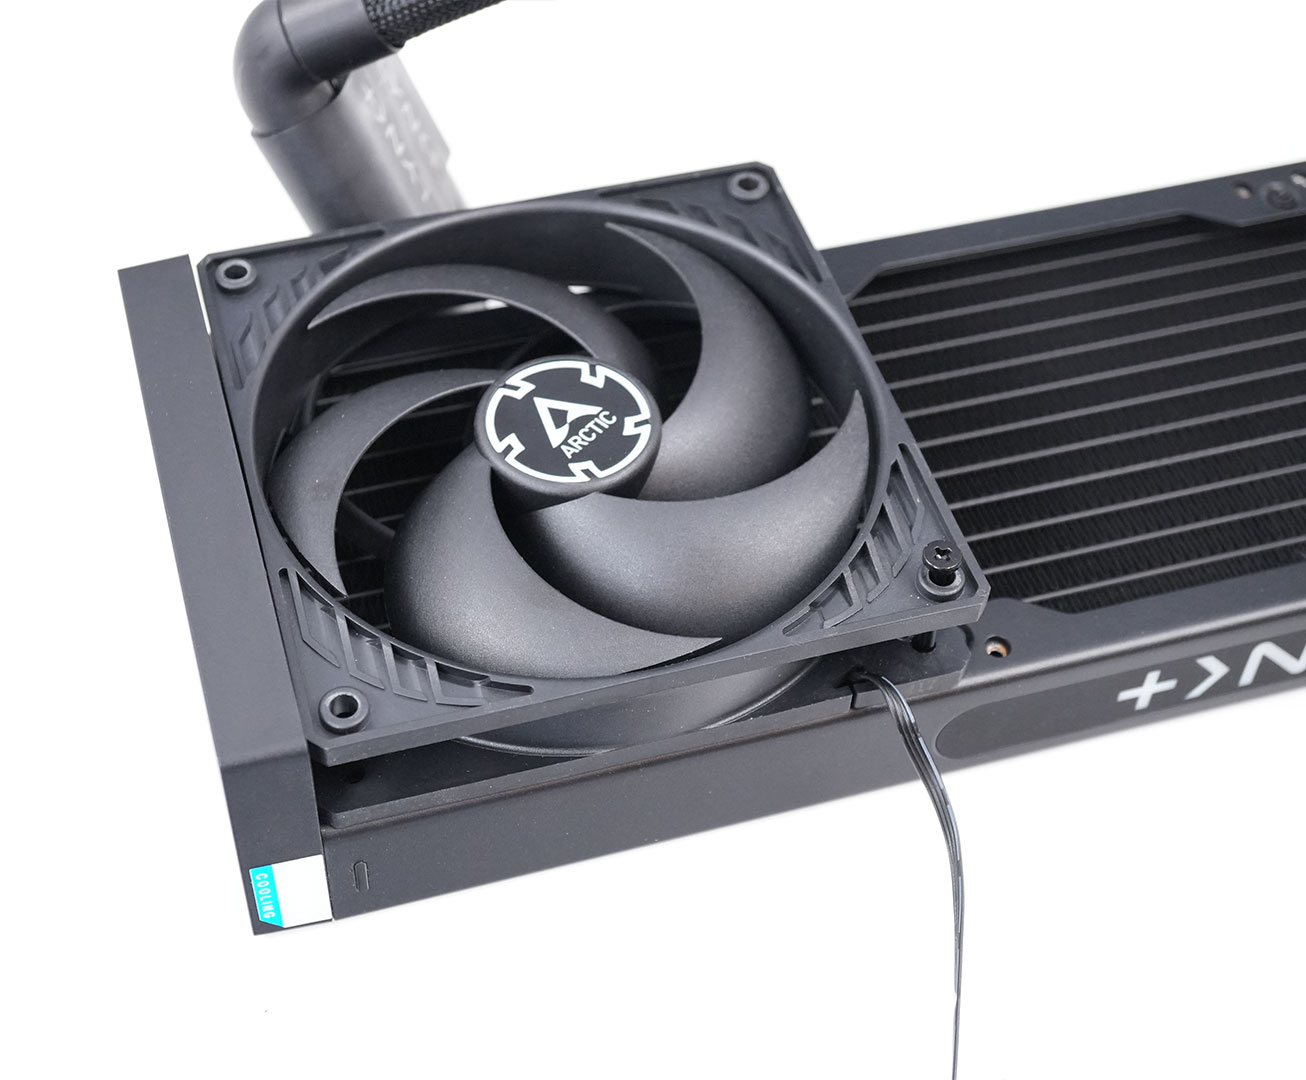
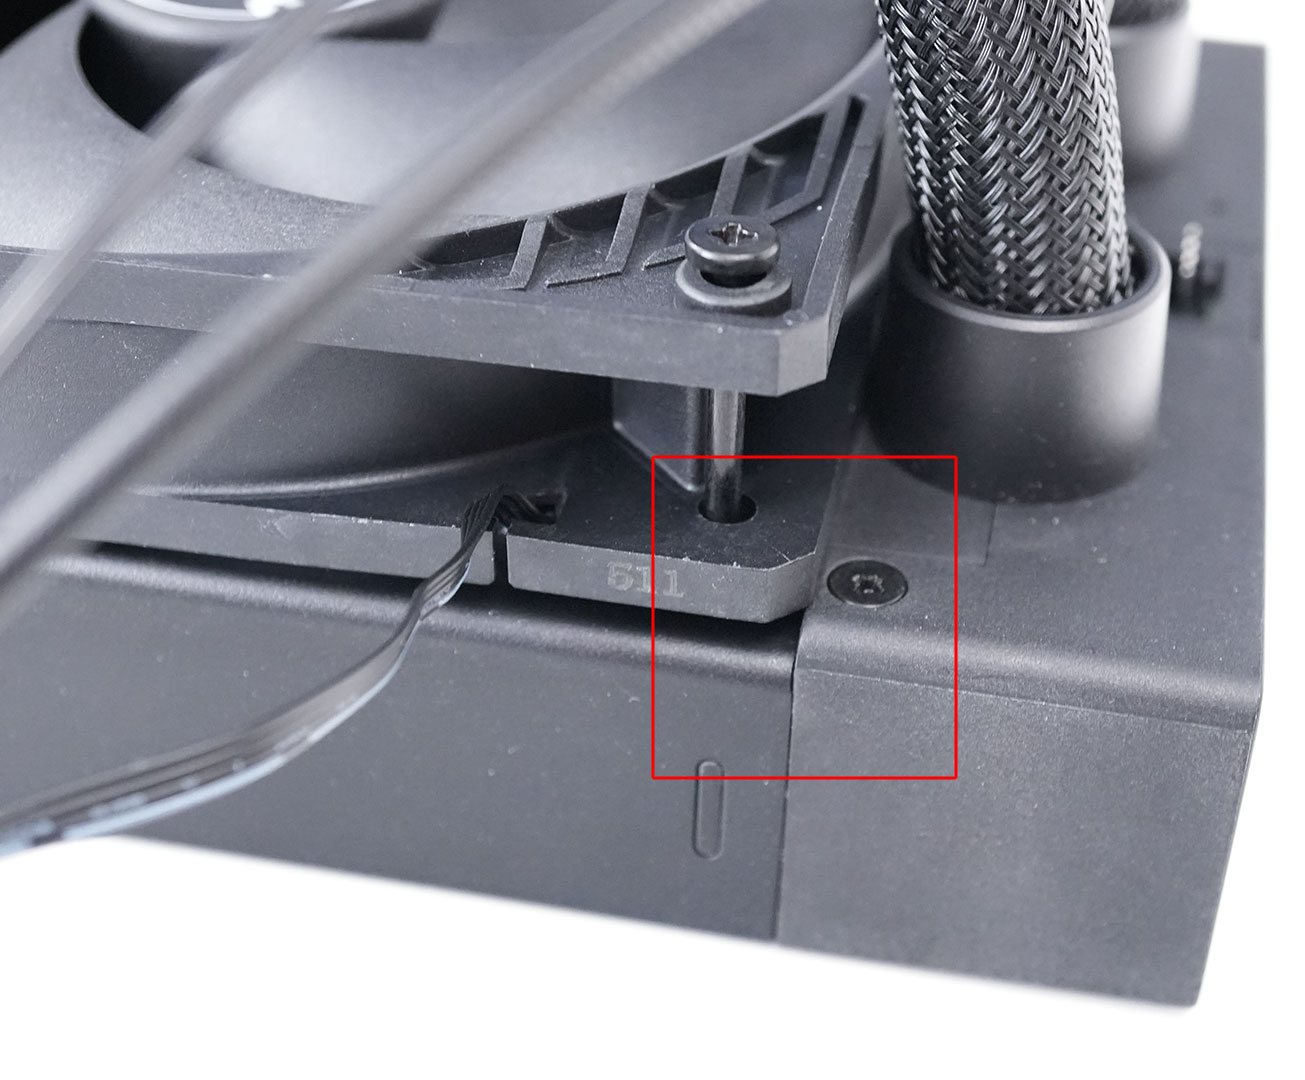
To begin, attach the fans to the radiator. As shown in the second photo, the space is quite limited, so avoid tightening the screws completely at first. Instead, secure them fully only after all three fans have been positioned correctly.
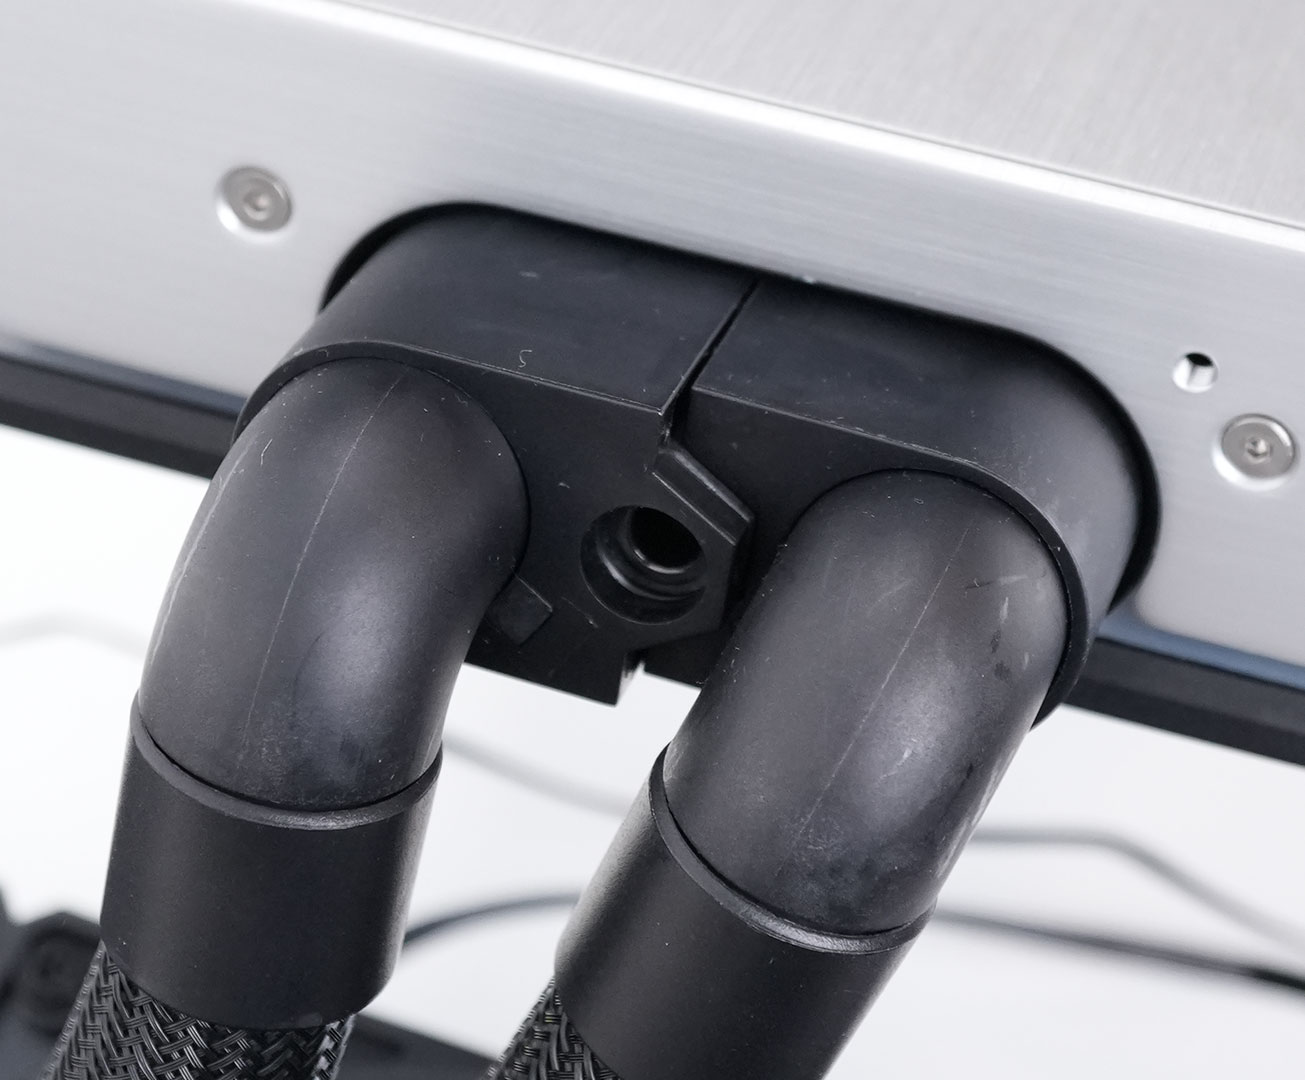
Next, the tubing has to be connected to the GPU. To do that just insert it, there is only one way it will fit.
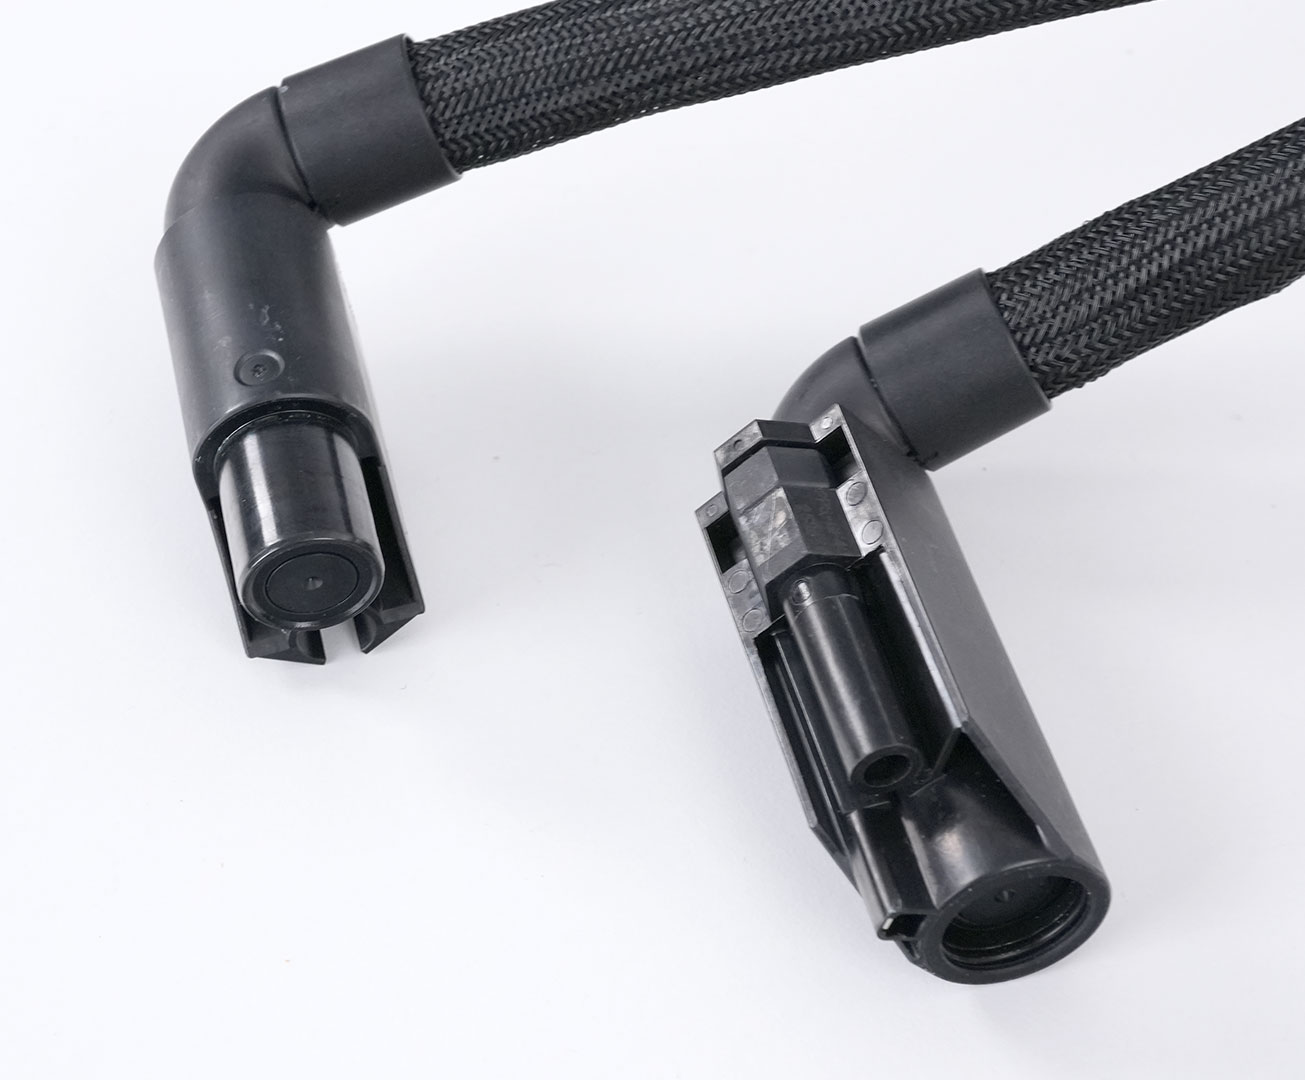
Do note that the two pieces can be separated easily, which lets you realign them or route them through small spaces. The "ends" can also be rotated, to help align, depending on the direction you're setting up the routing.


Insert the large included screw and tighten it using the provided tool. Simply pressing down won't be effective; you must rely on the screw's torque. The screw will come to a hard stop when fully tightened, leaving no ambiguity about whether you are finished.
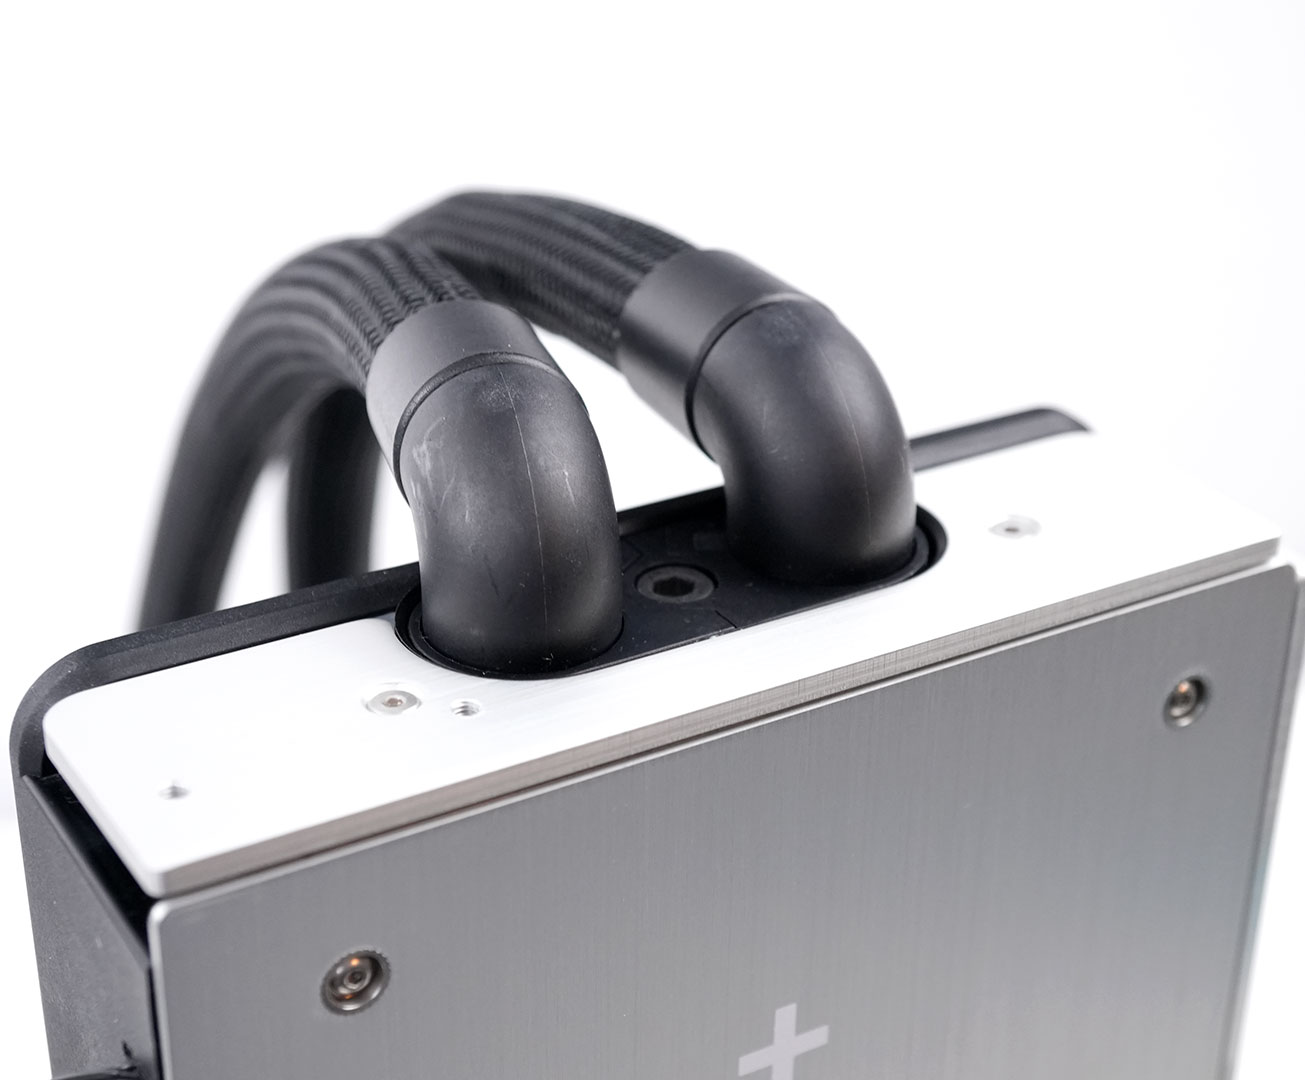
When done, it looks very nice, like a single piece.

To disassemble the system, simply remove the screw, and the connector will come out easily. No pulling or force is required. I took this photo immediately after running at full load and disconnecting the system. As you can see, there is a slight liquid "film," but it's only a tiny amount that will evaporate within minutes.
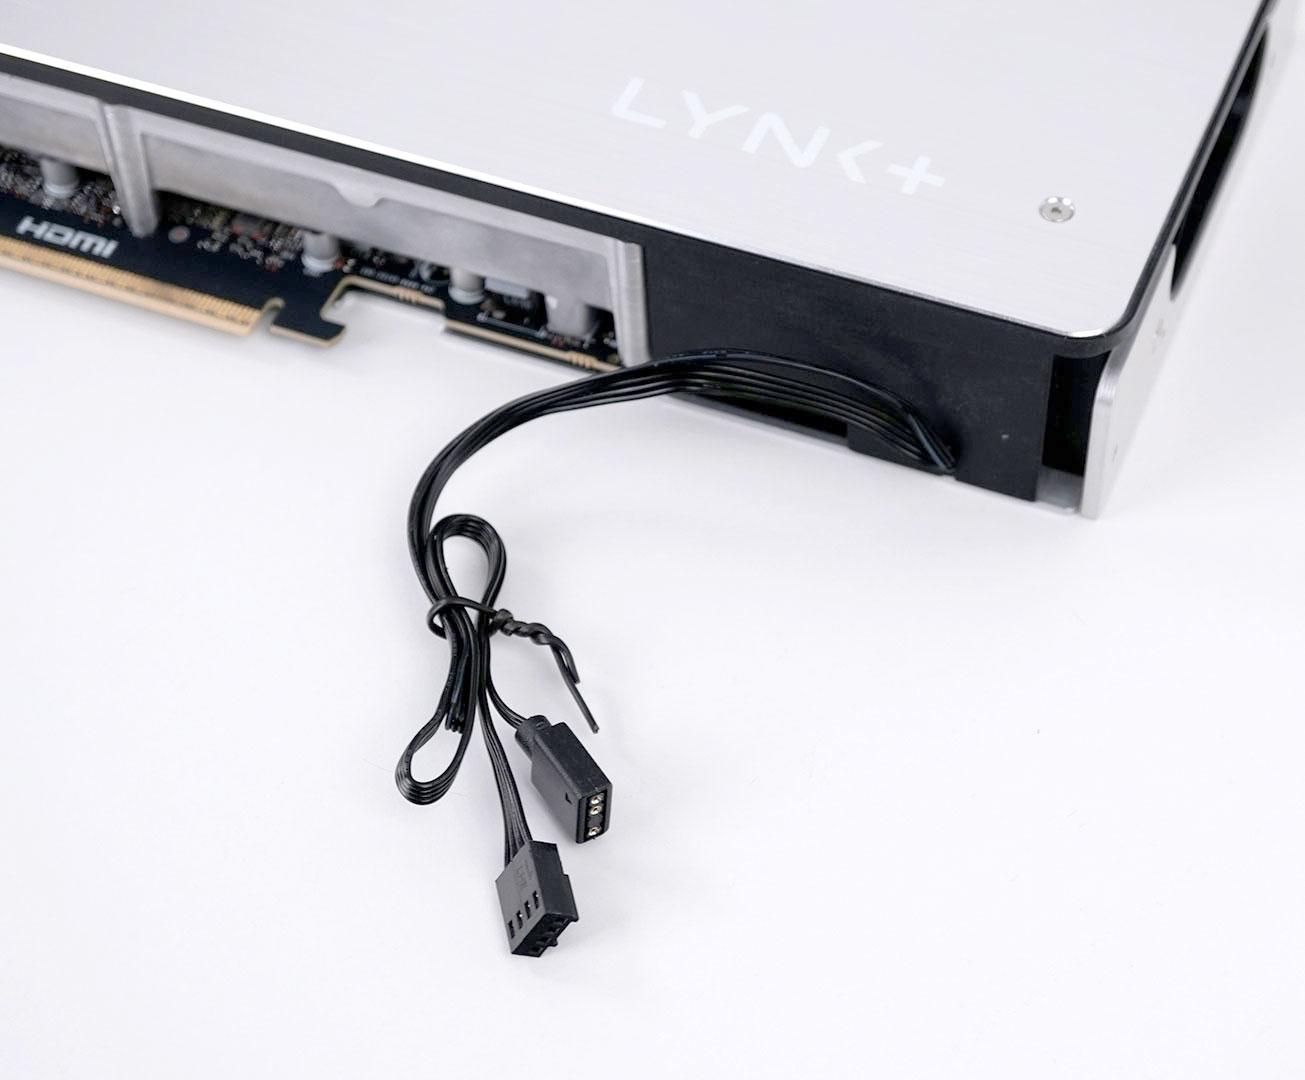
Finally, connect the PWM cable to your motherboard to provide an RPM signal for the pump and fans. When not connected, both pump and fans will run in a safe mode. The second cable is for RGB. Here, too, if it's not connected, the lighting is off.
Our Patreon Silver Supporters can read articles in single-page format.
Nov 14th, 2026 16:44 CST
change timezone
Latest GPU Drivers
New Forum Posts
- Ryzen 7 8700G OC (8)
- What can the FX 8320 do today? Here is the answer. (42)
- auto-closed by somethings by actions (2)
- [Community Benchmark] MrH OpenCL Benchmark 2.0e (Windows Only – CPU & GPU) (2)
- Show us your collections thread!! (368)
- Recent hardware you've donated? (30)
- WarpCoreBench scores! (32)
- X79 and/or rampage IV OC'ing thread for those of us still left.... (2450)
- Id thank you and just like a moment of your time, what do you think about having to recover the r36s maxes/pros is it just china 5 dollar junk card? (0)
- Ddr4 instead of ddr5 for 9060xt 8 gb over 5060 8 gb (8)
Popular Reviews
- AMD Zen 6 Technical Deep Dive
- ASUS ROG Strix B850-I Gaming Wi-Fi7 W Review
- Corsair HX1000i Shift Crystal Review
- NZXT C1200 Platinum Review
- Upcoming Hardware Launches 2027 (Updated Nov 2026)
- Montech King 95 3D PRO Review
- NZXT H7 RGB+ Review
- NZXT H5 Review
- Phantom Blade Zero Performance Benchmark Review - 35 GPUs Tested
- XPG NIMBUS PLUS Review - Mid-range Chair With Strong Competitors
TPU on YouTube
Controversial News Posts
- NVIDIA Co-Founder and CEO Jensen Huang Officially Resigns (405)
- OpenAI CEO Argues Home PCs Waste the World's Limited DRAM Supply (152)
- NVIDIA Launches Investigation Into Jensen Huang's Relationship With Suspected Chinese Spy (136)
- Intel "Raptor Lake Next" 16-Core and 20-Core CPUs Surface (130)
- Legendary Game Studio BioWare Shuts Down Following EA Layoffs (104)
- Dell CEO Says the Memory Shortage Will Get Worse in 2027 (95)
- NVIDIA GeForce RTX 50-Series Scheduled for up to $500 Price Hike This Week (89)
- Modder Fits RTX 5090 With Four 8-Pin Connectors, Halving Current per Wire (80)