 0
Microsoft Surface Laptop Ultra Review - The Next-gen Arm Laptop
Display Testing »Disassembly and Teardown
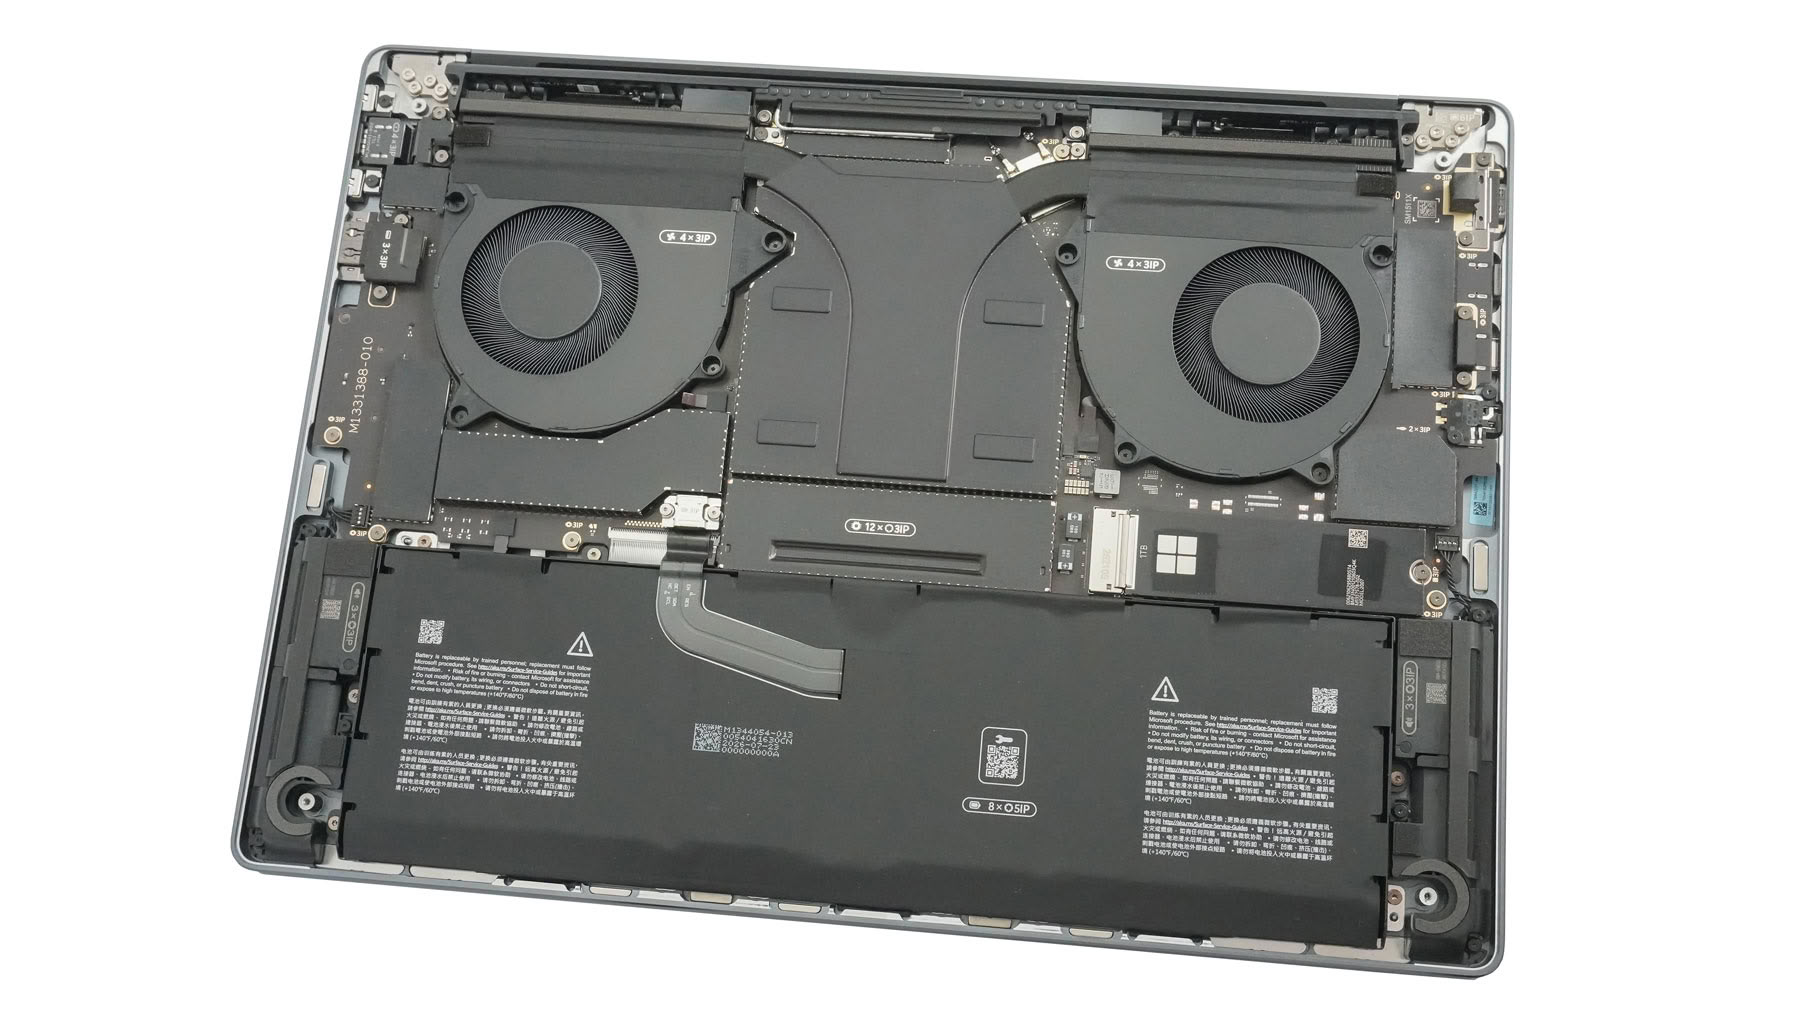
For one reason or another, I can't fully disassemble the NVIDIA RTX Spark-powered Microsoft Surface Laptop Ultra. On the bright side, I can show you how to pop the hood, which is always the main headache for users when it comes to upgrades.
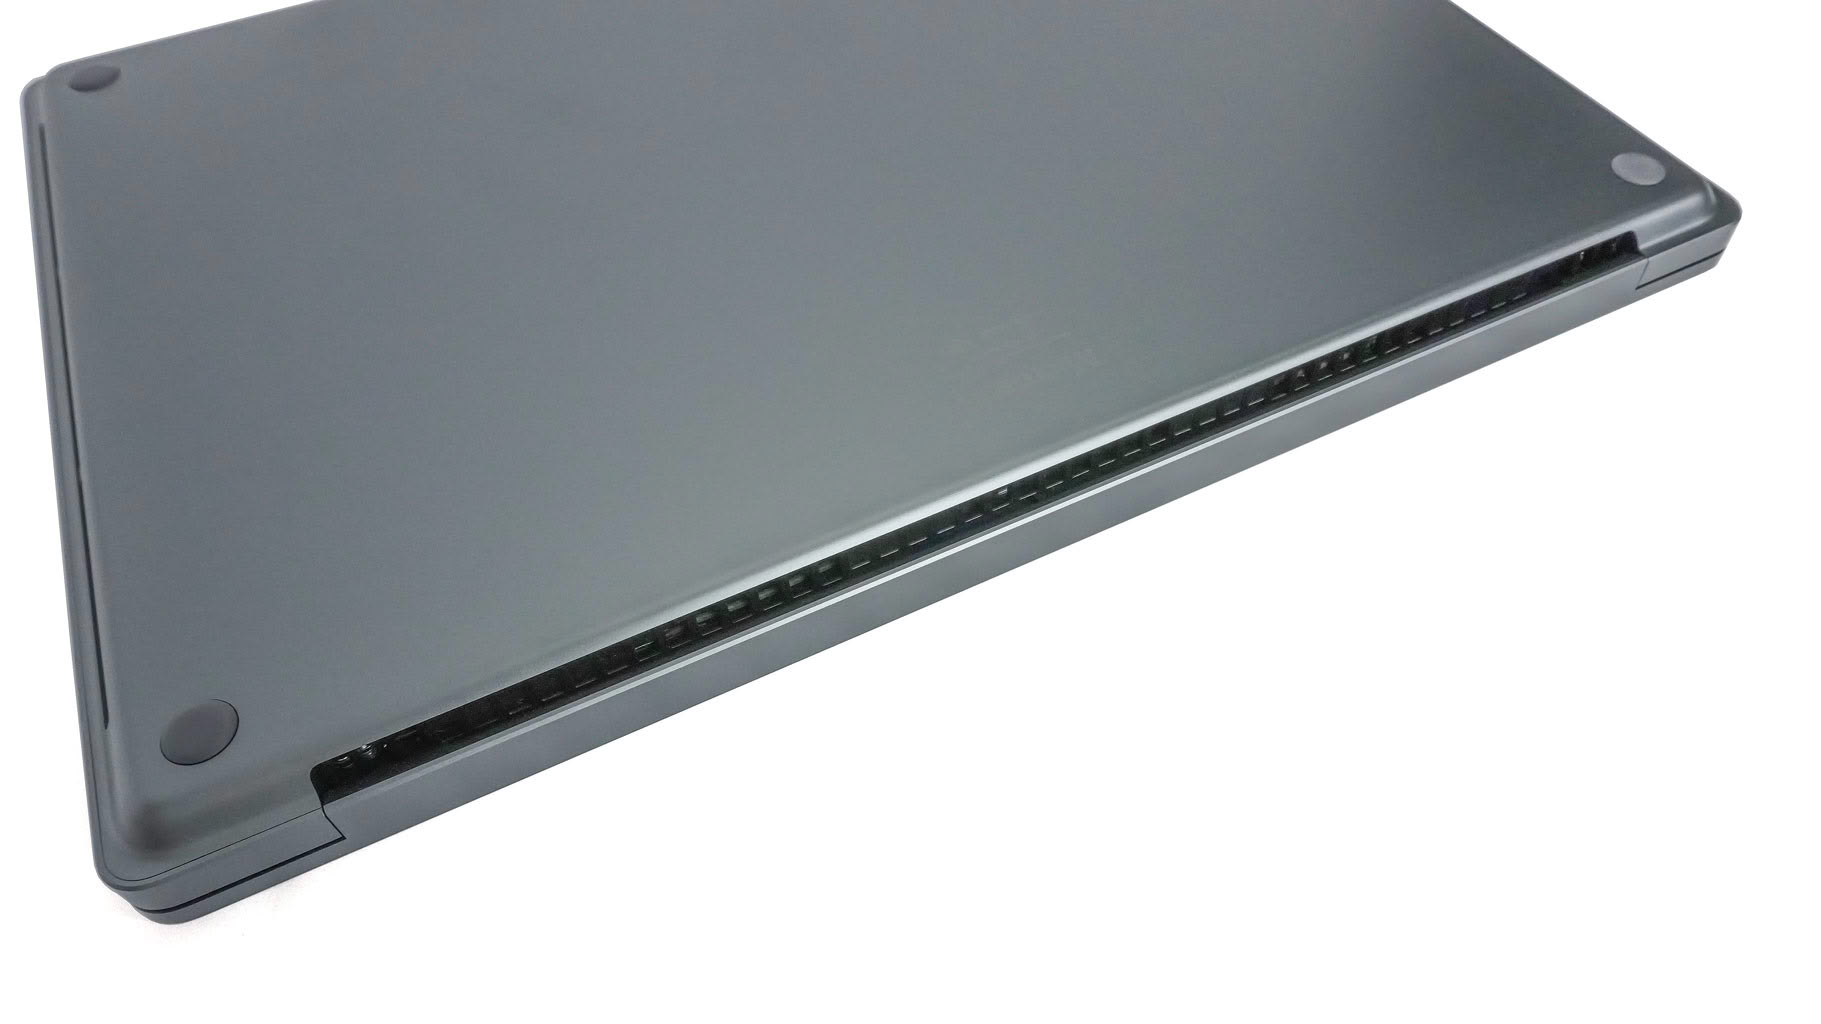
There are four small rubber feet in total, each one close to one of the bottom edges, and the screws hide underneath them. Don't bring out the screwdrivers just yet, Torx or otherwise. The panel looks so neat in this screw-free mode that it kind of reminds me of Apple's MacBooks.
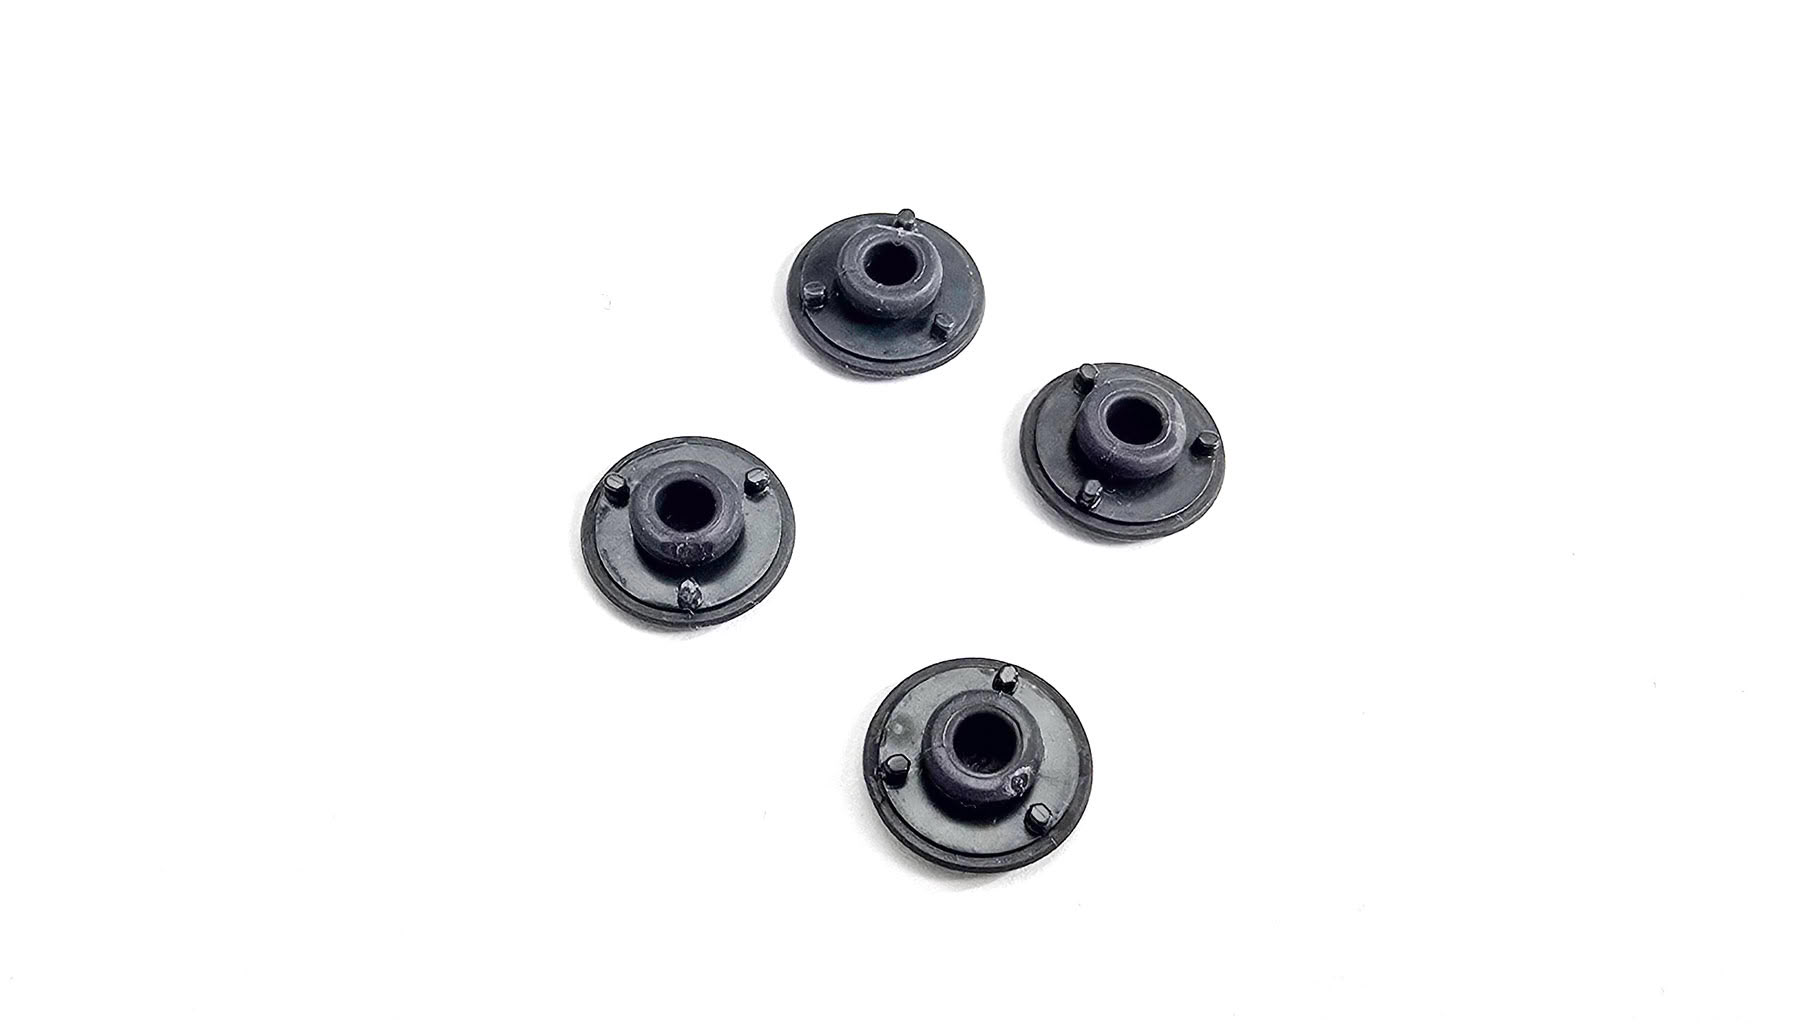
Take the thinnest plastic tool you've got and gently slip it between the bottom panel and one of the feet. Lift until you hear a click, which means the foot is free. Each foot has three small pins on its side that fit into dedicated mini holes in the panel. It's a clever design, and the feet are rock solid once you click them back in. Now you can unscrew the four screws.
You don't have to pry the panel, since it attaches to the base magnetically. Use a lever tool to lift it from the back side, where the heat exhaust is.
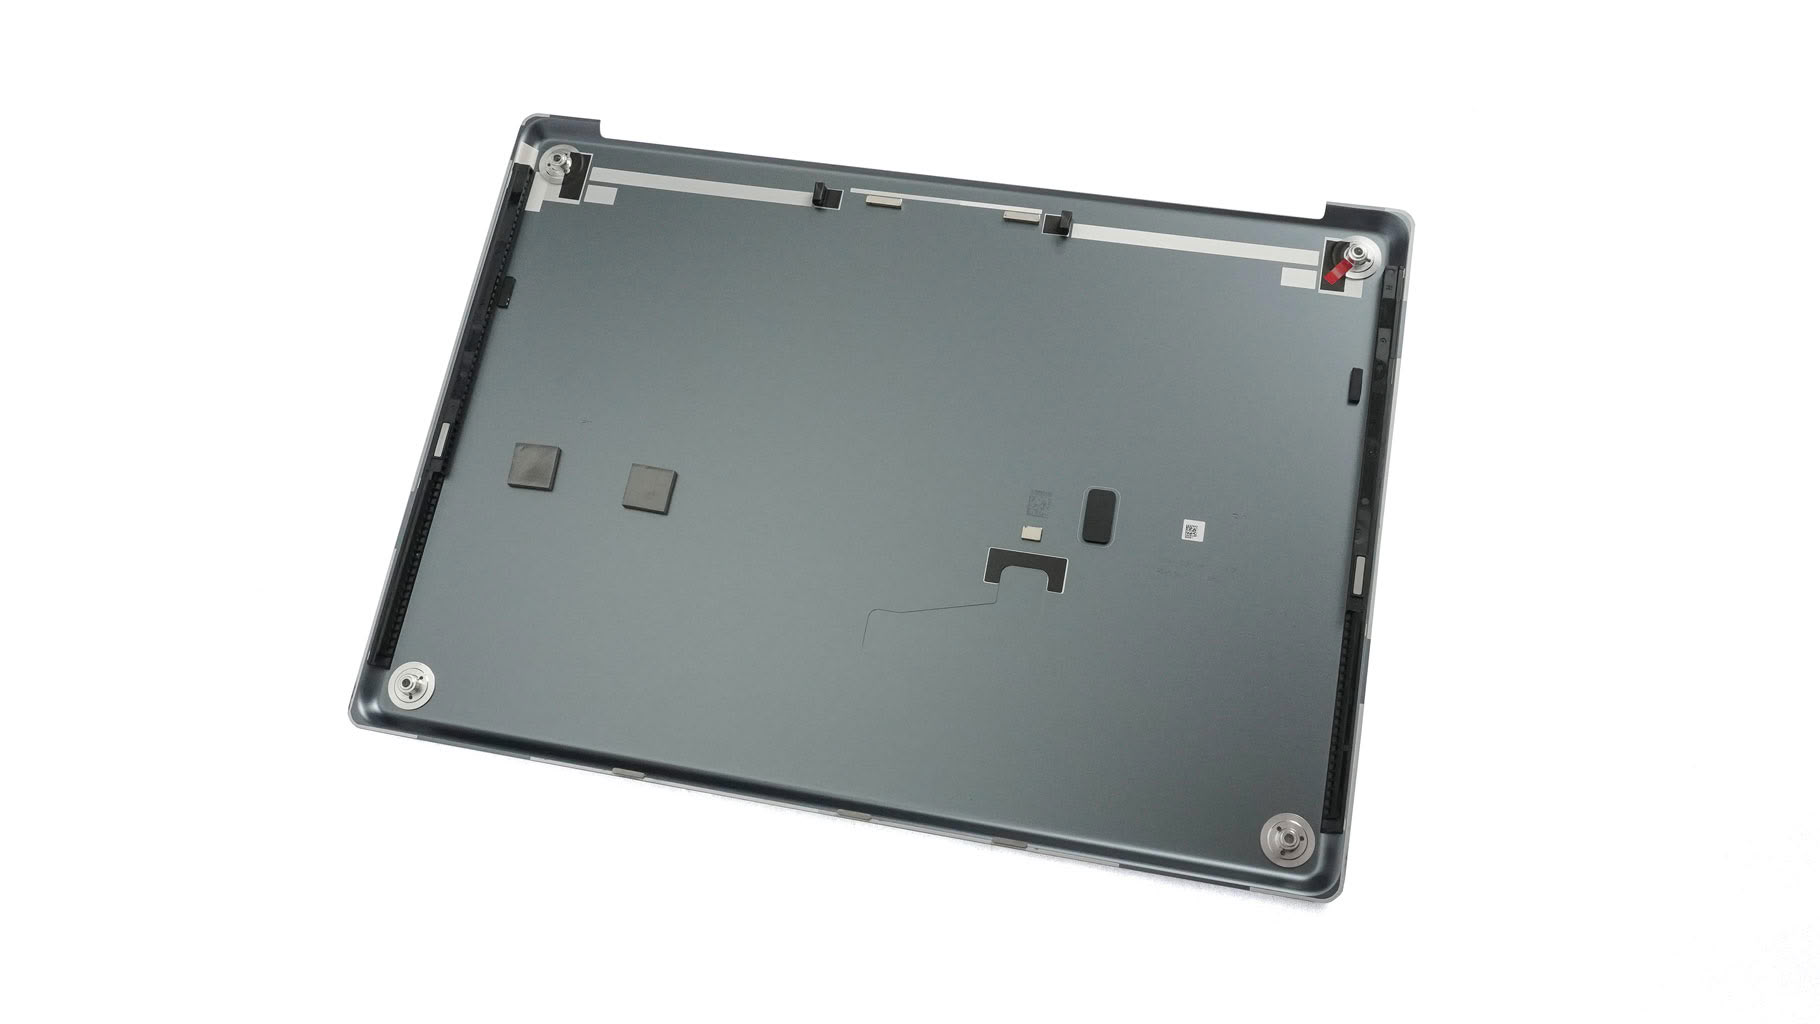
On the inside of the bottom plate, you'll find two thermal pads for the system SSD.
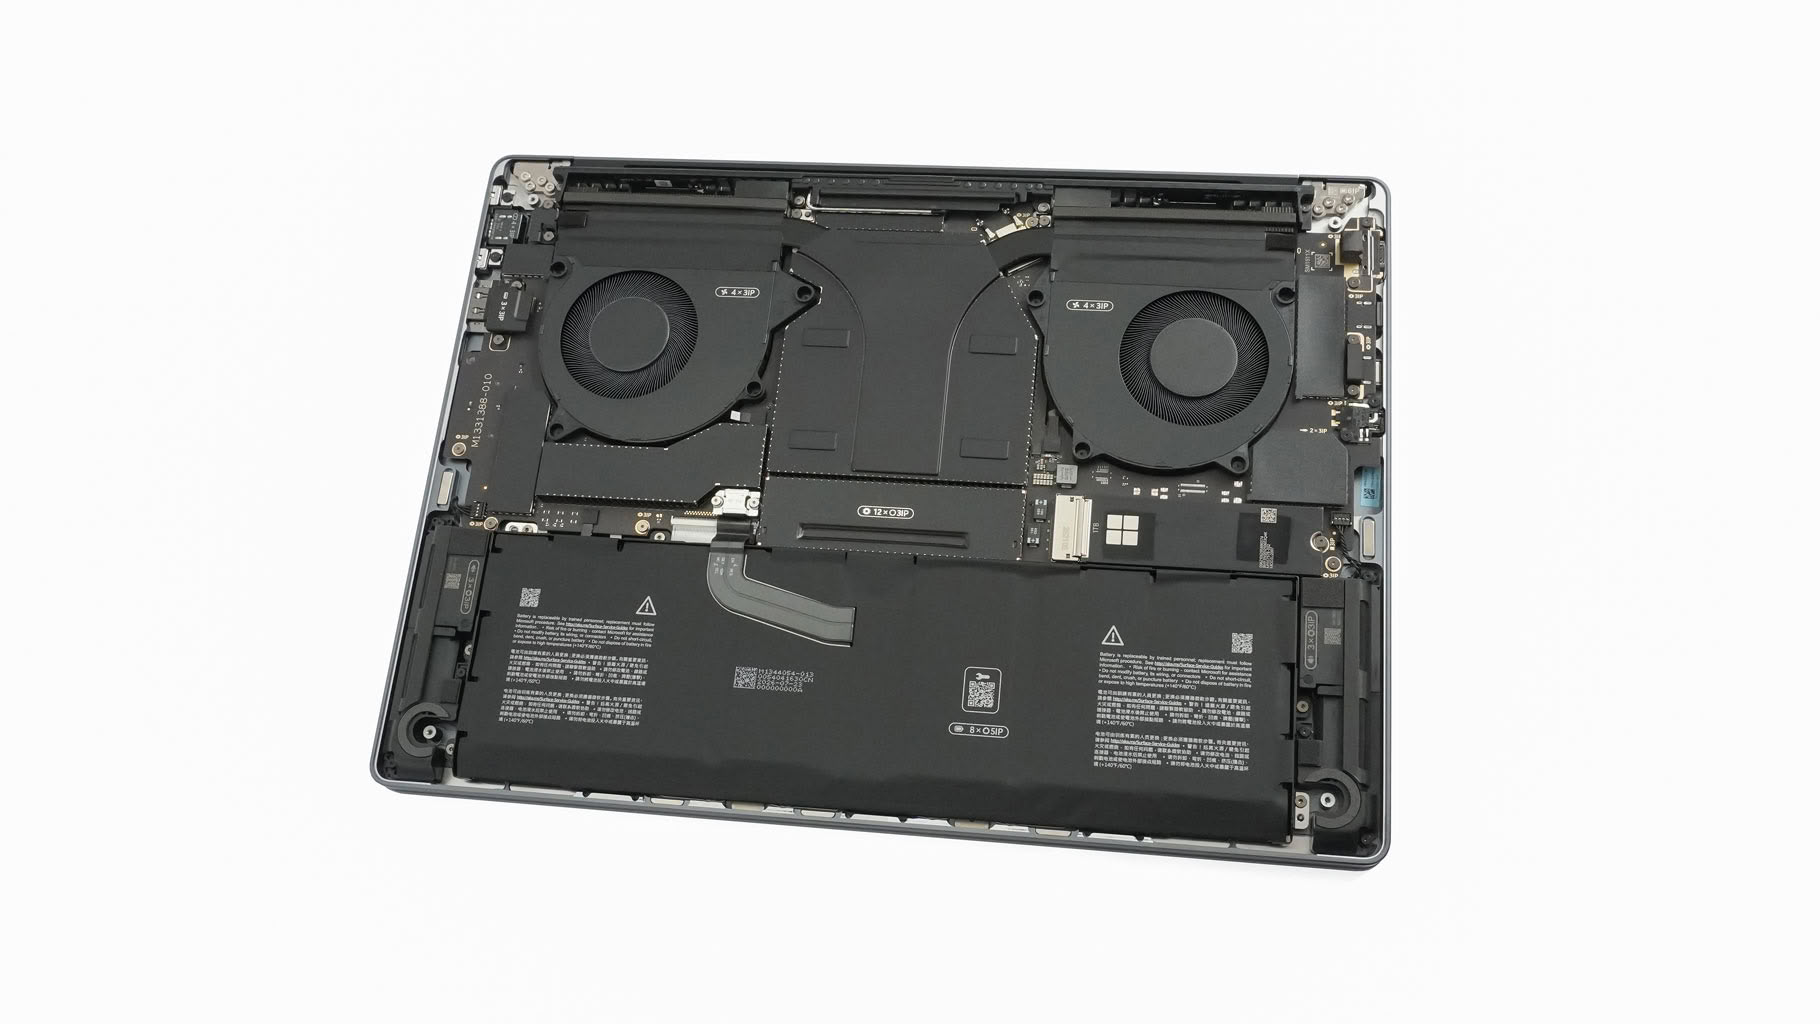
And voilà, that's the RTX Spark in its full glory!
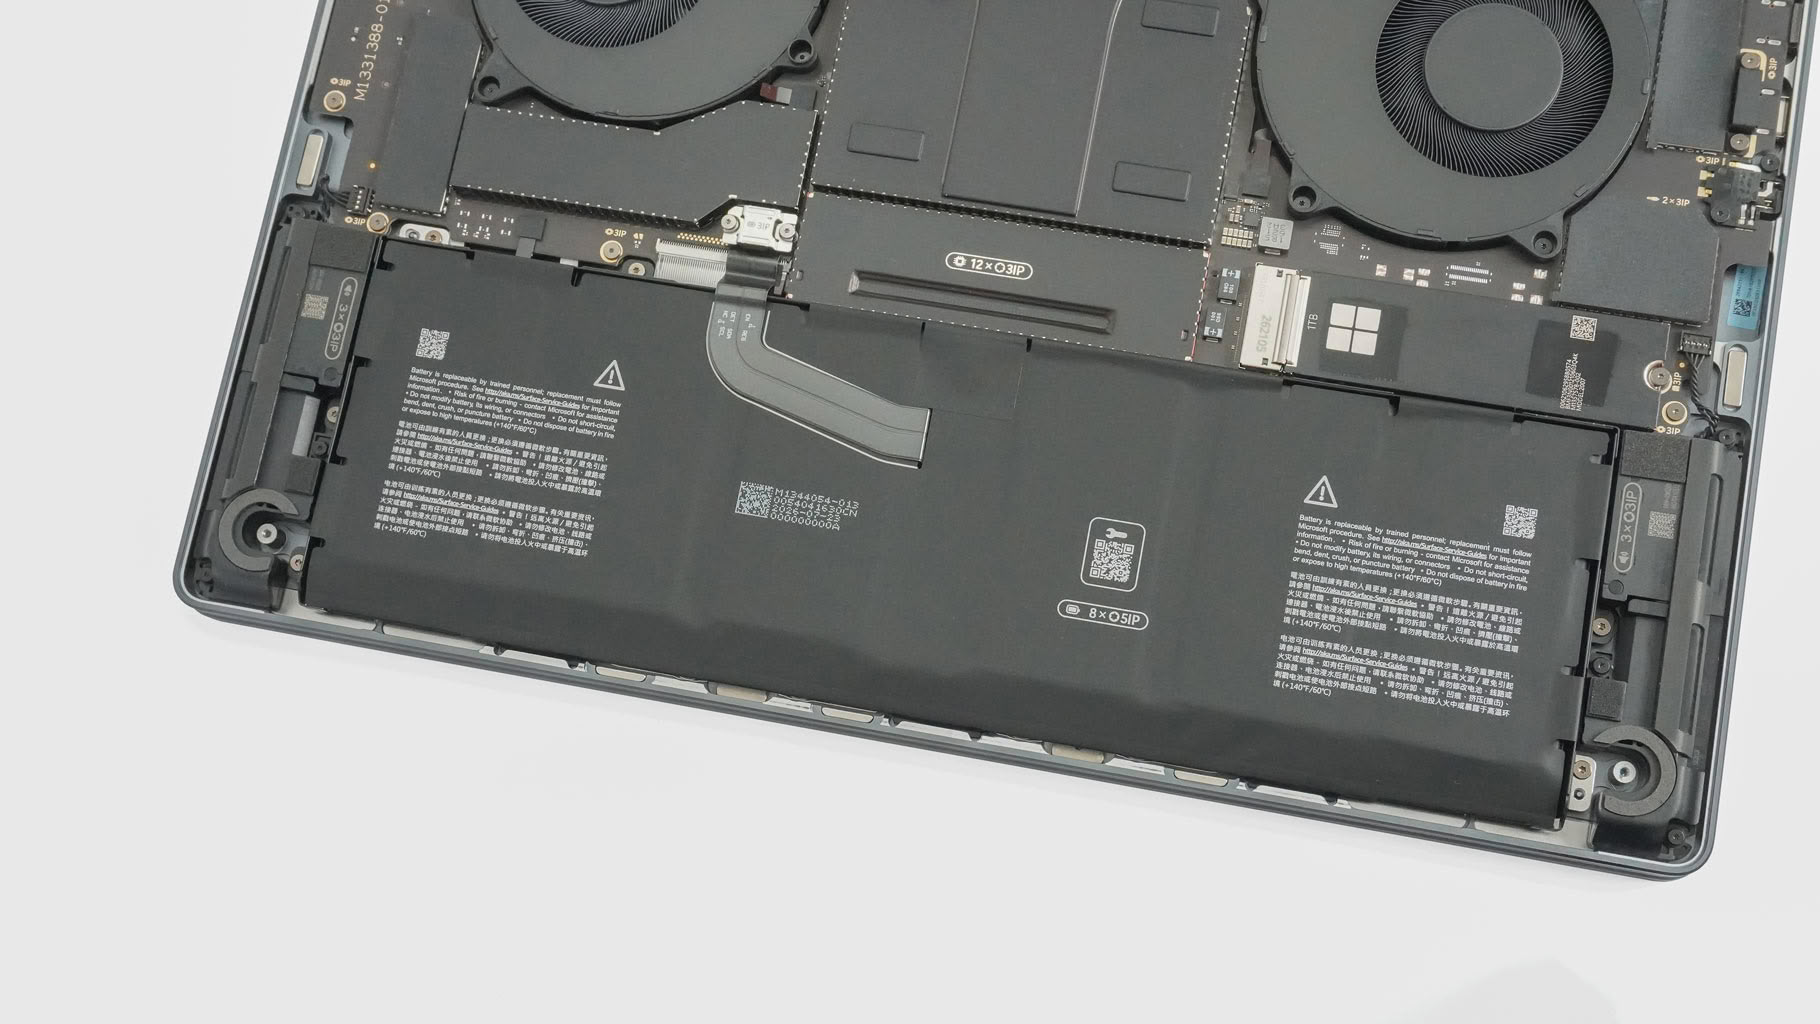
The Surface Laptop Ultra comes with a 92 Wh battery. Its connector is held in place by two screws, while the battery itself is fixed by eight others. Battery life is solid, with more than nine hours of 4K YouTube video playback. That's not bad for such a powerful machine with a bright, high-res, high-refresh screen. The speaker connectors sit close to the battery's top edges.
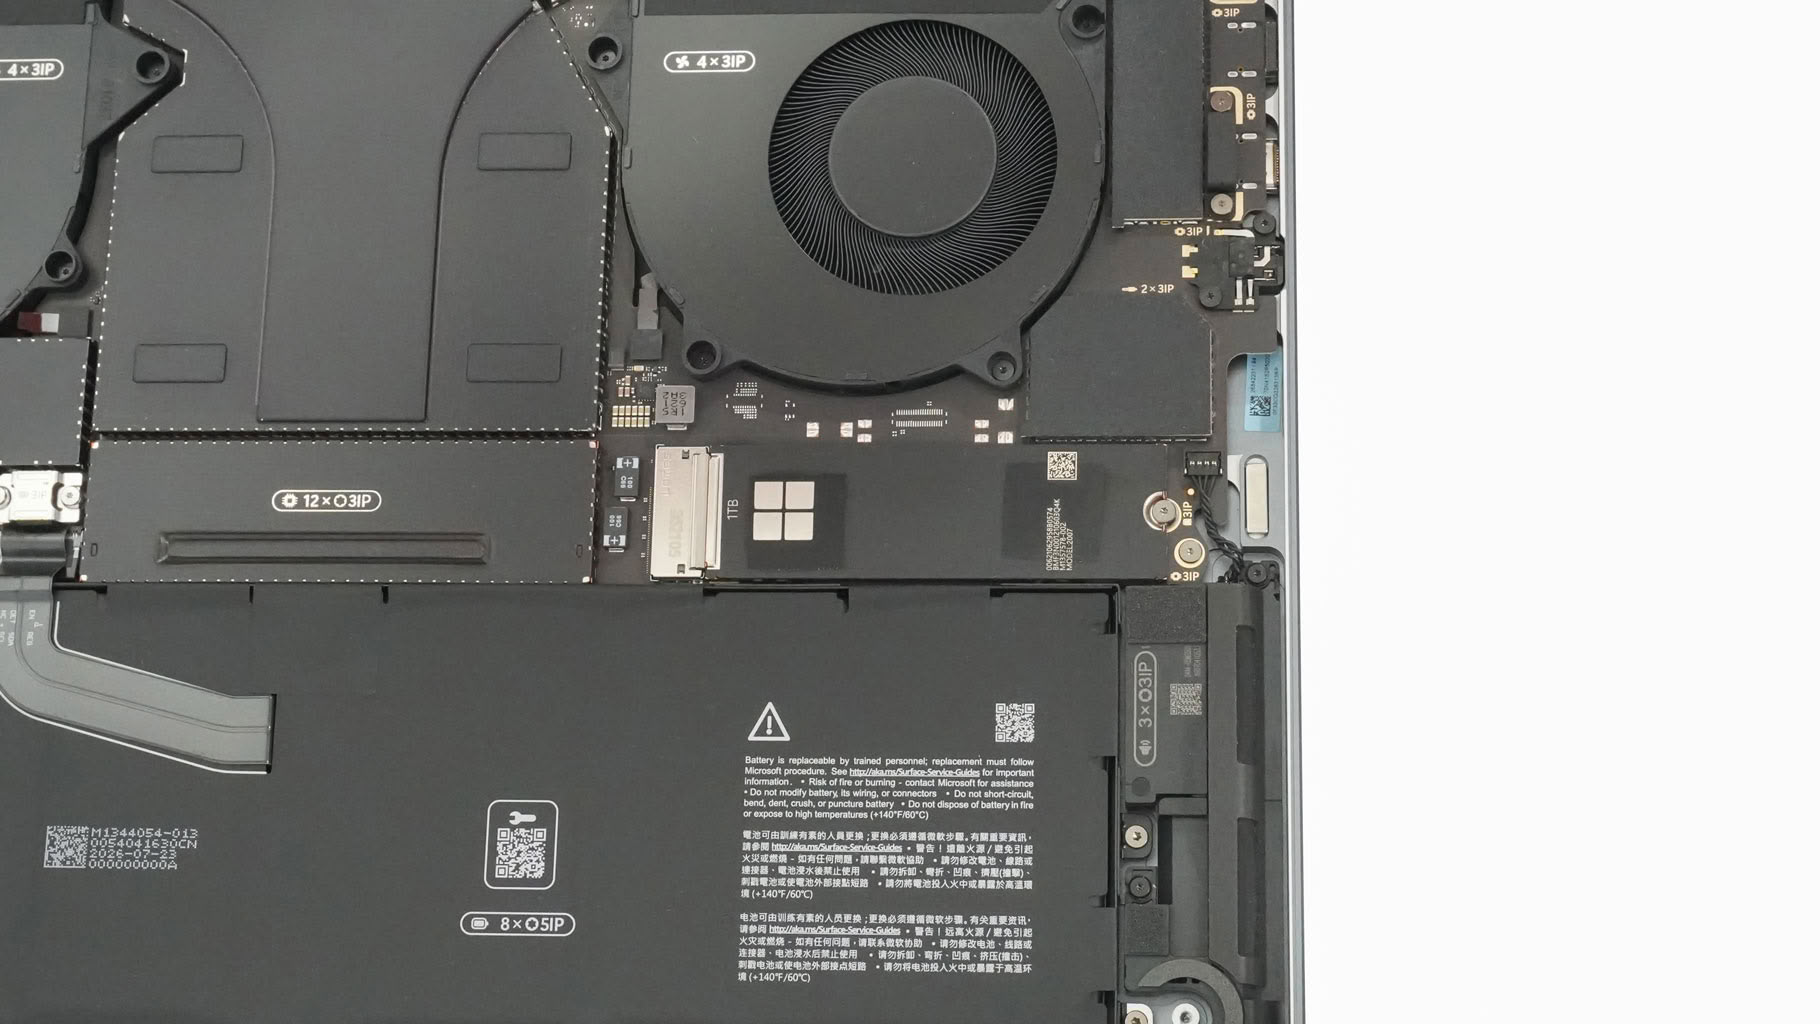
That's your upgradability: a single M.2 slot. Depending on your budget, it comes configured with anything from a 512 GB Gen 4 SSD up to a 4 TB Gen 5 NVMe drive. Technically it would be possible to install an 8 TB M.2 drive here too, but Microsoft does not offer this option in the configuration screen.
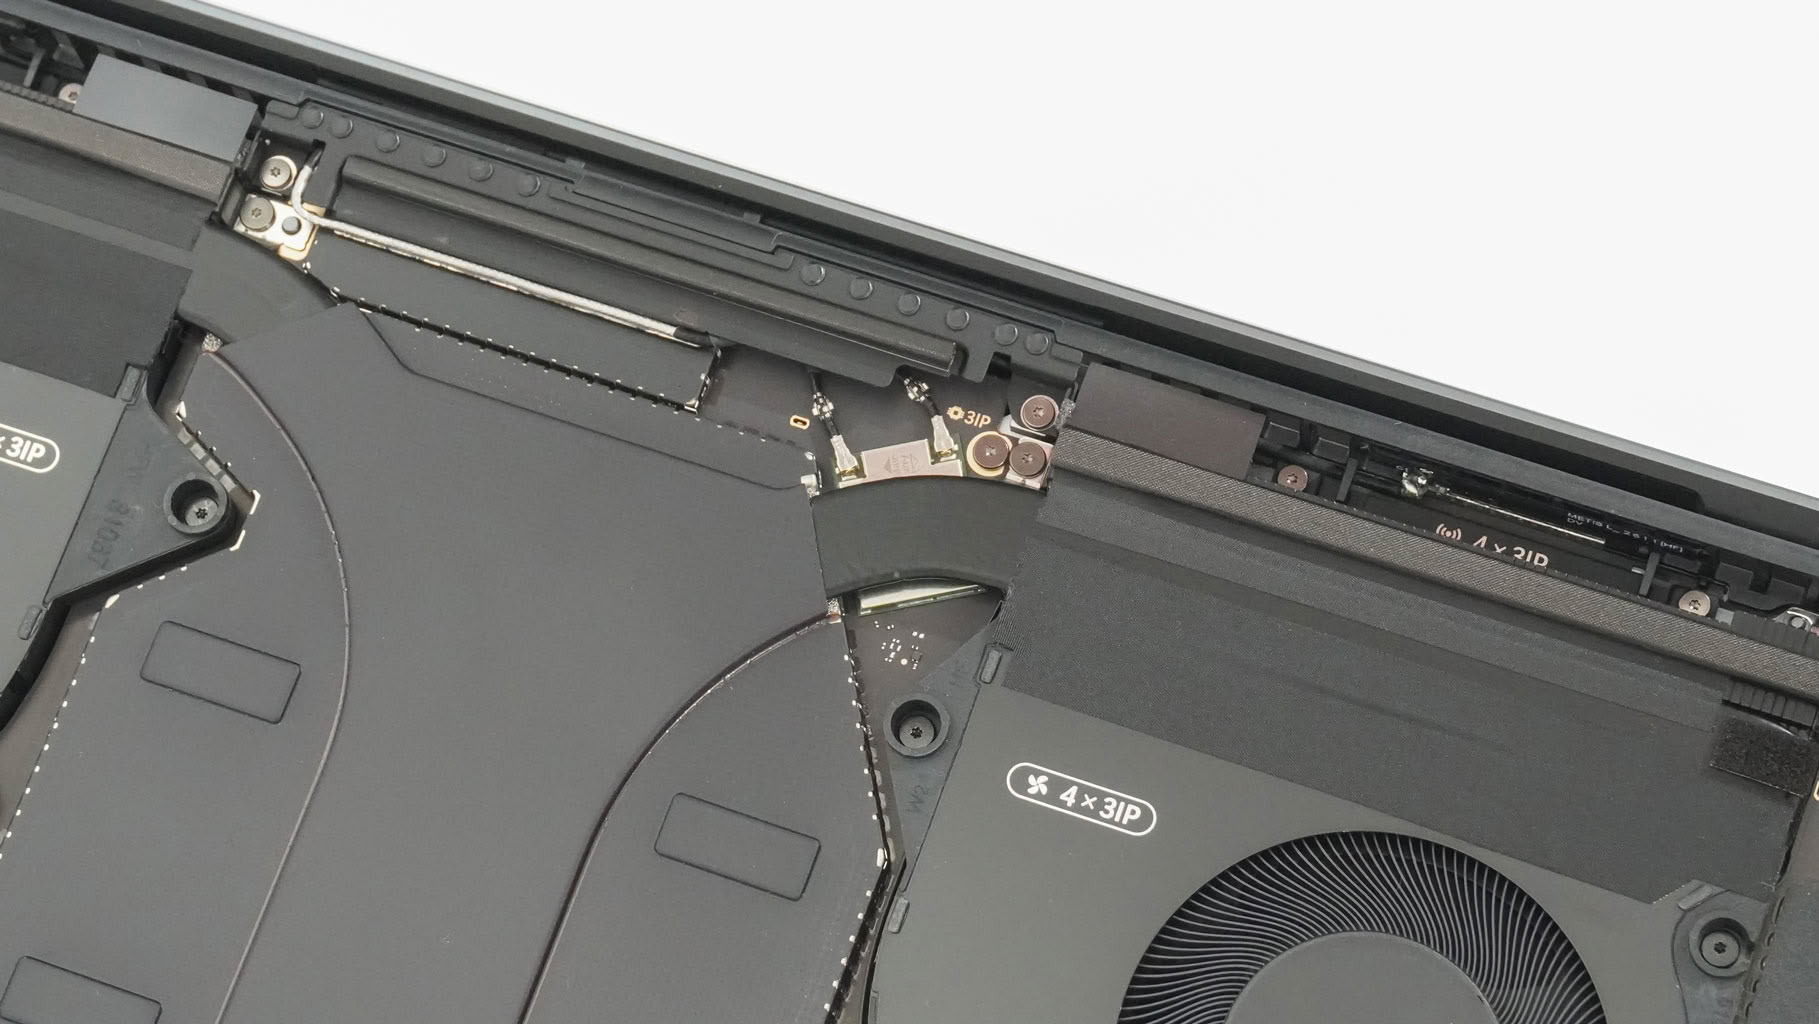
Since this is an Arm-based machine, the memory is soldered. You can choose from 24 GB to 128 GB of LPDDR5X-9400 unified memory, shared between the CPU and the GPU. The soldered Wi-Fi 7 card sits underneath the right heat pipe. That's not the best position for a wireless unit, but I didn't experience any Wi-Fi hiccups during testing.
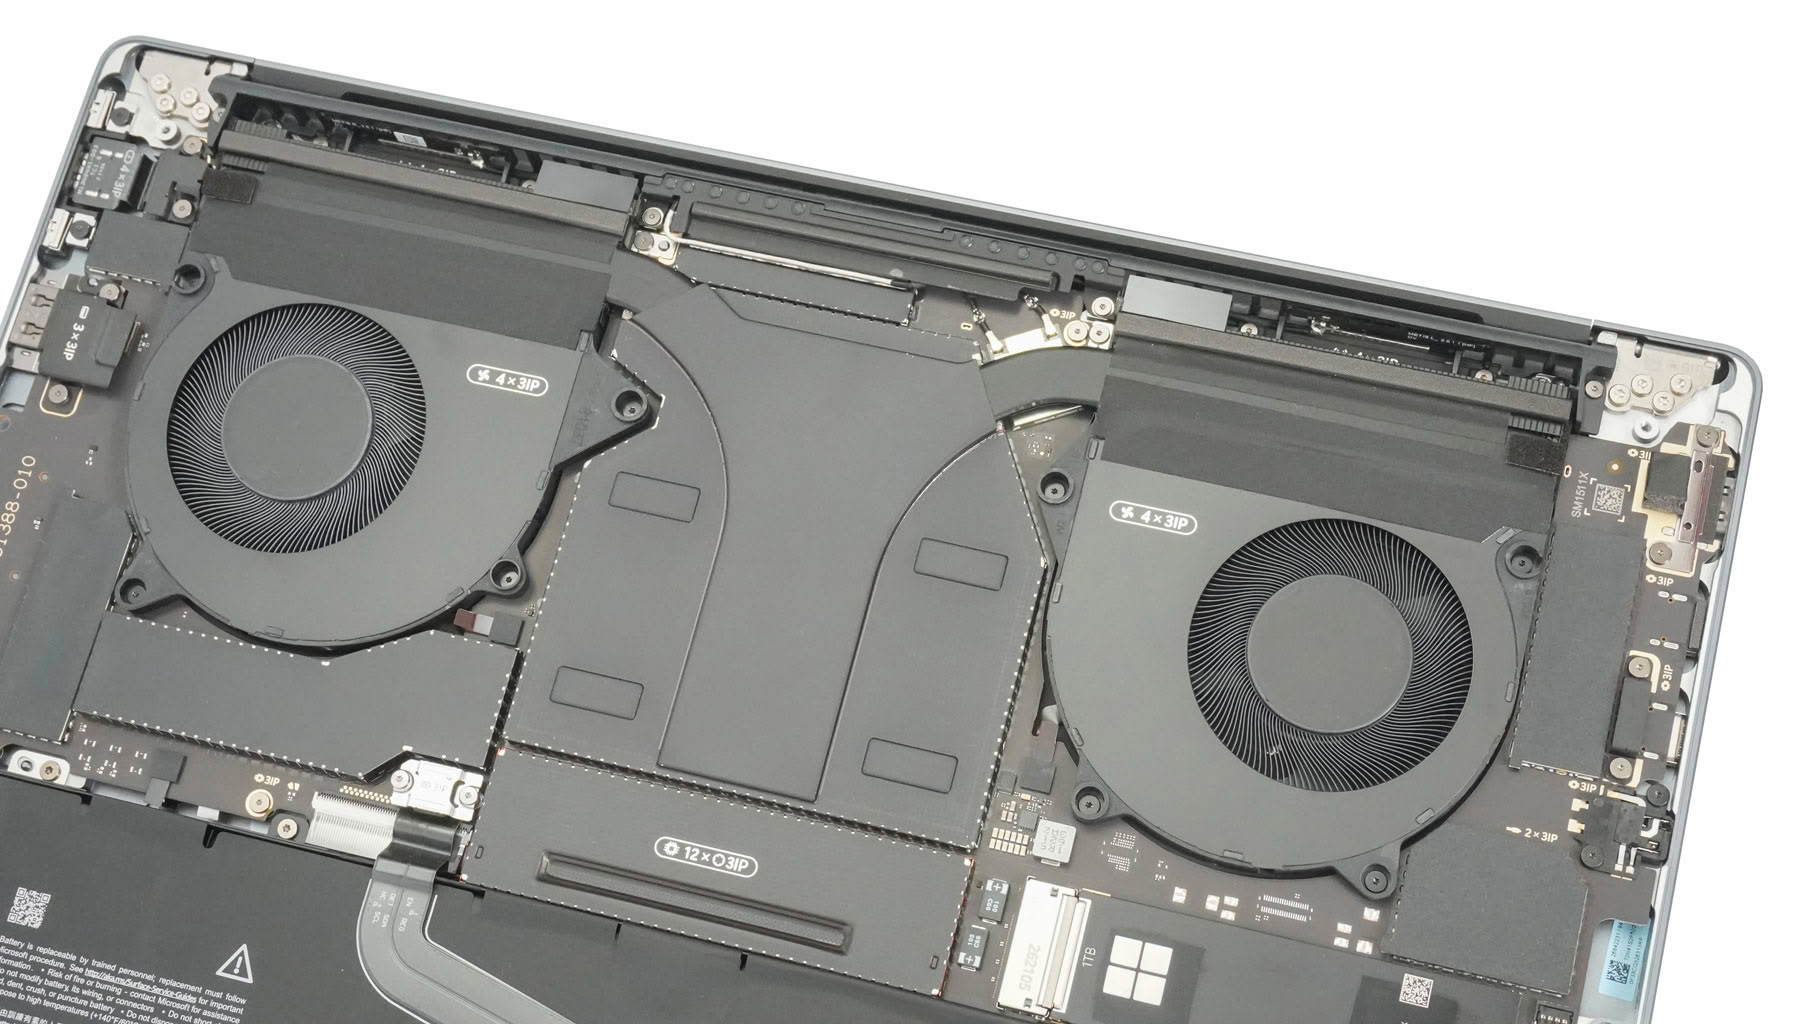
The cooling is comprised of two large fans, a pair of heat pipes, two top-mounted heatsinks, and one seriously big central cooling plate. Each fan is held in place by four screws.
That's it for now! Expect a full RTX Spark teardown in one of our future videos.
Nov 20th, 2026 10:24 PST
change timezone
Latest GPU Drivers
New Forum Posts
- Windows 11 General Discussion (7742)
- GTA VI (19)
- Anthrophics IPO (13)
- How to prevent OLED burn damage due to PC freezes or power outtages? (42)
- RX 7600 + Ryzen 5 5600GT getting the same FPS as my old RX 6500 XT – What am I missing? (19)
- RX 9000 series GPU Owners Club (2244)
- [Poll] 12V-2x6 Connector Protection: What Are You Using? (WireView / Ampinel / Equalizer / Other / Nothing) (49)
- Very unusual two gaming-pc scenarios. (28)
- Free Games Thread (5384)
- Making a game in Godot engine (13)
Popular Reviews
- AMD Zen 6 Technical Deep Dive
- Ugreen NASync DXP4800 GT Review
- Corsair RM1200e (Second Generation) Review
- Acemagic Retro X3 Review
- Upcoming Hardware Launches 2027 (Updated Nov 2026)
- Pulsar Office Tour & First Look at P1 Dual-Sensor Mouse
- Microsoft Surface Laptop Ultra Review - The Next-gen Arm Laptop
- Biwin Black Opal NV7400 2 TB Review
- AMD Ryzen 7 9800X3D Memory Performance Scaling
- AMD Ryzen 7 9800X3D Review - The Best Gaming Processor
TPU on YouTube
Controversial News Posts
- NVIDIA Co-Founder and CEO Jensen Huang Officially Resigns (490)
- Report: Jensen Huang Eyes NVIDIA Comeback (244)
- Open Letter Asking NVIDIA to Reinstate Jensen Huang Passes 115,000 Signatures (184)
- OpenAI CEO Argues Home PCs Waste the World's Limited DRAM Supply (152)
- NVIDIA Launches Investigation Into Jensen Huang's Relationship With Suspected Chinese Spy (136)
- Intel "Raptor Lake Next" 16-Core and 20-Core CPUs Surface (130)
- Legendary Game Studio BioWare Shuts Down Following EA Layoffs (104)
- Dell CEO Says the Memory Shortage Will Get Worse in 2027 (95)