 12
SCHENKER KEY 18 Pro (E25) Review - Top-Tier Contender
Display Testing »Disassembly and Teardown
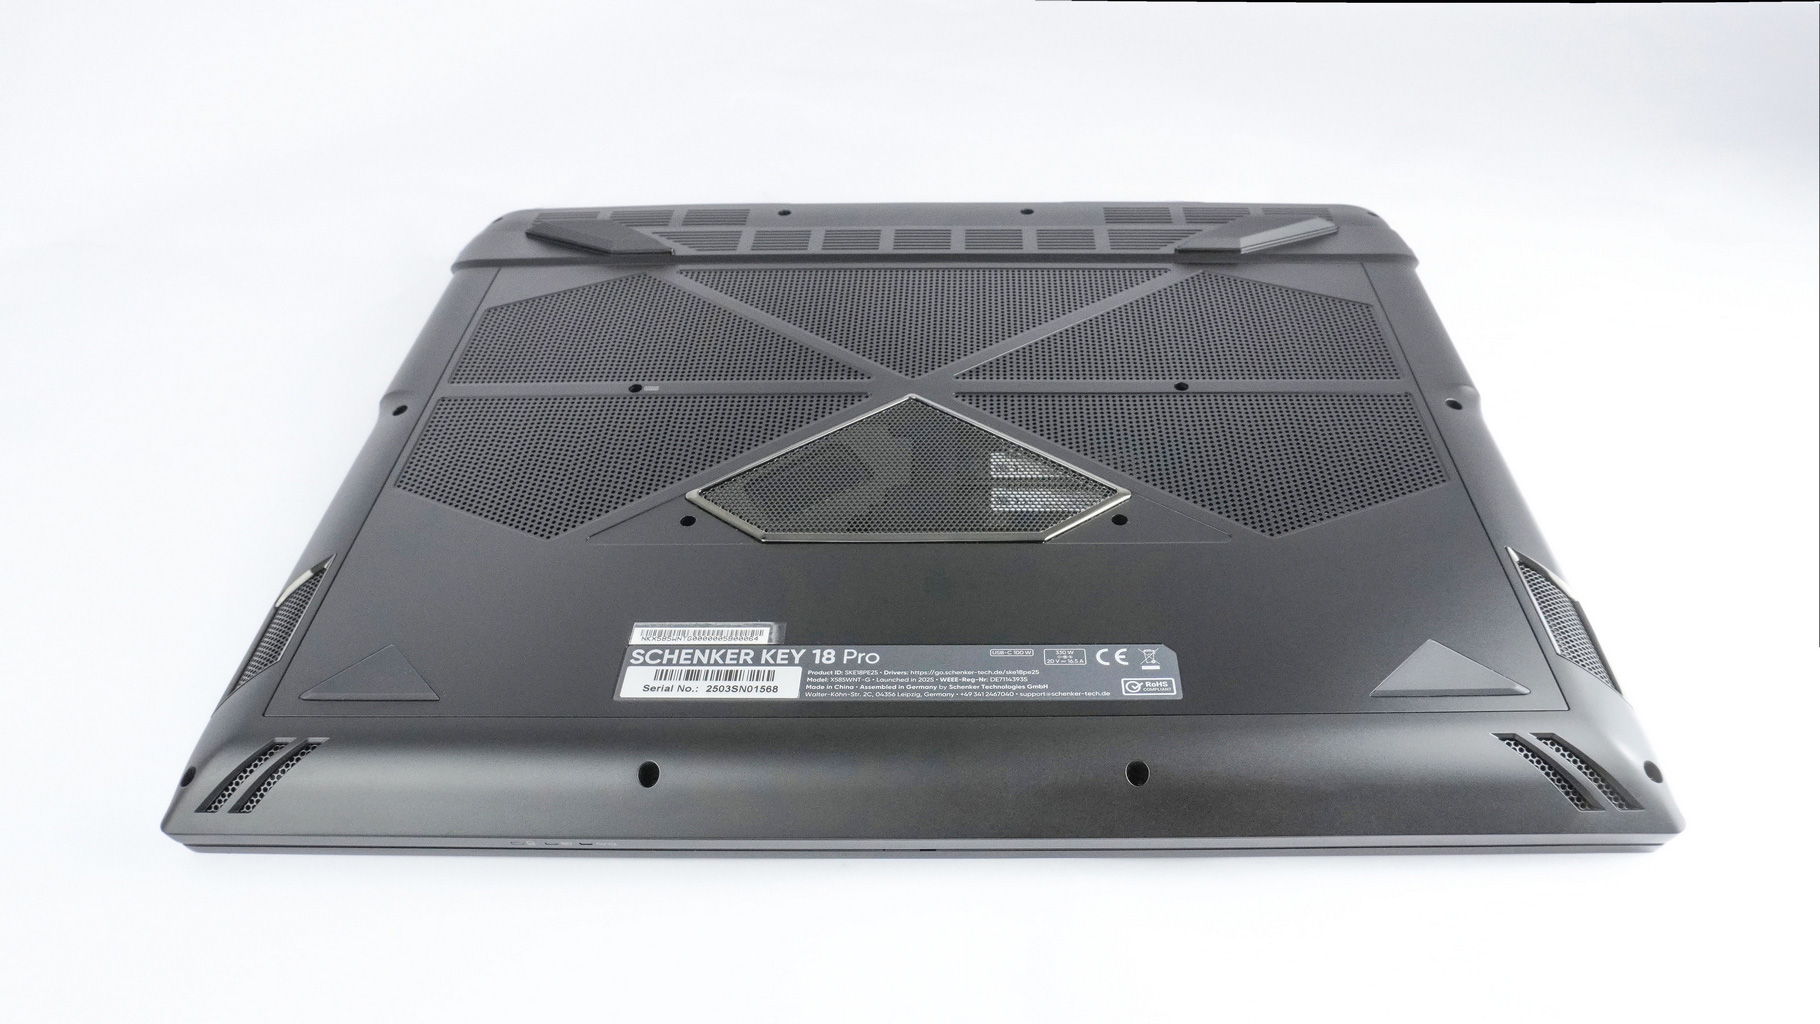
To access the internals of this huge notebook, you need to undo 14 Phillips head (PH 0) screws. Despite the substantial dimensions, and quantity of screws, the laptop isn't that hard to open. To do so, flip it upside down and remove the aforementioned screws, right off the bat, our main goal is to pry off the rear of the bottom plate. Hold the lower side of the exhaust with both hands. You can pop the vents at once or one by one if you want to be more careful. Lift the back upwards while your wrists are placed on the bottom to hold the laptop in place. Once the back clips are released, raise the panel slightly, and lift both sides one after the other. If the front is still attached, raise it from left to right or vice versa.
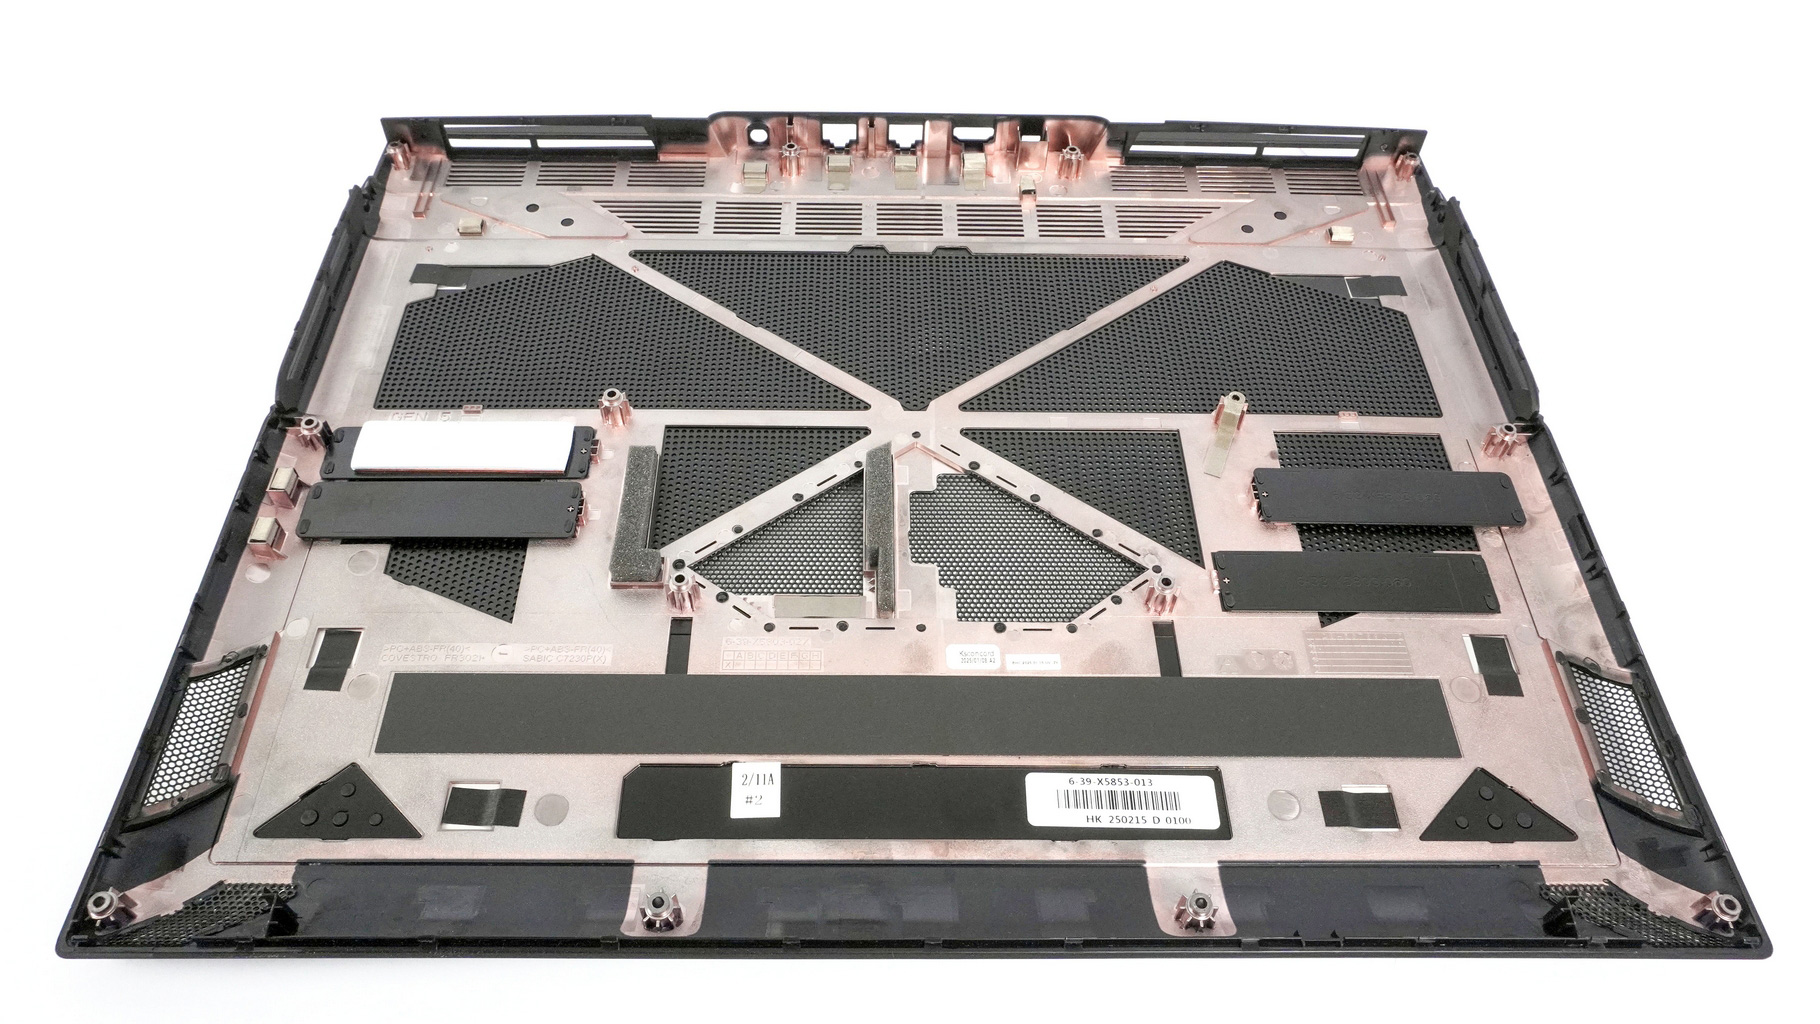
The internal side of the bottom plate houses four plates that are positioned over the SSD slots. The one above the system drive already has a pre-applied thermal pad. Now, we also have a clearer view of the numerous ventilation grilles.
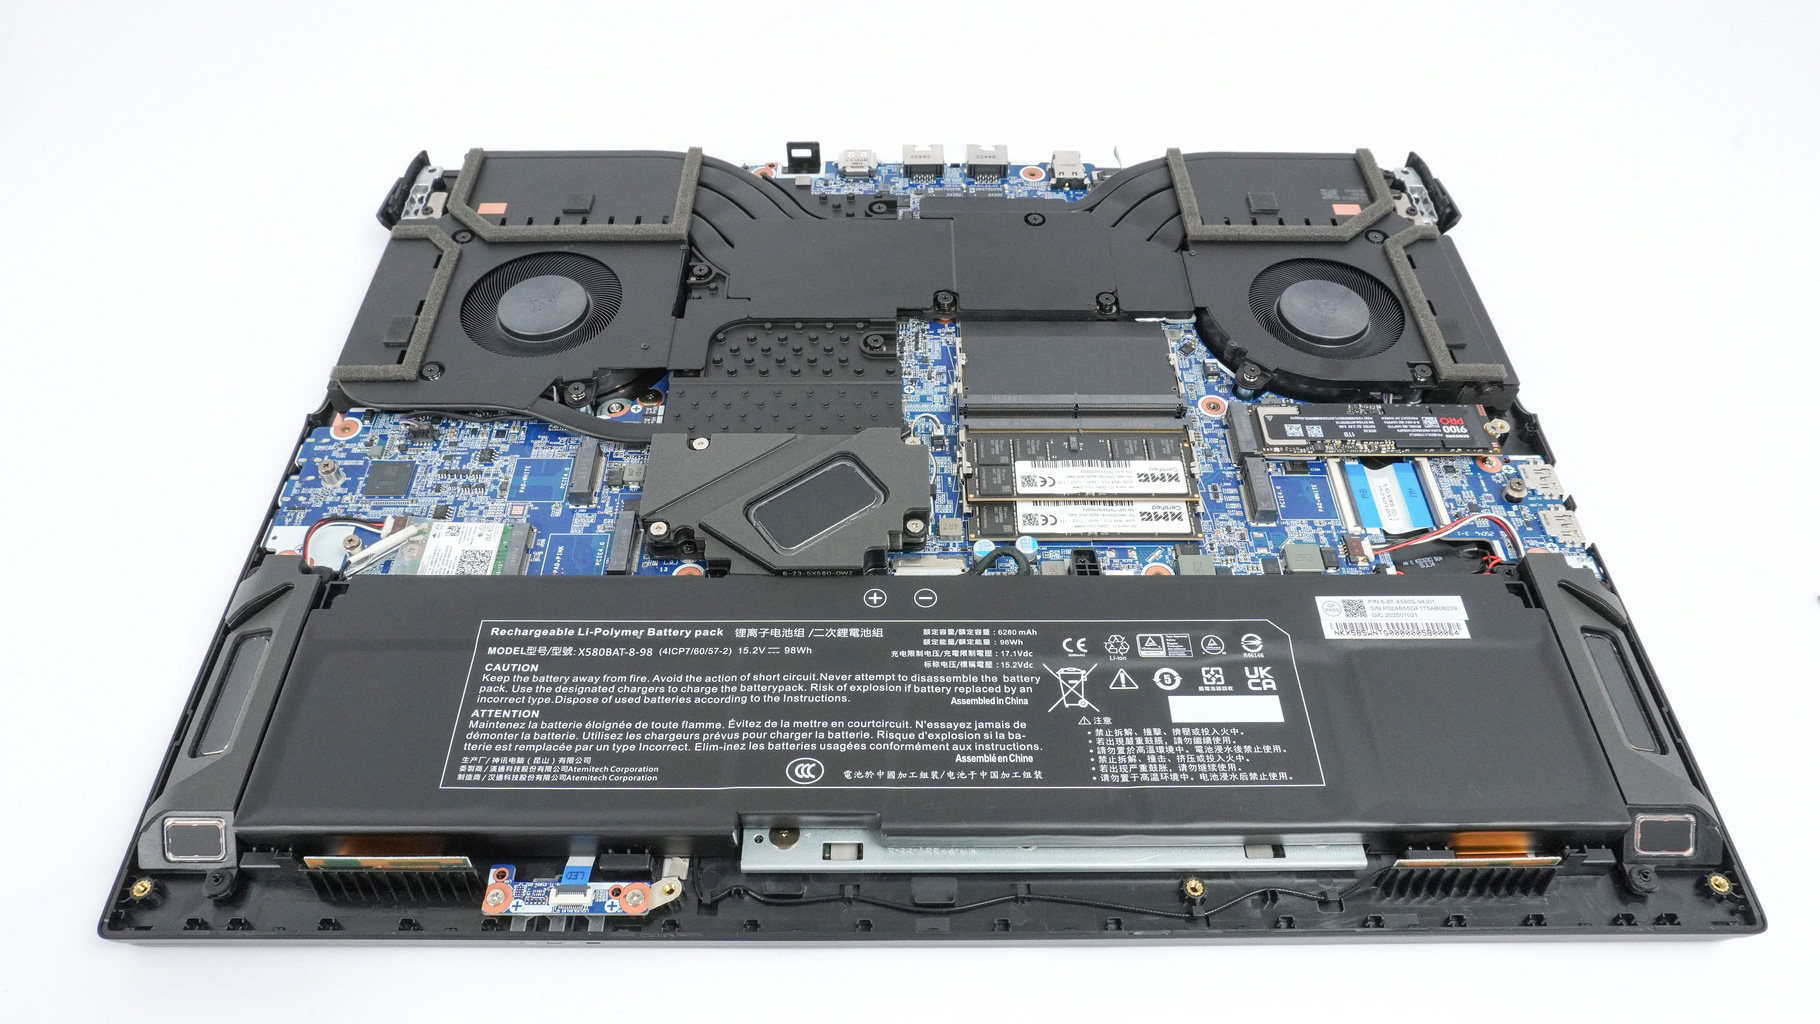
This is how the notebook looks when the bottom cover is removed.
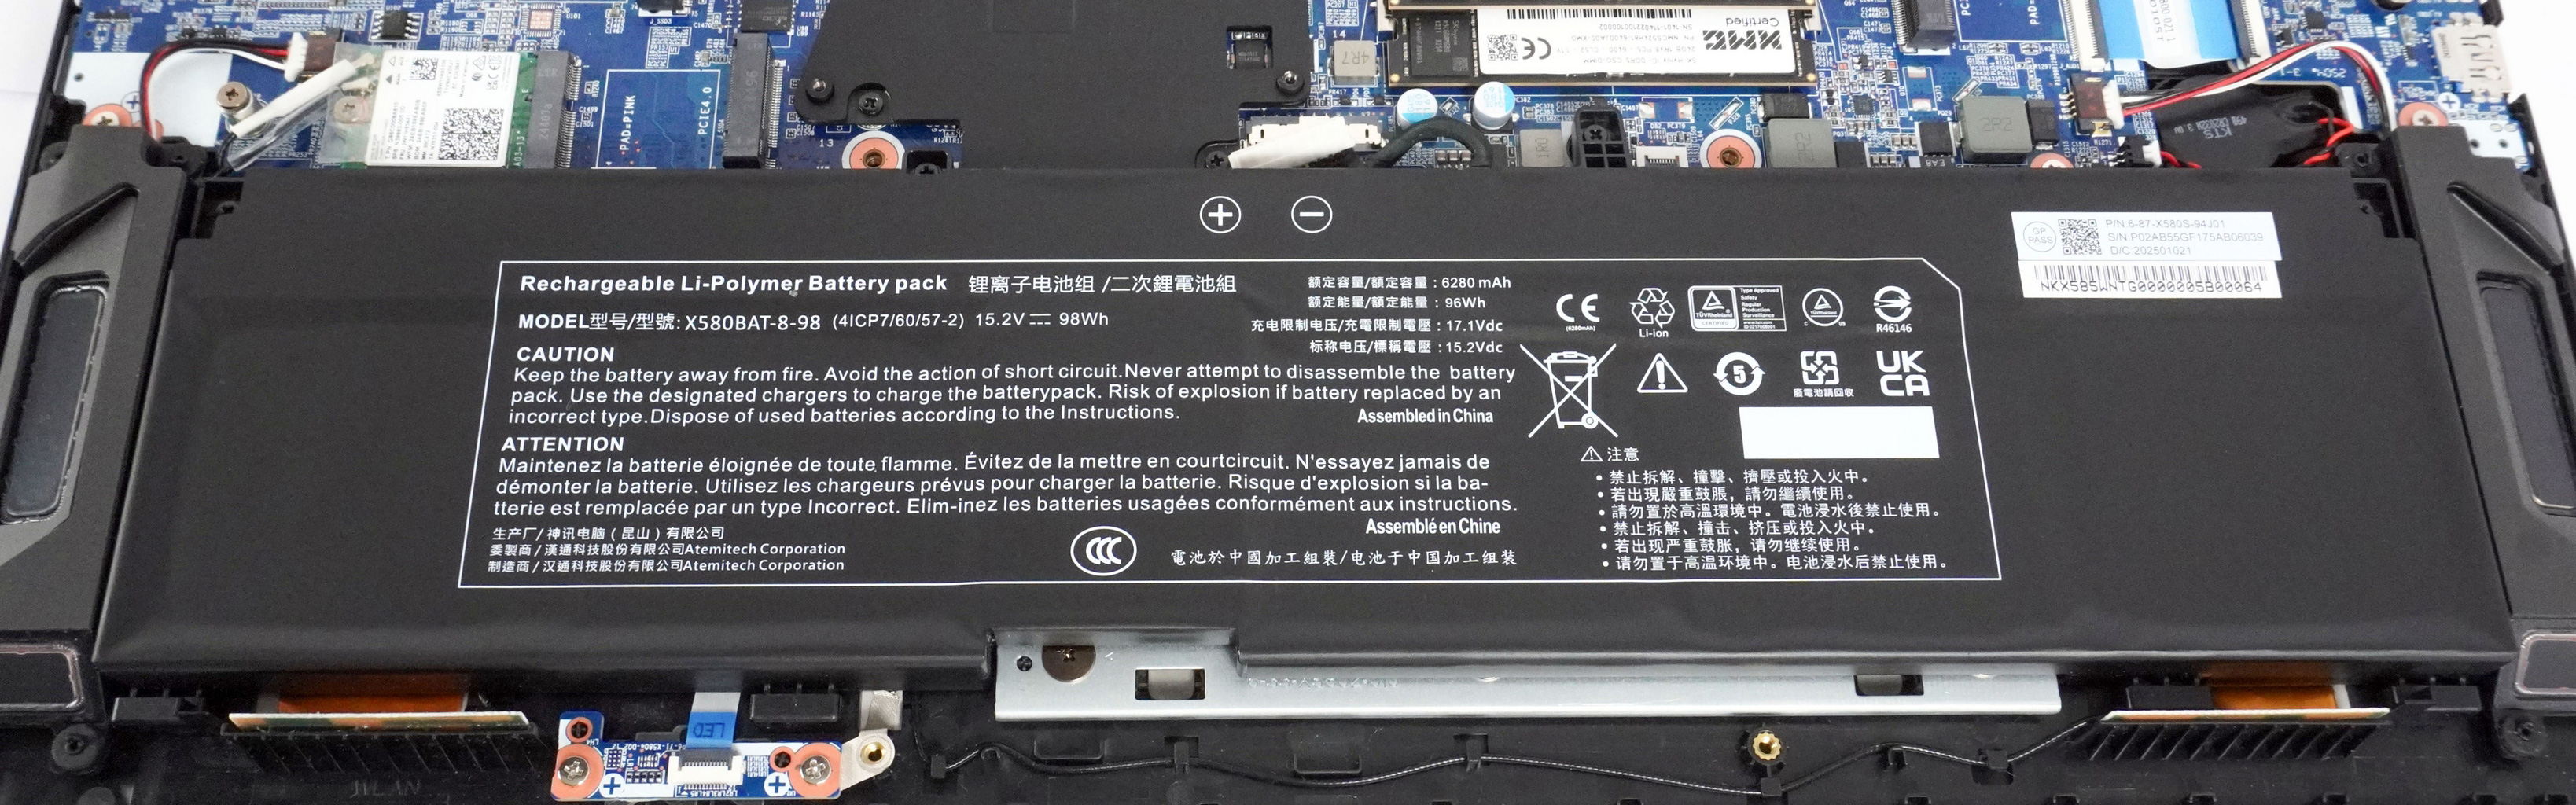
The battery is a huge—and just within airline safety standards—98Wh model. If you want to upgrade the laptop, you first have to disconnect the battery.
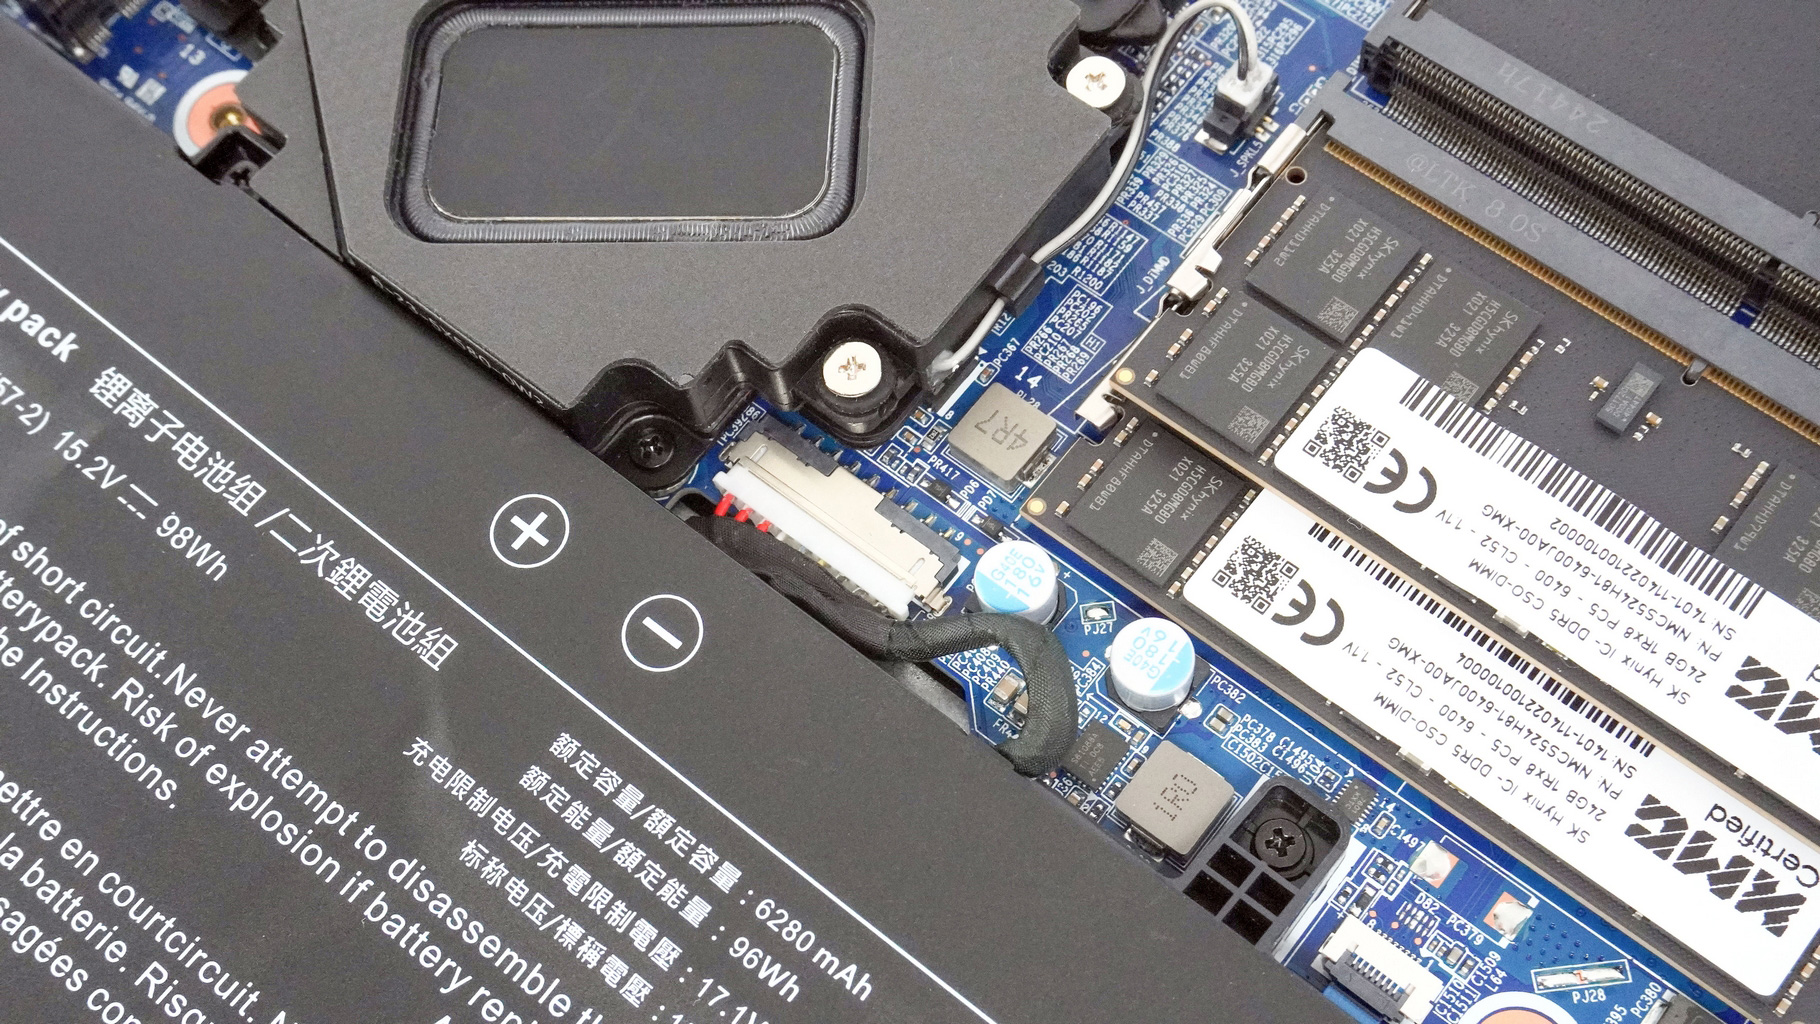
Unfortunately, the subwoofer is positioned too close to the connector, so removing it could be a challenge. Don't forget that you should wear electrically insulated gloves to avoid possible zaps. The safest way to do this is to lift the battery away from the base. Unscrew the top four Philips head screws, raise the upper side and slide the battery slightly towards the cooling to release it from the bottom clips. Hold the unit with one hand or place it on the base and disconnect the connector. Similar notebooks from the enterprise segment offer a BIOS setting which disables/enables the internal battery, making this step redundant.
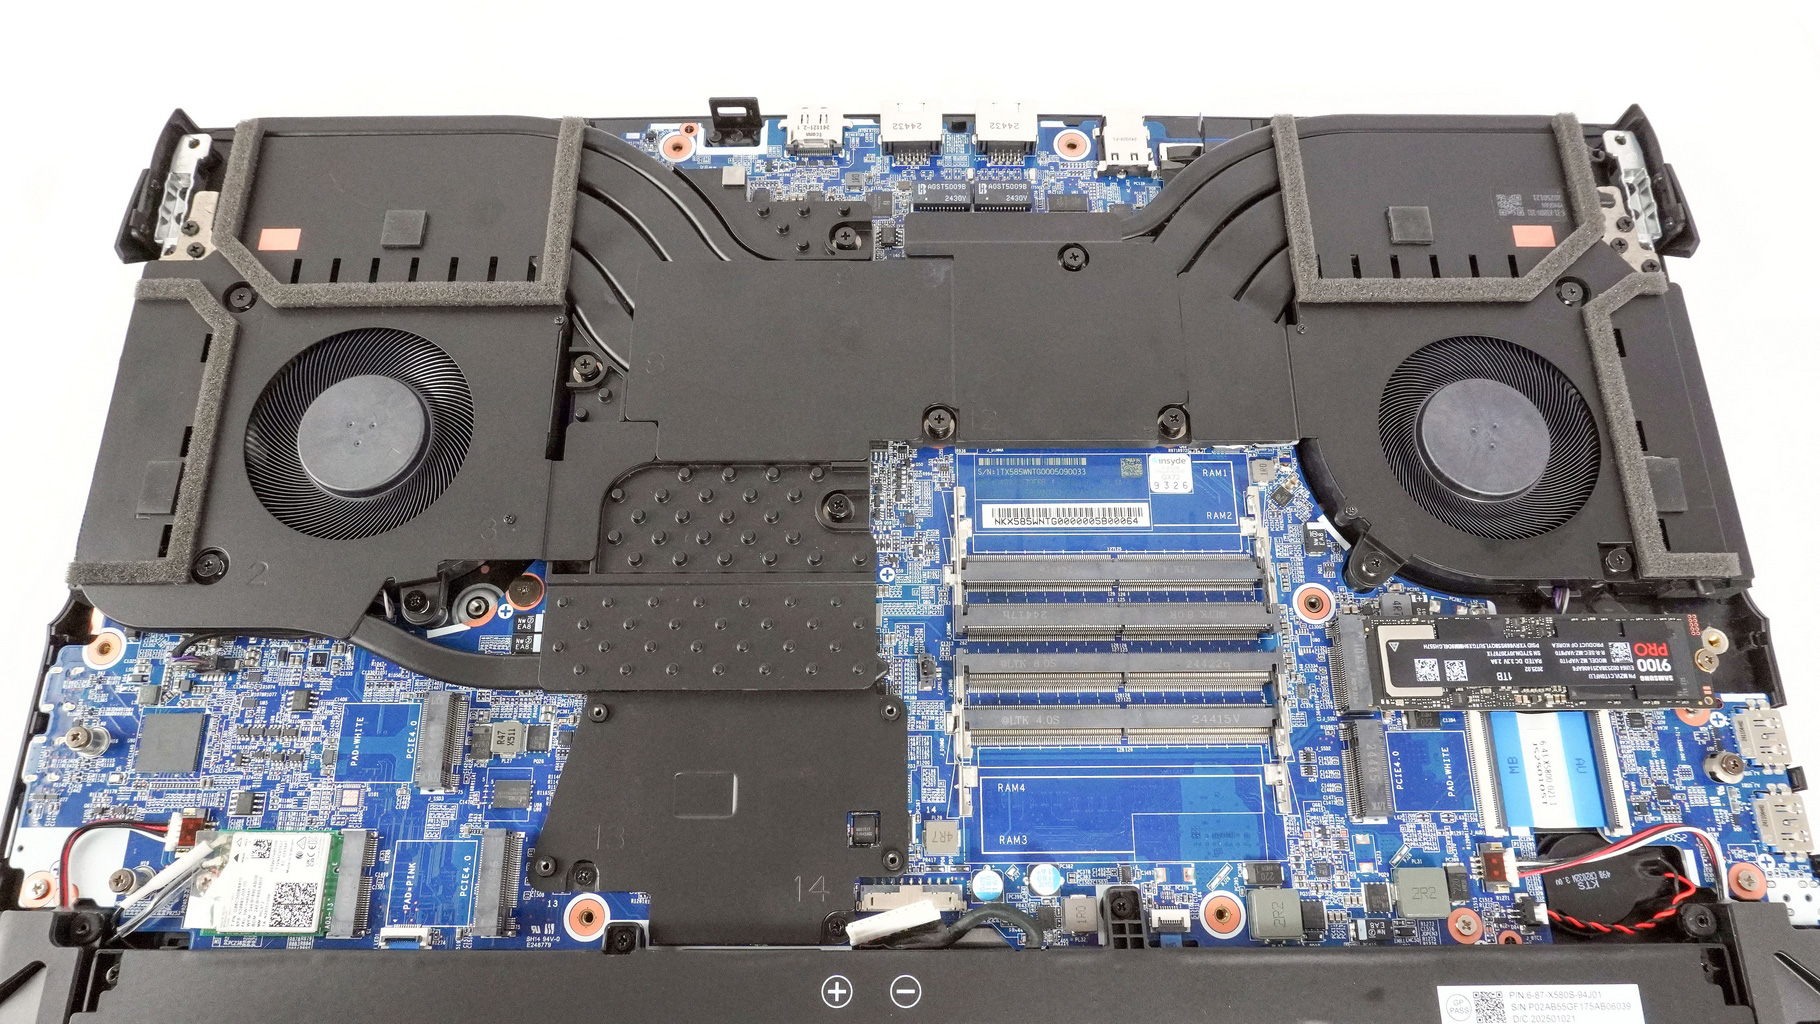
This machine offers four RAM slots, compatible with both DDR5 SO-DIMM and CSO-DIMM modules. Officially, Arrow Lake HX is limited to the DDR5-4400 speed if all four slots are populated. In this scenario, the SCHENKER KEY 18 Pro supports even higher frequencies, if you pick the right modules.
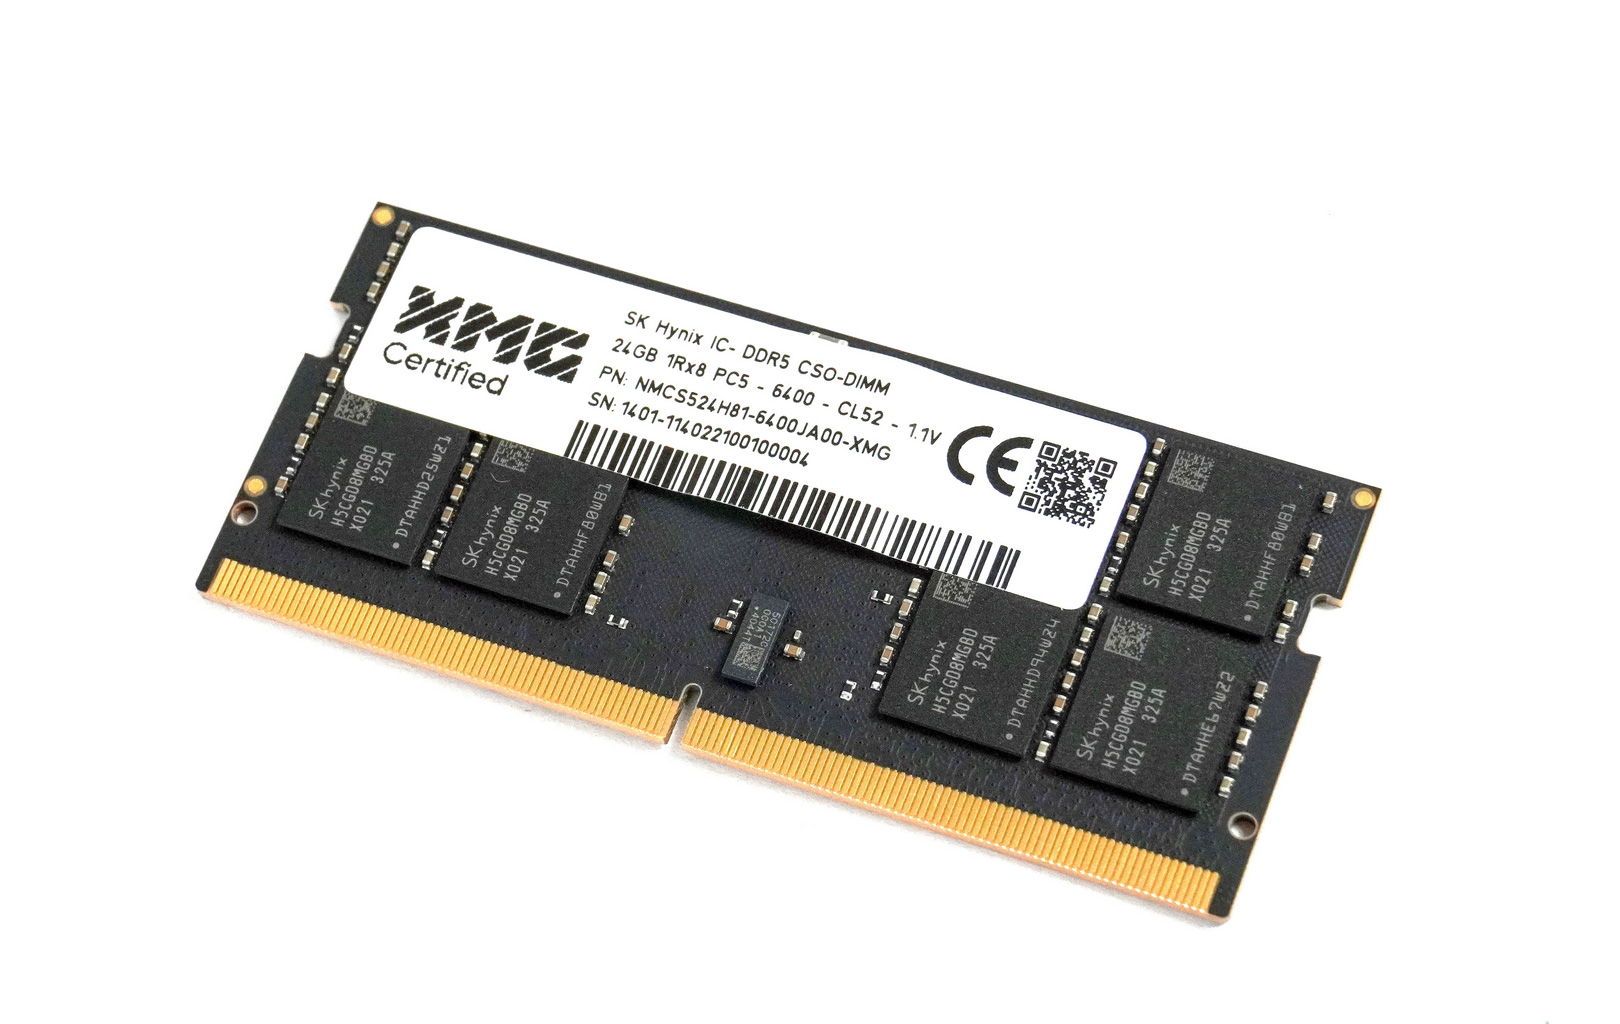
Single-rank CSO-DIMMs work at 5600 MHz with two or four 16–24 GB RAM sticks installed. The max capacity here is 96 GB. You can bump it to 192 GB if you use 32–48 GB dual-rank sticks, the laptop would in this case support 5000 MT for two modules and 4200 MT for four modules. The max possible memory amount for this notebook is a mind-blowing 256 GB, if four regular 64 GB 4600 MT SO-DIMMs are installed. With just two 64 GB modules installed, 5000 MT is still supported.
A quick reminder that dual-channel memory is only supported when both RAM 2 and RAM 3 slots are populated, thankfully the manual goes over this. A two DIMM per channel dual channel configuration is possible if your device has four memory sticks installed. If you want to test the machine in single-channel mode (for some strange reason), you can place just one stick in one of the slots, or install two in RAM 1 and RAM 2, or in RAM 3 and RAM 4 slots. The system will not boot with two modules installed in slots RAM1 and RAM3 or RAM1 and RAM4, so it's important to read the manual before making hardware modifications or upgrades.
If you order a laptop with a 4-way RAM configuration, three out of four sticks will be with thermal pads. Only the top-placed RAM module that is on the side of the battery will not have a pad since it's very close to one of the bottom vents, and it's passively cooled sufficiently because of that.

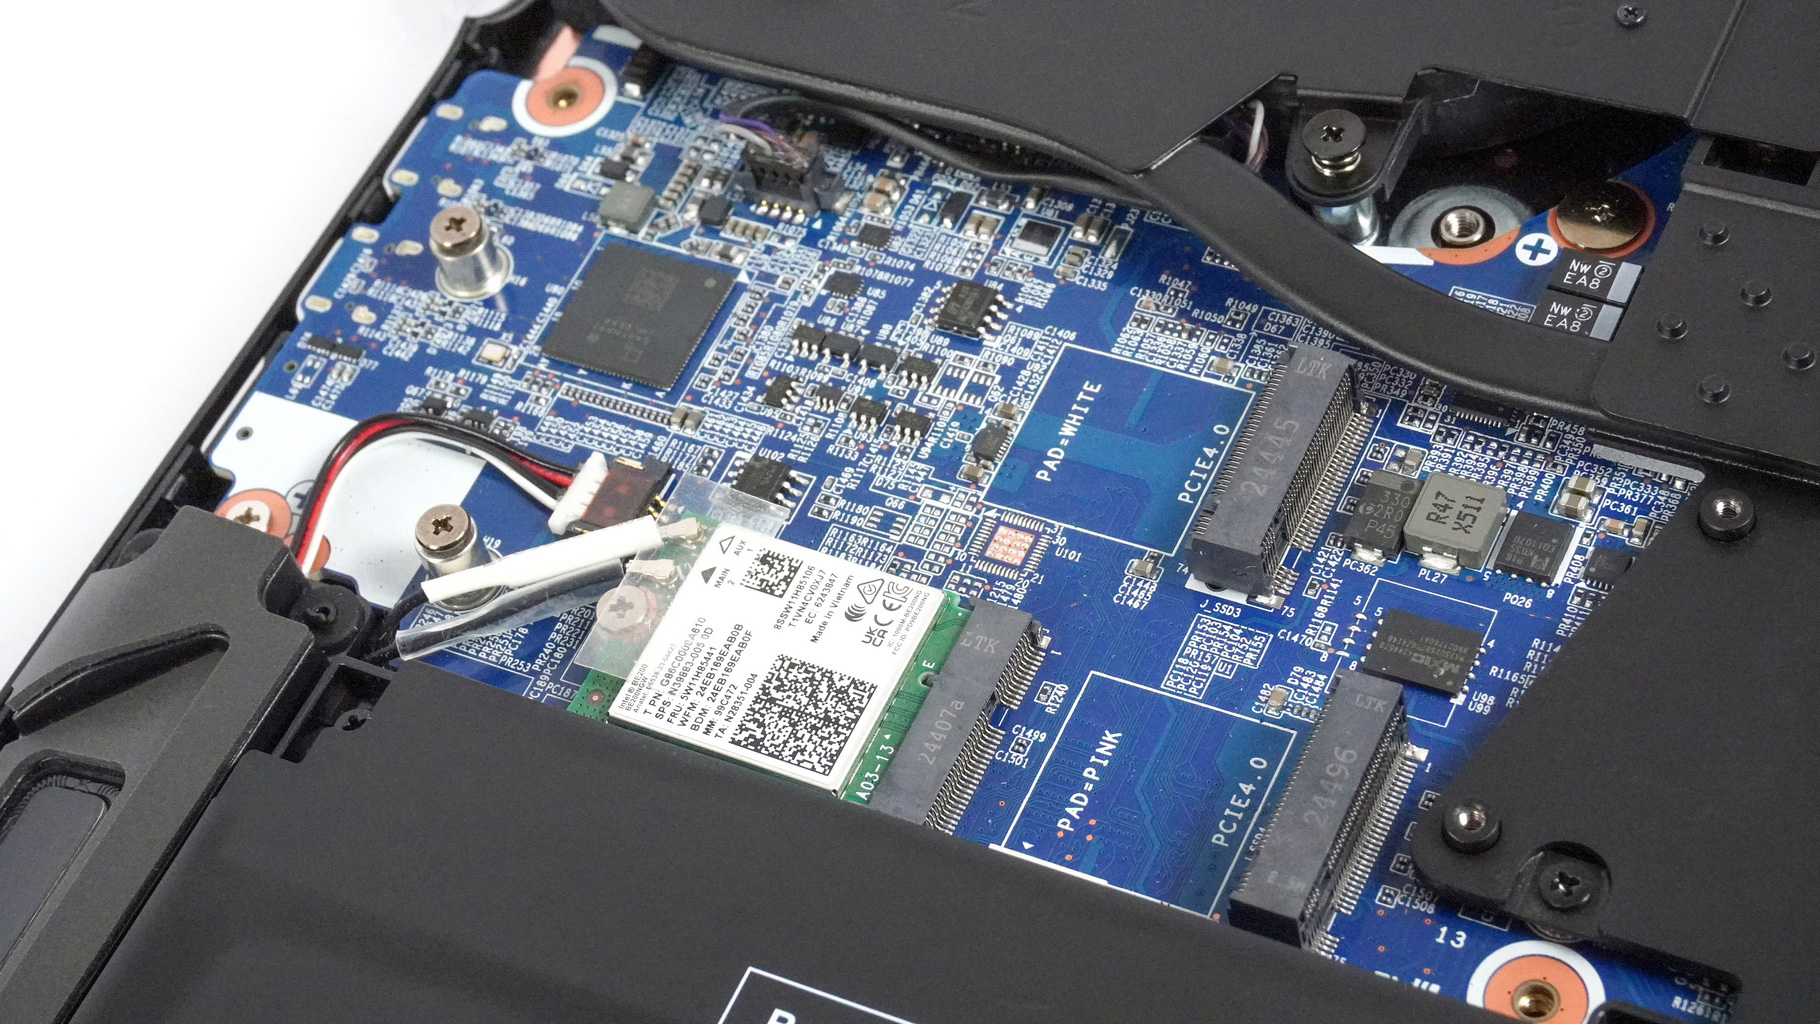
This laptop comes with four M.2 slots. The top right one is compatible with the latest and greatest Gen 5 NVMe drives.
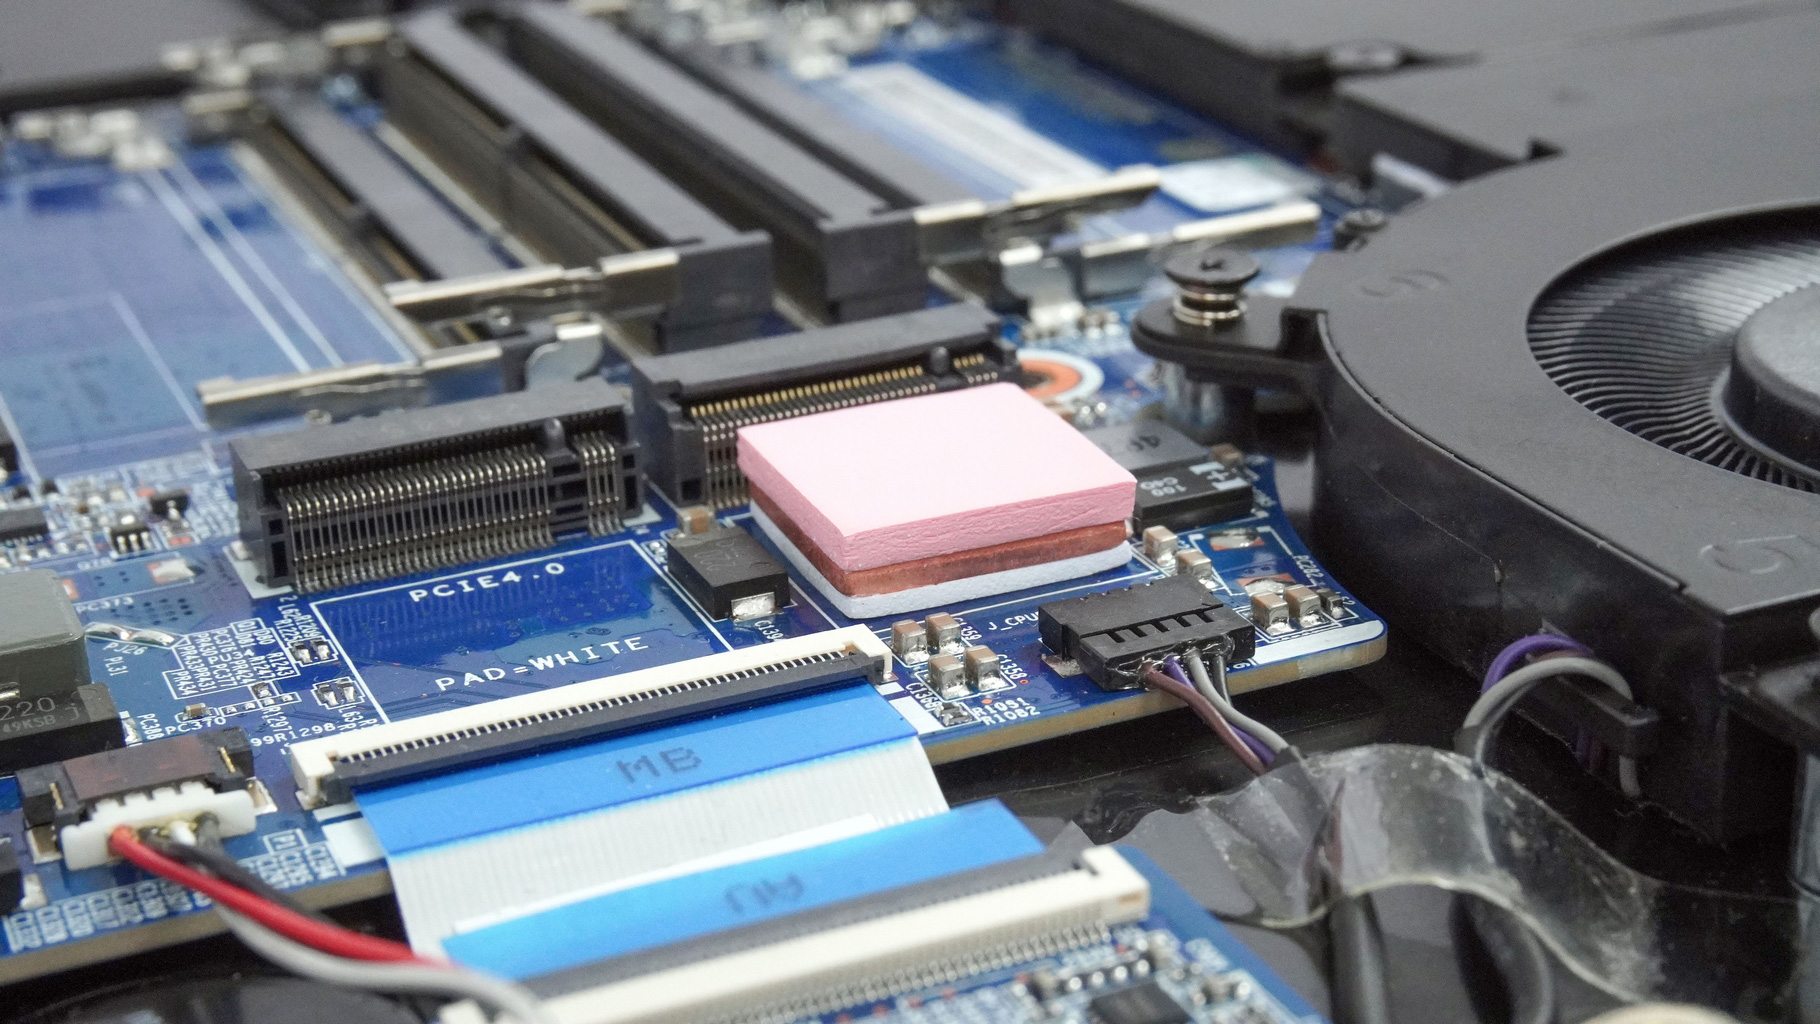
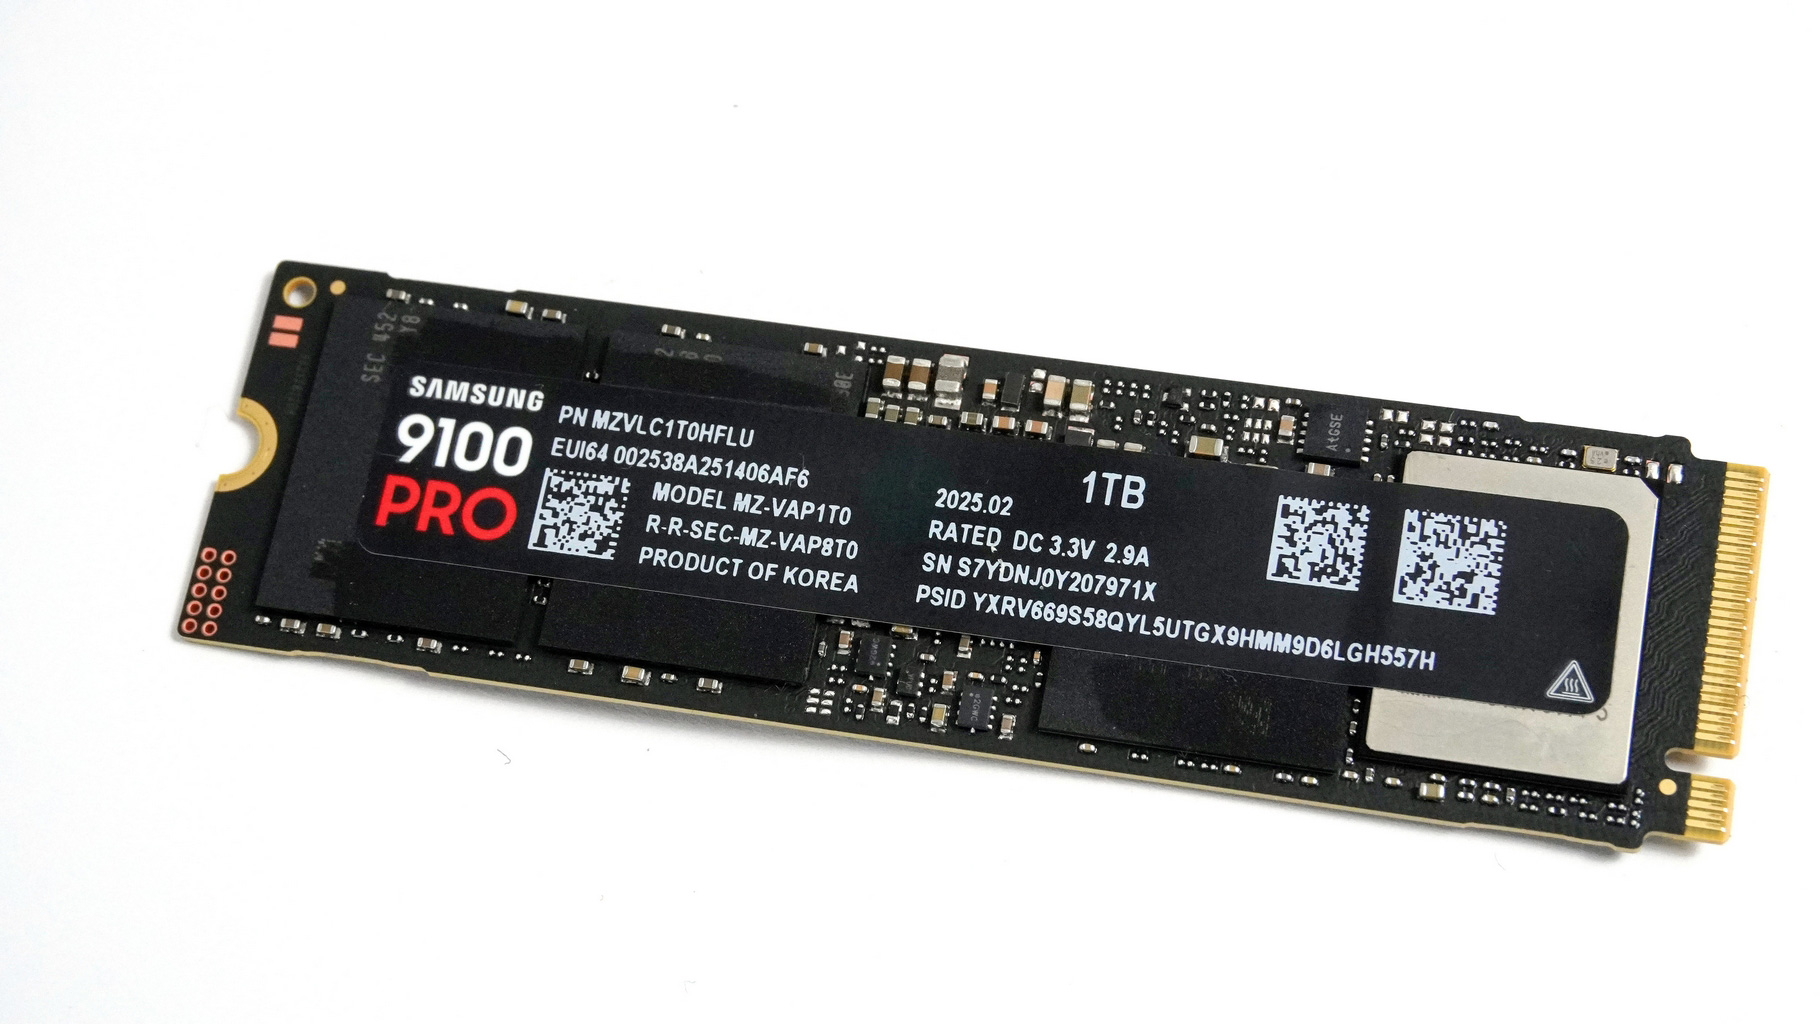
Underneath it, we can see a "sandwich" of two square pads, with a small metal plate in between them. They are placed below the SSD's controller. Every retail version of this laptop should be bundled with three rectangular and three square thermal pads (for the Gen. 4 slots) alongside one rectangular and two square thermal pads, plus an additional copper plate, for the Gen. 5 drive. I like that all slots are branded with their appropriate PCIe version, which is written on the mainboard's PCB. The correct placement for each of the thermal pads is indicated with a white square. The same goes for the RAM slots.
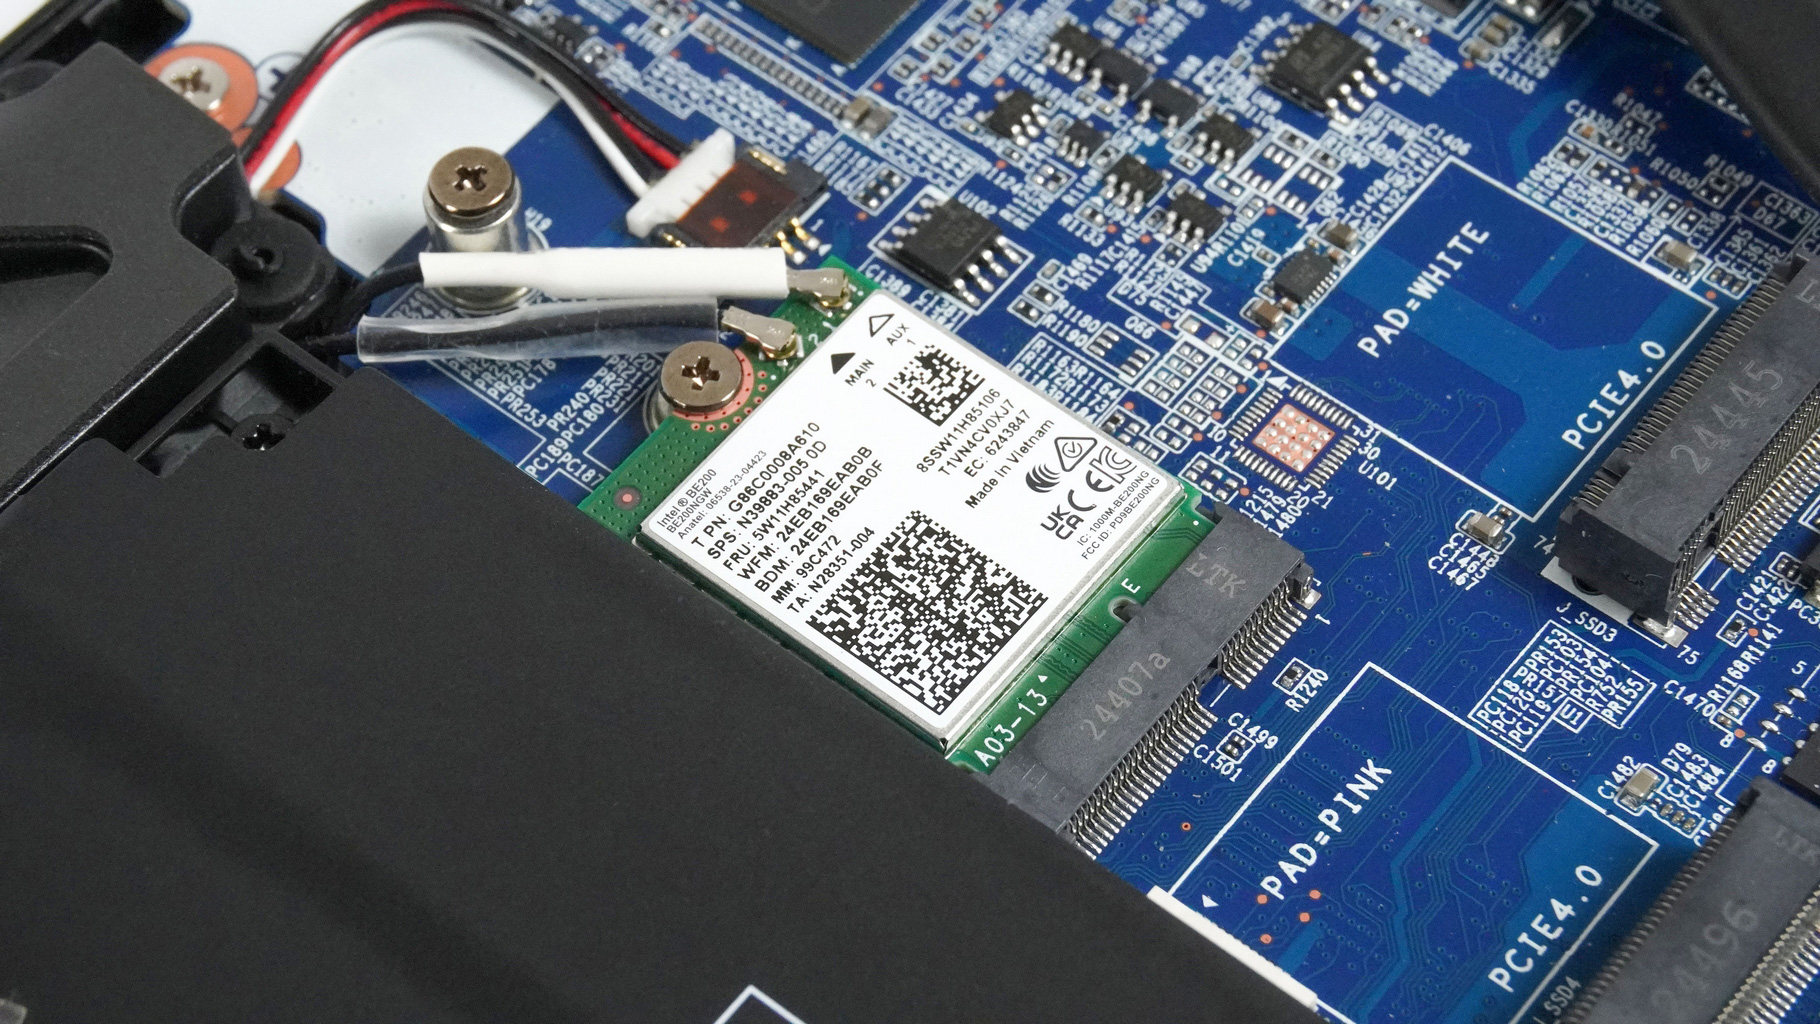
The Wi-Fi card of our laptop is positioned in front of the bottom left SSD slot. This means that if you install an NVMe there, it'll almost fully cover the wireless card, which could potentially lead to connection issues. That's one of the few cons of this device, but I guess no design is perfect, and most laptops don't even offer two M.2 slots, let alone the option to install four.
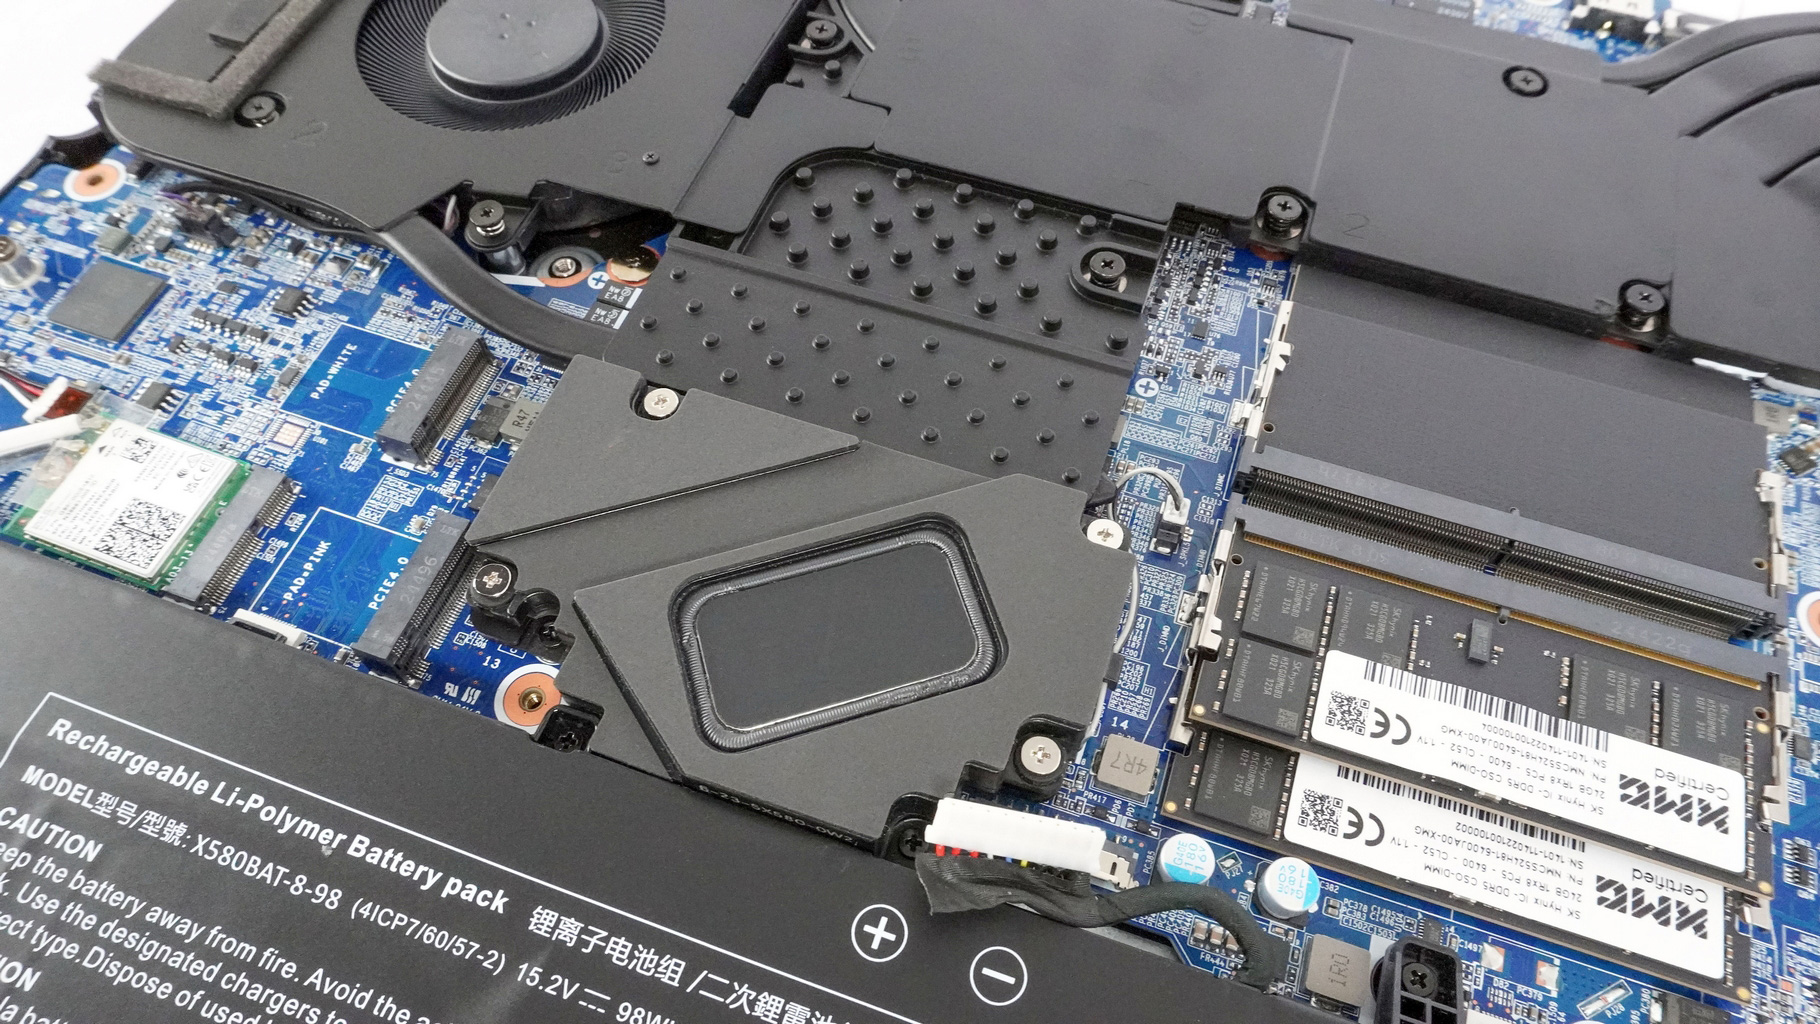

By the way, removing the subwoofer isn't hard. Undo the four screws that hold it to the base and then unplug the connector from the mainboard.
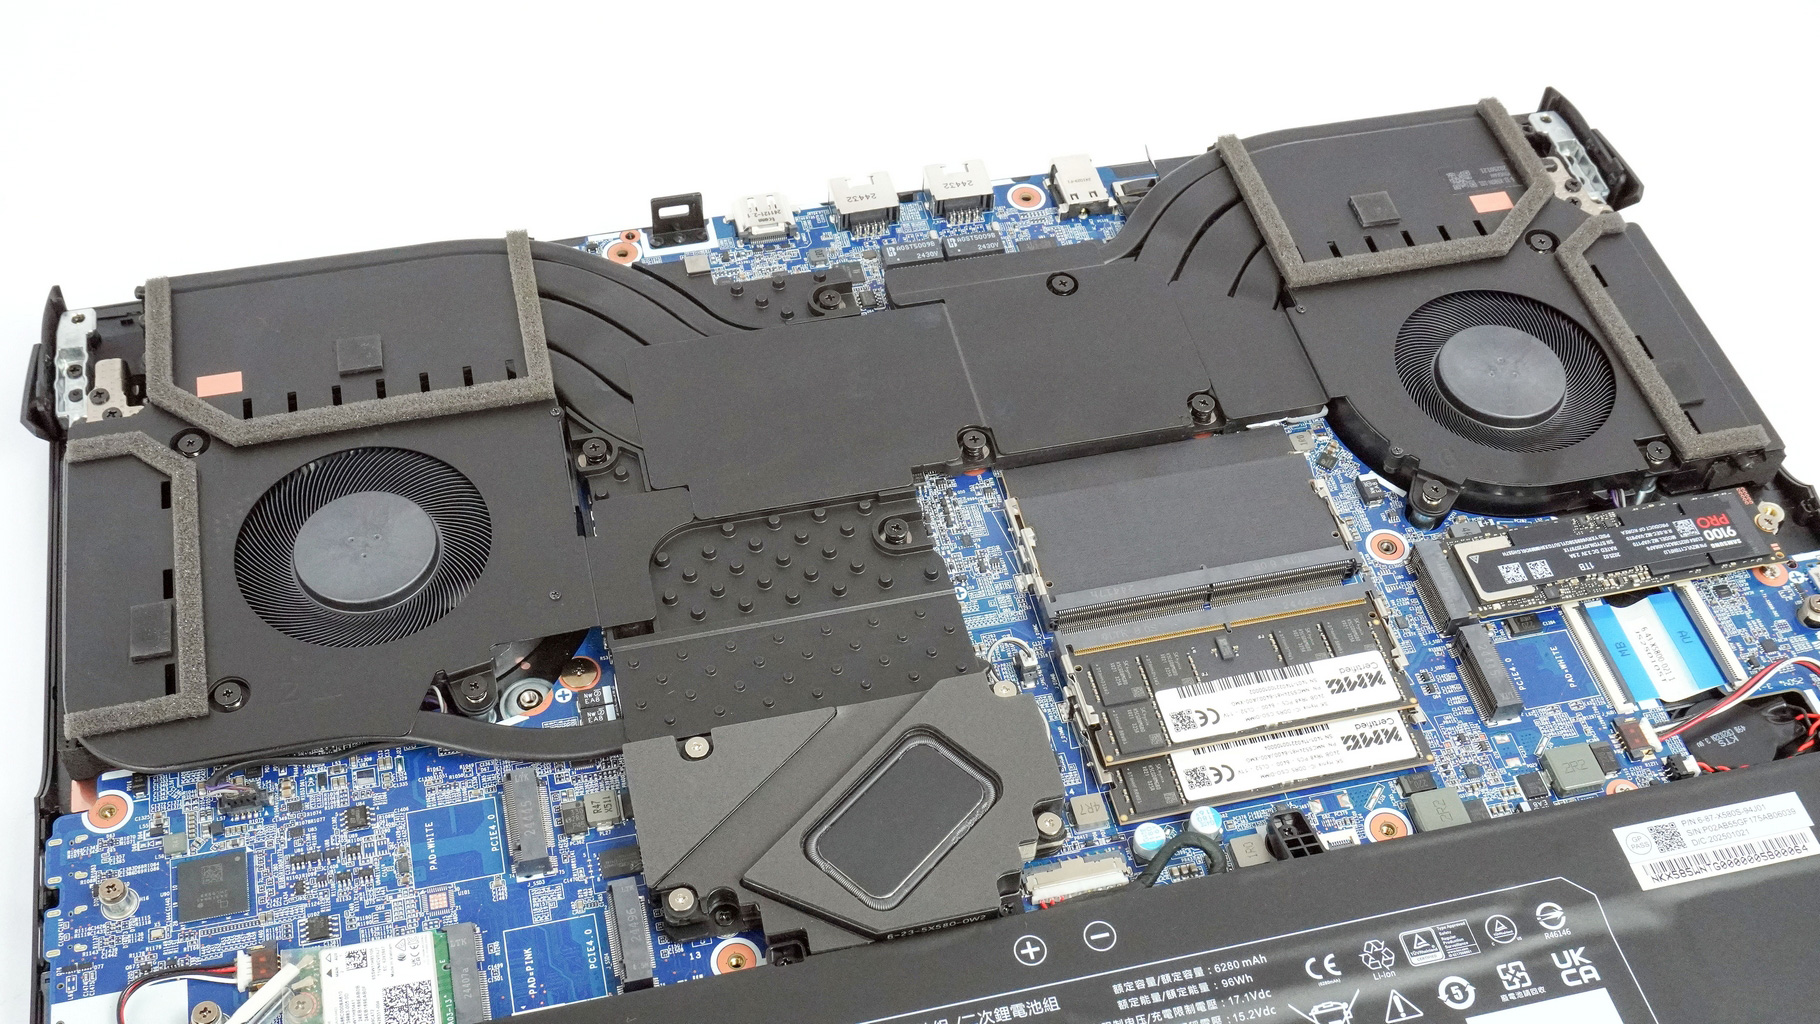
Last but not least, let's check the huge cooling. It has two fans - one 80 mm and one 70 mm. Expectedly, the bigger one is on the GPU side. The system has seven copper heat pipes in total. The upper one on the left covers both CPU and GPU, but it doesn't extend to the CPU's heat sink. The lower two pipes are entirely shared between the processor and the graphics card (from fin stack to fin stack). The fourth heat pipe is solely dedicated to the GPU. The bottom one cools the GPU VRM and the chipset as well. The top right pipe is for the CPU VRM. The lower heat pipe on the right is for the CPU only. The larger cooling plate is above the GPU, while the other one is on top of the CPU. The cooling also comprises four large heatsinks. PTM 7950 phase change thermal interface material is applied to both CPU and GPU dies, which offers superior longevity and performance to most traditional TIM or paste options.
Nov 18th, 2026 20:24 PST
change timezone
Latest GPU Drivers
New Forum Posts
- Without Jensen, PC gaming will be (46)
- TPU's Nostalgic Hardware Club (22168)
- Dual B70 or Dual R9700 Pro on Linux (7)
- Time to upgrade CPU and MOBO (40)
- Honestly, do you care about GTA VI? (150)
- Windows 11 General Discussion (7730)
- 26.11.2 Adrenalin Edition is out (0)
- [Poll] 12V-2x6 Connector Protection: What Are You Using? (WireView / Ampinel / Equalizer / Other / Nothing) (42)
- Got a new laptop! What should I do with it? (6)
- What are you playing? (26235)
Popular Reviews
- Acemagic Retro X3 Review
- Upcoming Hardware Launches 2027 (Updated Nov 2026)
- Ugreen NASync DXP4800 GT Review
- AMD Zen 6 Technical Deep Dive
- Pulsar Office Tour & First Look at P1 Dual-Sensor Mouse
- Biwin Black Opal NV7400 2 TB Review
- Sapphire Radeon RX 7700 XT Pure Review
- Chieftec Iceberg PRO 360 DARK Review
- ASUS ROG Strix B850-I Gaming Wi-Fi7 W Review
- Sapphire Radeon RX 7700 XT Pulse Review
TPU on YouTube
Controversial News Posts
- NVIDIA Co-Founder and CEO Jensen Huang Officially Resigns (483)
- Report: Jensen Huang Eyes NVIDIA Comeback (196)
- Open Letter Asking NVIDIA to Reinstate Jensen Huang Passes 115,000 Signatures (184)
- OpenAI CEO Argues Home PCs Waste the World's Limited DRAM Supply (152)
- NVIDIA Launches Investigation Into Jensen Huang's Relationship With Suspected Chinese Spy (136)
- Intel "Raptor Lake Next" 16-Core and 20-Core CPUs Surface (130)
- Legendary Game Studio BioWare Shuts Down Following EA Layoffs (104)
- Dell CEO Says the Memory Shortage Will Get Worse in 2027 (95)