 30
30
Thermaltake Embedded 7" Addon LCD Review
On-Screen Display »Installation
This LCD display is specifically designed for the Thermaltake Mozart TX. That's why I will show the installation there. With a little bit of modding this LCD should fit other cases as well. The dimensions of the part that go into the case are width 183mm, height 54mm, depth 158 mm.First you have to remove the cover of the 7" drive bay.

The two screws on the left side are very easy to reach.


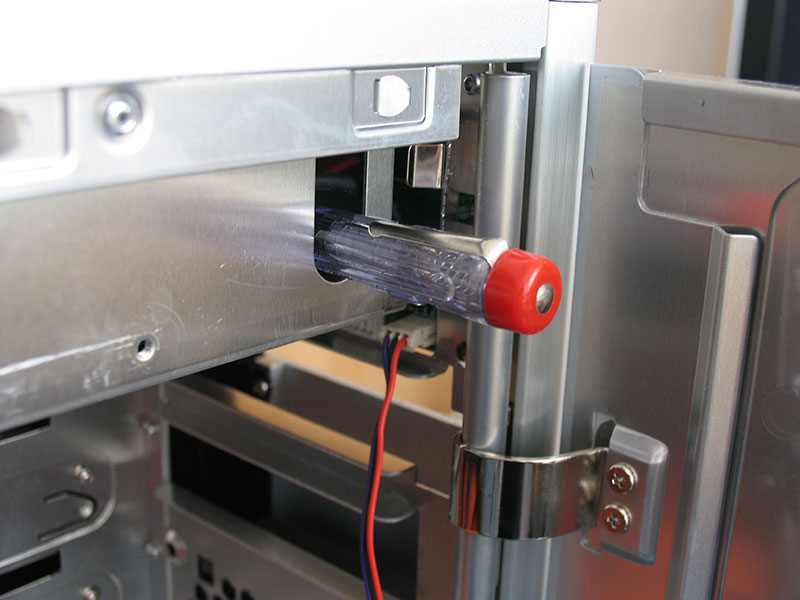
On the right side it is a bit more difficult. You can barely see the screw. In order to get it out you have to use a long screw driver. At least the opening is placed so that you can reach it.


Next, you have to remove the metal cover from the LCD unit. This is done by pressing the tabs on the sides apart, then you can slide the cover off.


After removing the old black cover you slide in the metal casing, it fits perfectly.

In order to lock the cage you have to press down these metal tabs so that they make contact with the case. When this is done the casing will be attached to the case perfectly. However, I don't like this mounting mechanism so much. It would be better if Thermaltake used a couple of screws. This would make it easier to get it out as well.


As last step you put the black bezel around the unit. The small opening at the top is normal. It is required for the LCD display to slide out.

On the backside you have to connect the power cable and the VGA cable. The USB cable is not required for display operation but used by the integrated touch panel.
May 5th, 2024 09:27 EDT
change timezone
Latest GPU Drivers
New Forum Posts
- Battery swap for cyberpower UPS (52)
- Weird red devil 6600 xt no output issue (7)
- Benchmarking Unity graphics performance in WebGL (41)
- Only some humans can see refresh rates faster than others, I am one of those humans. (121)
- What's your latest tech purchase? (20441)
- Throttlestop overclocking Desktop PCs (1515)
- Arctic MX-6 shelf life is just a couple months? (89)
- Display Screen buying inputs. (7)
- Apparently Valve is giving refunds on Helldivers 2 regardless of hour count. Details inside. (39)
- Resolution problems in-game with Av receiver (windows 11) (2)
Popular Reviews
- Finalmouse UltralightX Review
- Meze Audio LIRIC 2nd Generation Closed-Back Headphones Review
- ASRock NUC BOX-155H (Intel Core Ultra 7 155H) Review
- Montech Sky Two GX Review
- Cougar Hotrod Royal Gaming Chair Review
- Upcoming Hardware Launches 2023 (Updated Feb 2024)
- Alienware Pro Wireless Gaming Keyboard Review
- AMD Ryzen 7 7800X3D Review - The Best Gaming CPU
- HYTE THICC Q60 240 mm AIO Review
- Logitech G Pro X Superlight 2 Review - Updated with 4000 Hz Tested
Controversial News Posts
- Intel Statement on Stability Issues: "Motherboard Makers to Blame" (240)
- Windows 11 Now Officially Adware as Microsoft Embeds Ads in the Start Menu (167)
- AMD to Redesign Ray Tracing Hardware on RDNA 4 (144)
- Sony PlayStation 5 Pro Specifications Confirmed, Console Arrives Before Holidays (117)
- AMD's RDNA 4 GPUs Could Stick with 18 Gbps GDDR6 Memory (114)
- NVIDIA Points Intel Raptor Lake CPU Users to Get Help from Intel Amid System Instability Issues (106)
- AMD Ryzen 9 7900X3D Now at a Mouth-watering $329 (104)
- AMD "Strix Halo" Zen 5 Mobile Processor Pictured: Chiplet-based, Uses 256-bit LPDDR5X (103)