 1
1
Thermaltake Mini Typhoon Review
(1 Comment) »Introduction
I would like to thank Thermaltake for supplying the tested cooler.| Compatibility | Intel Pentium D Intel Pentium 4 Intel Celeron D AMD Athlon 64 X2 AMD Athlon 64 FX AMD Athlon 64 AMD Sempron |
|---|---|
| Sockets | Socket LGA775 |
| Dimension | 112(L) x 94(W) x 125(H) mm |
| Heatsink Material | Copper Base & Copper Fins (92) |
| Heatpipe | Copper tube diameter 6mm x 6 |
| Fan Dimension | 92x92x38 mm |
| Rated Voltage | 12V |
| Startup Voltage | 6V |
| Power Input | 2.88W |
| Fan Speed | 2200 +- 10% RPM |
| Max. Air Flow | 38.7 CFM |
| Max. Air Pressure | 2.69 mm H2O |
| Noise | 18 dbA |
| Connector | 3 Pin |
| Weight | 605g |
Packaging


Box contents:
- CPU Cooler
- Mounting clips for Socket 775
- Mounting clips for Socket 939, 745, AM2
- Thermal grease
- Instruction manual


The heatsink's base is flat and has only very small milling marks. A few tiny irregular scratches are to be seen but these are nothing to be worried about.
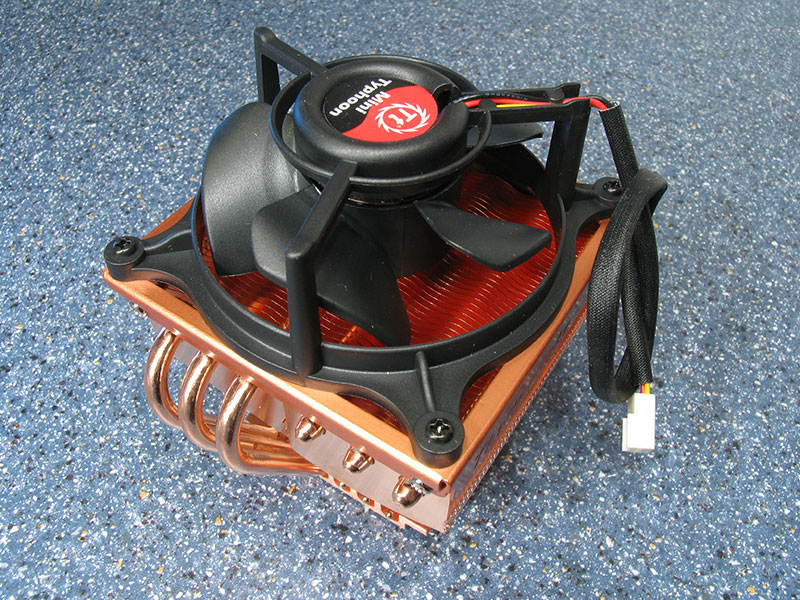


As its name says the Mini Typhoon is rather small compared to other massive coolers. With its six heatpipes it still looks like it can keep up with some heat load.

On both sides I found those small edges. They are pretty sharp and can easily damage cloth, or even hurt you when you are unlucky.

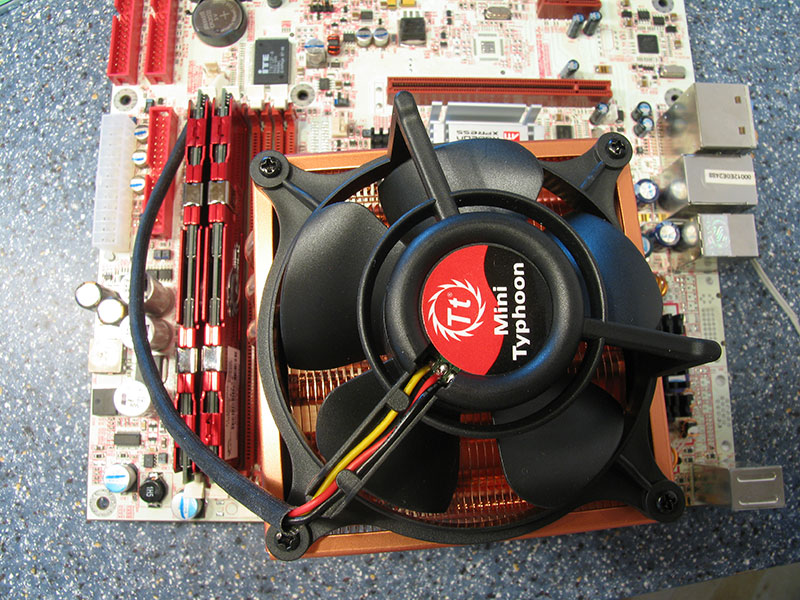
Thermaltake uses a 92mm fan on the cooler which is held in place by four standard screws. So it's easy to replace it with your own fan.


With the fan removed you can see the all copper fins which radiate heat from the heatpipes.
Installation
The installation of the Thermaltake Mini Typhoon is very easy. I would advise to remove the motherboard for easier Socket939 installation because the cooler and the mounting clip are two different parts.

Basically all you have to do is put the heatsink on the CPU and hook the mounting clip into one side of the socket. Next you hook in the other side of the mounting clip and move the lever.

I found the lever a bit hard to move since it touches the copper fins of the heatsink a little bit. When installing the cooler you just pull the lever backwards a little and you can move it without touching the heatsink. Either way how you do it, this will not cause any further problems with the installation or the performance of the cooler.
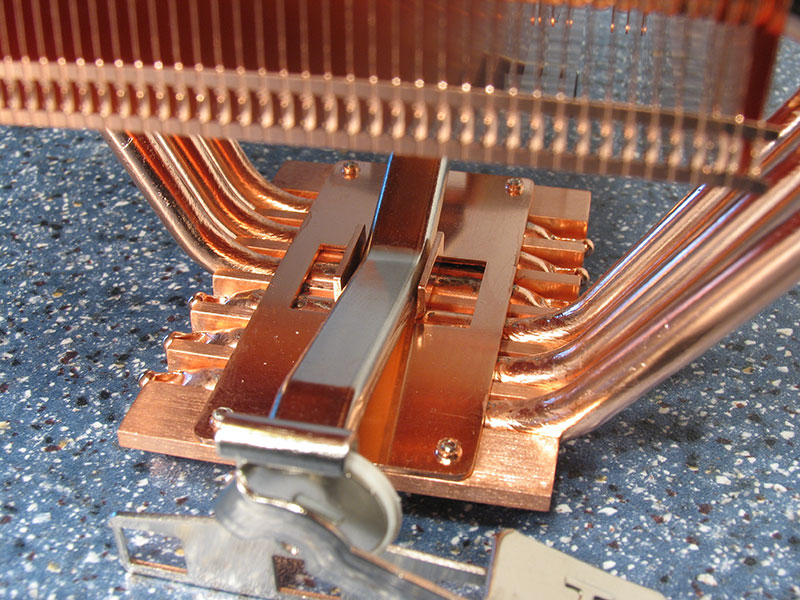
As you can see here the metal clip has no way to properly seat it, so it can freely move along the base and you may end up with a cooler which is off-center.
Another possibility is that you may end up with a slightly rotated cooler. Having most mounting pressure only in the center lets you rotate it when you apply some force.


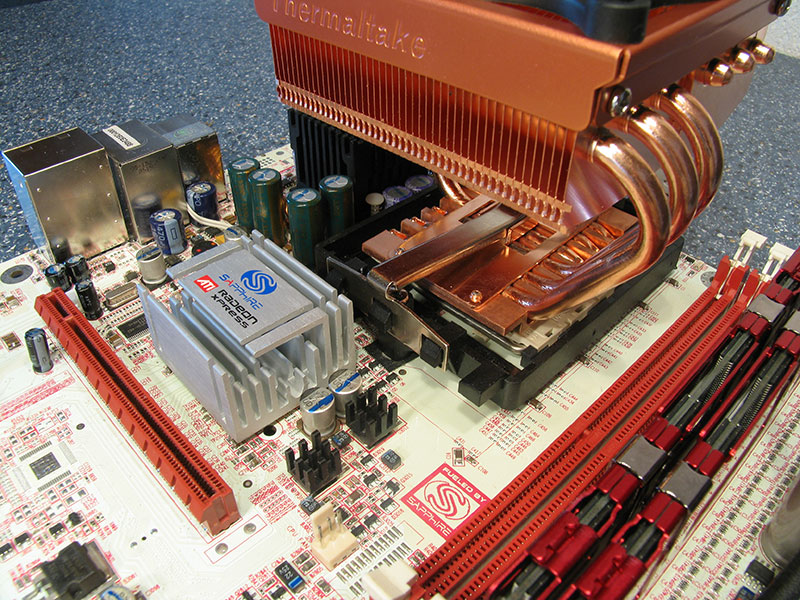
The design of the heatpipes allows memory access with the cooler installed. No space problems here at all.
Our Patreon Silver Supporters can read articles in single-page format.
Jul 28th, 2025 14:09 CDT
change timezone
Latest GPU Drivers
New Forum Posts
- Hyper-threading (3)
- Hear ye, Hear ye: We are Light, We come from Light, We emit Light (7)
- I stupidly changed my gpu BIOS and ruined everything (2)
- AI Job Losses: let's count the losses up, total losses to AI so far 94,000 and counting (76)
- What are you playing? (24021)
- Upgrade from old x58 system (47)
- PC upgrade after many years (1)
- Windows 12 (235)
- Kindly help me to complete my new PC build... (15)
- New PC wont post in specific ram slot (23)
Popular Reviews
- Lian Li O11 Dynamic Mini V2 Review
- Herman Miller Logitech G Embody Gaming Chair Review - No Pain, No Gain
- AQIRYS Sirius Pro Review
- Noctua NF-A12x25 G2 PWM Fan Review
- Upcoming Hardware Launches 2025 (Updated May 2025)
- VAXEE XE V2 Wireless Review
- UPERFECT UMax 24 Review
- DDR5 Memory Performance Scaling with AMD Zen 5
- Sharkoon OfficePal C10 Review - Affordable and Decent
- AMD Ryzen 7 9800X3D Review - The Best Gaming Processor
TPU on YouTube
Controversial News Posts
- AMD's Upcoming UDNA / RDNA 5 GPU Could Feature 96 CUs and 384-bit Memory Bus (134)
- AMD Radeon RX 9070 XT Gains 9% Performance at 1440p with Latest Driver, Beats RTX 5070 Ti (131)
- NVIDIA GeForce RTX 5080 SUPER Could Feature 24 GB Memory, Increased Power Limits (115)
- Intel "Nova Lake-S" Core Ultra 3, Ultra 5, Ultra 7, and Ultra 9 Core Configurations Surface (107)
- NVIDIA DLSS Transformer Cuts VRAM Usage by 20% (100)
- DDR6 Memory Arrives in 2027 with 8,800-17,600 MT/s Speeds (99)
- AMD Sampling Next-Gen Ryzen Desktop "Medusa Ridge," Sees Incremental IPC Upgrade, New cIOD (97)
- Intel CEO Confirms SMT To Return to Future CPUs (95)