 0
Thermaltake Muse 3.5" HDD Enclosure Review
(0 Comments) »Introduction
From the manufacturer Thermaltake:- All aluminum fanless design
- Silver body with graceful curve
- Screwless design easy to install 3.5 HDD without tools
- Deliver Meter with blue backlight to indicate digital signal.
- Cypress AT2+ chip - speed & protect your digital data
- IDE to USB2.0 interface - the most compatibility
- Compact mount easily to stand.
- Transfer speed up to 480Mbps
| Model | A2292 |
|---|---|
| Case Type | 3.5" HDD |
| Weight | 745g |
| Dimension | 2119x125x40.5mm (HxWxD) |
| Material | Aluminum |
| Interface | IDE to USB2.0 |
| ATA compatibility | ATA6 |
| PCBA Chip | Cypress AT2+ |
| Transfer Rate: | USB2.0: 480 Mbps |
| Operating System | Windows SE, ME, 2000 and XP Mac OS 9.x up |
| Drive Bay Kits | USB 2.0 external cable, Power adapter, Metal foot stand |
Packaging

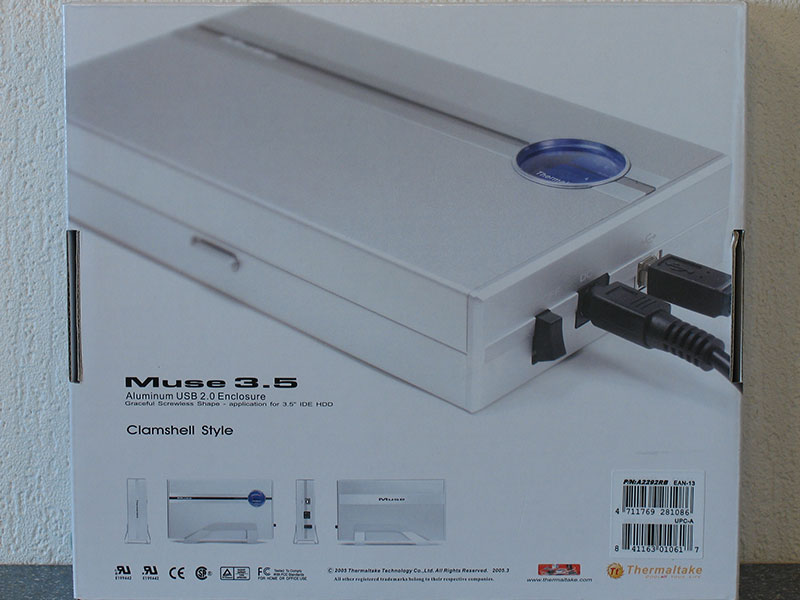
The Thermaltake Muse comes in a package which does not follow the standard Thermaltake color-theme. I like the elegant white packaging of the Muse better.

Inside the package you will find:
- Aluminum case
- Aluminum stand
- USB cable 1m
- User's Manual & Driver CD
- Power supply with cable
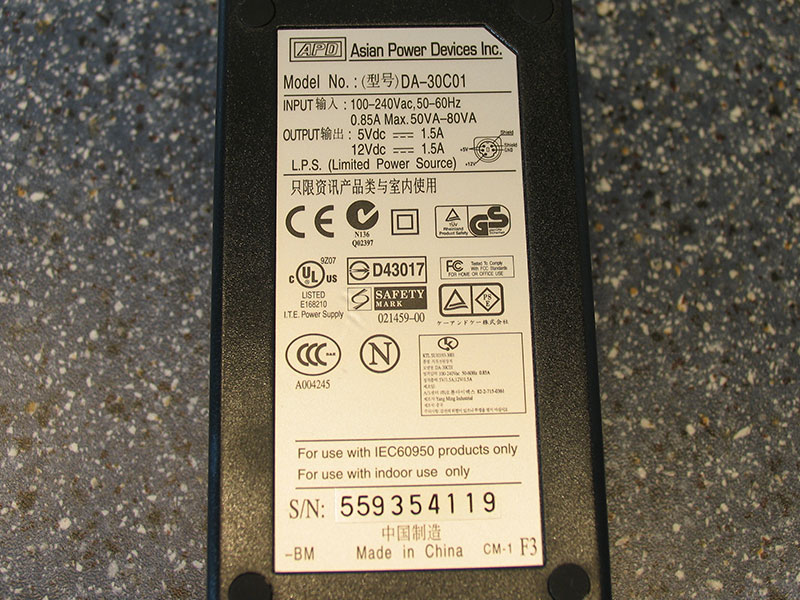
Power for the harddisk is delivered by an external PSU. This is neccessary, because USB is specified to max. 500mA. However, integrating the PSU into the case should be no problem and would significantly reduce the cable mess.
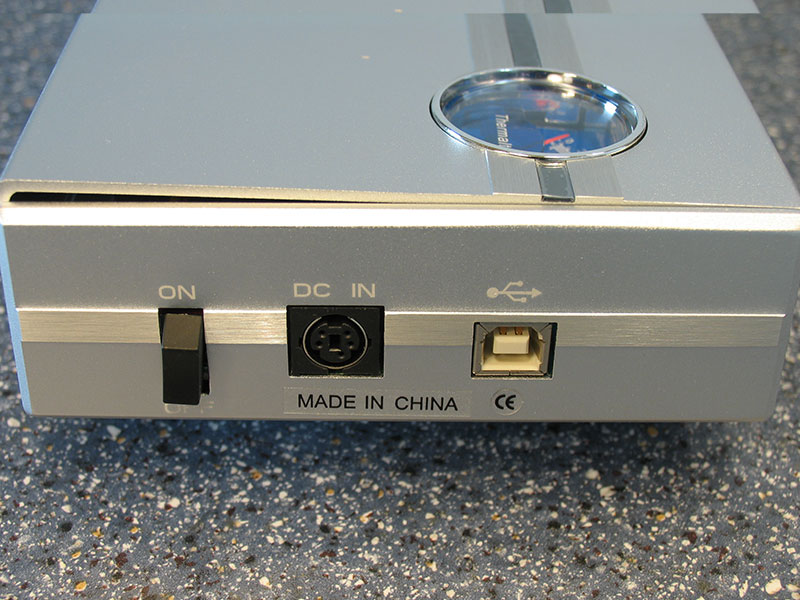
On one side of the aluminum case are two connectors for power, USB and the power switch.
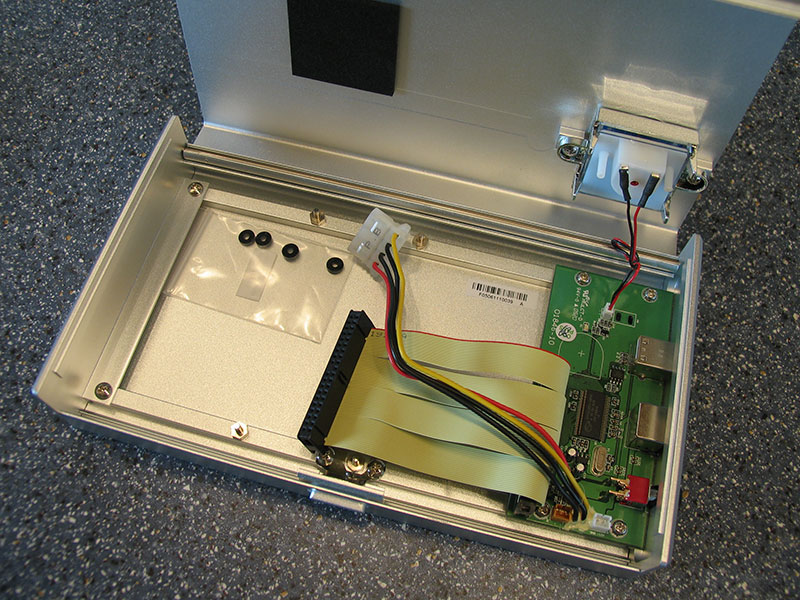
Opening the case is accomplished by pressing a small button on one side, then opening the top. Inside you will find some empty space for your 3.5" HDD and a small PCB which has a USB to ATA converter chip on-board. The cable is a standard IDE cable, if you lose or break the cable you can just use any regular HDD cable.
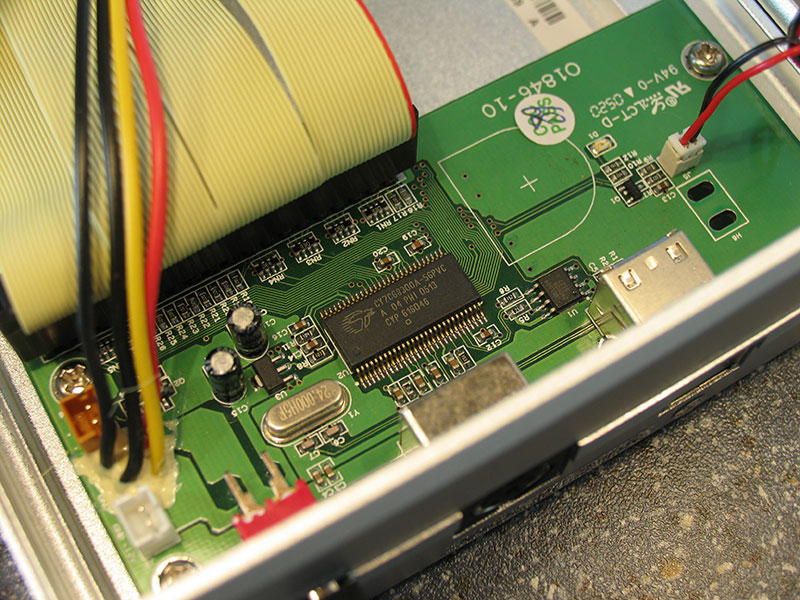
The converter chip comes from Cypress and is a CY7C68300A. It is USB 2.0 compatible with support for 480 Mbps high-speed transfers.
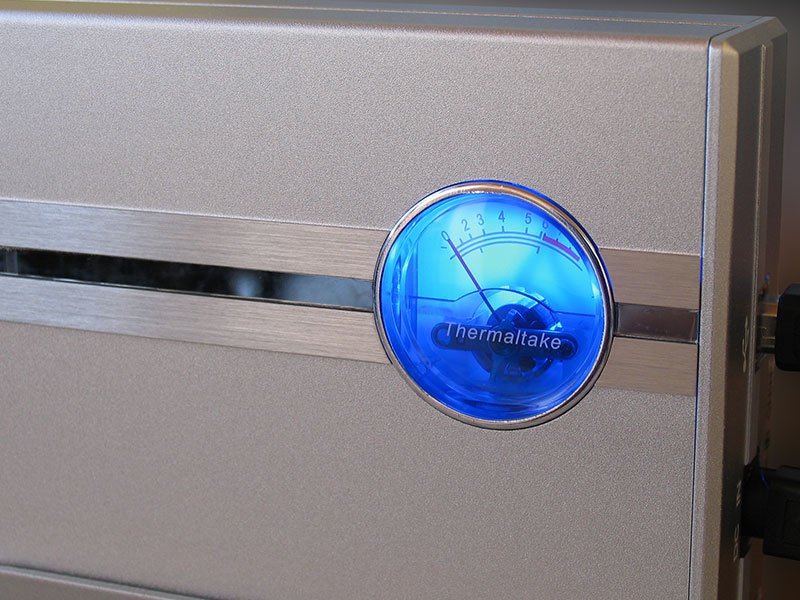
When the unit is powered on, the analog VU meter is lit up in a nice blue. The meter's needle moves with harddisk activity.
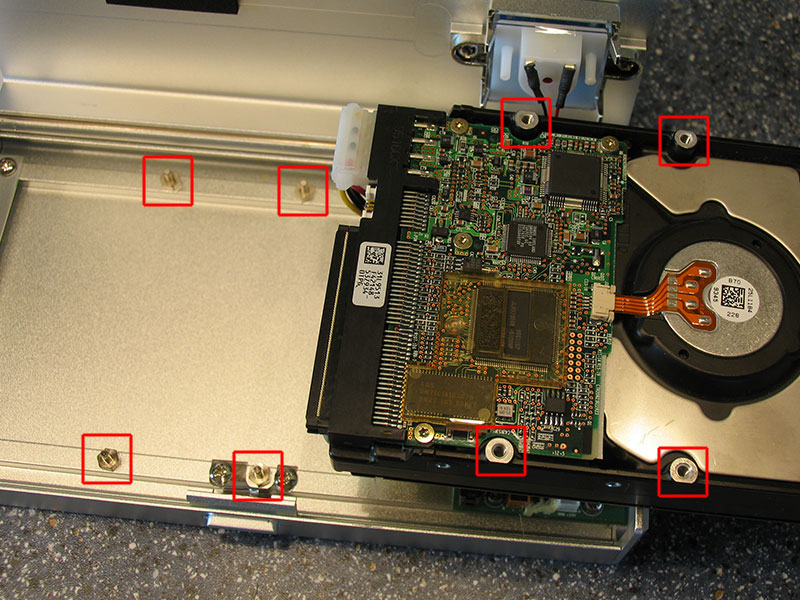
For mounting, Thermaltake has come up with a clever solution. The HDD just rests on the marked posts without any screws. Since the lid on top makes sure that the harddisk can not move, this is a safe method of installation, while still making it easy to remove the disk.
Installation
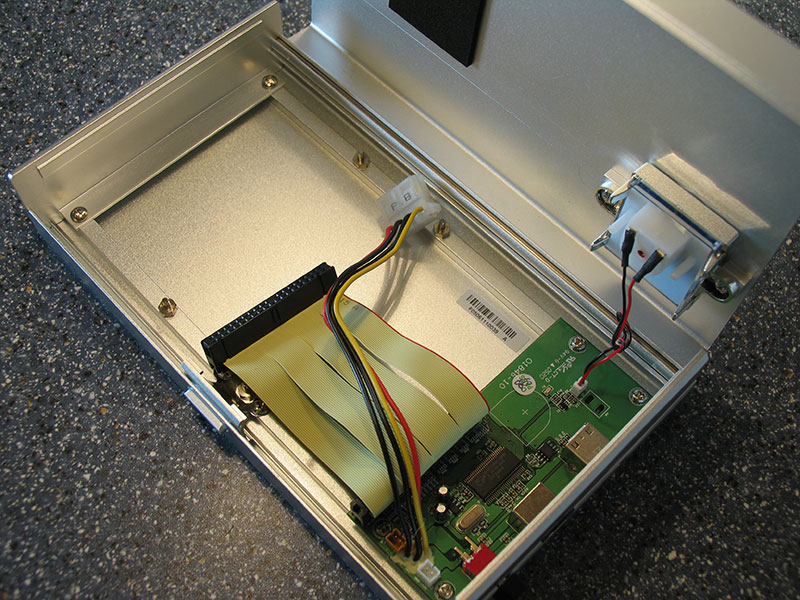


Installation of the internal harddisk is really easy and well documented in the included manual.
- Open case
- Connect HDD power
- Connect IDE cable
- Put HDD on mounting posts
- Close case
A driver installation is only required on Windows 9x. Windows 2000 and up automatically install the drive as a harddisk, without any reboot.
Our Patreon Silver Supporters can read articles in single-page format.
Nov 15th, 2026 04:14 CST
change timezone
Latest GPU Drivers
New Forum Posts
- What can the FX 8320 do today? Here is the answer. (52)
- Honestly, do you care about GTA VI? (51)
- Can you guess Which game it is? (318)
- Is this anyhow possible, that a GPU (ROG Strix RX480 O8G) can crash the whole PC after "ReFlash" in normal Mode? (0)
- AI generated images... (227)
- WebXPRT 4 performance scores (46)
- Optical Disc Drive owners club (213)
- "Legacy Control Panel" won't install (3)
- Power supply noise stops when I move the mouse (0)
- Ryzen Owners Zen Garden (8558)
Popular Reviews
- AMD Zen 6 Technical Deep Dive
- ASUS ROG Strix B850-I Gaming Wi-Fi7 W Review
- Corsair HX1000i Shift Crystal Review
- Upcoming Hardware Launches 2027 (Updated Nov 2026)
- Montech King 95 3D PRO Review
- NZXT C1200 Platinum Review
- NZXT H7 RGB+ Review
- NZXT H5 Review
- Phantom Blade Zero Performance Benchmark Review - 35 GPUs Tested
- AMD Ryzen 7 9800X3D Review - The Best Gaming Processor
TPU on YouTube
Controversial News Posts
- NVIDIA Co-Founder and CEO Jensen Huang Officially Resigns (408)
- OpenAI CEO Argues Home PCs Waste the World's Limited DRAM Supply (152)
- NVIDIA Launches Investigation Into Jensen Huang's Relationship With Suspected Chinese Spy (136)
- Intel "Raptor Lake Next" 16-Core and 20-Core CPUs Surface (130)
- Legendary Game Studio BioWare Shuts Down Following EA Layoffs (104)
- Dell CEO Says the Memory Shortage Will Get Worse in 2027 (95)
- NVIDIA GeForce RTX 50-Series Scheduled for up to $500 Price Hike This Week (89)
- Modder Fits RTX 5090 With Four 8-Pin Connectors, Halving Current per Wire (80)