 3
XPG Valor Air Pro Review
Thermal Stress Test »Assembly

As the XPG Valor Air Pro does not support BTF, we went ahead and installed a classic ATX variant instead using the spacers and screws. The openings for cable management line up very nicely for that format of a board. Those opting to use E-ATX will have to use the side fan mounting area as cable management, which will look a bit out of place. Some case brands do provide a cover with explicit cutouts for E-ATX setups and that would have been nice to see here as well.


The metal 2.5" drive trays may be lifted out of the case by removing the single captive thumb screw holding each of them in place. Adding an SSD requires the use of the included screws. Once filled, you can put it back unto the backside of the motherboard tray.


For larger drives, the plastic tray provides a tool-free method to include a 3.5" unit. Simply snap it down and slide it back into the HDD cage until it in turn clips down as well. The tray does provide mounting holes for a 2.5" drive, which require the use of screws and a screwdriver.

Sliding in our 160 mm long 1000 W power supply was quite easy as there is plenty of space even for longer variants. Considering the target audience of this chassis, that will likely mean that you won't ever get into the scenario where you will have to choose between a long PSU or a thick liquid cooling setup in the front.


Adding the 360 mm AIO in the ceiling is not hard either. Thanks to very good clearances, the motherboard headers at the top edge are still accessible if you stick to cooling setups of classic thickness. That said, you should also be able to go push/pull as long as you stick to 120 mm fan based radiators.

As the XPG Valor Air Pro is deeper than the non-Pro, you not only get to install longer AIOs in the ceiling, but also can fit longer GPUs of up to 400 mm in length. Our Zotac GeForce RTX 5070 Ti has plenty of room to breathe. A GPU support bracket—which is becoming rather common for cases of this price segment—would certainly have been beneficial too.


With everything installed, the setup looks sufficiently clean. Grommets would have really helped here and those opting for the white variant of the XPG Valor Air Pro will miss them even more. In the rear due to similar reasons we really had to focus to stay clear of running any cables across any of the openings, so they would not be as visible. As such, we avoided the two row of hooks between the cable routing holes for example.
Finished Looks


Turning the XPG Valor Air Pro on, you can clearly see the glow of the hub mounted ARGB LEDs in the fans. A white power LED lights up underneath the triangular power button as soon as you turn the system on as well.


Thanks to the fact that the front fans are installed on the exterior of the frame, you get to see them without an obstruction, which is a nice detail. In the rear, everything is where you would expect to see it for a modern mid-tower chassis.


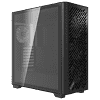
Thanks to the clear window, you can feast your eyes on your hardware and the glow any ARGB elements will provide. Naturally, as there are no fans on the side intake of the case, looking at the opposite, metal side of the finished system inside the XPG Valor Air Pro, there is not really anything new to see here.
Nov 13th, 2026 10:17 PST
change timezone
Latest GPU Drivers
New Forum Posts
- Microsoft Exchange/365 outages? (48)
- inside Case Mod gallery, non modded cases are posted? (1)
- Debunking 10-Year-Old Myths: How a Properly Tuned FX-8320 (4.21 GHz) Beats i5-8400, i7-4770, Ryzen 5 1500X, and Even a 4.92 GHz FX-9590 in 3DMark Time (7)
- WarpCoreBench scores! (27)
- The TPU Darkroom - Digital SLR and Photography Club (4496)
- TPU's Nostalgic Hardware Club (22154)
- To AiO CPU Cooler users? (9)
- Dual B70 or Dual R9700 Pro on Linux (3)
- Slow SSD read speeds - help! (3)
- I won't download games that are larger than 30–40 GB. (108)
Popular Reviews
- AMD Zen 6 Technical Deep Dive
- Corsair HX1000i Shift Crystal Review
- NZXT C1200 Platinum Review
- Upcoming Hardware Launches 2027 (Updated Nov 2026)
- Montech King 95 3D PRO Review
- NZXT H7 RGB+ Review
- NZXT H5 Review
- Phantom Blade Zero Performance Benchmark Review - 35 GPUs Tested
- XPG NIMBUS PLUS Review - Mid-range Chair With Strong Competitors
- Gigabyte Z890I Aorus Ultra Review
TPU on YouTube
Controversial News Posts
- NVIDIA Co-Founder and CEO Jensen Huang Officially Resigns (358)
- OpenAI CEO Argues Home PCs Waste the World's Limited DRAM Supply (152)
- NVIDIA Launches Investigation Into Jensen Huang's Relationship With Suspected Chinese Spy (136)
- Intel "Raptor Lake Next" 16-Core and 20-Core CPUs Surface (130)
- Legendary Game Studio BioWare Shuts Down Following EA Layoffs (104)
- Dell CEO Says the Memory Shortage Will Get Worse in 2027 (95)
- NVIDIA GeForce RTX 50-Series Scheduled for up to $500 Price Hike This Week (89)
- Modder Fits RTX 5090 With Four 8-Pin Connectors, Halving Current per Wire (80)