 71
71
Zotac GeForce 9800 GX2 Review
A Closer Look »Card Disassembly
Since the disassembly of this card is so complicated we decided to give you one extra page with step by step instructions. Assembly is done the same way in reverse.I found the whole disassembly process to be incredibly complex and difficult. If you don't have the right tools you can get frustrated quickly (frustration = $600 paperweight really fast). Overall it took me about one hour to take the card apart, take pictures of the process and custom-make some tools.

First you release the screws on the bottom (where the PCI-E connector is) that hold the backside plate in place. There are also two screws near the back of the card under two rubber covers that need to be removed. Once the screws are gone you have to pull the backplate above the PCB, a long metal tab makes this quite difficult, you need some force.
Next you remove the second plate by removing its screws and pulling it off over the 8-pin PCI-E power connector. Here you will also need some force and gently bend the metal a bit so it will go over the power connector.


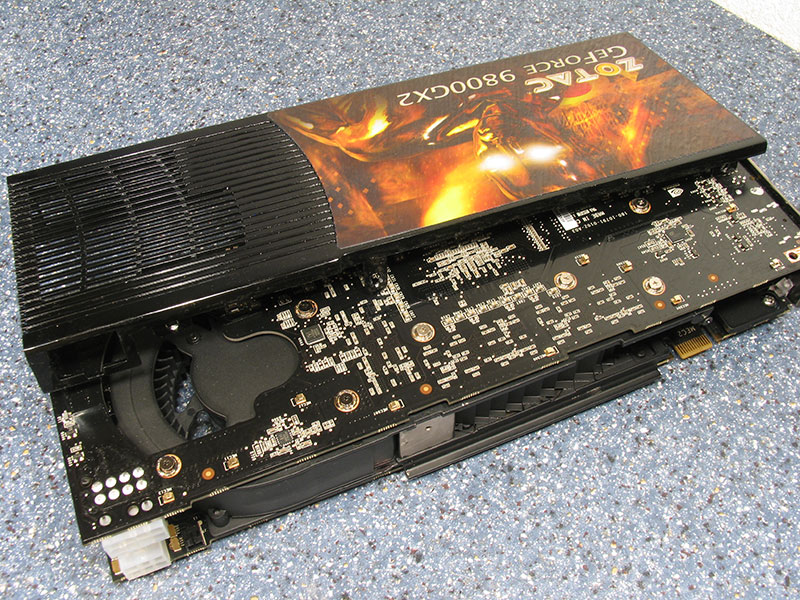
Phew, done. Here is the card without the outer shell, which has no real function other than to cover the components and make the card look nicer. It probably also helps with the airflow but does not cool any component directly.
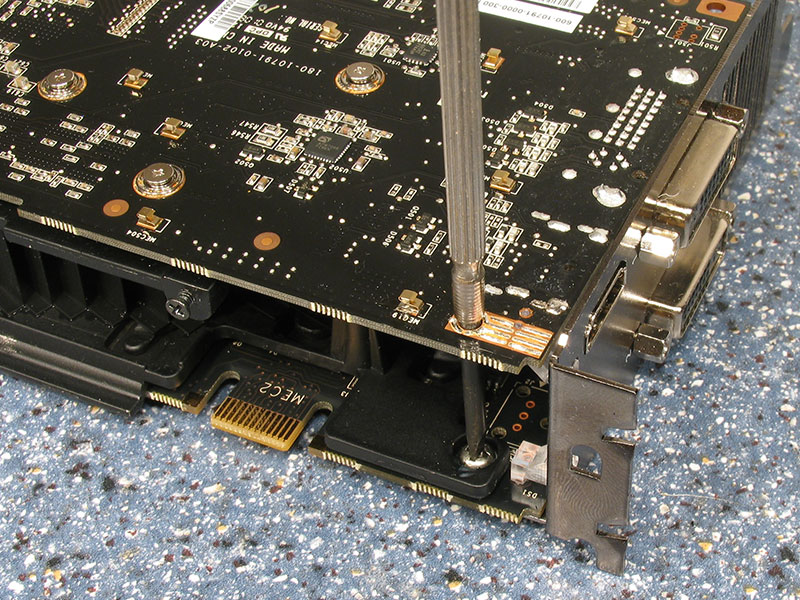

Next you have to remove the PCI slot cover because the DVI connectors hold the two sides together. As first step you remove the two screws going through the PCB that hold the slot cover in place. One way is to go through the second PCB with your screwdriver. Be advised that the screws are tightened with an insane torque, the cheap screwdriver you see in the first picture broke. Another method is to release the screws from the sides.

Now you can remove the four screws holding the connectors in place on the front, and the PCI slot cover is gone.


Next you release the screws on the back of one card that fixes it to the cooler. Be advised that the screws require a very very small screwdriver and are tightened down really hard. After breaking one screwdriver and a screw I dremeled down a screwdriver tip to make it fit.
With all screws gone you can carefully lift off the PCB off the cooler, be careful not to rip off the SLI/PCIE flat cable.
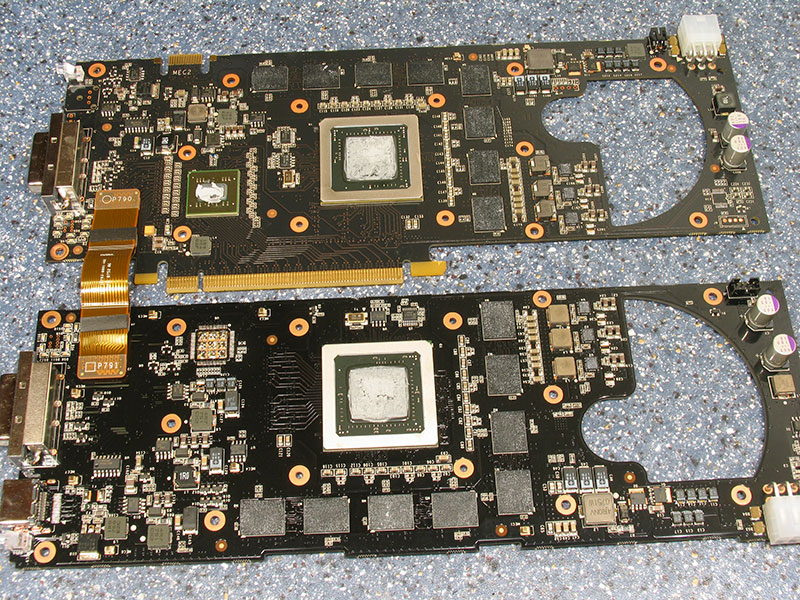
Do the same for the card on the other side and remove its PCB too. Mission accomplished!

To give you an idea how complex the disassembly is, here is a photo of all the parts that were removed during the card disassembly.
Apr 25th, 2024 19:20 EDT
change timezone
Latest GPU Drivers
New Forum Posts
- Best SSD for system drive (80)
- Core PL1 + GPU PL1 + Ring EDP OTHER (9)
- Which new games will you be buying? (315)
- BSOD if I touch the pcache offset voltage in throttlestop (i9-13900hx lenovo pro 7i) (23)
- Alphacool CORE 1 CPU block - bulging with danger of splitting? (16)
- How to check flatness of CPUs and coolers - INK and OPTICAL INTERFERENCE methods (112)
- TPU's Nostalgic Hardware Club (18464)
- Post your Cinebench 2024 score (450)
- Ubuntu 24.04 LTS released (2)
- Dell Workstation Owners Club (3054)
Popular Reviews
- Fractal Design Terra Review
- Thermalright Phantom Spirit 120 EVO Review
- Corsair 2000D Airflow Review
- Minisforum EliteMini UM780 XTX (AMD Ryzen 7 7840HS) Review
- ASUS GeForce RTX 4090 STRIX OC Review
- NVIDIA GeForce RTX 4090 Founders Edition Review - Impressive Performance
- ASUS GeForce RTX 4090 Matrix Platinum Review - The RTX 4090 Ti
- MSI GeForce RTX 4090 Suprim X Review
- MSI GeForce RTX 4090 Gaming X Trio Review
- Gigabyte GeForce RTX 4090 Gaming OC Review
Controversial News Posts
- Sony PlayStation 5 Pro Specifications Confirmed, Console Arrives Before Holidays (117)
- Windows 11 Now Officially Adware as Microsoft Embeds Ads in the Start Menu (106)
- NVIDIA Points Intel Raptor Lake CPU Users to Get Help from Intel Amid System Instability Issues (106)
- AMD "Strix Halo" Zen 5 Mobile Processor Pictured: Chiplet-based, Uses 256-bit LPDDR5X (101)
- US Government Wants Nuclear Plants to Offload AI Data Center Expansion (98)
- AMD's RDNA 4 GPUs Could Stick with 18 Gbps GDDR6 Memory (87)
- Developers of Outpost Infinity Siege Recommend Underclocking i9-13900K and i9-14900K for Stability on Machines with RTX 4090 (85)
- Windows 10 Security Updates to Cost $61 After 2025, $427 by 2028 (84)