 0
0
Nanoxia Deep Silence 3 Review
Value & Conclusion »Assembly

Installing the motherboard within the Deep Silence 3 is done with the supplied spacers and screws. The cooler and a large graphics card fit into the chassis well, with plenty of room to the right and down below. One additional, non-functional difference between the DS2 and DS3 is the fact that the motherboard tray does not extend all the way to the drive bays in the front, leaving a gap which you will have to bridge with various cables. In an attempt to reduce the chance of a cable mess, I actually re-routed all the cables through a single opening in the front to then pull these cables across the gap.


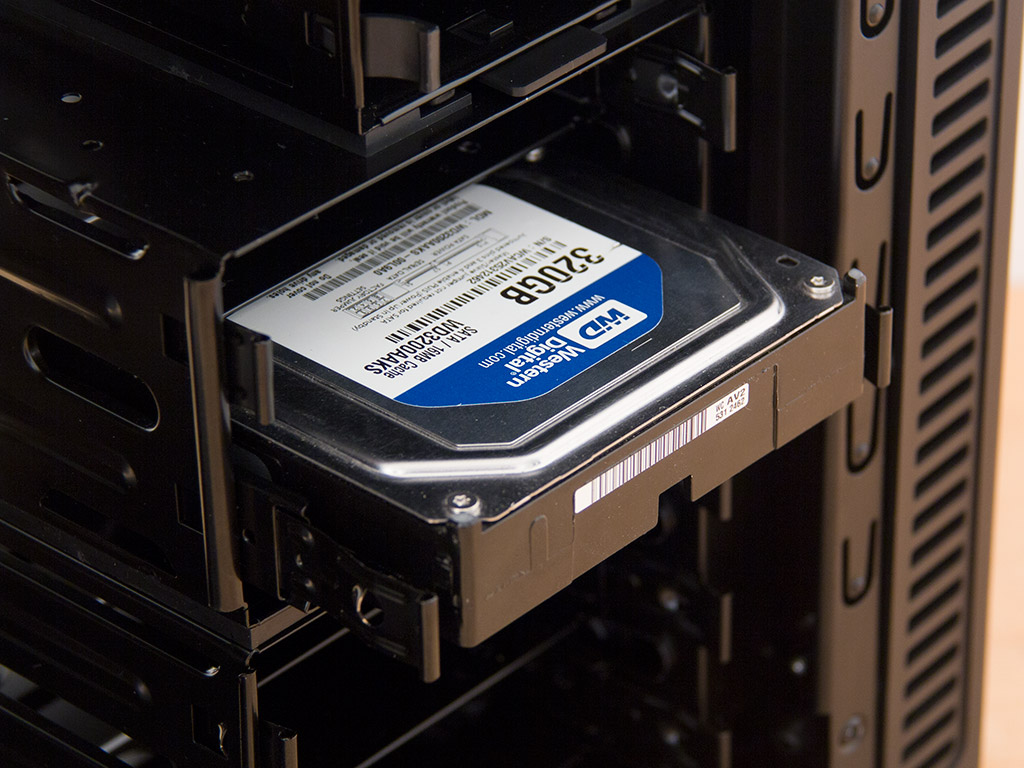
Each 3.5" hard drive needs to be placed on one of the metal hard-drive trays. You will have to use tools to attach them to the tray - regardless of whether you go for 2.5" or 3.5" drives. Once filled, slide the tray into the chassis until it snaps down firmly.


With the introduction of 2.5" trays, Nanoxia also changed materials, as these are out of plastic, unlike the larger variant. This is not a big deal since these only hold SSDs or other small hard drives, and those will fit well enough. Just like with larger storage units, you will have to secure these with screws to then slide them into the bay of your choice.
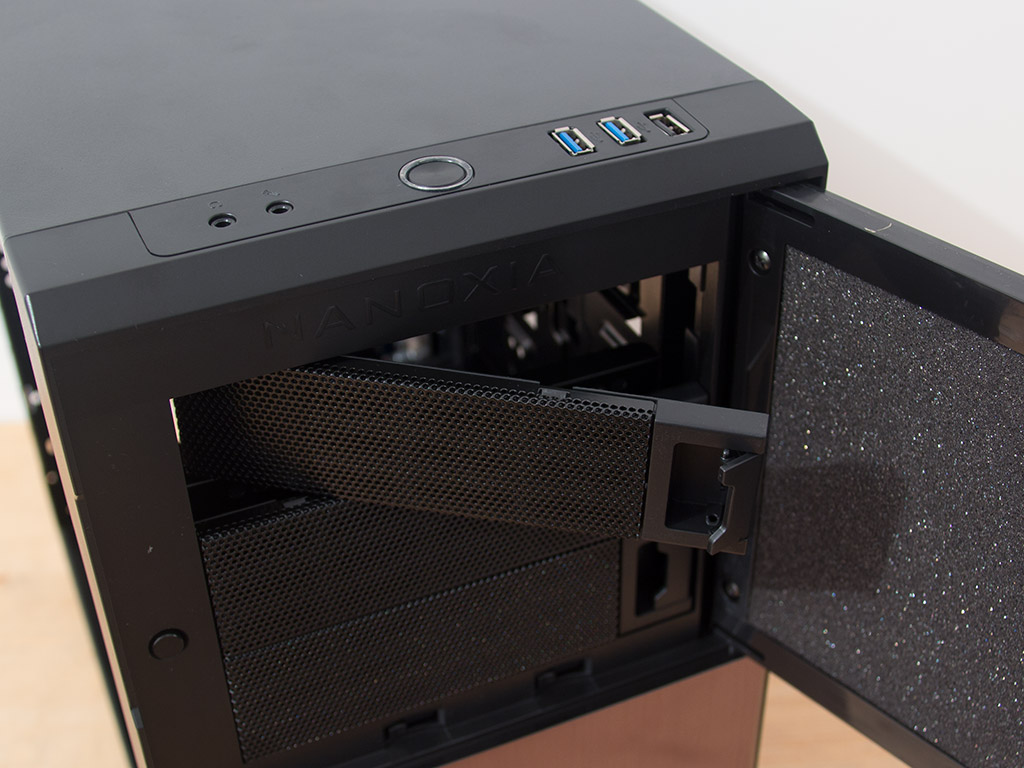


Installing an optical drive is quite simple and does not require any screws or tools. Simply remove the cover of your choice, slide the drive into place, and use the locks on each side to secure it in place. These hold quite well; you can rest assured that you optical drive will not move around, but while these locks do hold the drive in place, there is also a tiny bit of wiggle room. You should secure the drive with a single screw to eliminate any vibrations as it operates.

You will still need to use traditional screws to secure the PSU. There is plenty of space, so you could, for example, install a long unit and use the near-by HDD socket for a small drive.

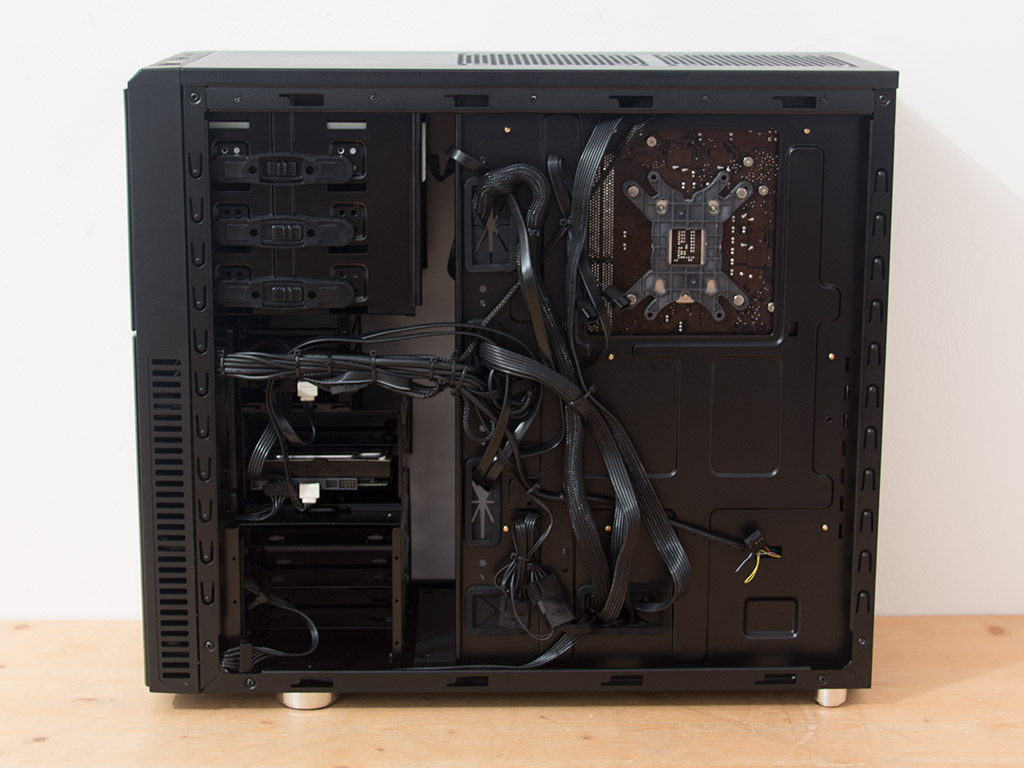
With everything in place, the chassis looks very clean. While this is due to the fact that all cables have been hidden behind the motherboard tray, you do have to invest some time and imagination into utilizing the aforementioned gap as little as possible. Such a look would not be possible without as many openings and hooks to secure the cables onto properly with zip ties.
Finished Looks


Once the side panels have been put back onto the chassis and its power button has been pushed, the Deep Silence 3 does a great job of encapsulating noise. There are no fans with fancy LEDs or other gimmicks as all major panels are completely solid. You may also use an optical drive of any color as the door will hide it nicely. The only visual cue that it has been turned on is its green LED, shining through as a green ring of light around the power button. Turning the chassis around, everything is readily accessible, being where you would expect it to be.
Jul 29th, 2025 16:46 CDT
change timezone
Latest GPU Drivers
New Forum Posts
- Weird issue with Worms: Armageddon on NV GPUs (6)
- 3D Printer Club (574)
- Dell Workstation Owners Club (3338)
- RX6800XT Gigabyte Gaming OC not giving image while being on "OC" switch and even sometimes while being on "silent" switch. (4)
- 2022-X58/1366 PIN Motherboards NVME M.2 SSD BIOS MOD Collection (949)
- Looking To Make List Of Keyboard Manufacturers (23)
- Kindly help me to complete my new PC build... (22)
- Upgrade from old x58 system (57)
- 6400c30 vs 8000c36 Ryzen 9800X3D (39)
- AI Job Losses: let's count the losses up, total losses to AI so far 94,000 and counting (79)
Popular Reviews
- Herman Miller Logitech G Embody Review - No Pain, No Gain
- Lian Li O11 Dynamic Mini V2 Review
- Lenovo Legion 5i (15IRX10) Review - Feature-Rich and Wallet Friendly
- Upcoming Hardware Launches 2025 (Updated May 2025)
- MSI Claw 8 AI+ A2VM Review
- Noctua NF-A12x25 G2 PWM Fan Review
- Sapphire Radeon RX 9060 XT Pulse OC 16 GB Review - An Excellent Choice
- AMD Ryzen 7 9800X3D Review - The Best Gaming Processor
- AQIRYS Sirius Pro Review
- VAXEE XE V2 Wireless Review
TPU on YouTube
Controversial News Posts
- AMD's Upcoming UDNA / RDNA 5 GPU Could Feature 96 CUs and 384-bit Memory Bus (134)
- AMD Radeon RX 9070 XT Gains 9% Performance at 1440p with Latest Driver, Beats RTX 5070 Ti (131)
- NVIDIA GeForce RTX 5080 SUPER Could Feature 24 GB Memory, Increased Power Limits (115)
- Intel "Nova Lake-S" Core Ultra 3, Ultra 5, Ultra 7, and Ultra 9 Core Configurations Surface (110)
- DDR6 Memory Arrives in 2027 with 8,800-17,600 MT/s Speeds (100)
- AMD Sampling Next-Gen Ryzen Desktop "Medusa Ridge," Sees Incremental IPC Upgrade, New cIOD (97)
- Intel CEO Confirms SMT To Return to Future CPUs (95)
- NVIDIA Becomes First Company Ever to Hit $4 Trillion Market-Cap (94)