 19
ASUS ROG Crosshair X870E Glacial Review - A Masterpiece
Component Analysis »Board Layout
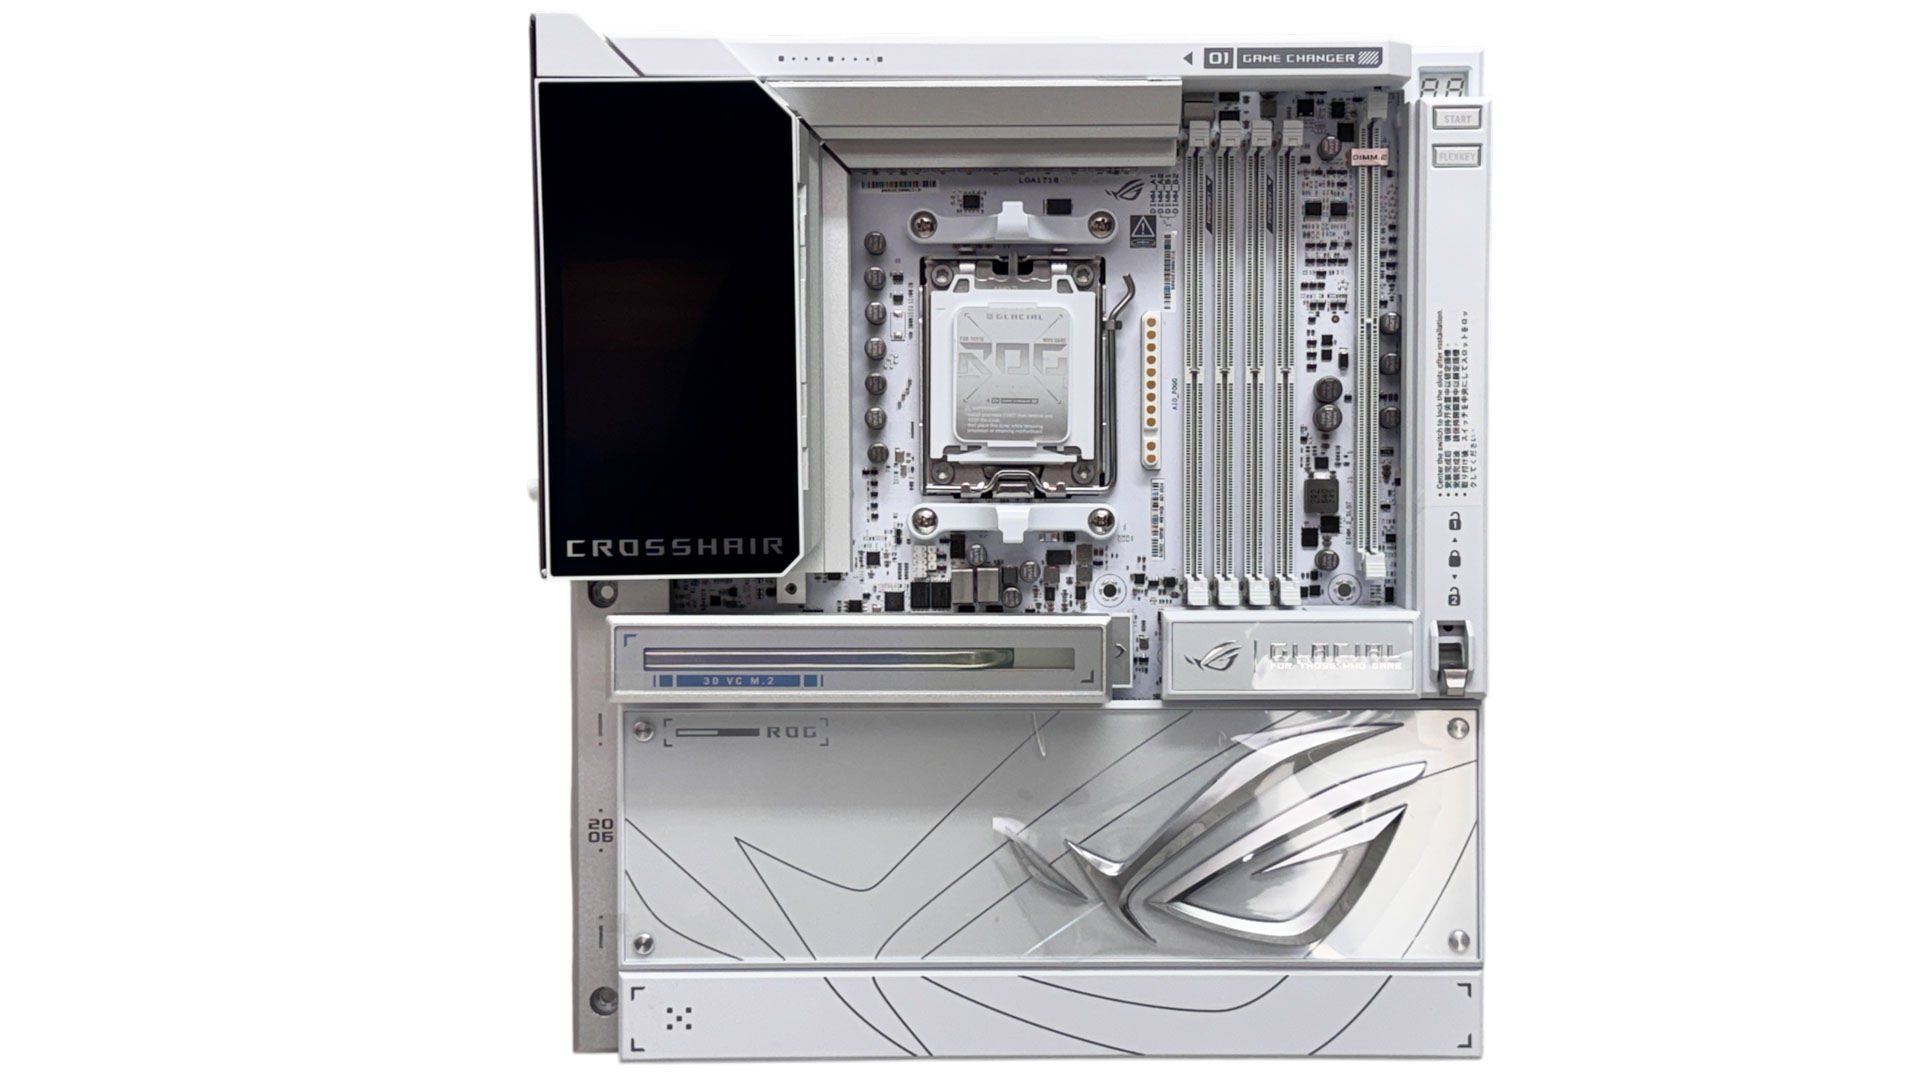
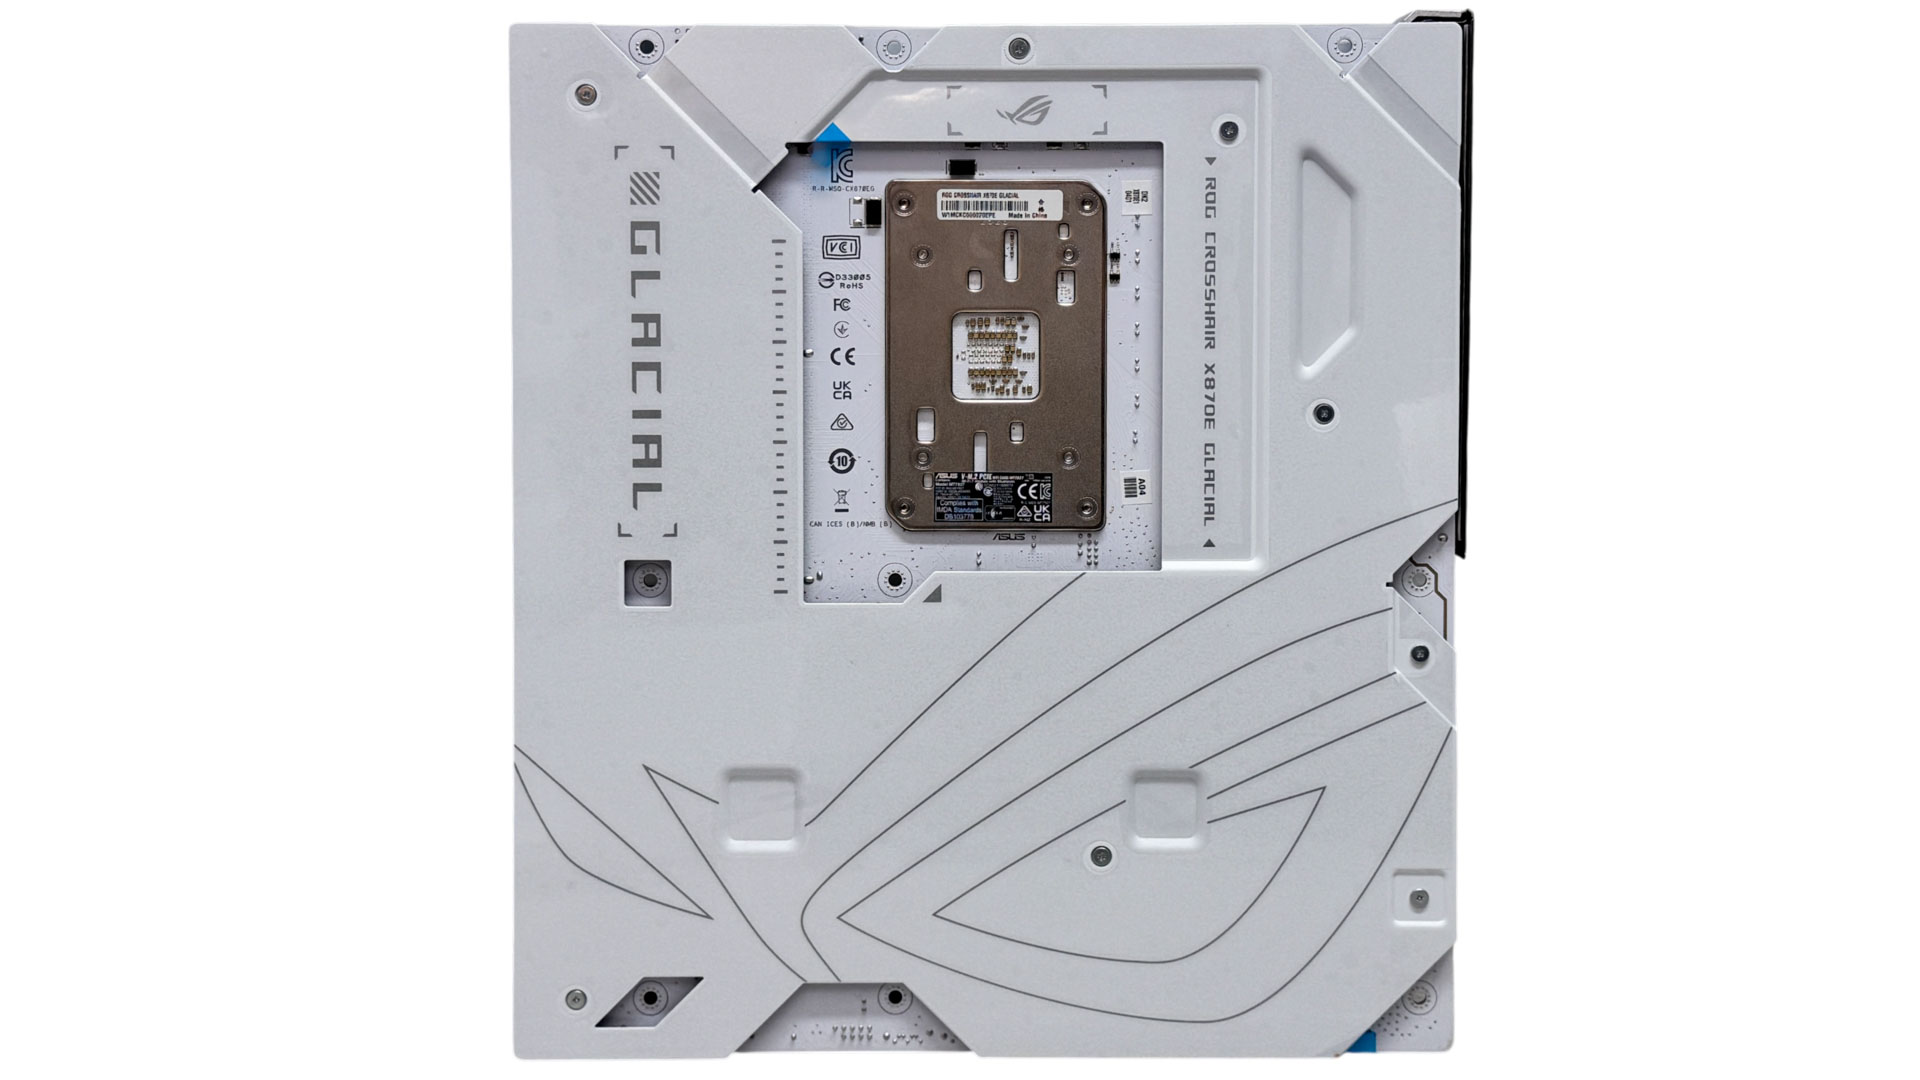
You'll need a case that supports EATX motherboards for starters and probably something that allows the large display to be visible too. More on that later. The PCIe slots are covered here by a large magnetic plate that's mostly redundant if you need to access the PCIe slots, but can be attached to your case using magnets. The ROG Crosshair X870E Glacial is absolutely stunning with huge imposing heatsinks, a full white design and one of the largest displays we've seen on a motherboard along with a full-cover backplate.
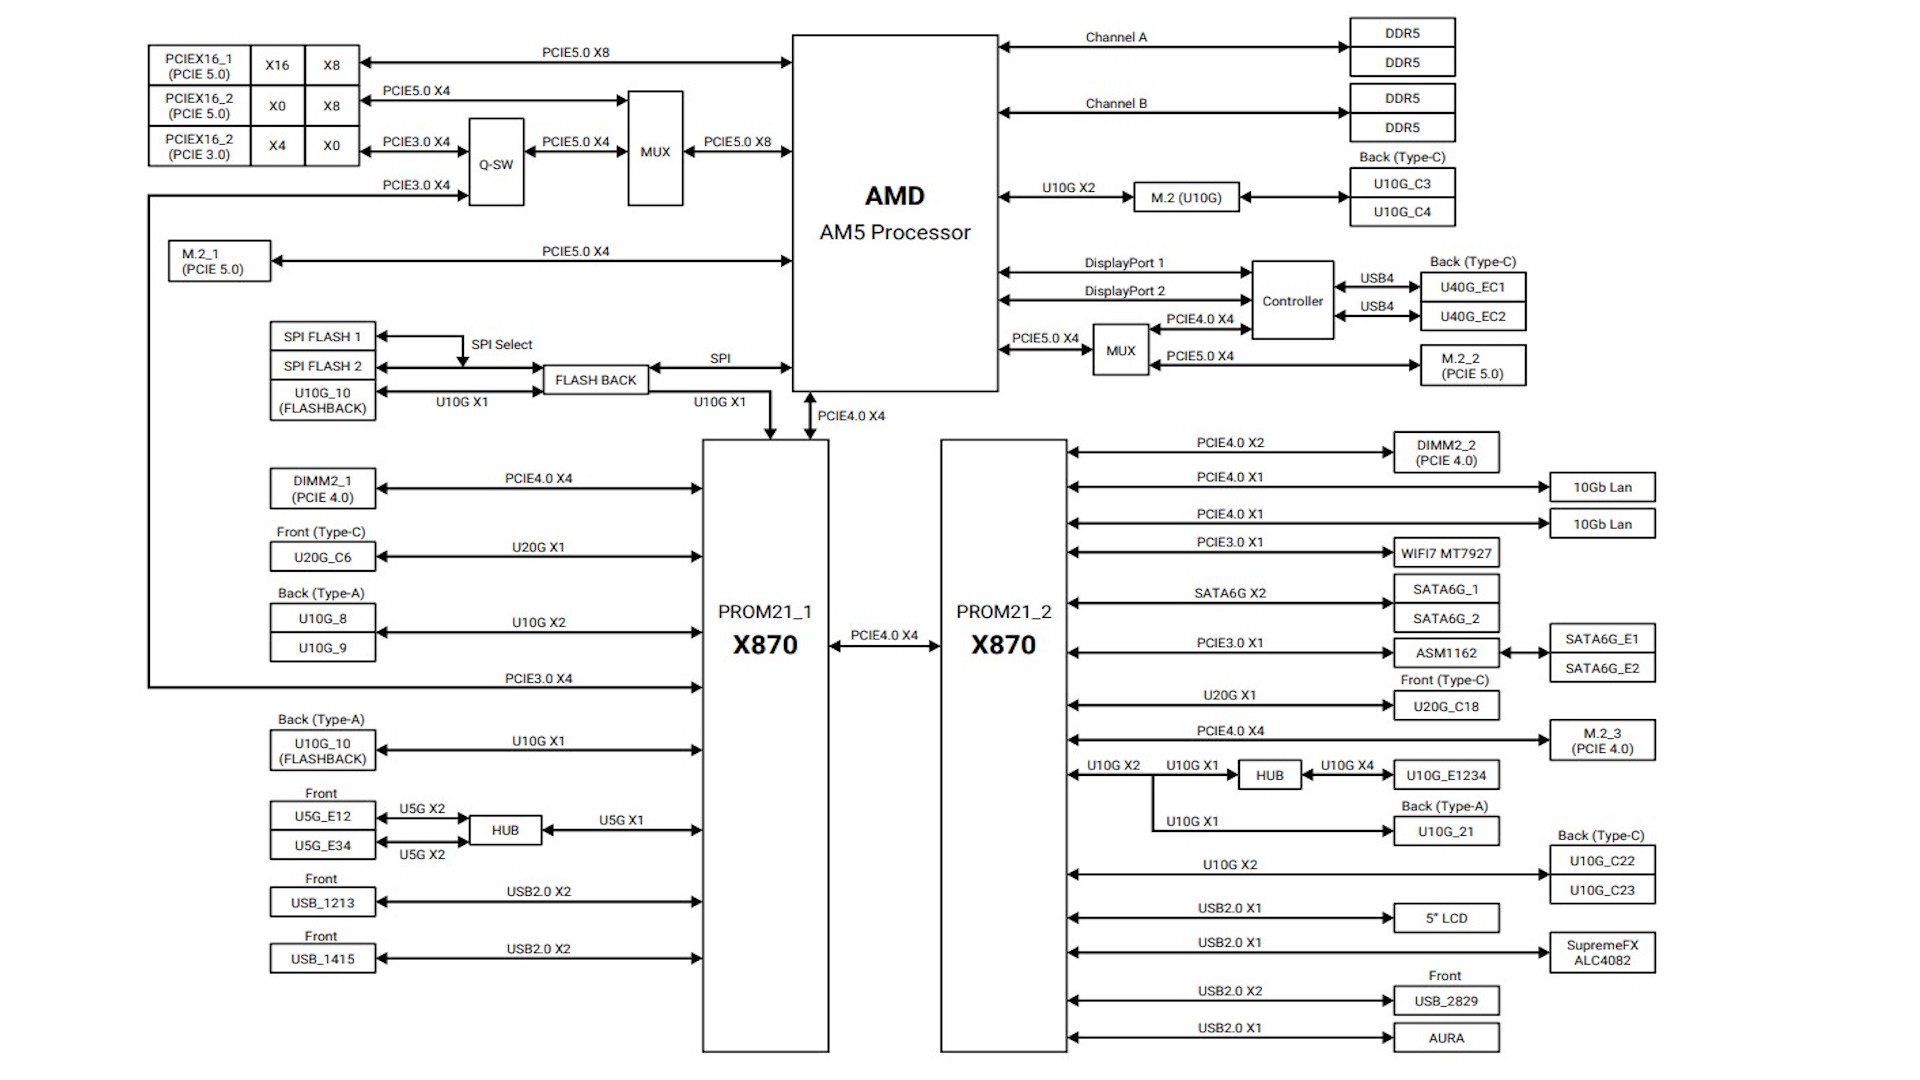

There are three M.2 ports on the PCB itself, with the first and second being PCIe Gen 5-capable and the third PCIe Gen 4. A further four are available with the ROG Q-DIMM.2 and ROG Hyper M.2 Card, the latter offering a pair of PCIe Gen 5 M.2 ports. Both PCIe slots are Gen 5, but with full bandwidth going to your GPU, the second slot will be limited to PCIe 3.0 x4. Dropping the primary slot to eight lanes allows the second to stretch its legs and run at PCIe Gen 5 x8, in turn offering maximum bandwidth to a pair of PCIe Gen 5 SSDs in the expansion card for example. The second PCIe Gen 5 port also shares bandwidth with the USB4 ports. Both default to x2 mode when used at the same time, so any x4 SSD will be cut to 50% speed unless you manually force the slot to operate at x4, which disables the USB4 ports.
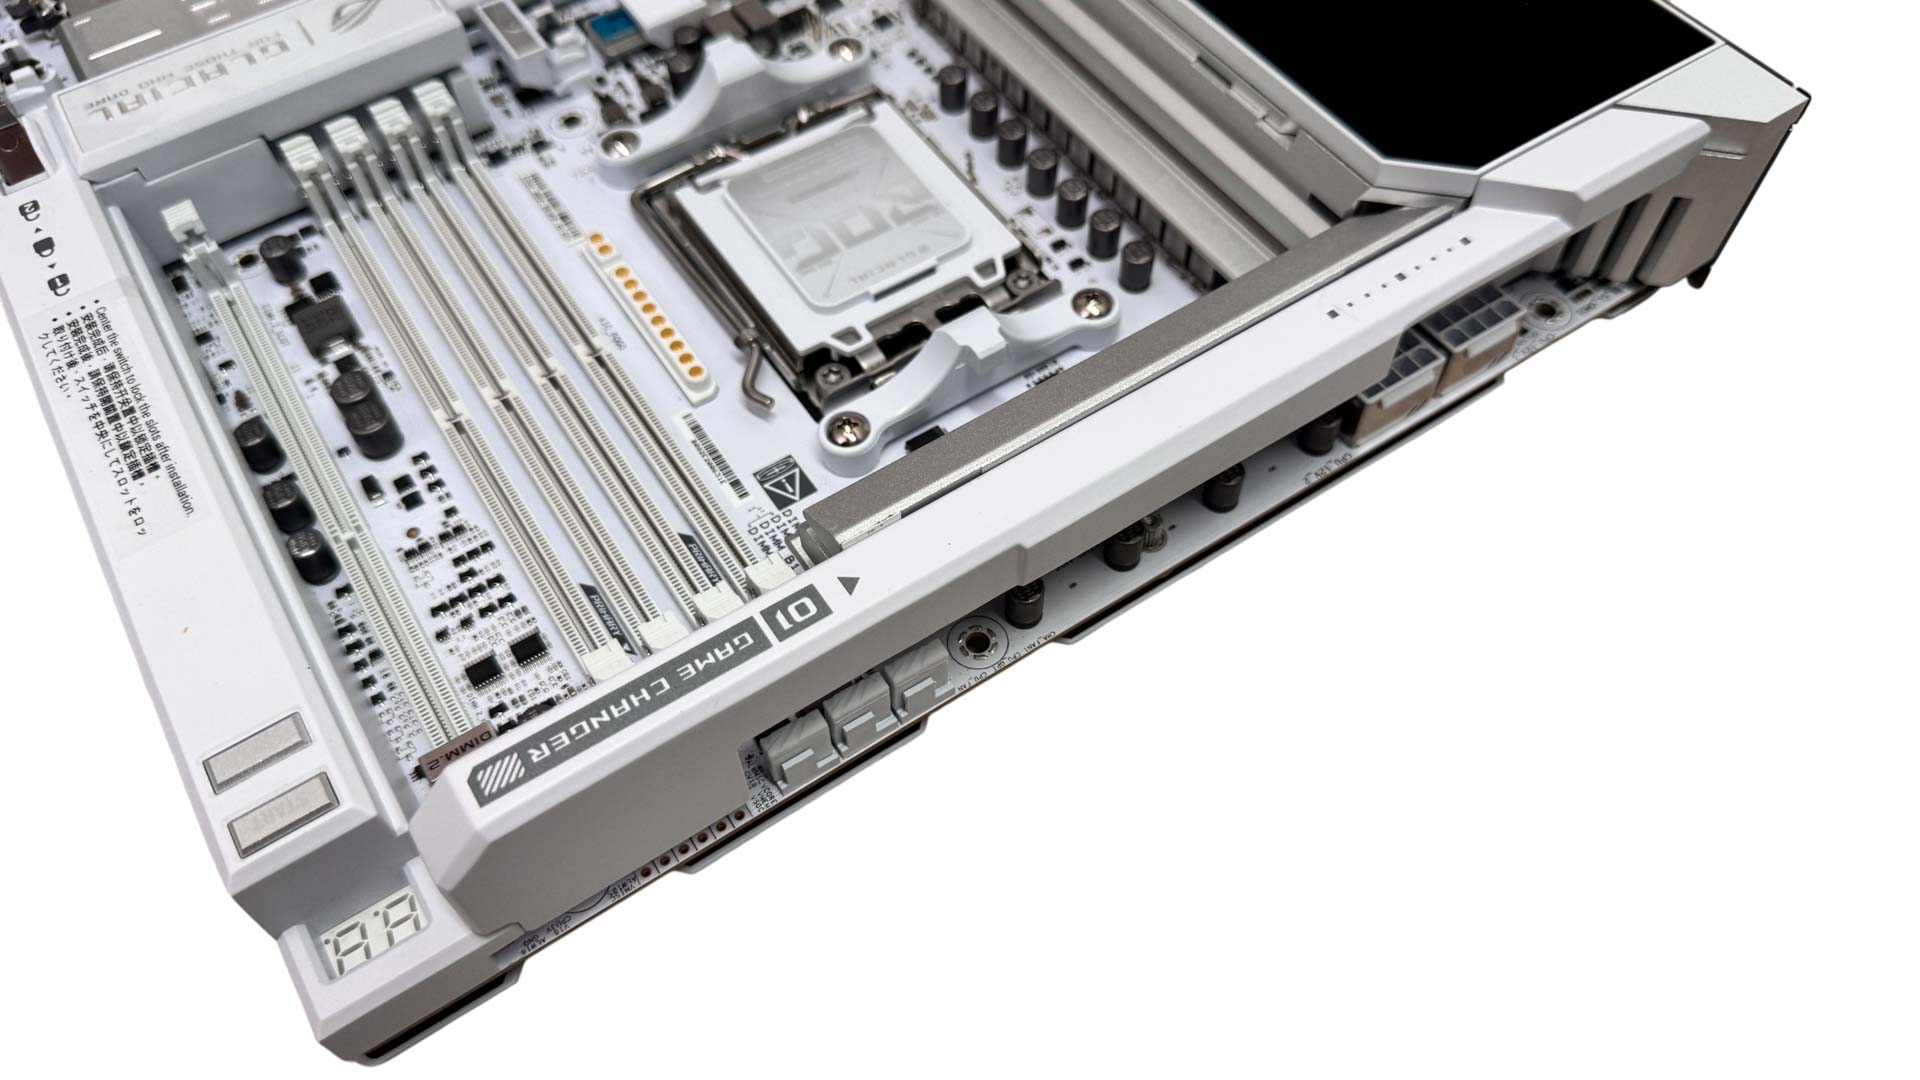
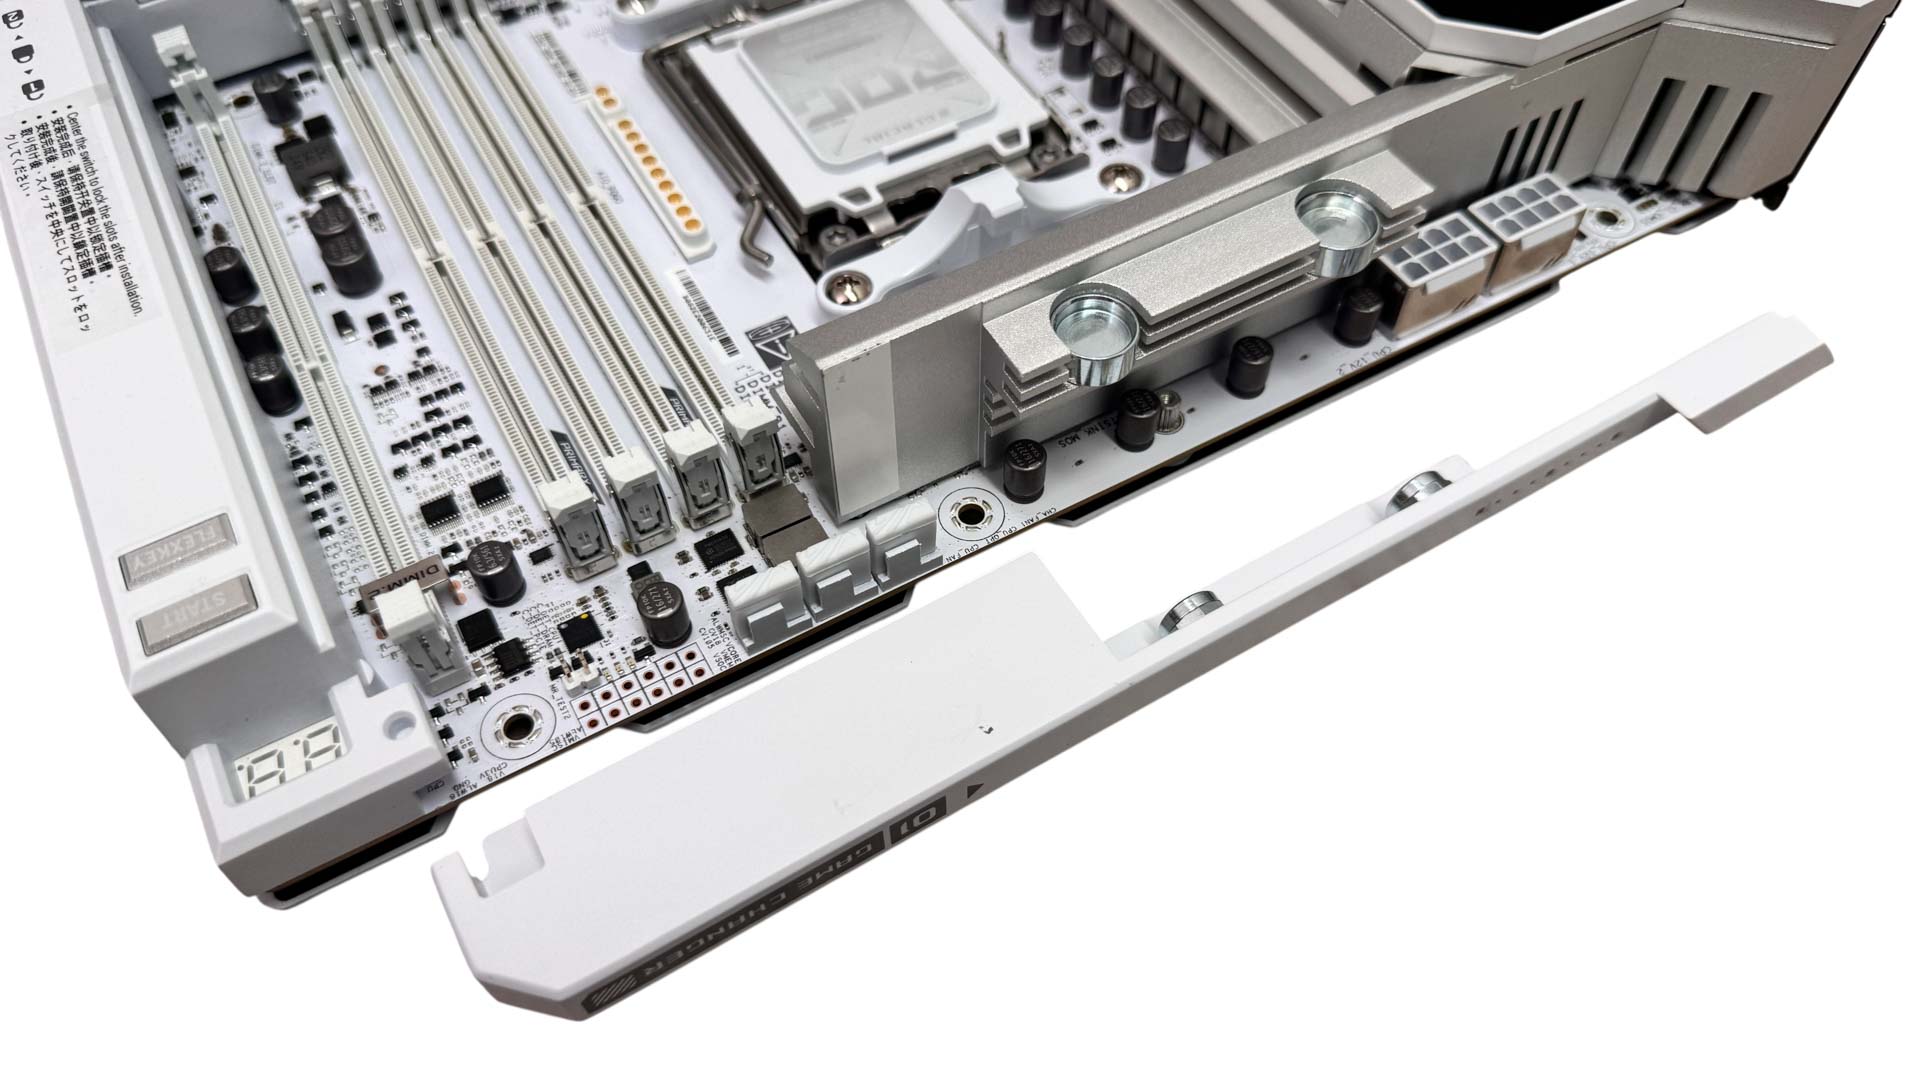
One of the ROG Crosshair X870E Glacial's party pieces are its numerous magnetic panels. These can be removed entirely, or as is the case with the one at the top of the PCB, provide access to various ports and headers, but then sit back on top with cables routed at angles underneath. This helps to cover the vast majority of these unsightly ports and the magnets provide a decent amount of force to prevent the panel from being lifted by any stiff cables.
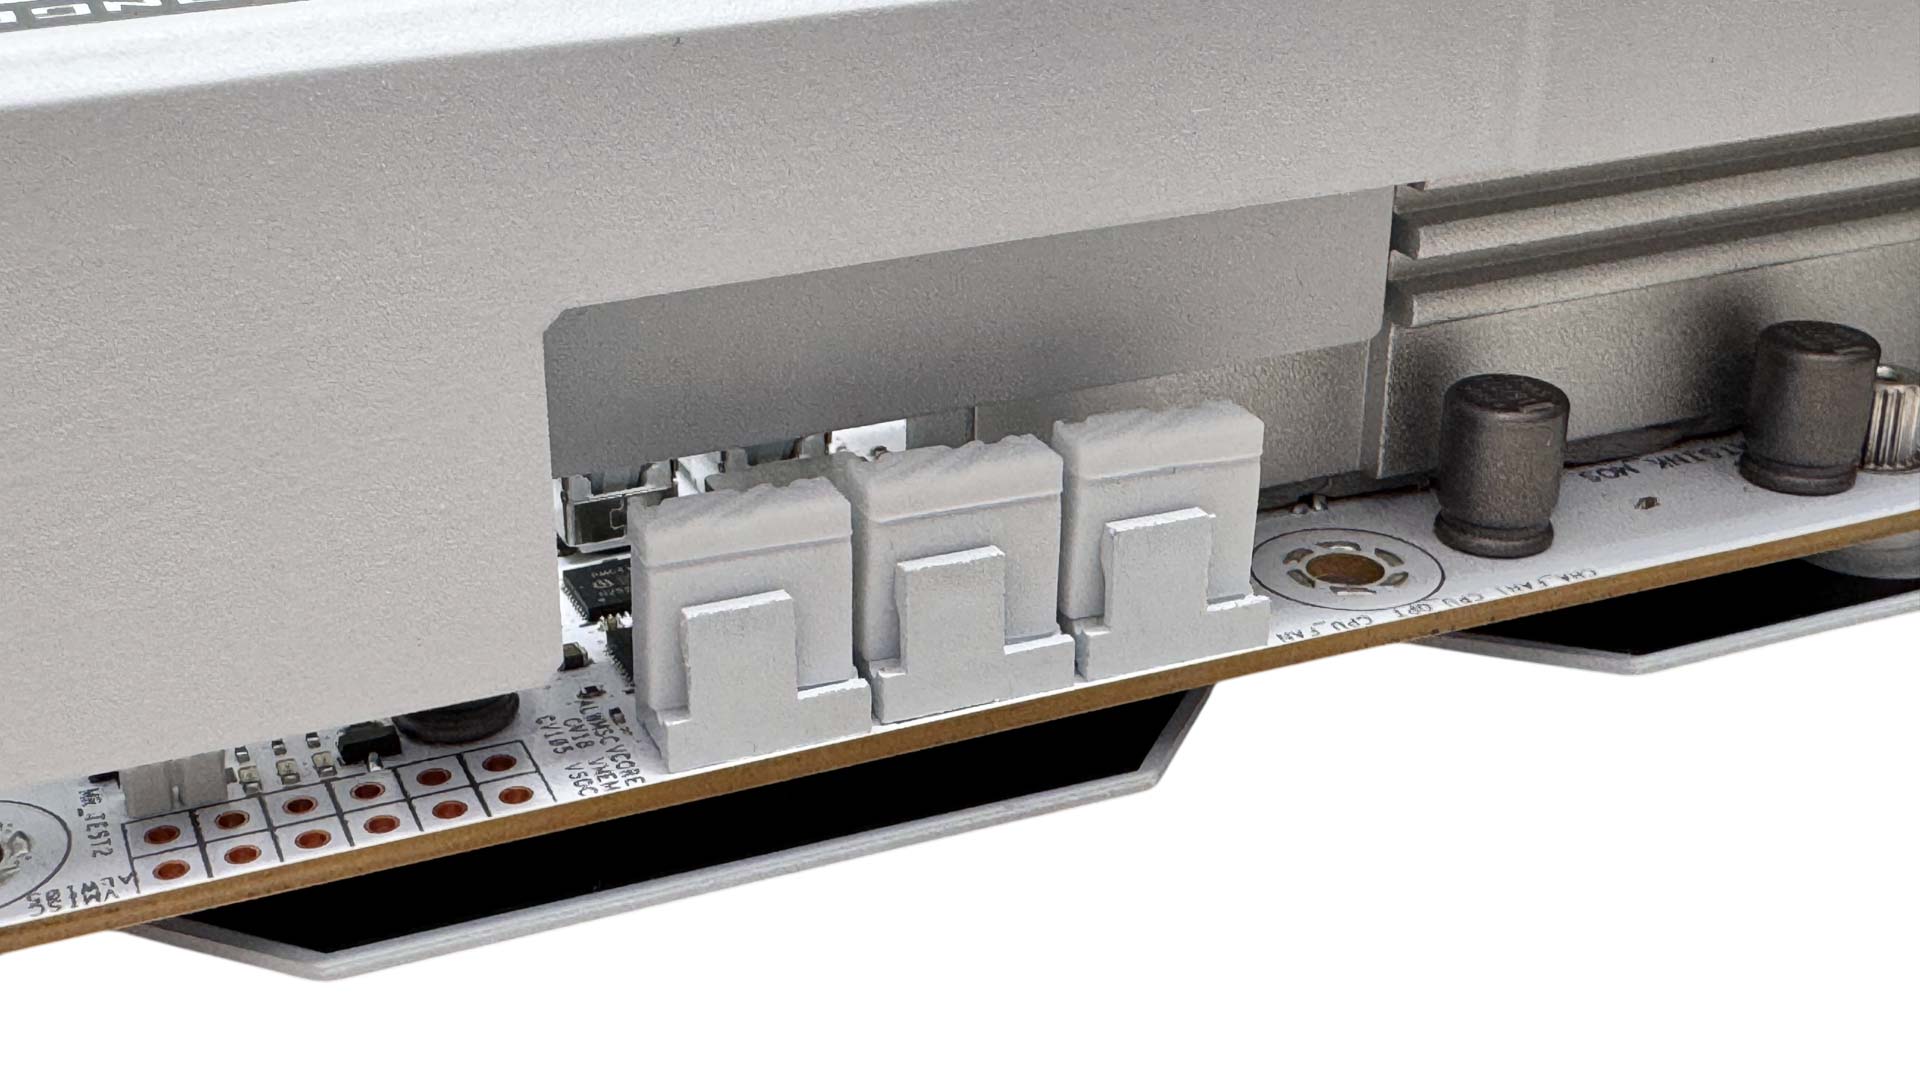

The top of the PCB has three fan headers underneath this plate, but removing it does allow access to more extreme features such as the voltage measuring points above. By day the board can hide these, but the idea is it can shed its various covers and turn into an extreme overclocking and benchmarking machine at weekends. There are eight 4-pin fan headers in total on the PCB, all offering 12 W/1 A except for two W_PUMP connectors that offer 36 W/3 A each. There are also two 3-way fan splitter cables, essentially adding four fans to that number.
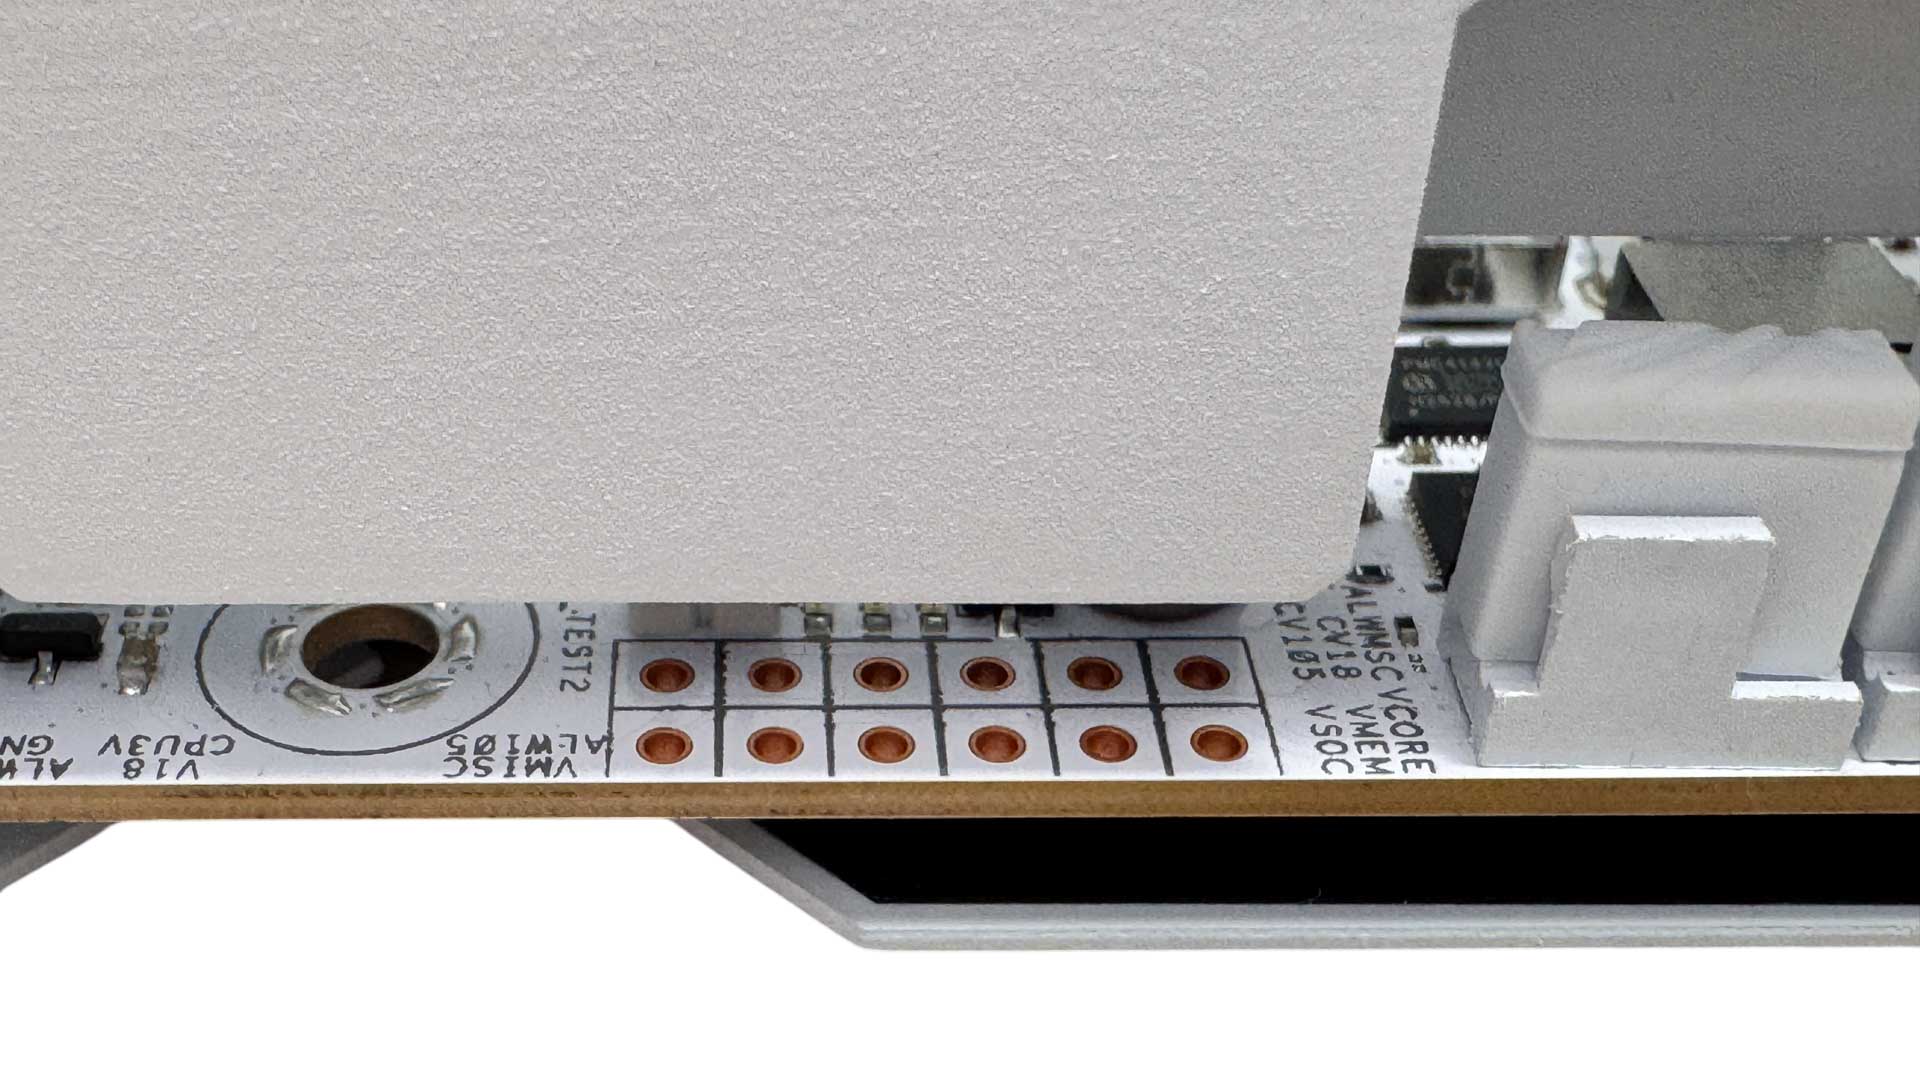
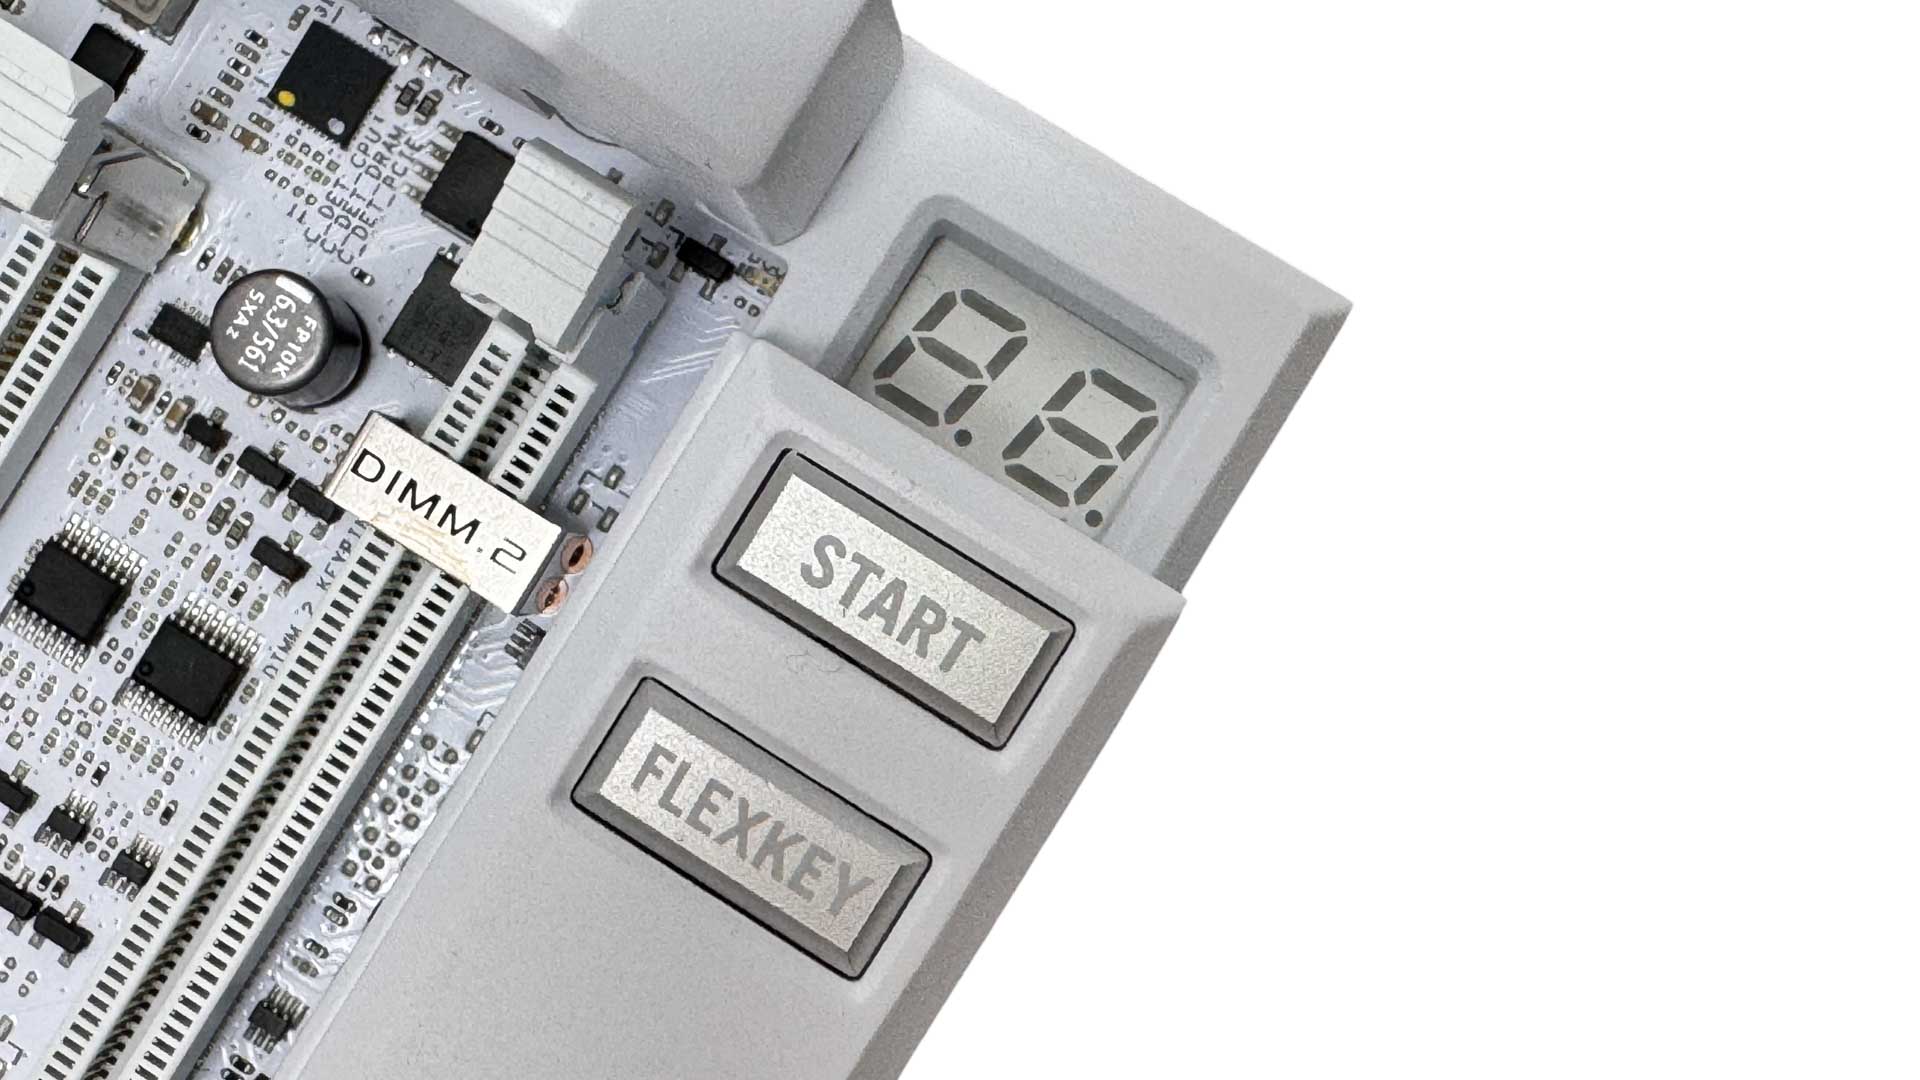
Along from the voltage measuring points we have an LED POST code display plus power and reset buttons, with the latter actually a customizable Flexkey that can be configured in the EFI to perform other tasks.
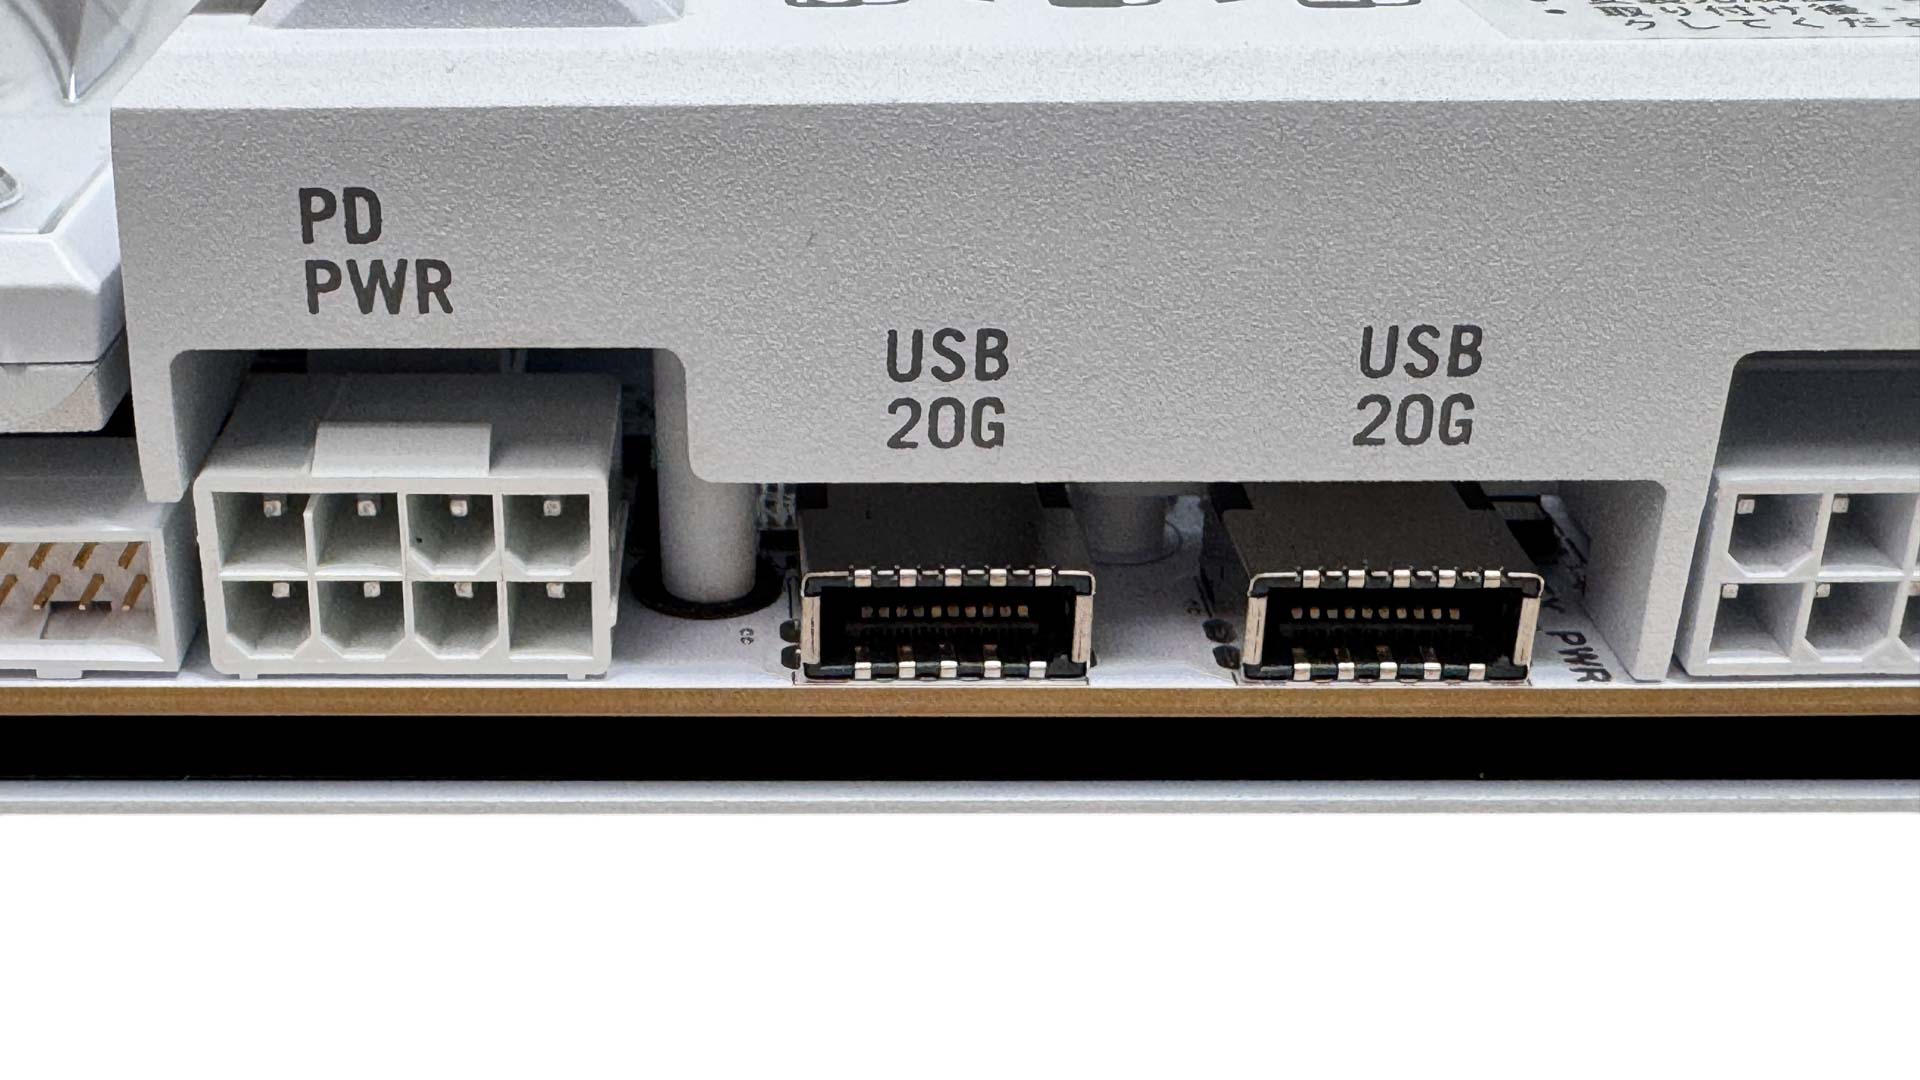
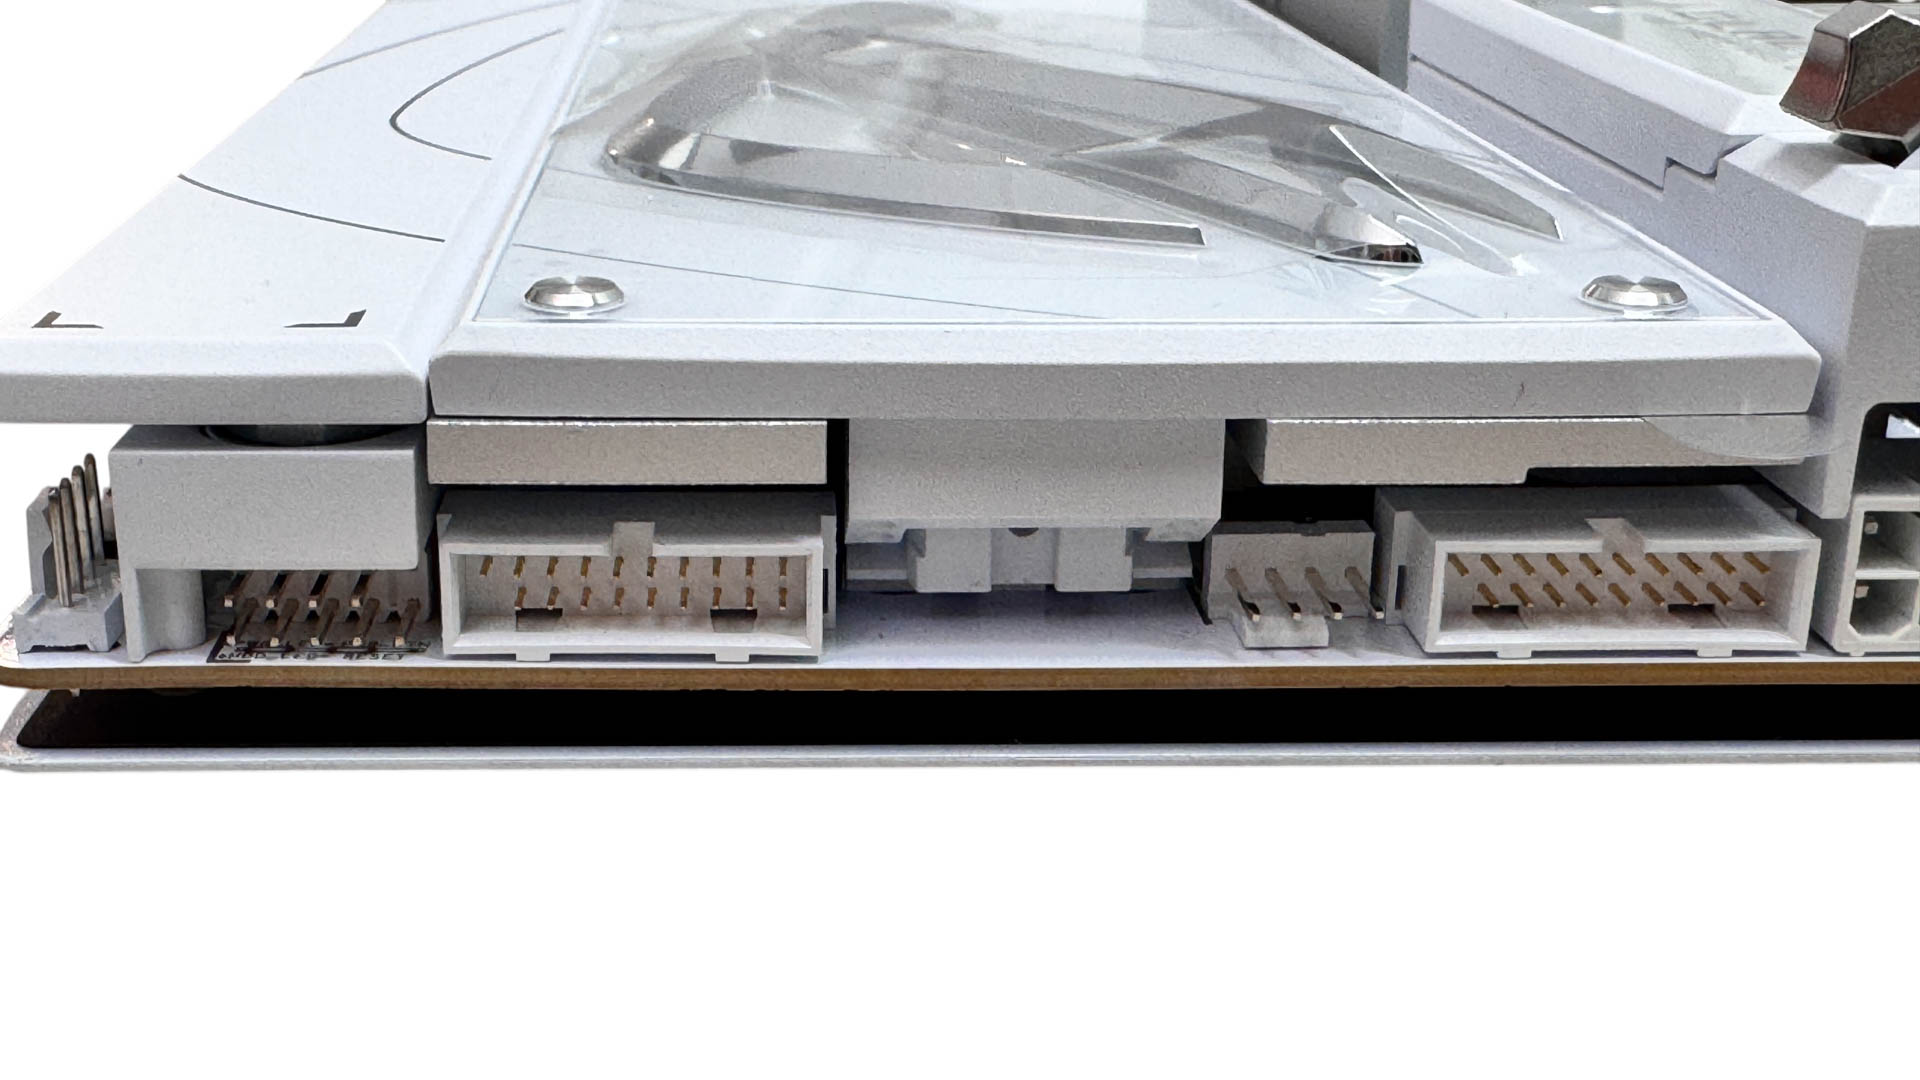
Both Type-C front panel headers support USB 3.2 Gen 2x2 20 Gbps, while the top header also offers PD 3.0/QC 4+ support with up to 60 W power delivery. For this you'll need to hook up an 8-pin PCIe power cable to the PD PWR port. Along from these we have a pair of USB 3.0 headers, another 4-pin fan header and front panel header, which can be used in conjunction with the Q-connector accessory.
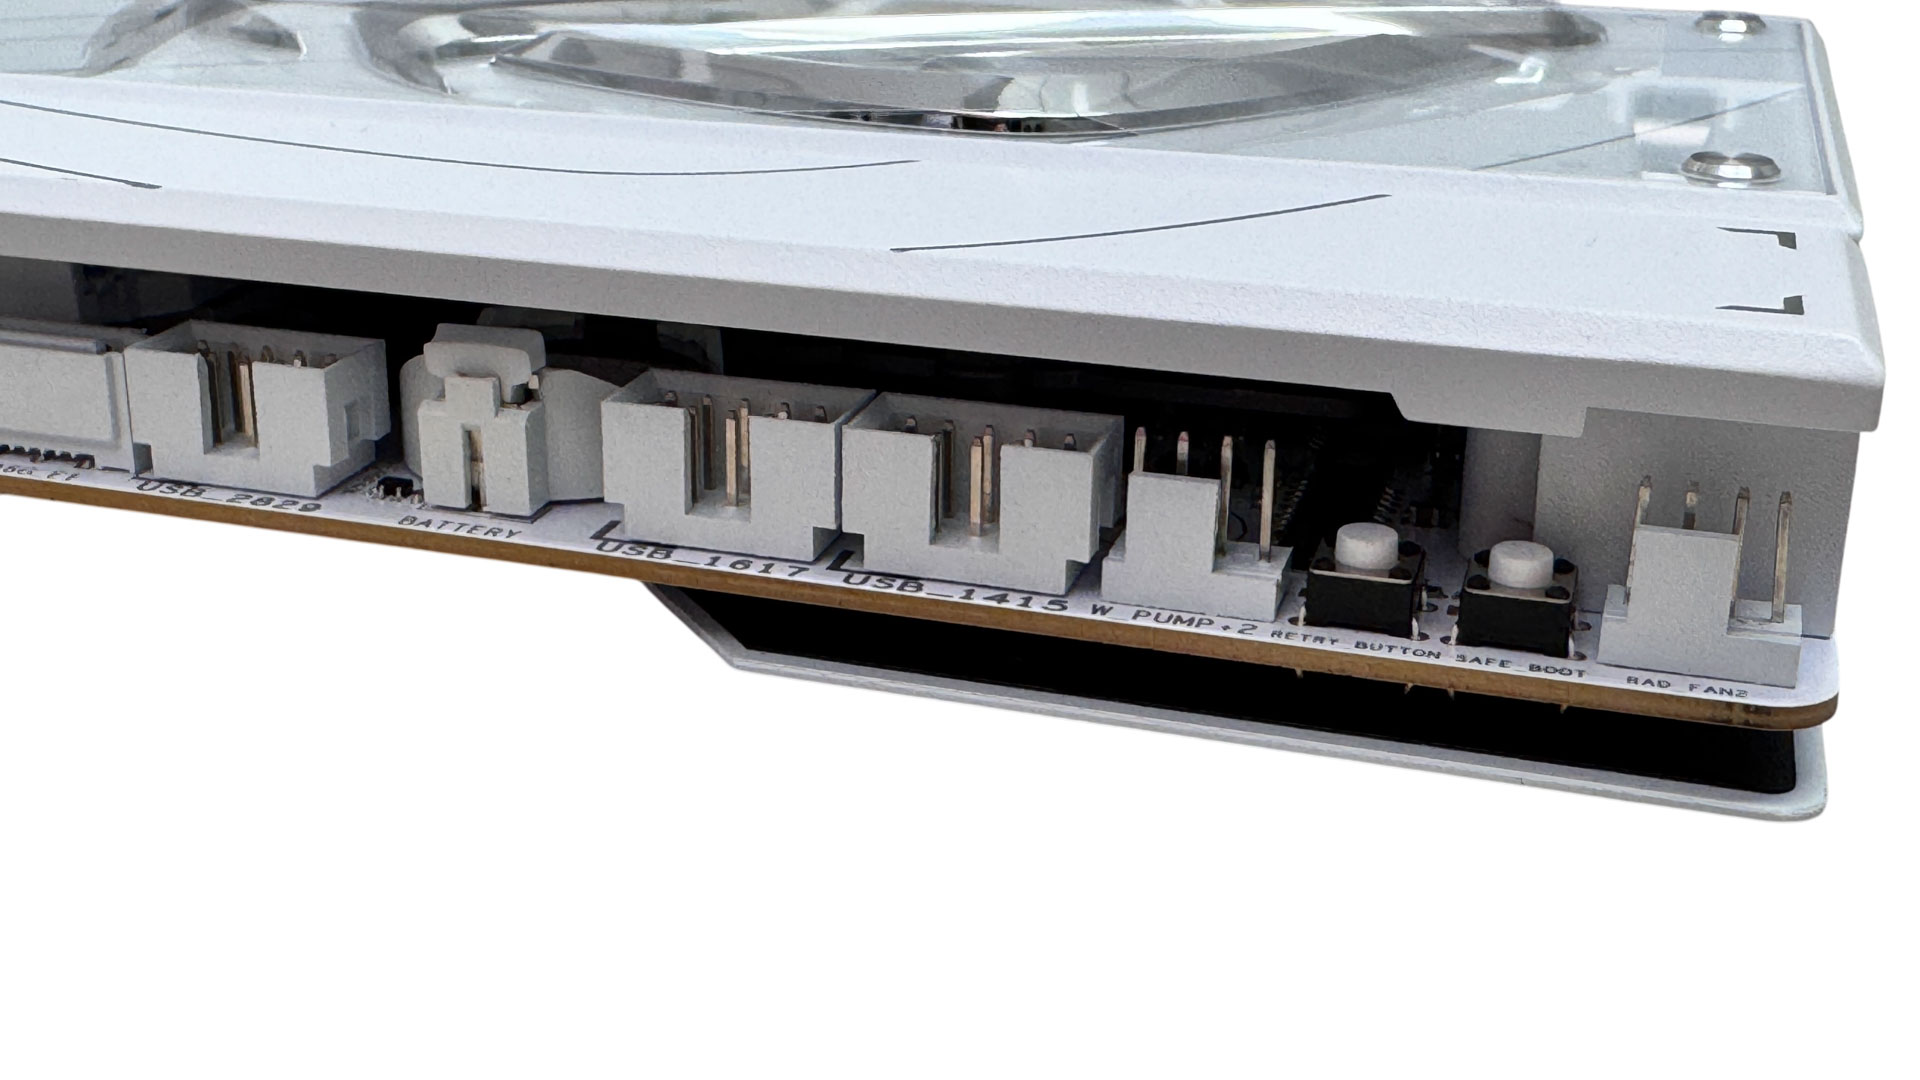
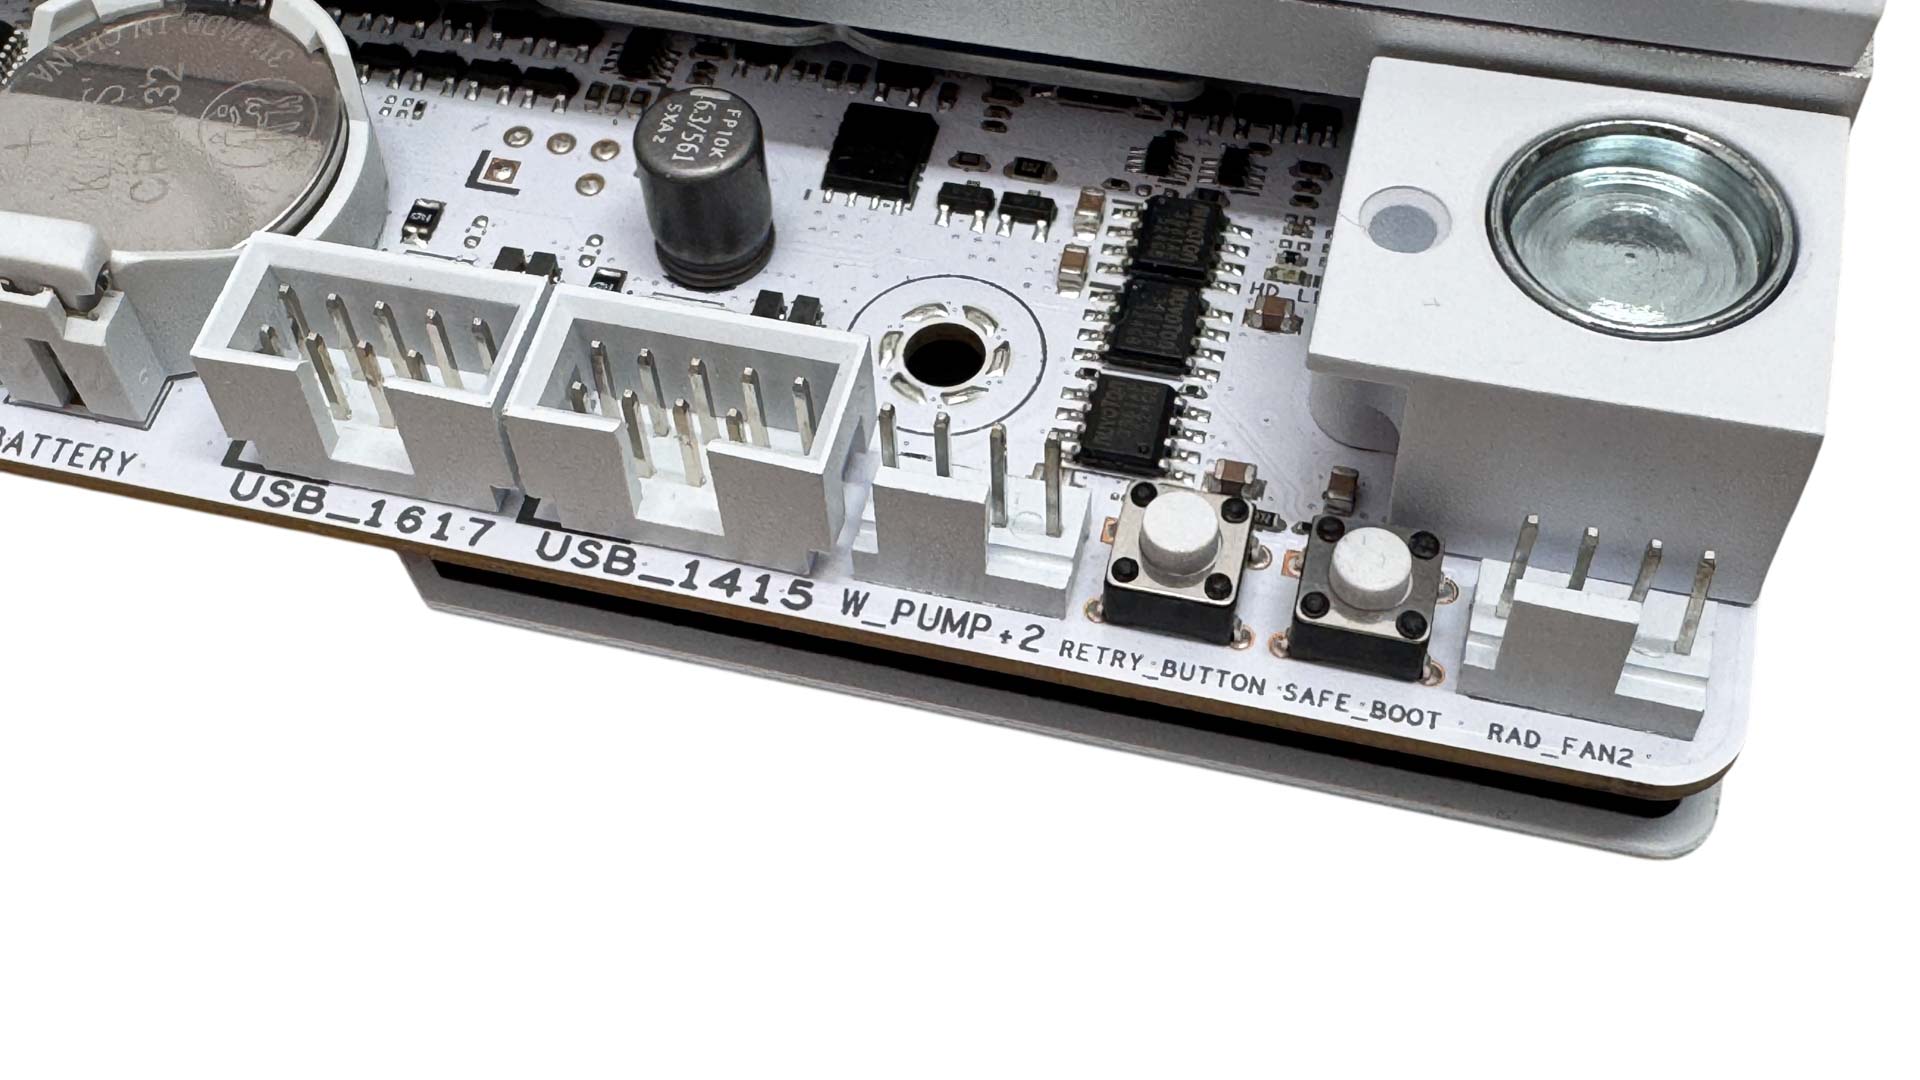
Another magnetic plate covers the entire width of the base of the PCB. Some headers here may well need its removal anyway, such as the USB 2.0 headers, but there's a good chance it might still be able to sit in place. We have another couple of fan headers here, extreme overclocking-orientated retry and safe boot buttons and a total of three USB 2.0 headers.
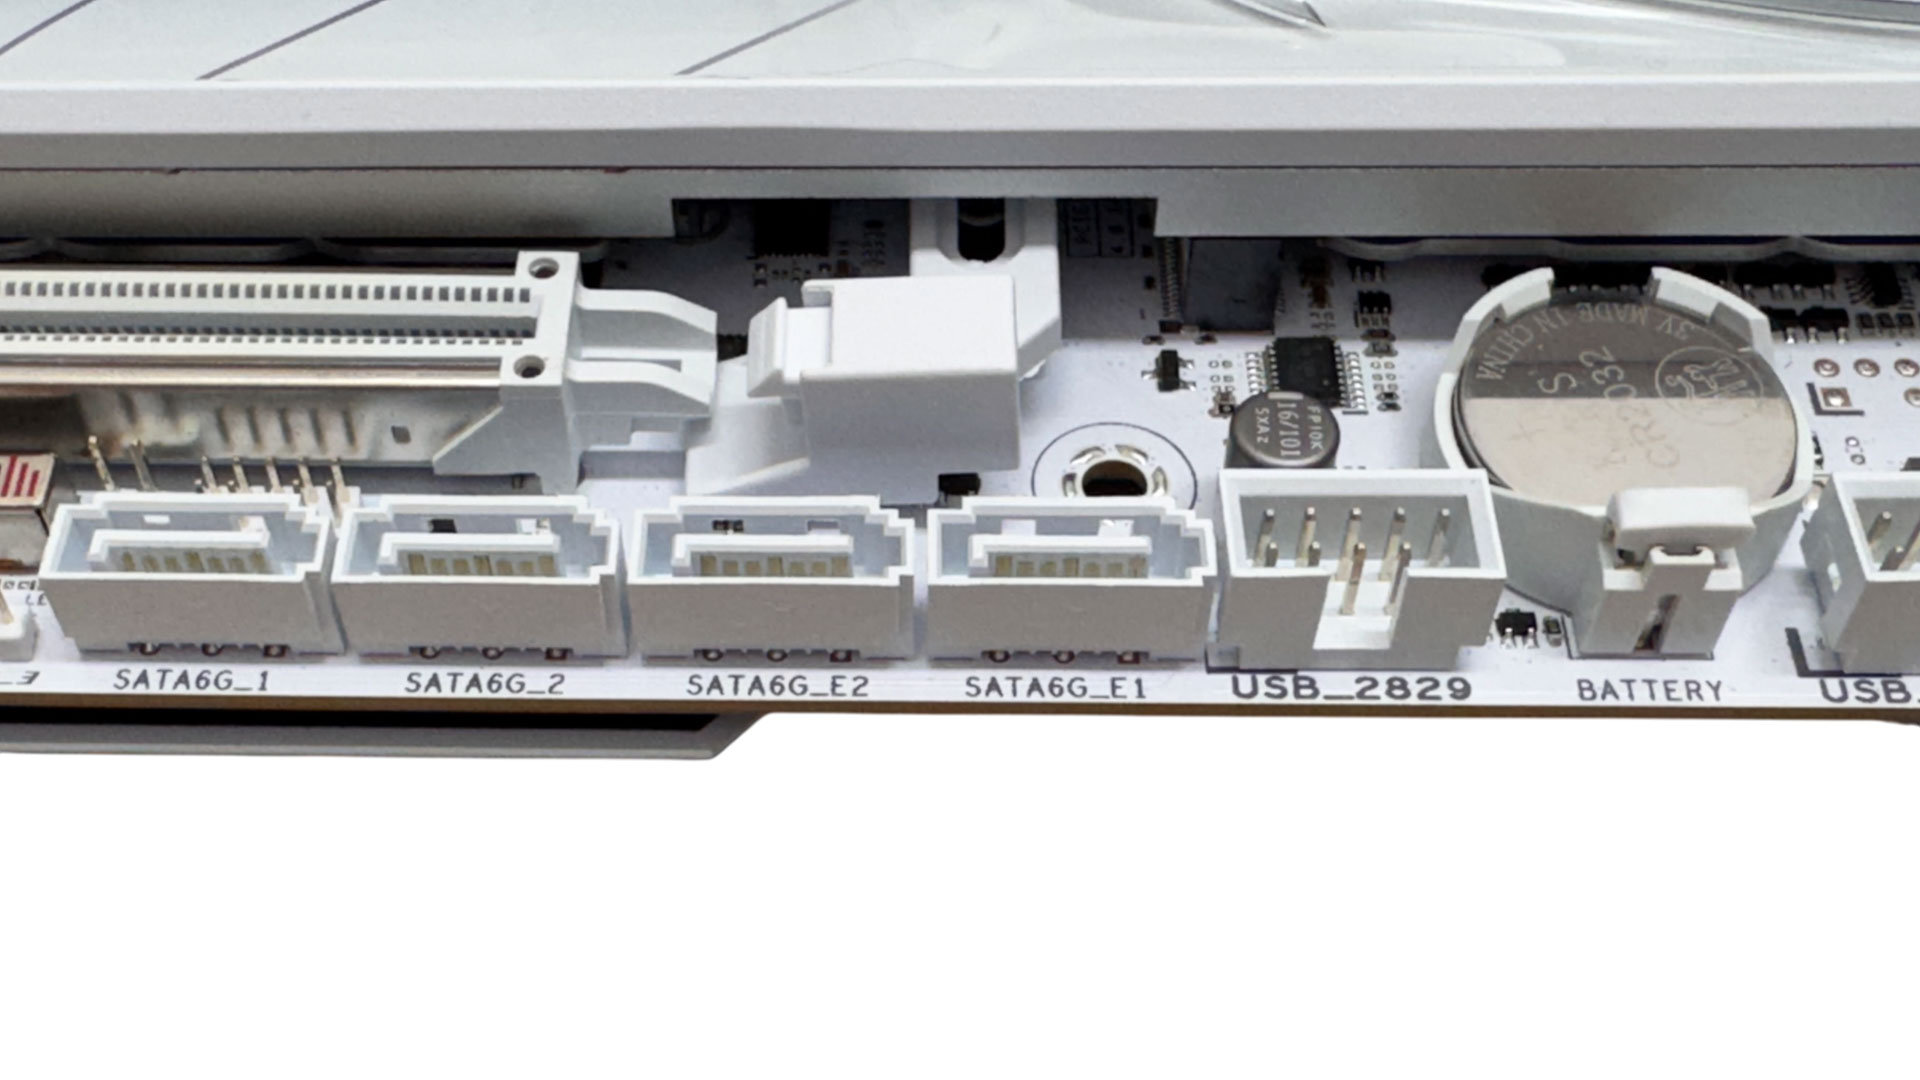
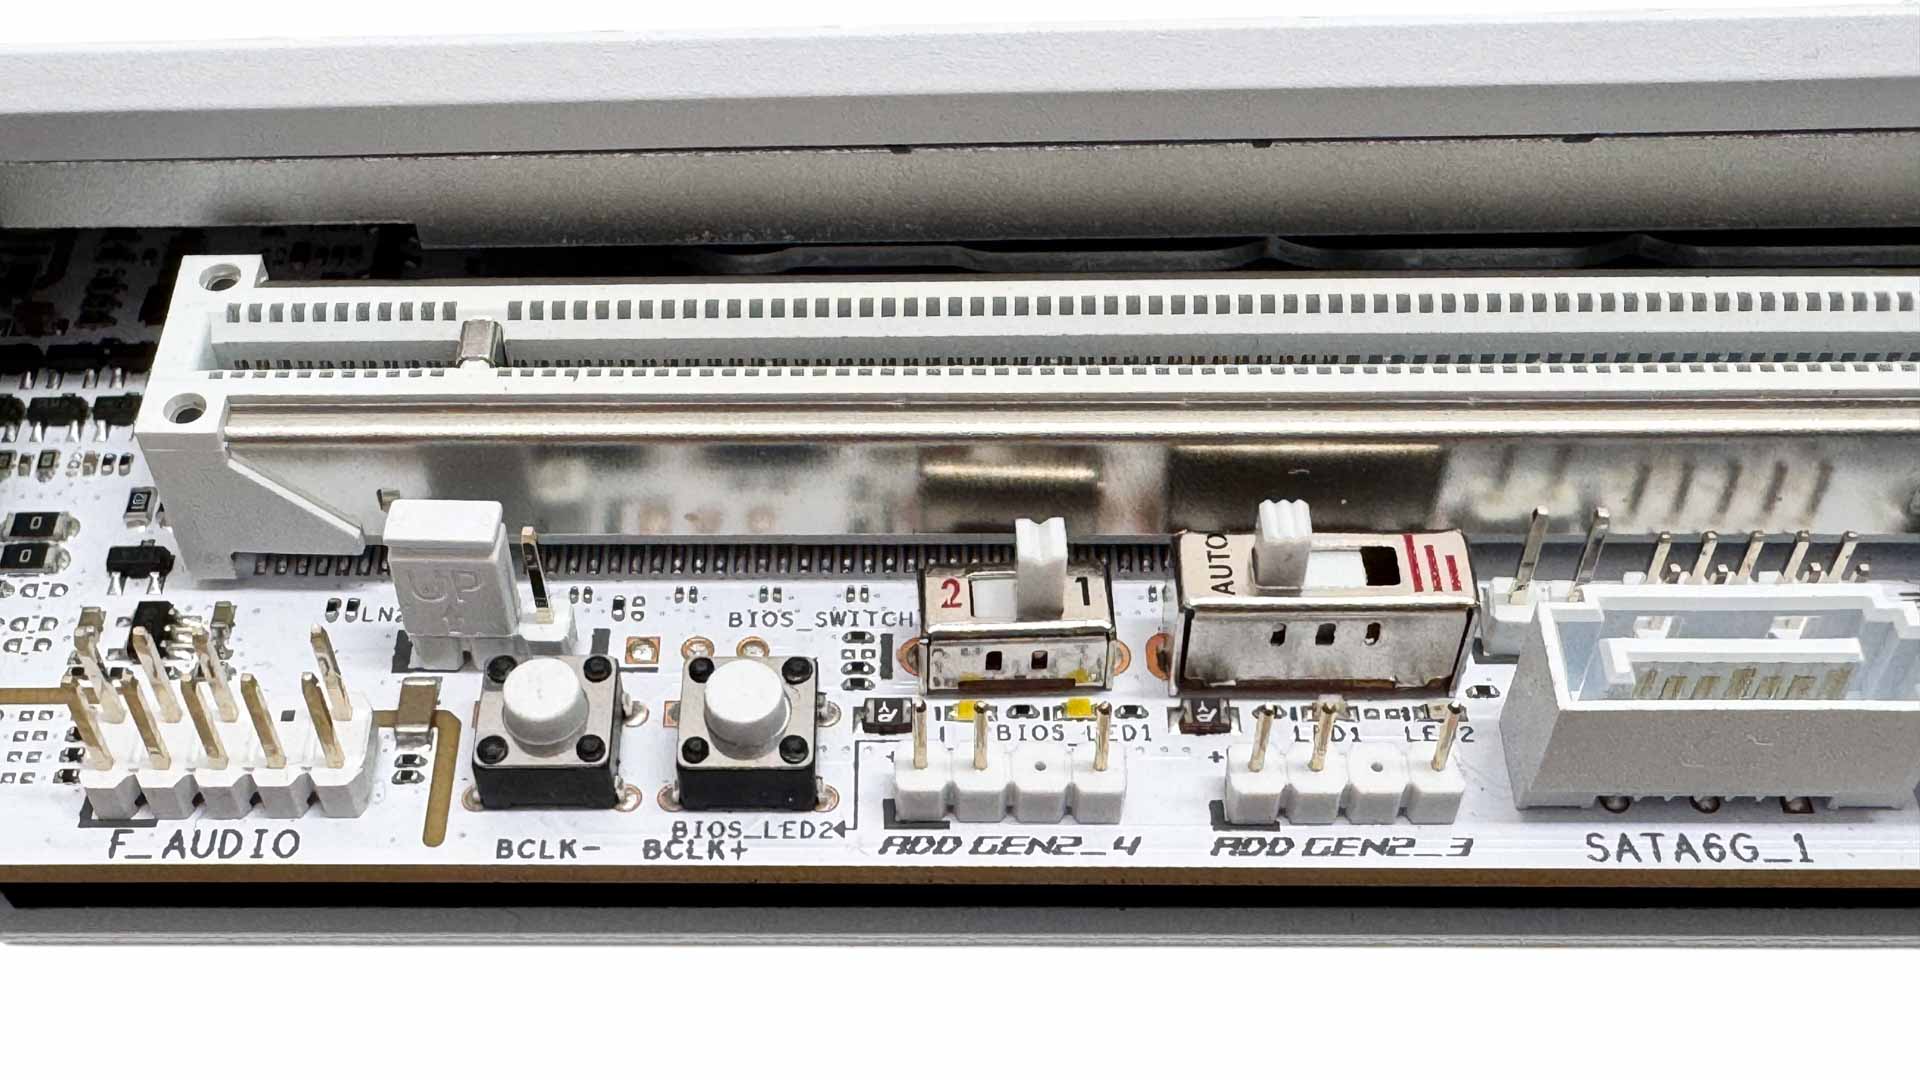
There are four SATA ports via both the X870E chipset and ASMedia ASM1162 controller. Just above these are a single 2-pin thermistor header and RSVD or slow mode switch header. Further along we have a dual BIOS switch and also PCIe mode switch as well as base clock adjustment buttons, which are a little more useful with more mainstream overclocking now that this can be adjusted in isolation rather than being tied to the rest of the system, with the same possible on MSI's latest boards too.
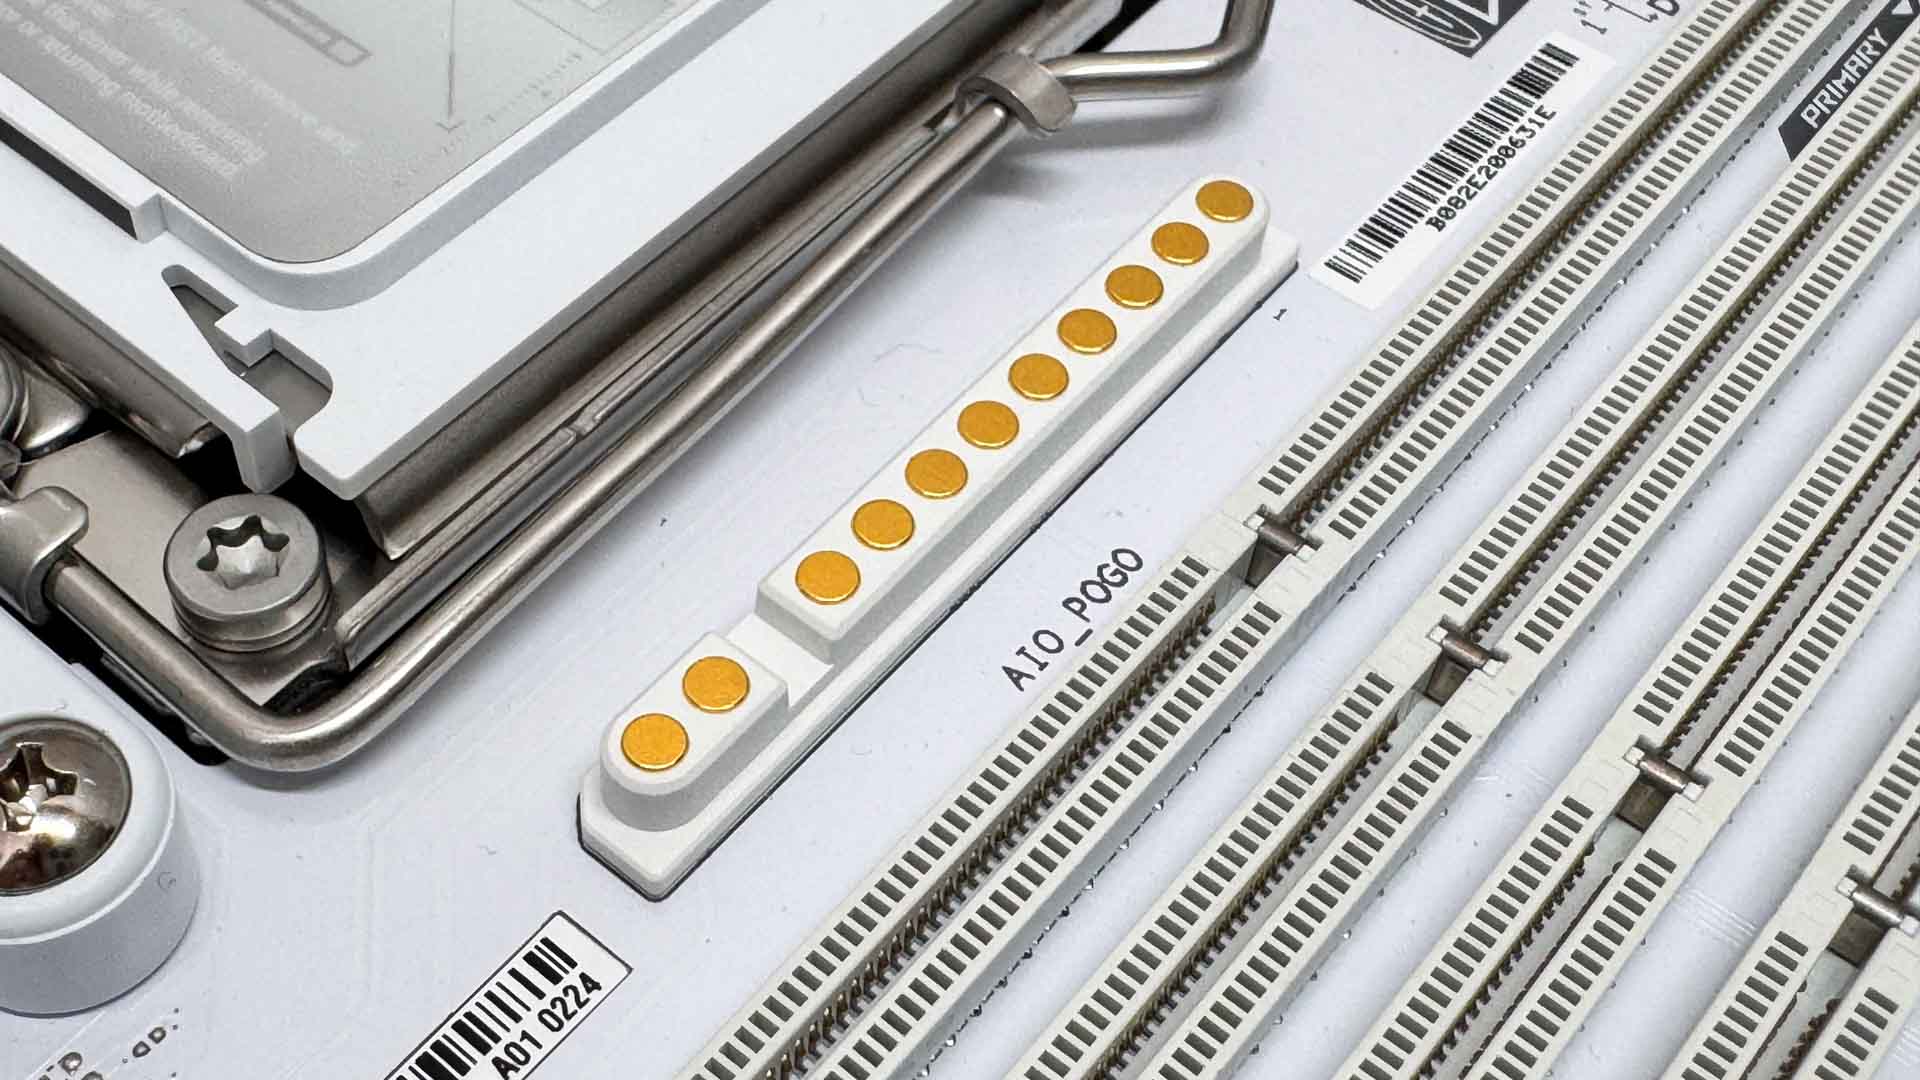
No, these aren't more voltage check points. This is the ASUS AIO Q-Connector that's compatible with some of its AIO liquid coolers and provides a cable-free connection from the pump to the motherboard using pogo pins. Just another feature we'd love to see make its way down to cheaper boards.
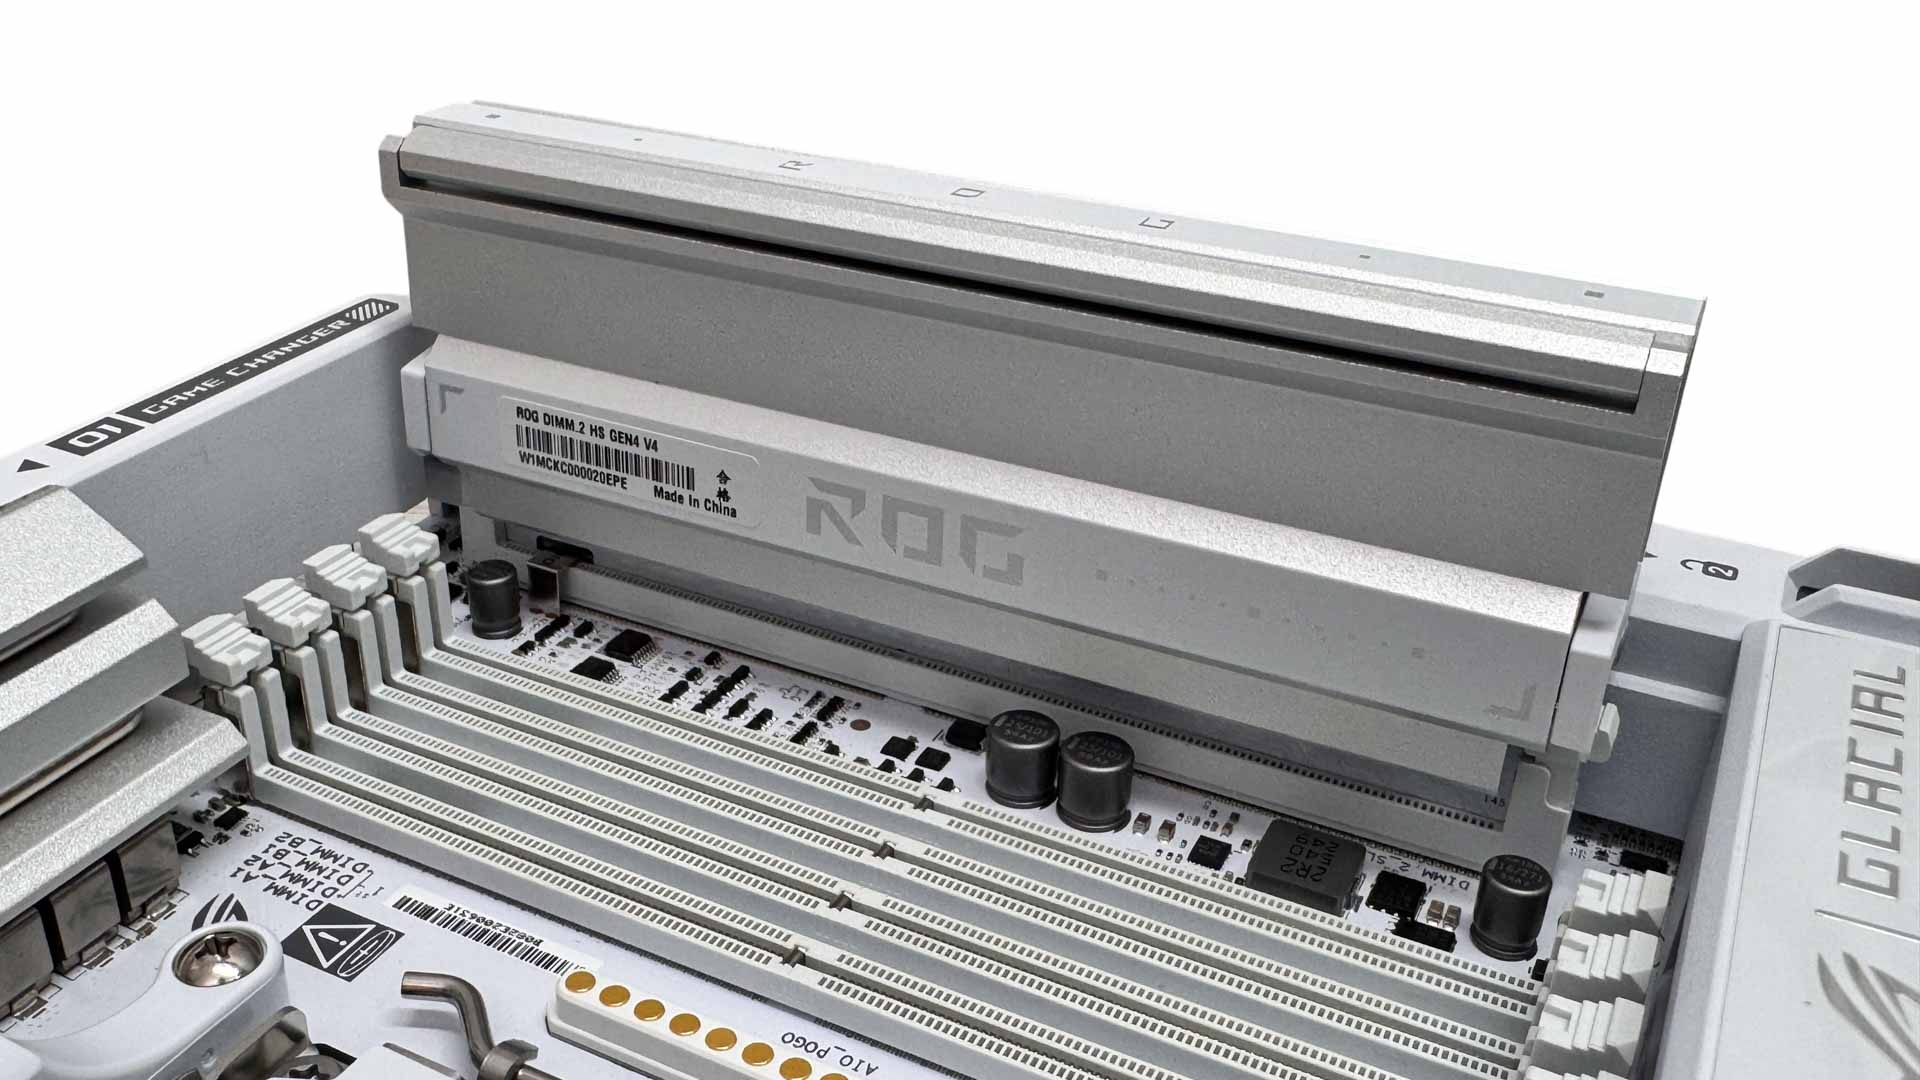
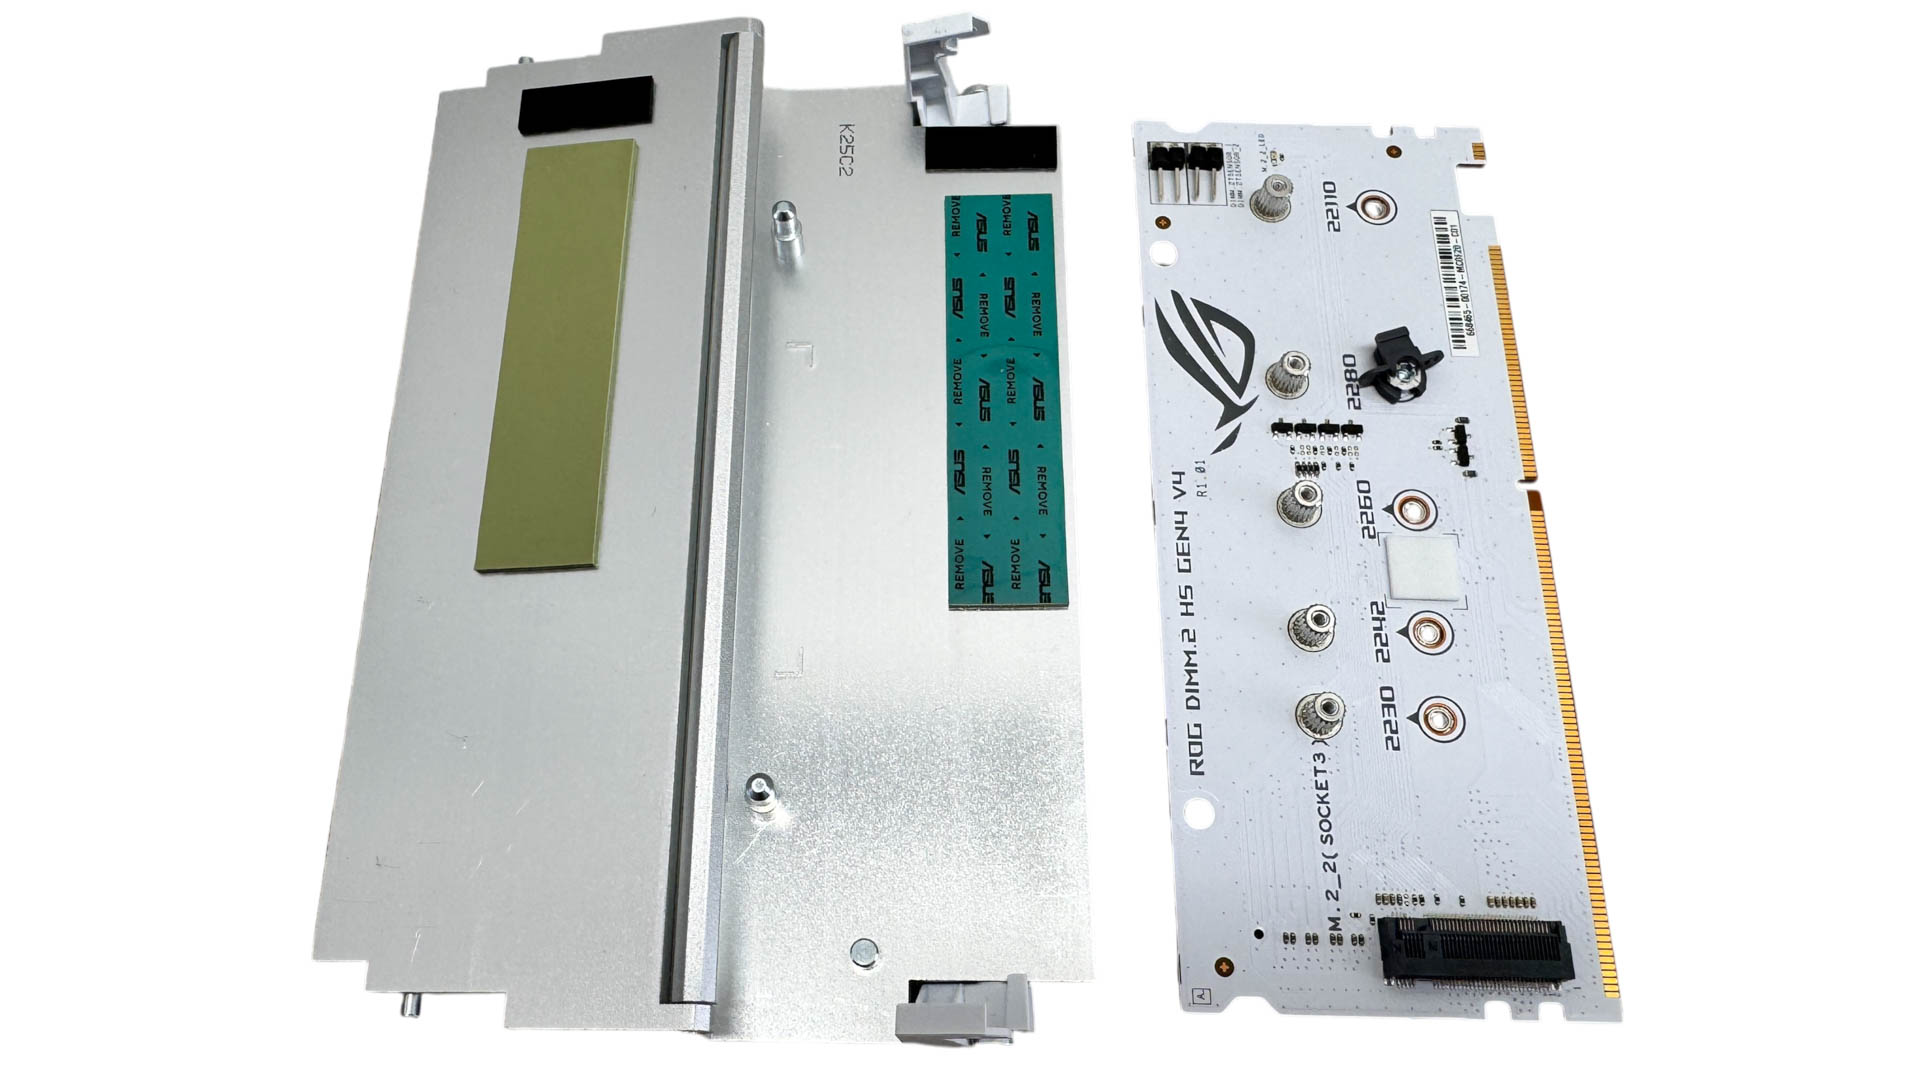
The ROG Q-DIMM.2 module can be traced back several generations of AMD and Intel boards and does make cooling and accessing your SSDs a lot easier, even if it's a tad ungainly. They have, though, stuck with PCIe Gen 4 support for some time, and due to bandwidth restrictions of current platforms it will likely be a while before DIMM.2 makes that move and as usual, we have a pair of PCIe Gen 4 M.2 ports split either side of the PCB. It's worth noting, though, that unlike some other similar DIMM.2-equipped boards such as the ROG Crosshair X870E Apex, one of these ports only has two PCIe lanes, while the Apex had four lanes a piece on its DIMM.2 card, so be sure to avoid that particular x2 slot unless your SSD is limited to two lanes anyway.
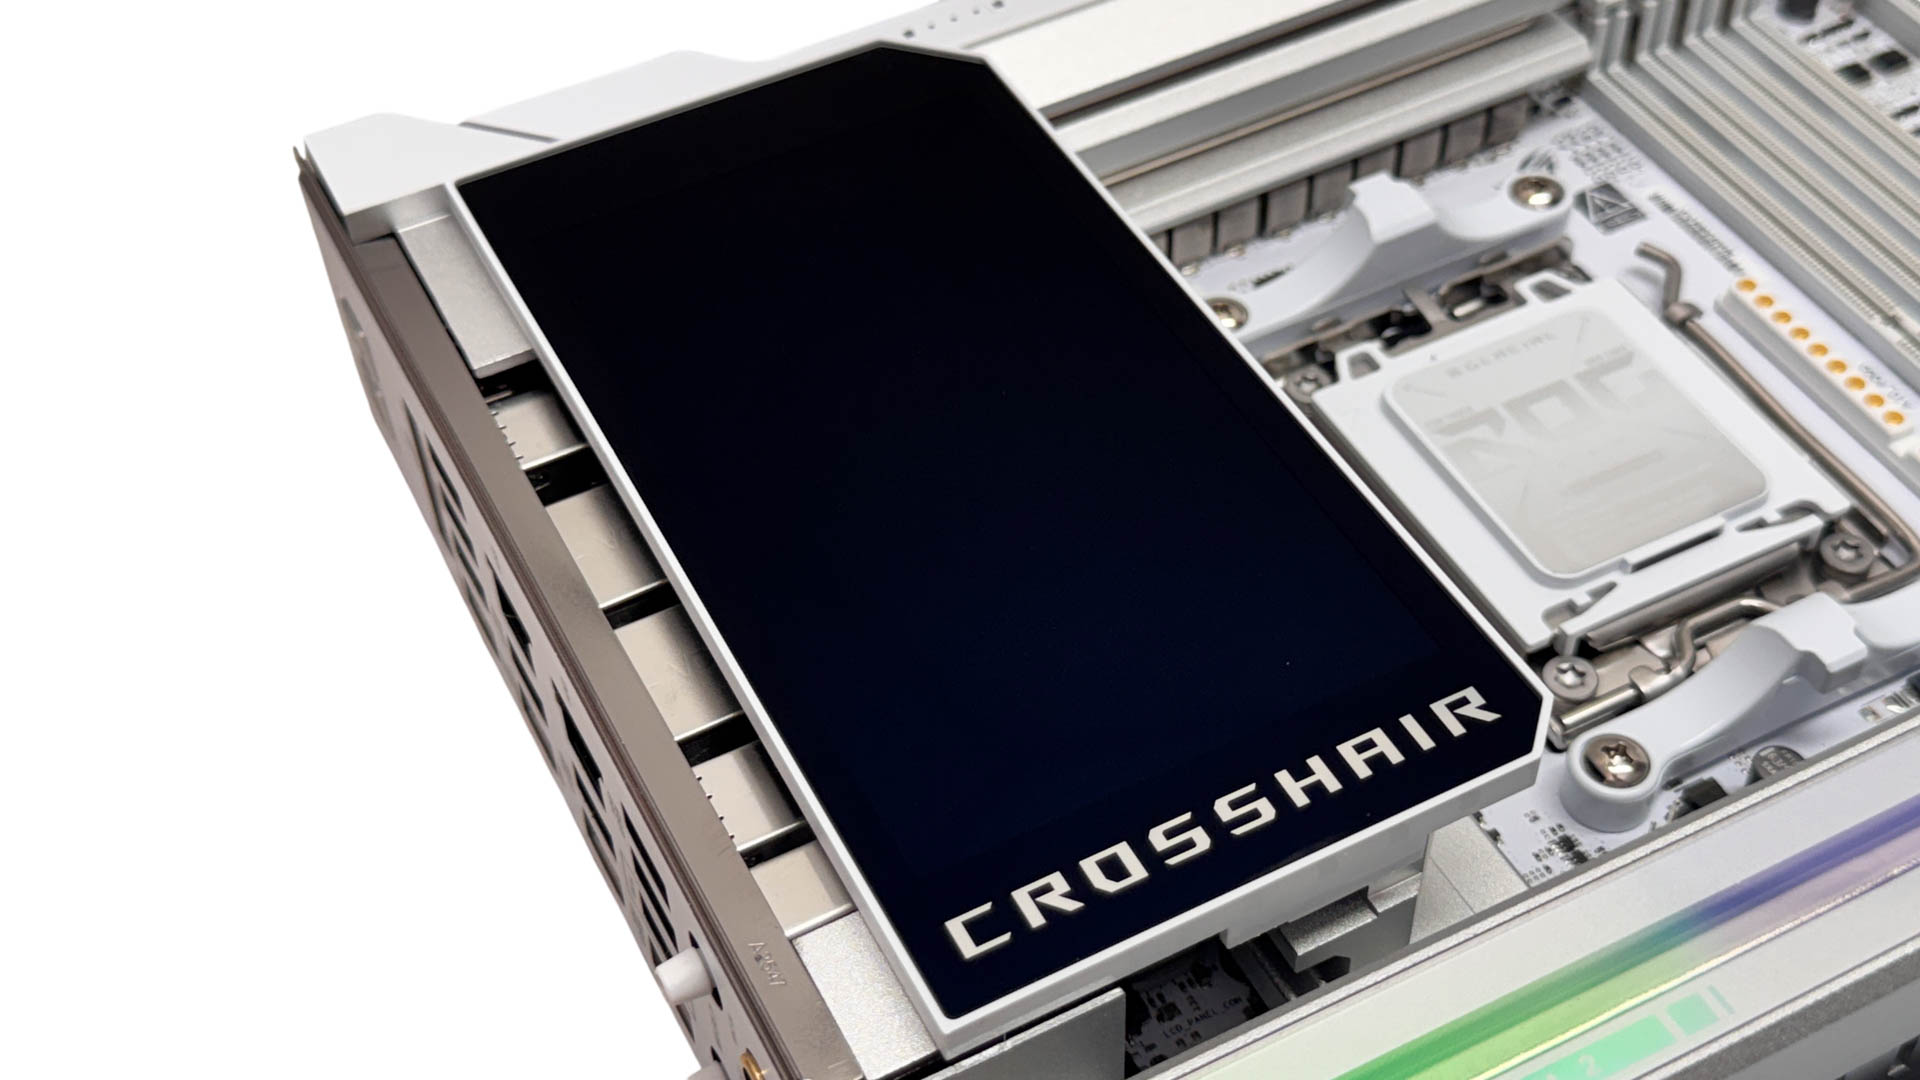
The five-inch LCD screen is enormous and covers the entire I/O panel. As we can see here, it can slide to the right too so rear fans don't obstruct it. You can upload your own images, but ASUS provides both animations plus hardware readouts. The screen is sharp, vibrant and also has a satin finish, so doesn't suffer too much from reflections.
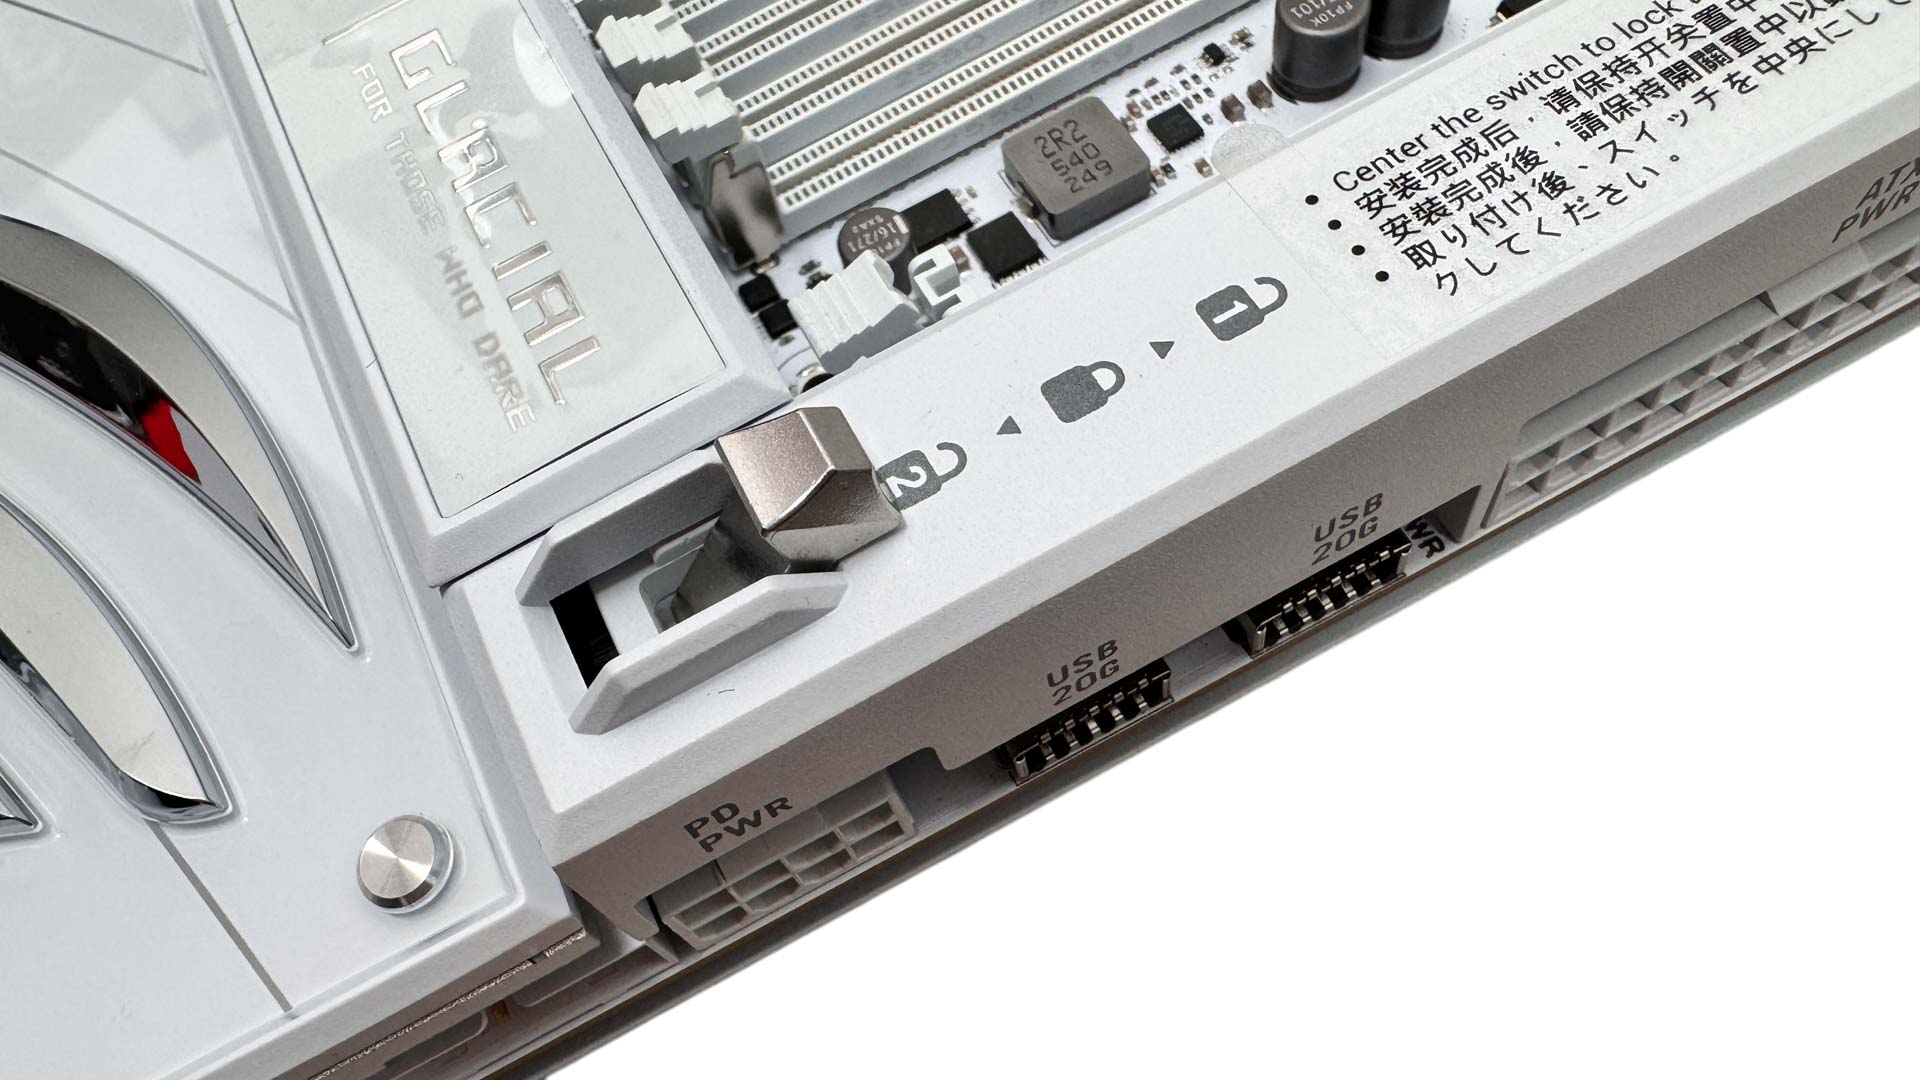
A new GPU release mechanism makes an appearance here too. PCIe Q-Release Switch is a dual-throw latch that is connected to both upper and lower PCIe slots and can open each in turn, with the lock position sitting in the middle. It can be a little stiff but is more intuitive than the usual pull up at one end method with other ASUS boards and is a very rare case of both PCIe slots being equipped with an enhanced release mechanism.
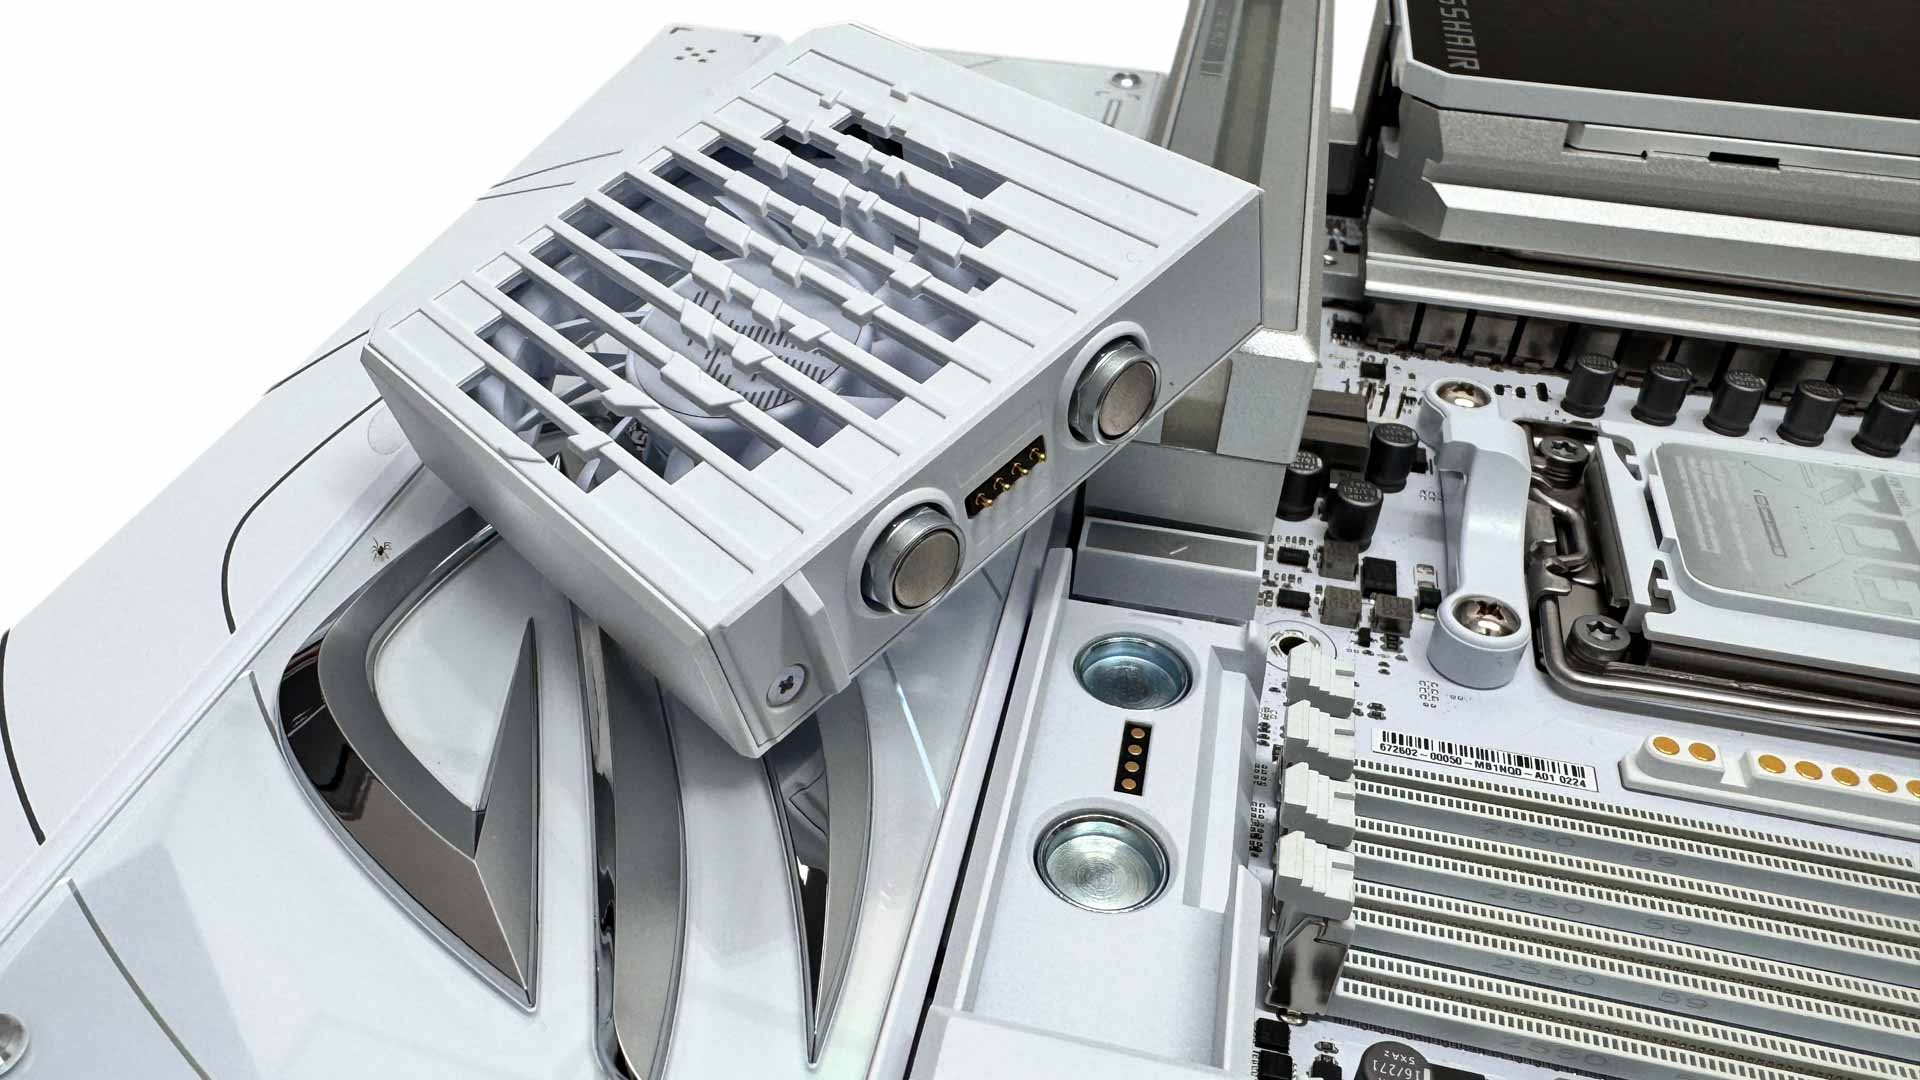
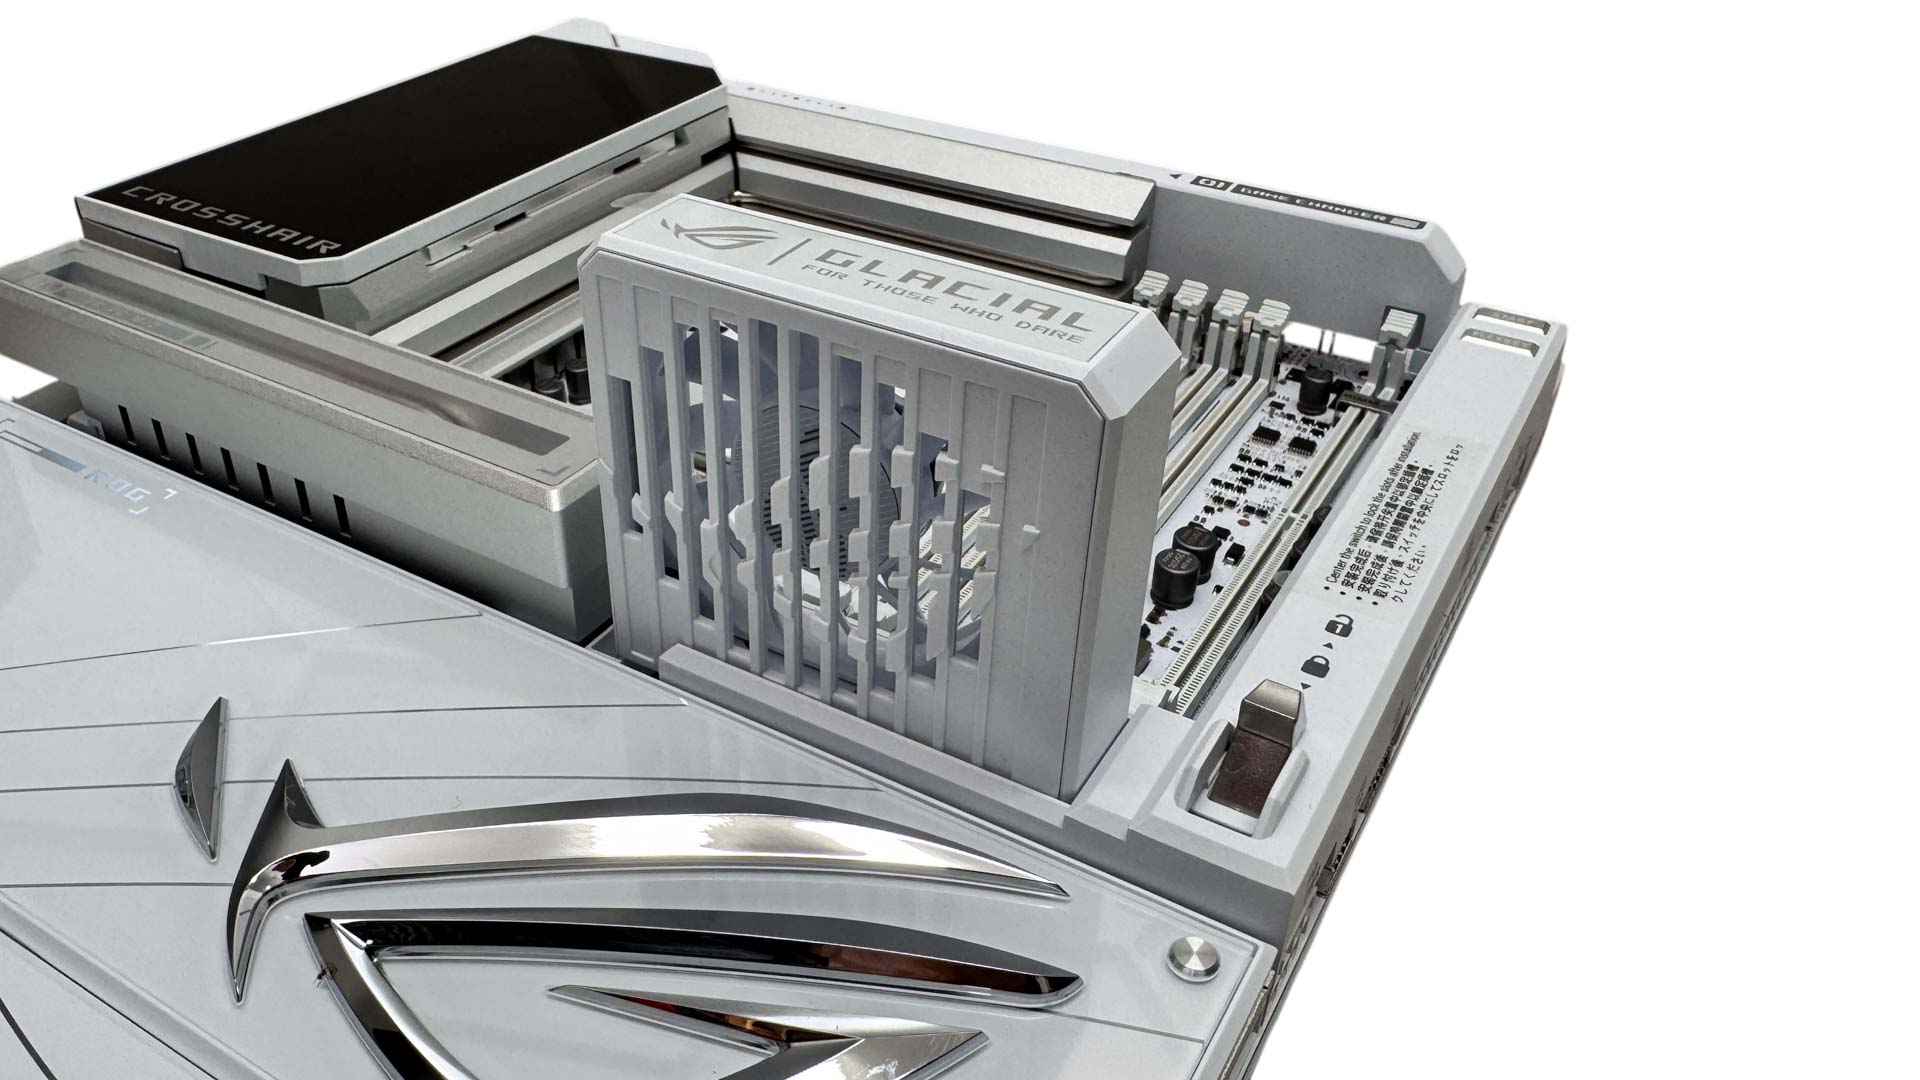
The ROG Memory Q-Fan is blissfully quick and easy to install, requiring no screws and having no cables. It secures using magnets and features pins that make contact with pads in its recess and is fully controllable in the EFI and software. The downside is that it can interfere with your GPU's cooling.
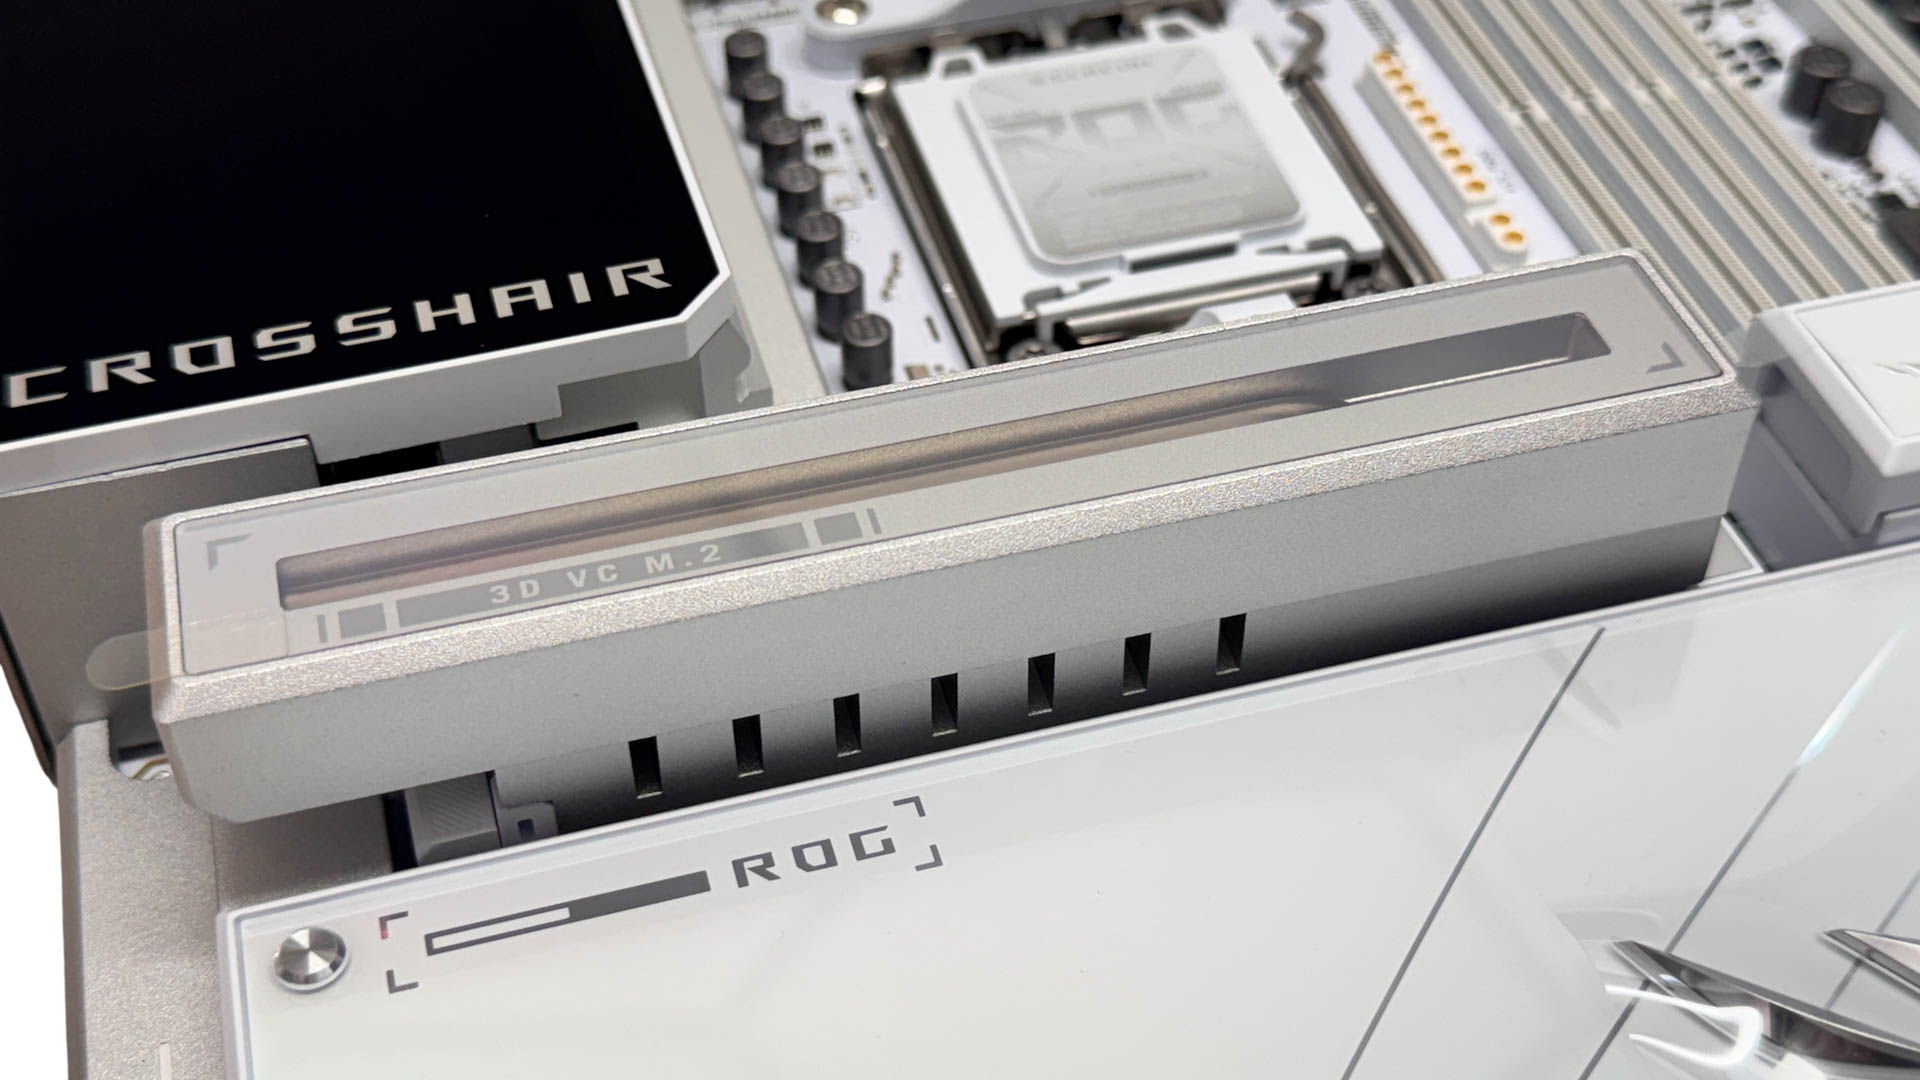
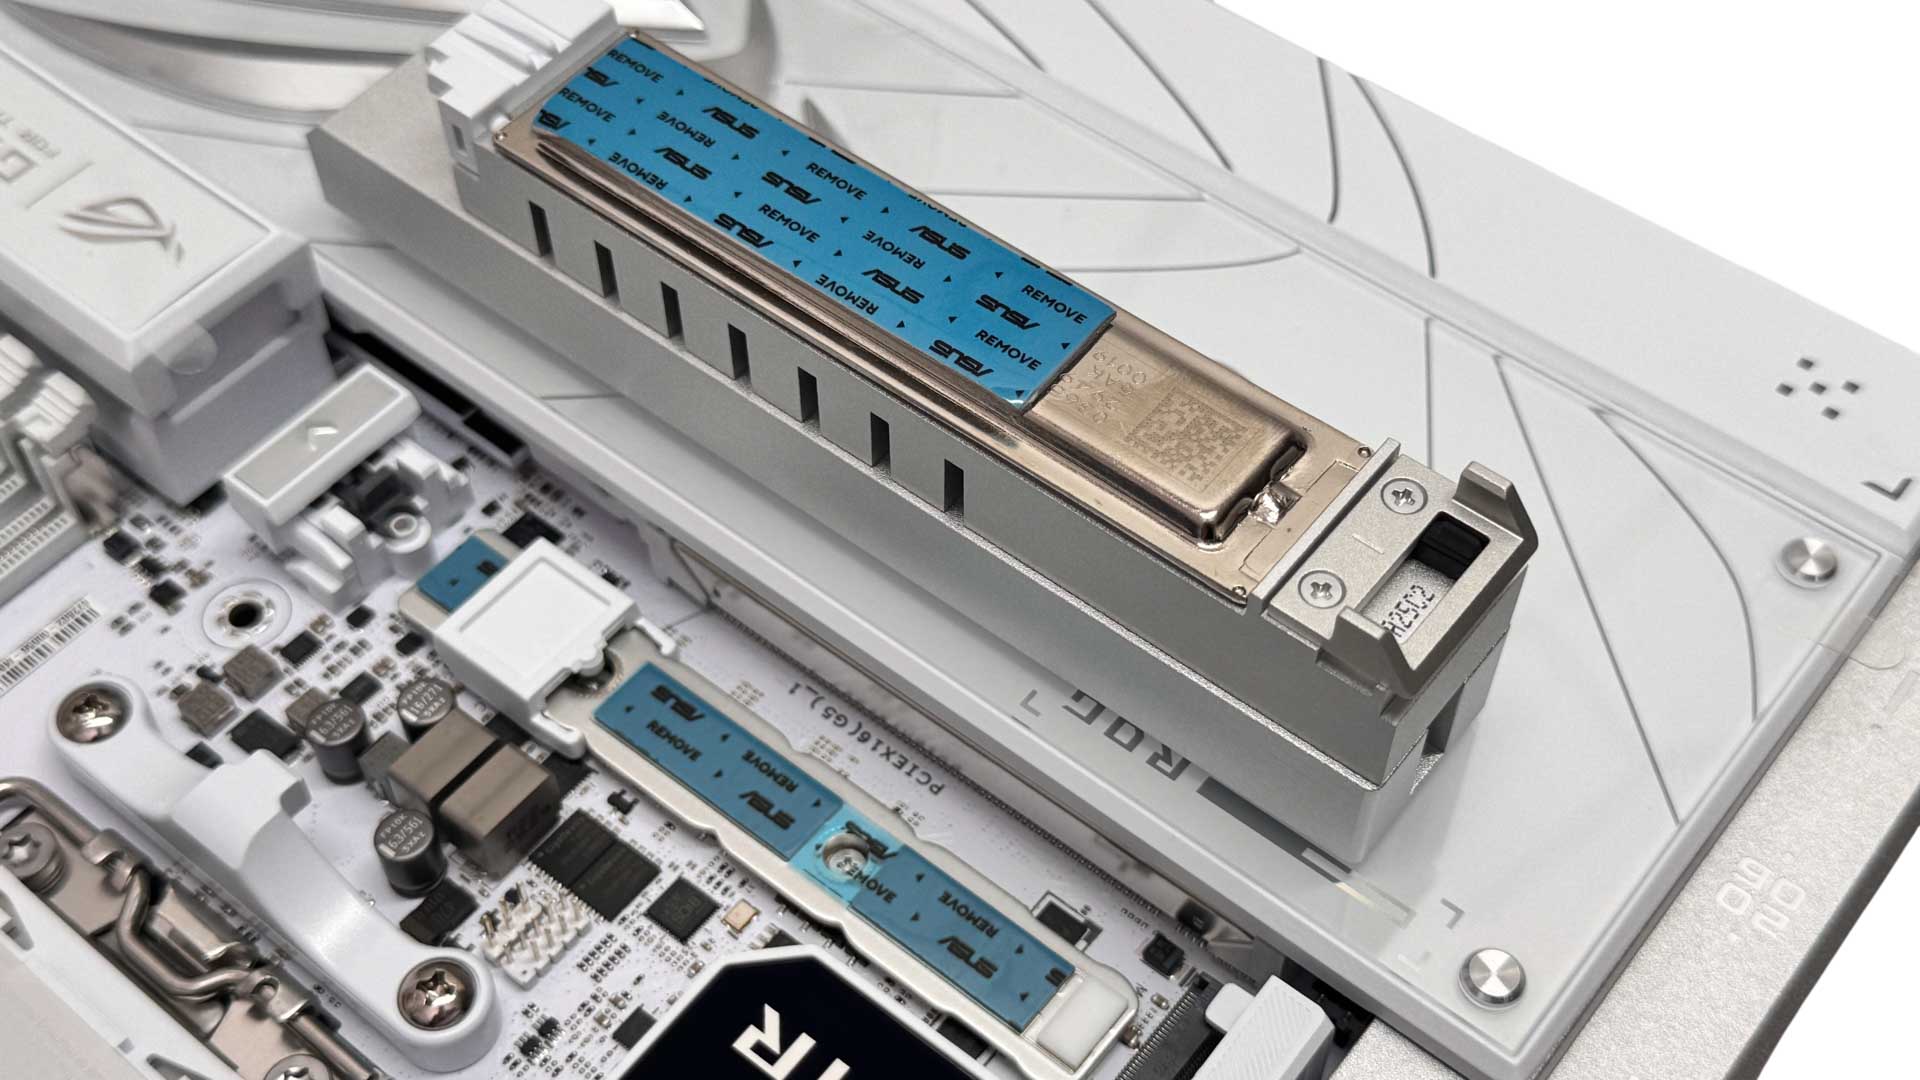
The primary M.2 slot features a tool-free M.2 heatsink that has an integrated 3D vapor chamber, which ASUS claims is a first on a gaming motherboard. It's one of the largest and heaviest we've seen and SSDs are cooled on both sides too. The only issue is due to its size, it can be tricky to release, especially if the optional memory fan is installed.
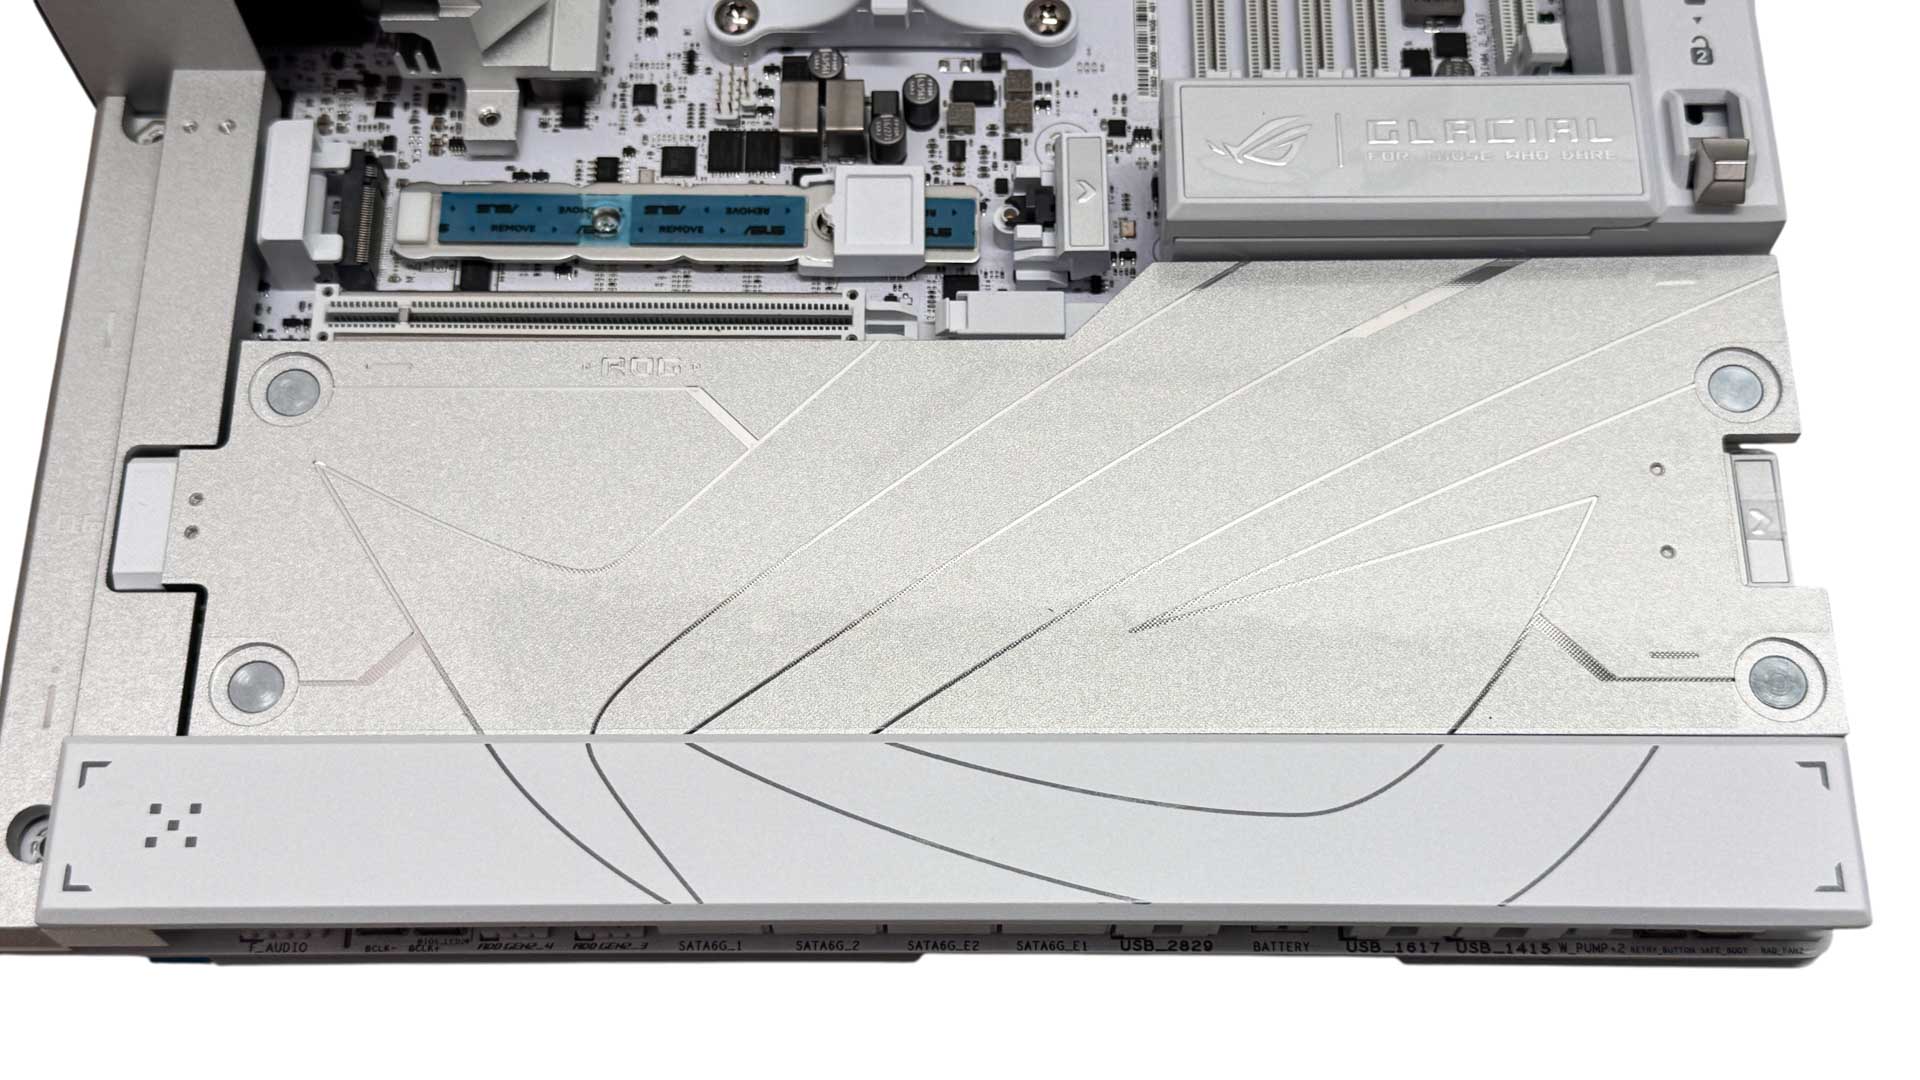
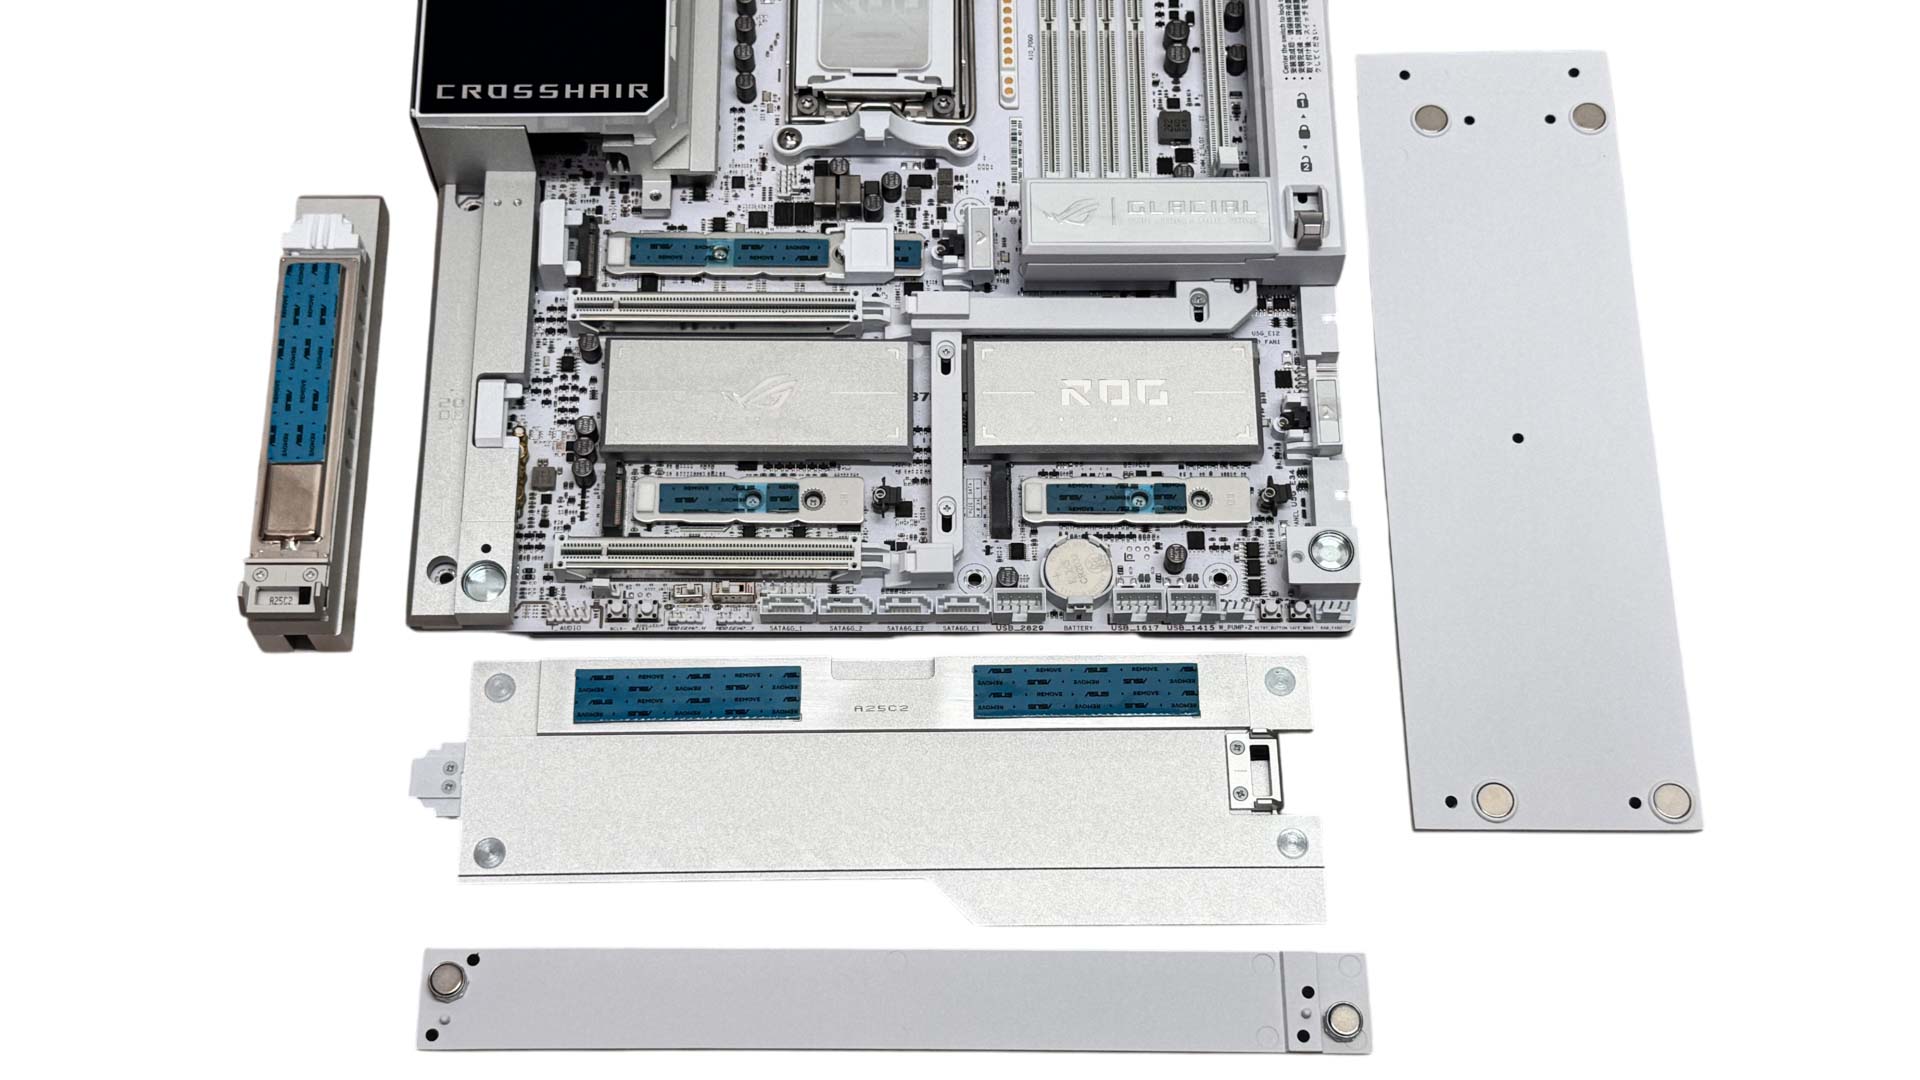
Underneath the removable magnetic panel is a large M.2 heatsink that cools the second and third slots, with one of those being PCIe Gen 5-capable. This installs using a simple latch mechanism so is infinitely easier to install than something with four tiny screws that you have to line up blind. With all the lower heatsinks and magnetic plates removed we can see the busy lower end of the PCB.
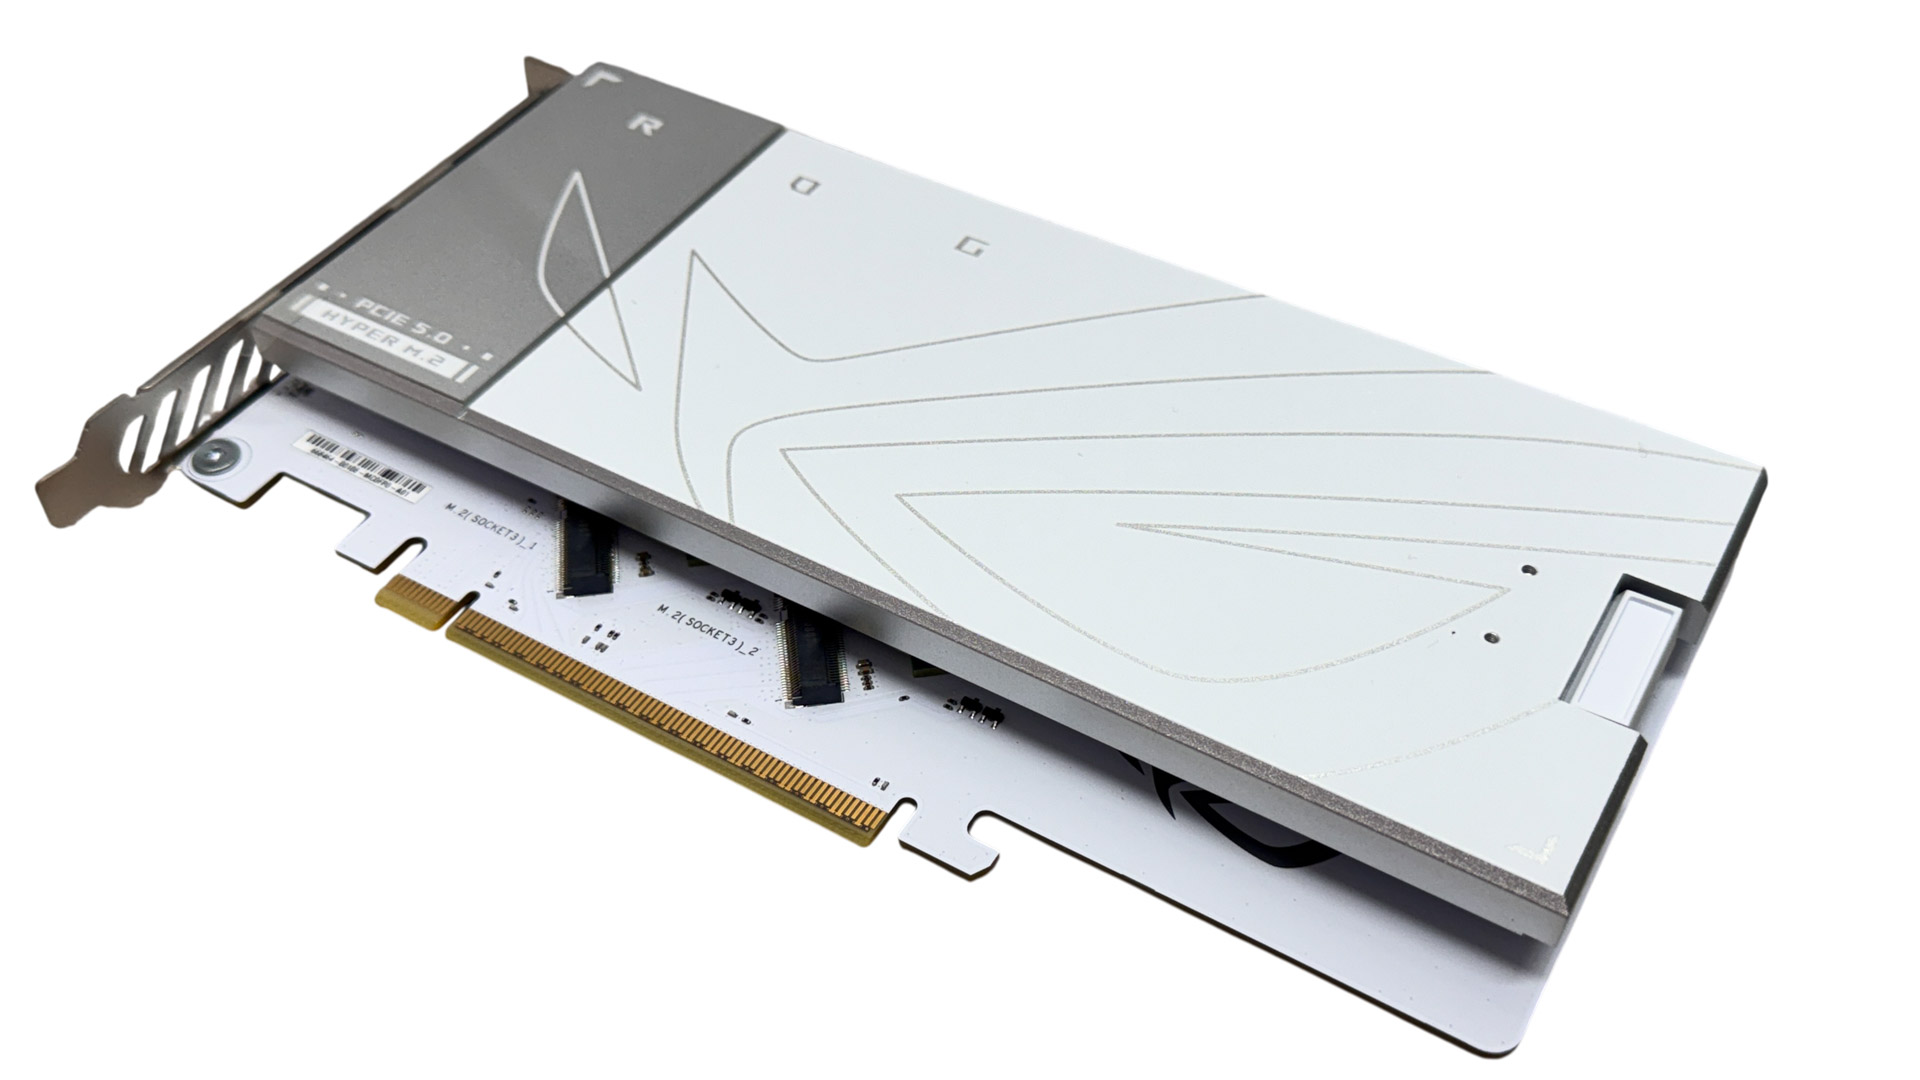
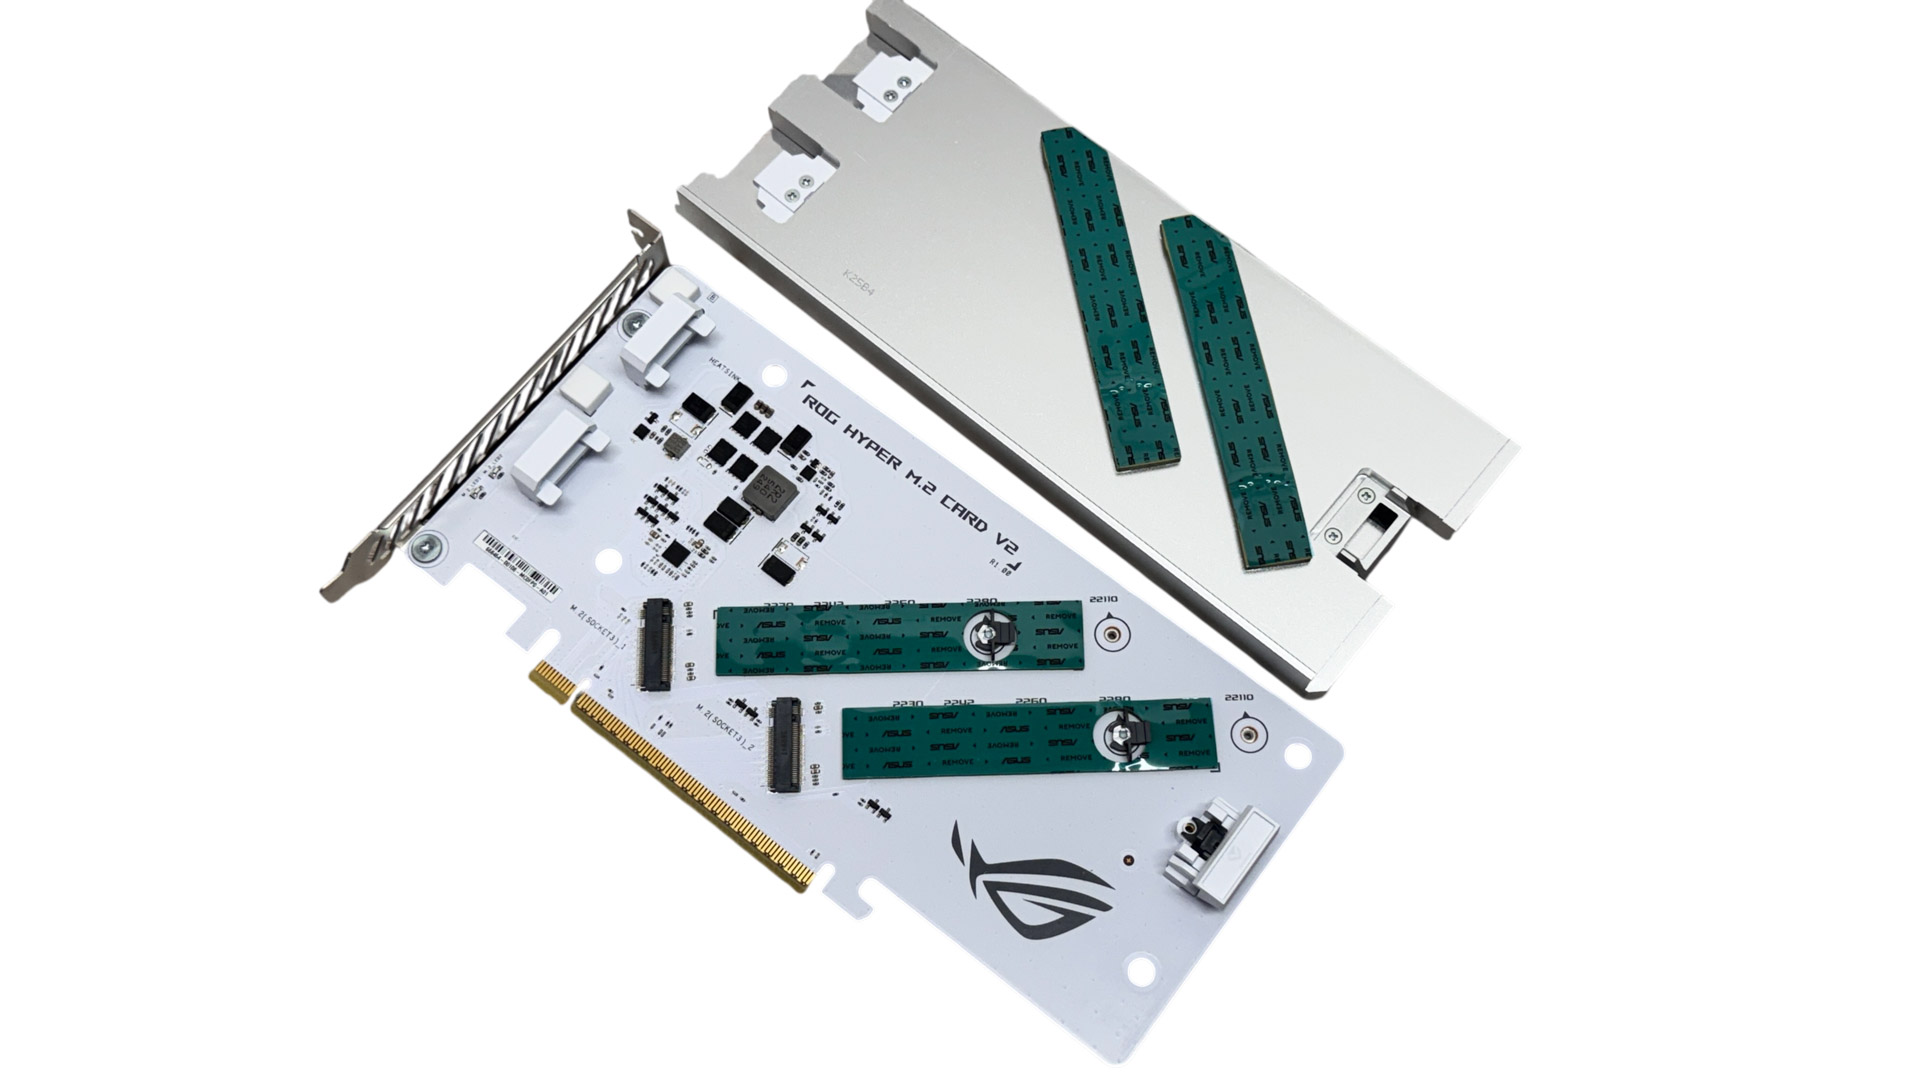
The ROG Hyper M.2 Card is another accessory that we've seen before in older iterations of the dual PCIe Gen 5 M.2 port expansion card that we have here. It's once again a new design, with a single latch-based heatsink, so is super easy to install and remove. If plugged into a slot with eight PCIe lanes you'll get full bandwidth, bringing the total PCIe Gen 5 M.2 ports that can be used at the same time, albeit with bandwidth sacrifices elsewhere, to four. SSDs are cooled on both sides so it should hopefully deal well with double-sided plus single-sided SSDs.
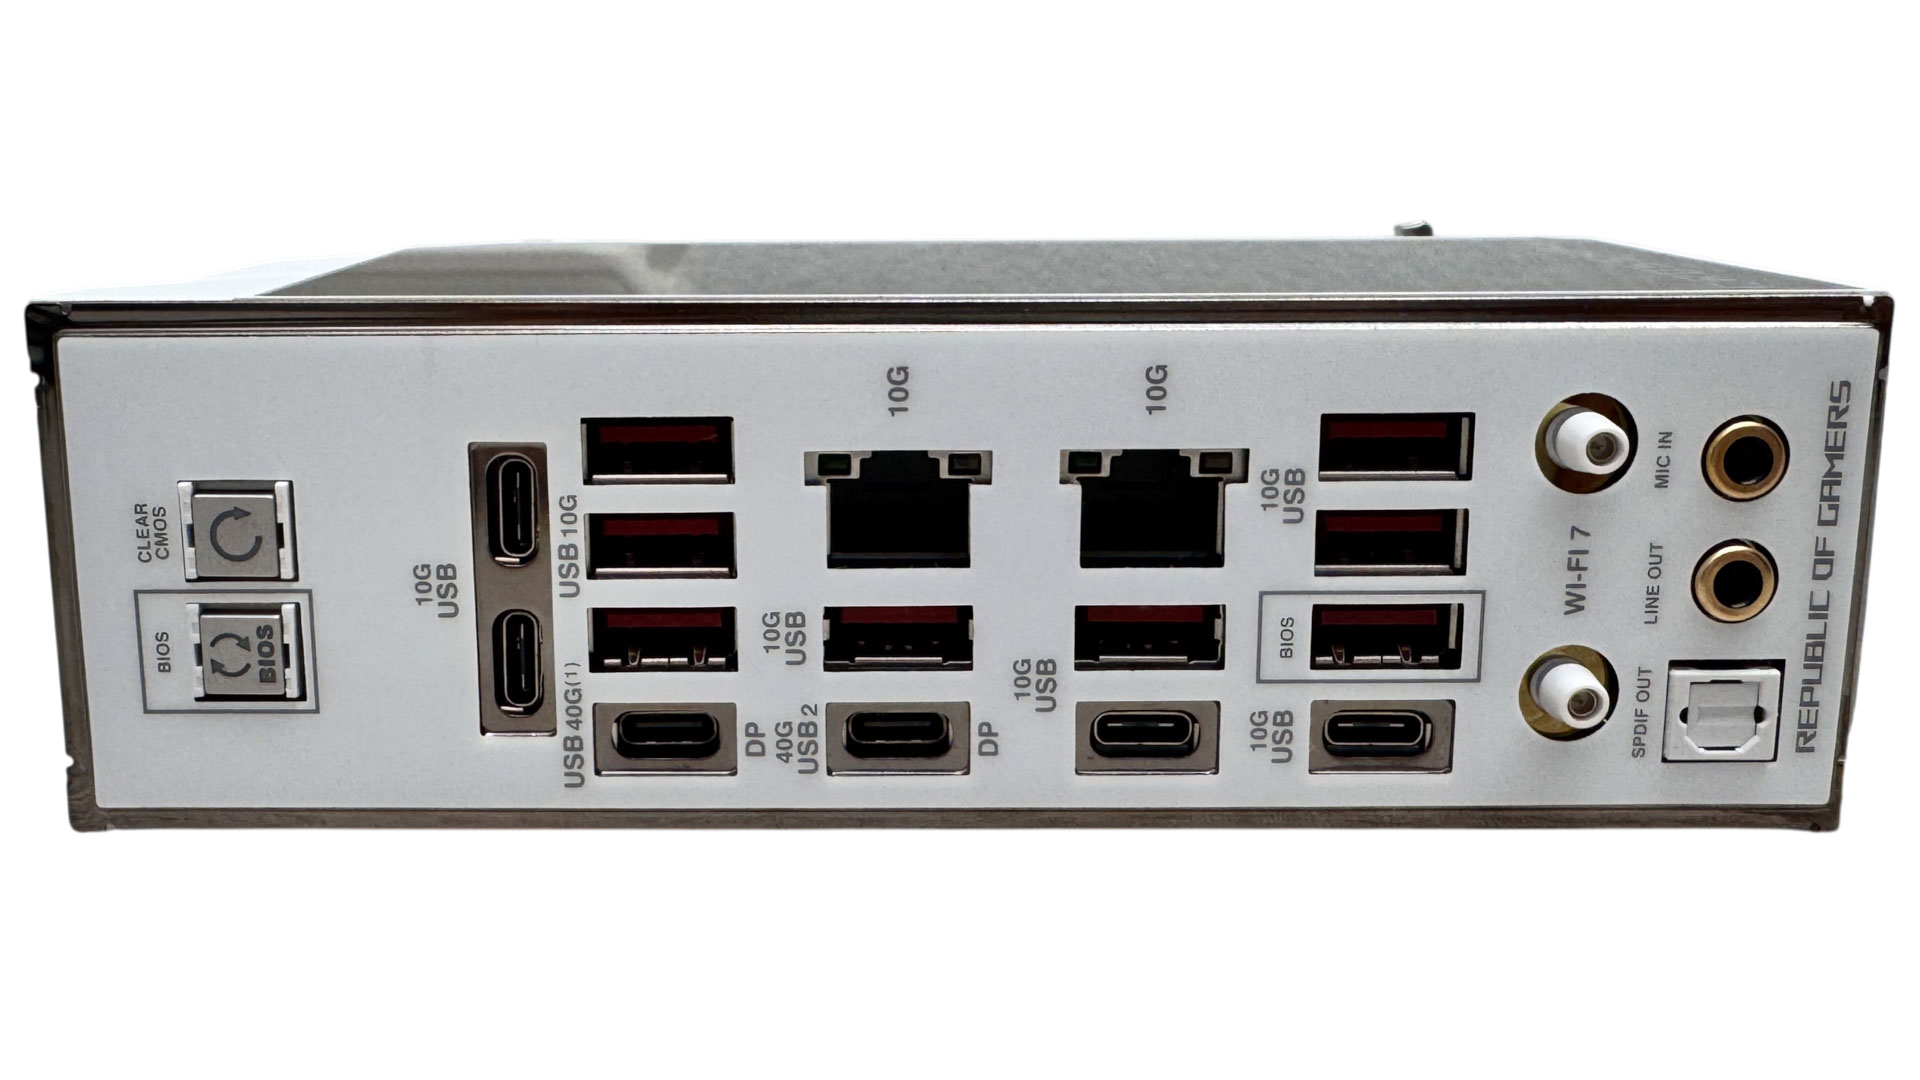
Dual 10 Gbps Ethernet? One would surely be enough here seeing as even one is still extremely niche on ultra high-end motherboards so we do have to question this decision, even on a board at this price. Otherwise, the rear I/O panel is well featured with Clear CMOS and USB BIOS Flashback buttons, four USB 3.2 Gen 2 10 Gbps Type-C ports, dual USB4 40 Gbps Type-C ports that support DisplayPort out as well as Thunderbolt 4, but we still have ten Type-A ports too. All of those are USB 3.2 Gen 2 10 Gbps.
Nov 20th, 2026 12:13 PST
change timezone
Latest GPU Drivers
New Forum Posts
- Honestly, do you care about GTA VI? (195)
- Anthrophics IPO (17)
- The Final Upgrade for Legacy AiO's (10)
- Very unusual two gaming-pc scenarios. (34)
- How to prevent OLED burn damage due to PC freezes or power outtages? (46)
- GeekMagic Ultra Smart WiFi Weather Station (6)
- Can i play GTA 6 now? (Joke) (10)
- Last game you purchased? (1410)
- TechPowerUp Screenshot Thread (MASSIVE 56K WARNING) (4387)
- SATA drive 1.4 GBps with Intel X25-E on Windows 98! (35)
Popular Reviews
- AMD Zen 6 Technical Deep Dive
- Ugreen NASync DXP4800 GT Review
- Corsair RM1200e (Second Generation) Review
- Acemagic Retro X3 Review
- Microsoft Surface Laptop Ultra Review - The Next-gen Arm Laptop
- Upcoming Hardware Launches 2027 (Updated Nov 2026)
- Pulsar Office Tour & First Look at P1 Dual-Sensor Mouse
- Biwin Black Opal NV7400 2 TB Review
- AMD Ryzen 7 9800X3D Memory Performance Scaling
- AMD Ryzen 7 9800X3D Review - The Best Gaming Processor
TPU on YouTube
Controversial News Posts
- NVIDIA Co-Founder and CEO Jensen Huang Officially Resigns (490)
- Report: Jensen Huang Eyes NVIDIA Comeback (253)
- Open Letter Asking NVIDIA to Reinstate Jensen Huang Passes 115,000 Signatures (184)
- OpenAI CEO Argues Home PCs Waste the World's Limited DRAM Supply (152)
- NVIDIA Launches Investigation Into Jensen Huang's Relationship With Suspected Chinese Spy (136)
- Intel "Raptor Lake Next" 16-Core and 20-Core CPUs Surface (130)
- Legendary Game Studio BioWare Shuts Down Following EA Layoffs (104)
- Dell CEO Says the Memory Shortage Will Get Worse in 2027 (95)