 0
0
Building a Keyboard 14: Ducky ProjectD Outlaw 65 + Cherry MX2A Red
Introduction
Taiwan-based peripherals brand Ducky has had an interesting few years. It's impressed consistently with keyboards for many years since inception, especially by offering novel designs and support for less-common form factors at a time when it was all black box keyboards in TKL/full-size. Ducky was also among the first, if not the very first, to come up with seam-less legends in doubleshot injected legends which made its PBT keycap sets and keyboards all the more popular among the mechanical keyboard enthusiasts. Add to this the use of new and uncommon switches and you can see why we've always been wanting to cover Ducky products. That said, I did notice that the recent few years have been quieter than usual with no more limited edition Chinese zodiac keyboards and increased competition from Chinese brands threatening to take over the market. As such, I was happy to visit Ducky at Computex this year and see what the brand had planned. There was a lot to see and yet one thing caught my eye almost immediately—ProjectD.

ProjectD can be considered as a new keyboard platform from Ducky with no doubt different entries planned. There are currently two such versions—the ProjectD Tinker 65 which uses a plastic case and comes either as a pre-assembled keyboard or a barebones kit, or the subject of today's keyboard build called the ProjectD Outlaw 65. This is a 65% form factor keyboard using an aluminium case and only comes as a barebones kit. In fact, it's so bare in bones that you get individual parts and instructions to build your own keyboard. It's a similar experience to the Wind Sin65 we recently saw except this time you have to assemble the case as well. This can be a fun project, hence the name, for many but others may not want to go through this when there are pre-assembled kits/keyboards available. Think of the ProjectD Outlaw 65 as something you'd do when the thrill of building your PC has left you wanting more and now you get the idea. Thanks to Ducky for providing a sample of the ProjectD Outlaw 65 in addition to switches and keycaps as we begin this new keyboard build which also features Cherry's brand new MX2A switches!
ProjectD Outlaw 65: Packaging and Accessories


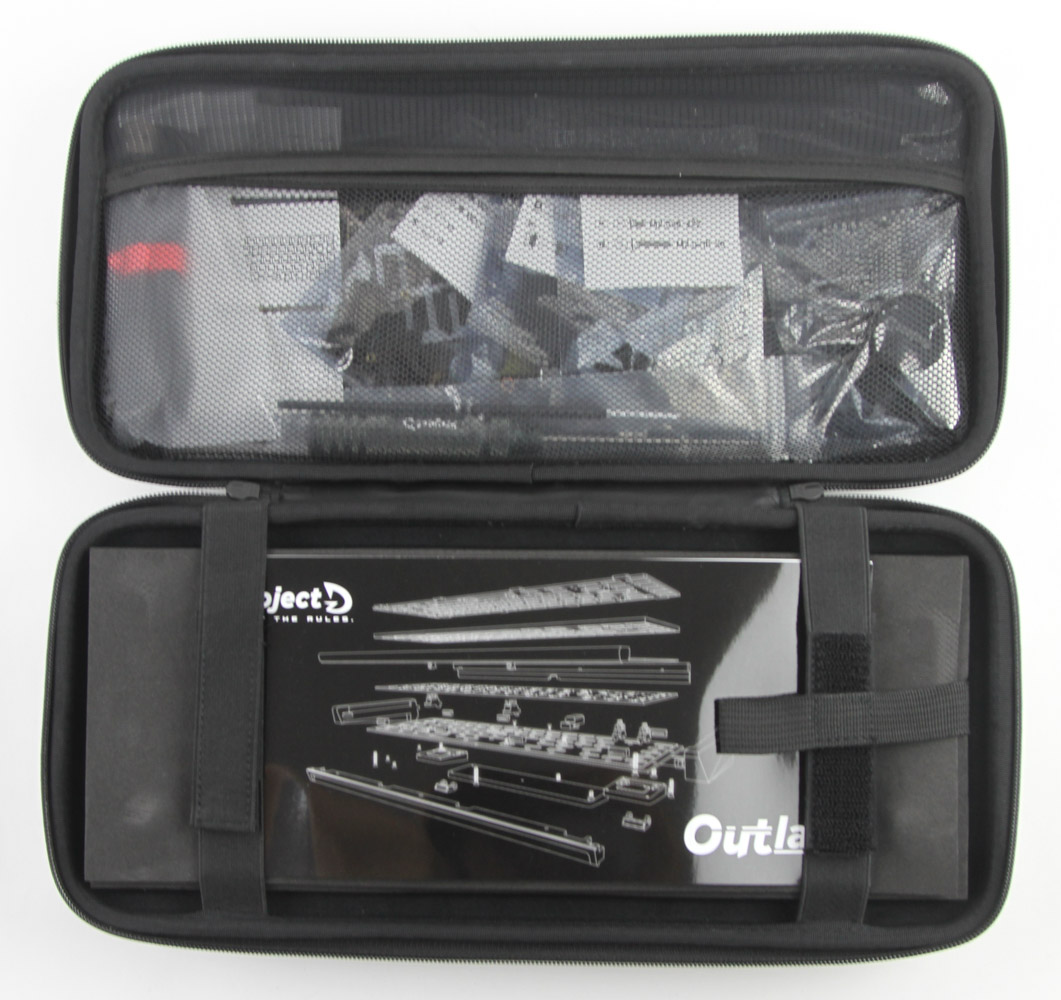


Ducky's aiming for its ProjectD Outlaw 65 to leave a strong impression and the unboxing experience does not disappoint. There is no product box and instead you get a handy carry bag with a handle and two good quality zippers keeping it closed. ProjectD branding is seen here instead of Ducky's own logo. The gray colors don't attract much attention either which is good when inside is a premium keyboard kit—or an entire keyboard when you have assembled and built it. Opening the bag shows a multi-layered approach with various parts in the netted compartment at the top and then an instruction manual (online copy available here) greets you on the bottom. This is an excellent manual outlining every single item and how to use it so Ducky has already made the assembly process easier compared to Wind Studio with its slightly ambiguous instructions for the Sin65. There are two foam sheets with cutouts to snugly hold and protect the various aluminium parts and we get some more paperwork including an ID card (w/serial number).
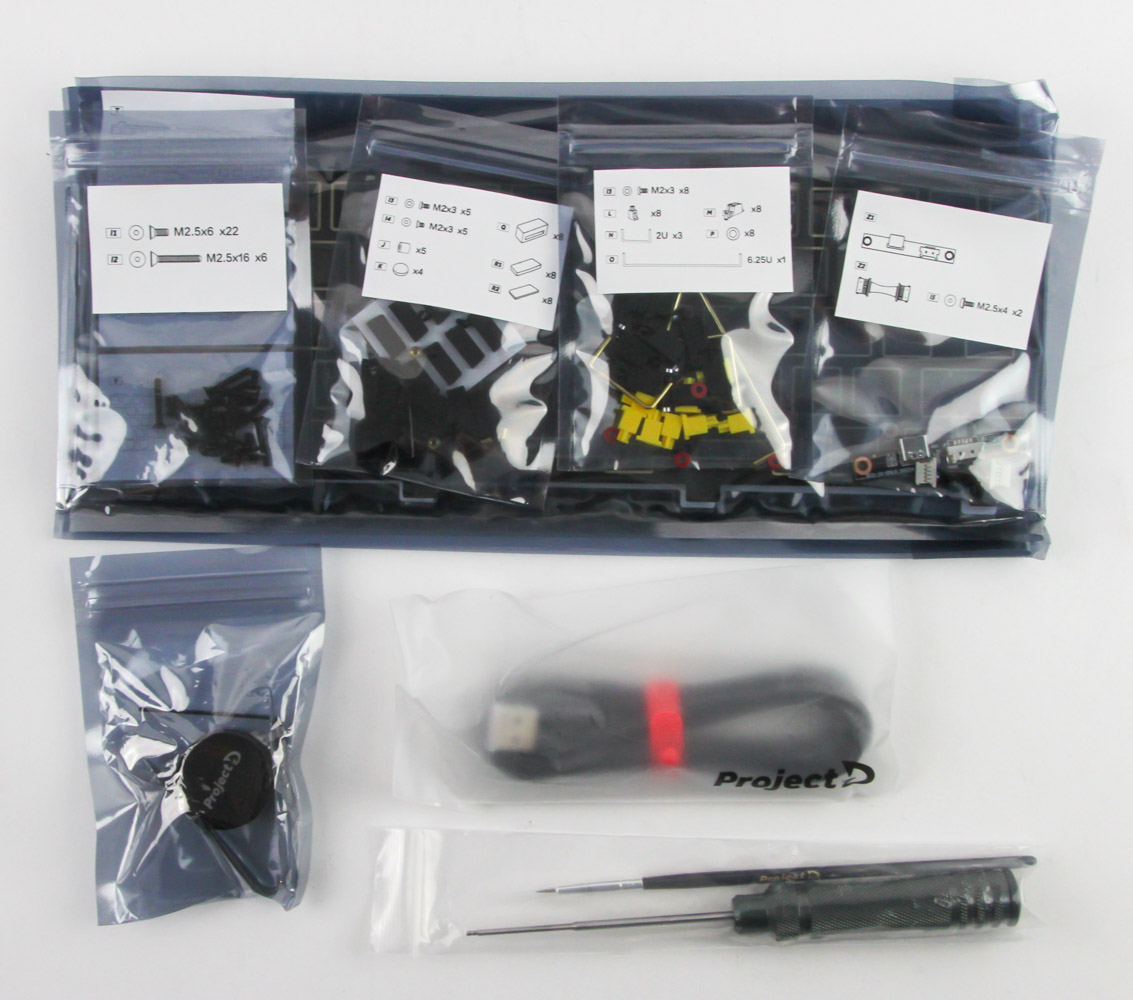
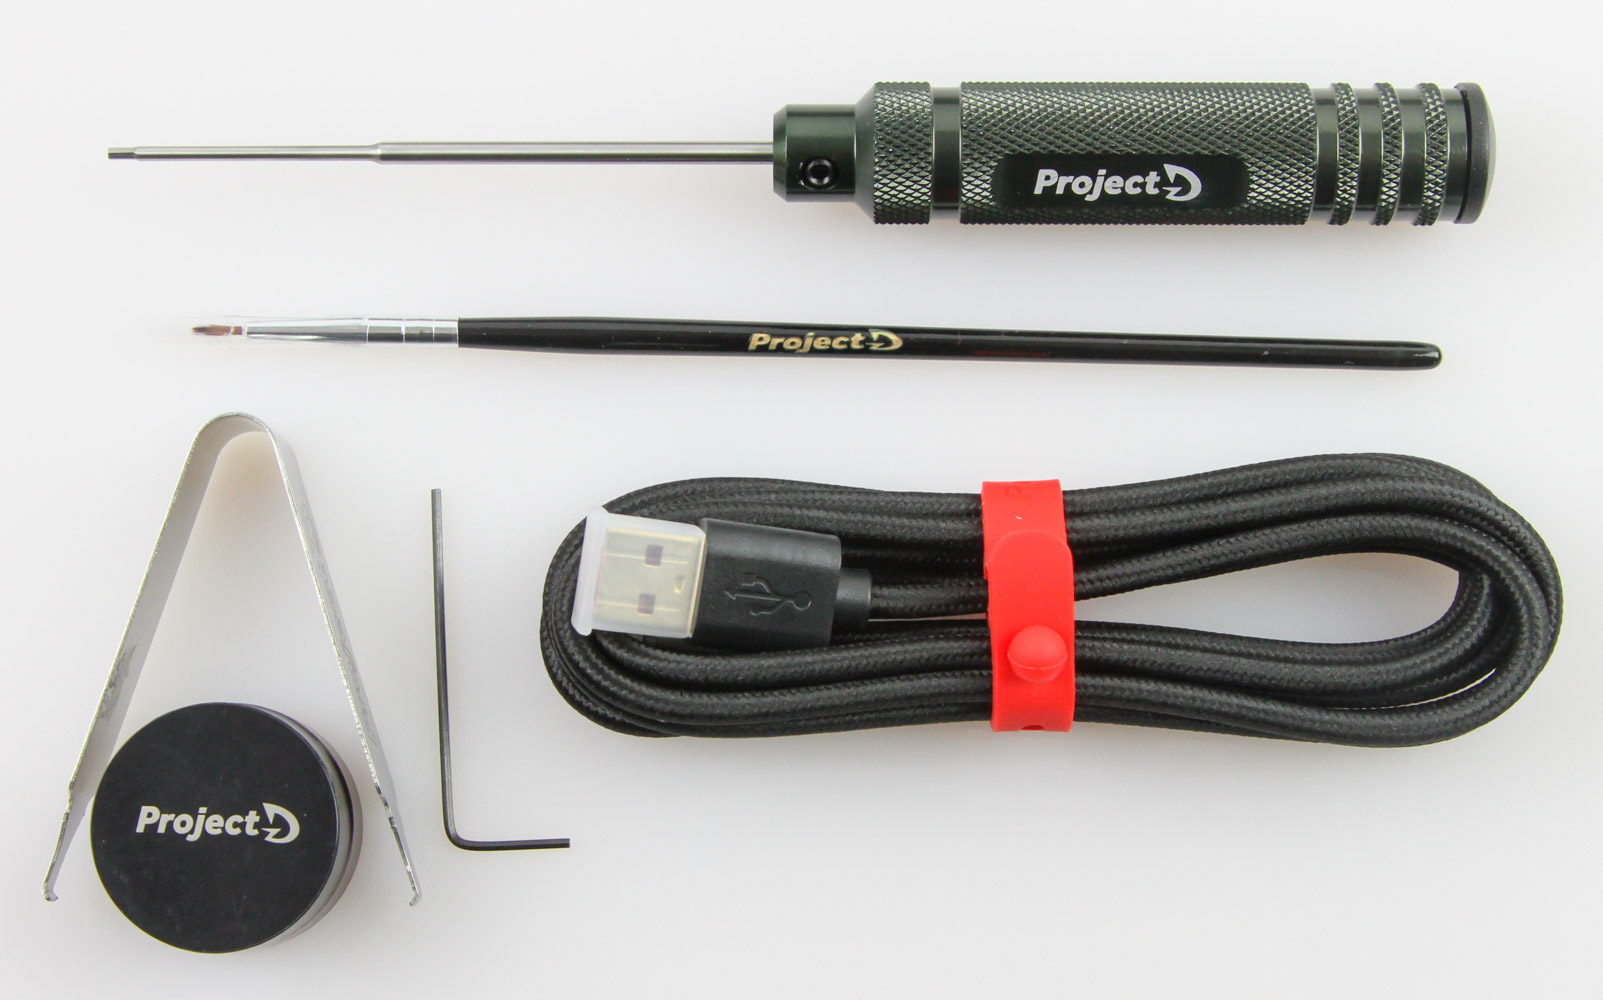
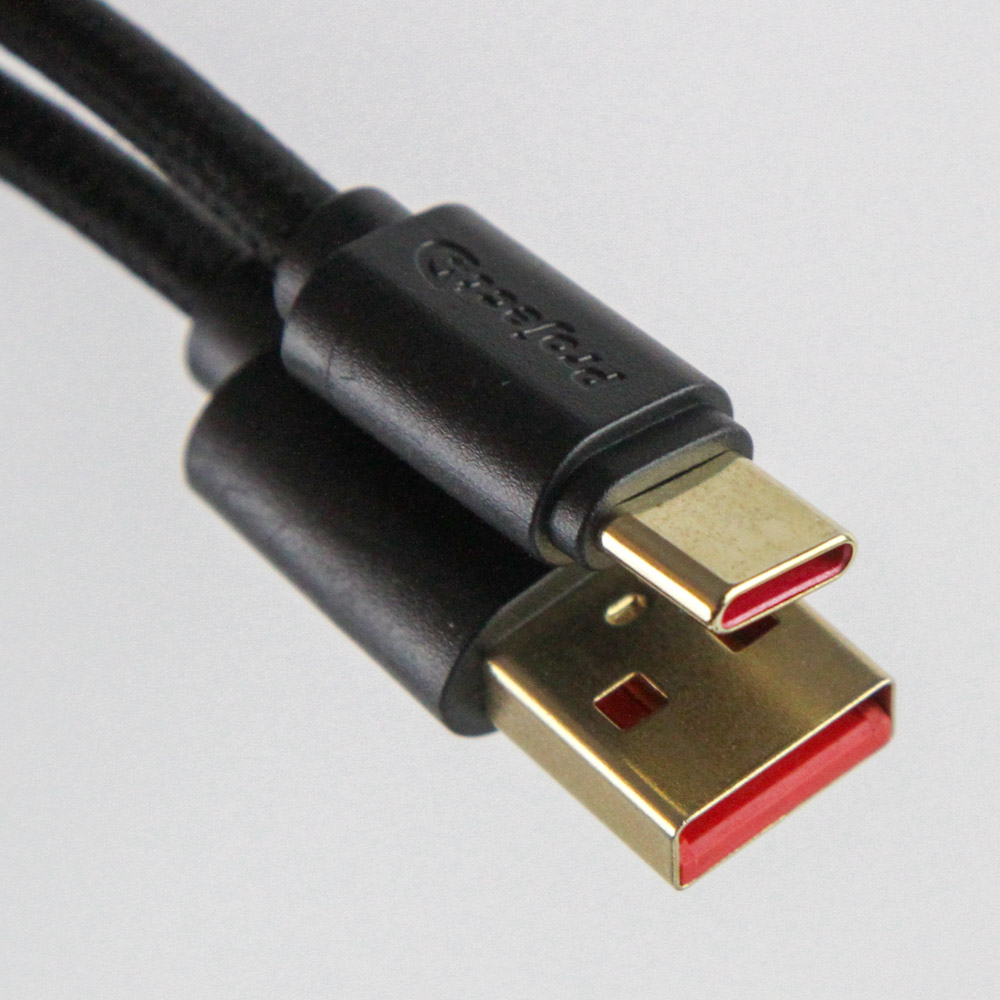
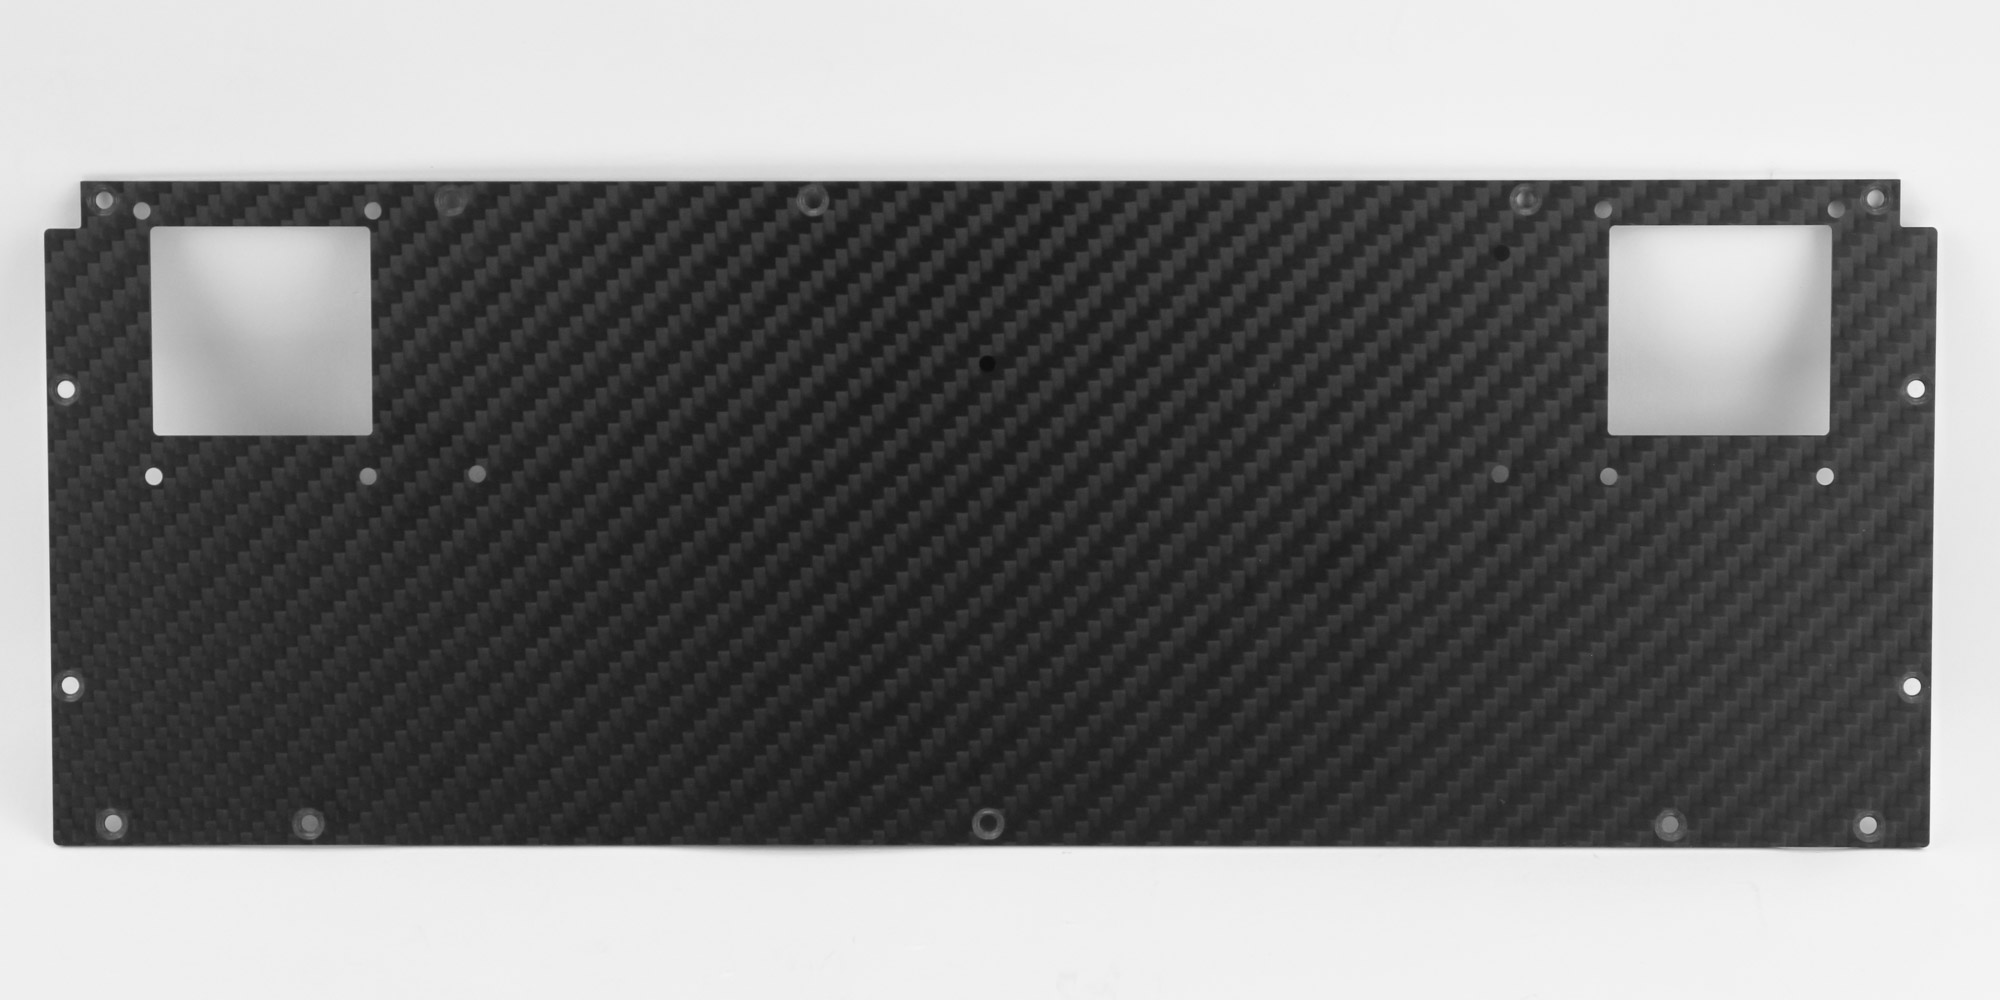

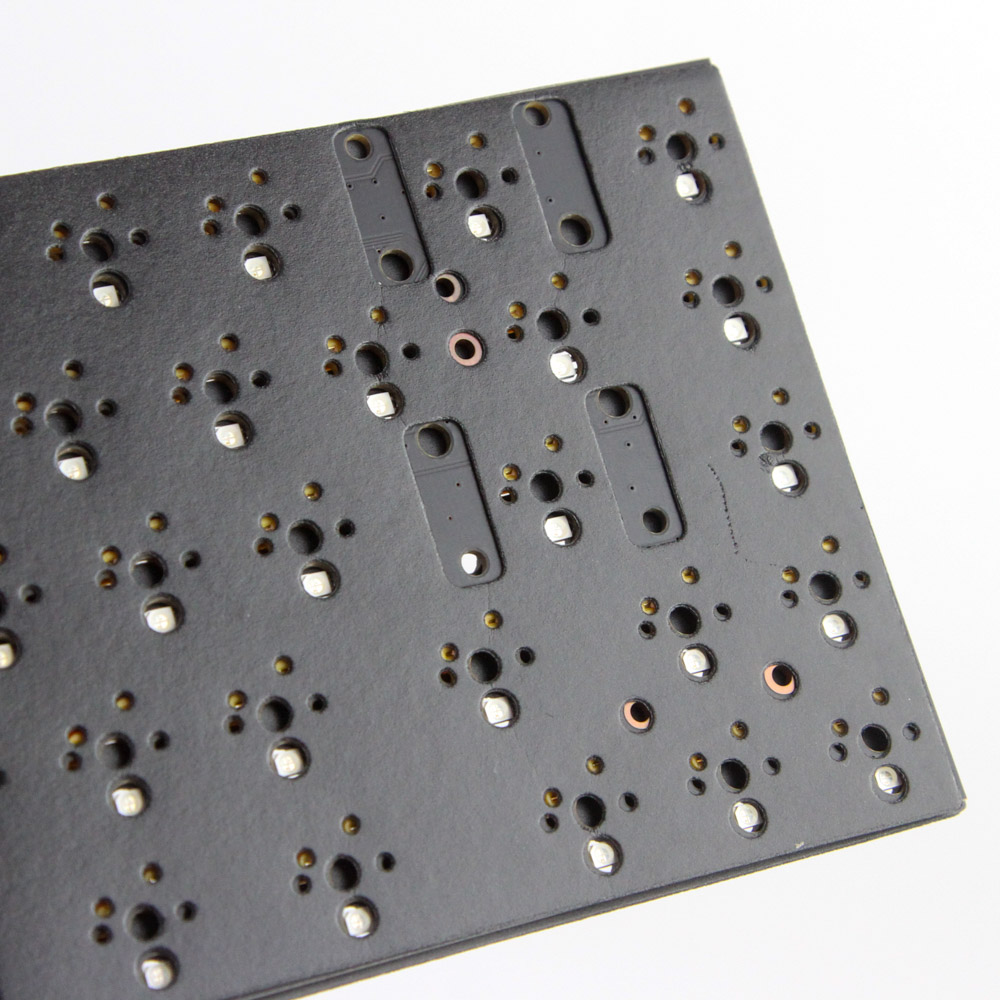
What also impressed me was every single item comes marked for easier identification in the manual. The pouches also have stickers which identify the exact items inside—22 M2.5x6 screws with a socket head, for example—including simple diagrams showing the type of screws, stabilizers, even washers. These parts also get code names (I1, I2, J, P etc) which get referred to in the manual at each relevant step. I also appreciated that Ducky provides everything you need to build the kit including the screwdrivers, let alone a brush and lube for the stabilizers. There's also a switch removal tool and a USB Type-C to Type-A cable which again has ProjectD branding instead of Ducky. At this point I decided to start taking out the larger parts beginning with this carbon fiber bottom plate that the aluminium pieces are installed on. This is why you see all those holes for the screws and these are placed in a countersunk on either side so the screw heads don't jut out of the surface of the plate.
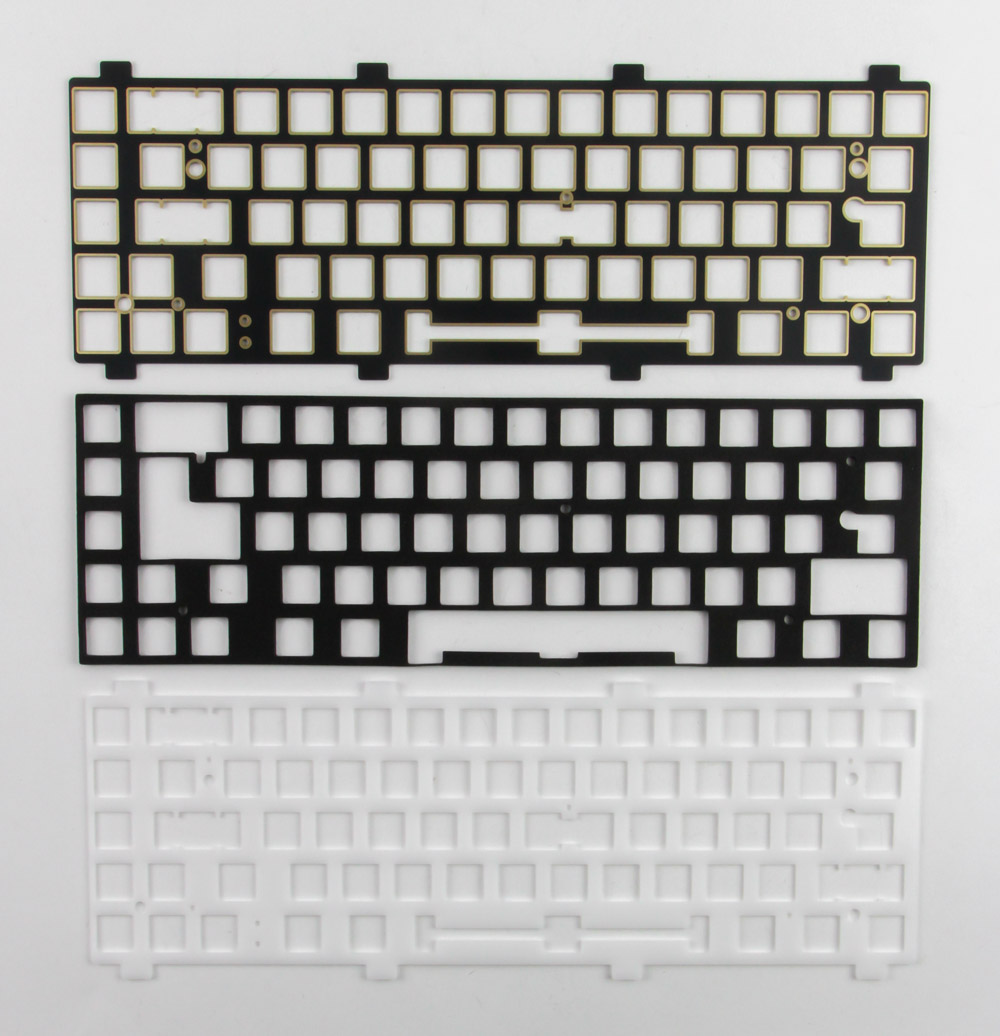
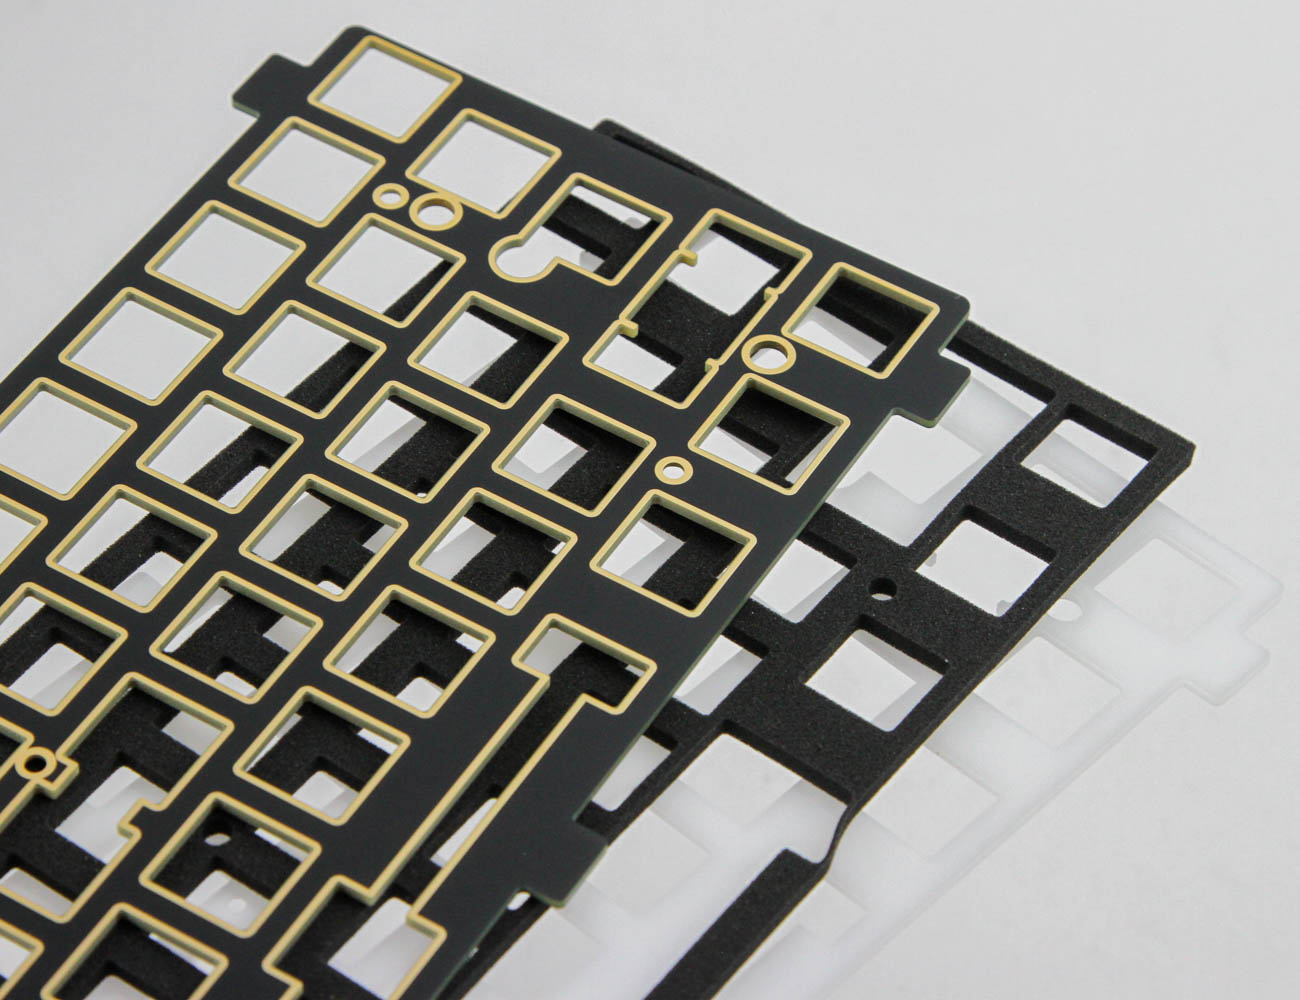
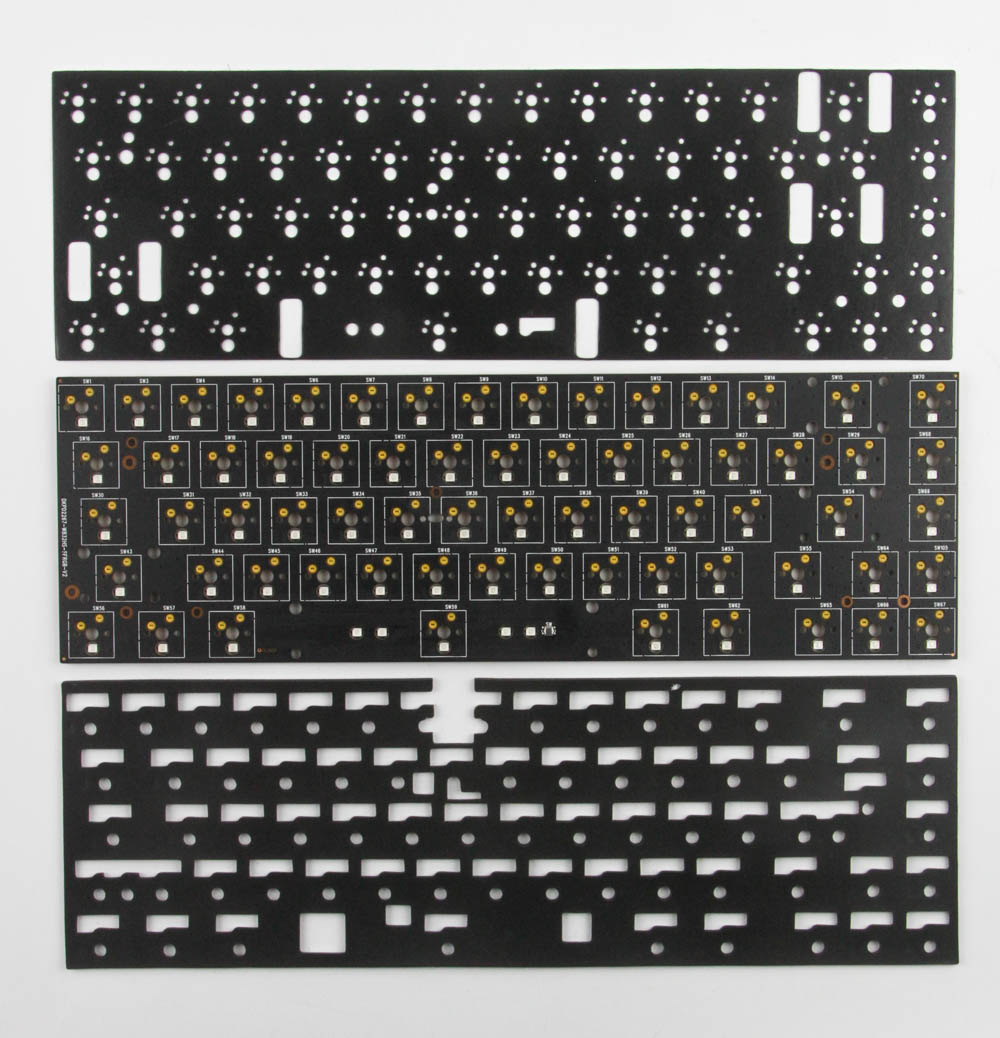
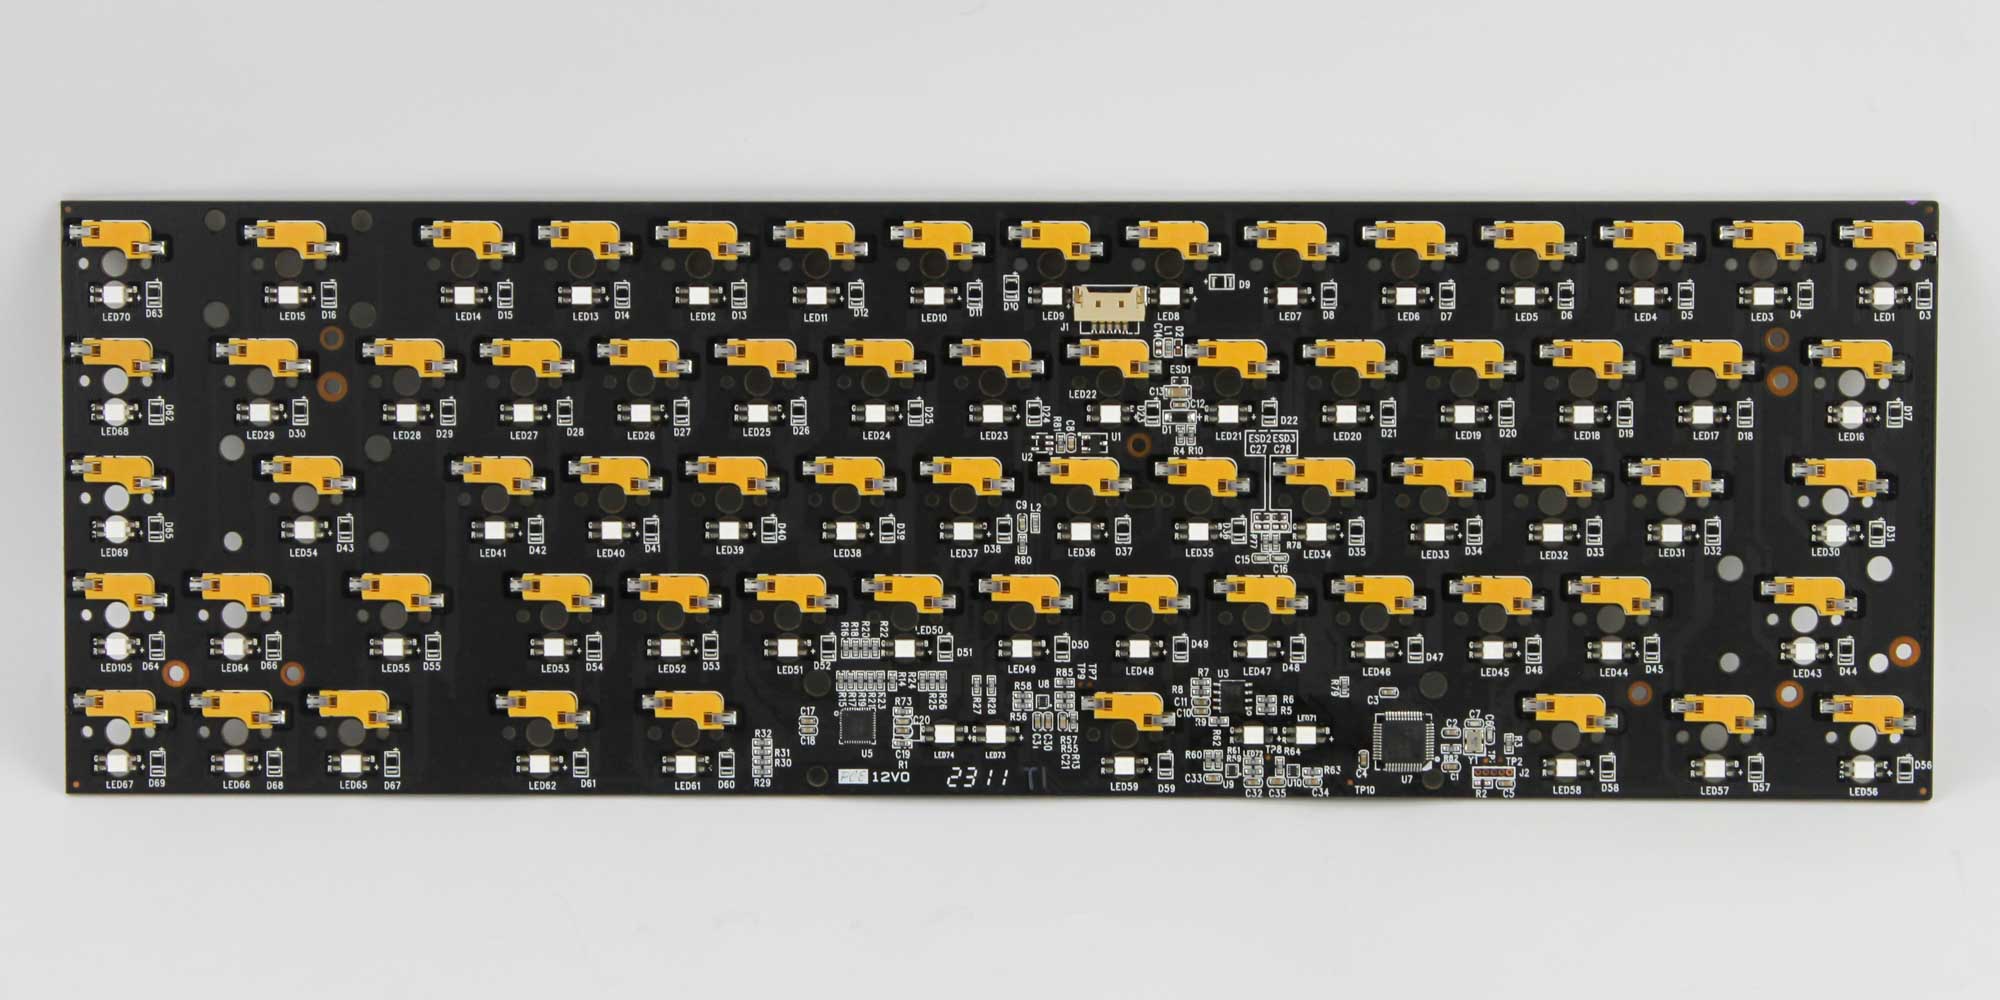


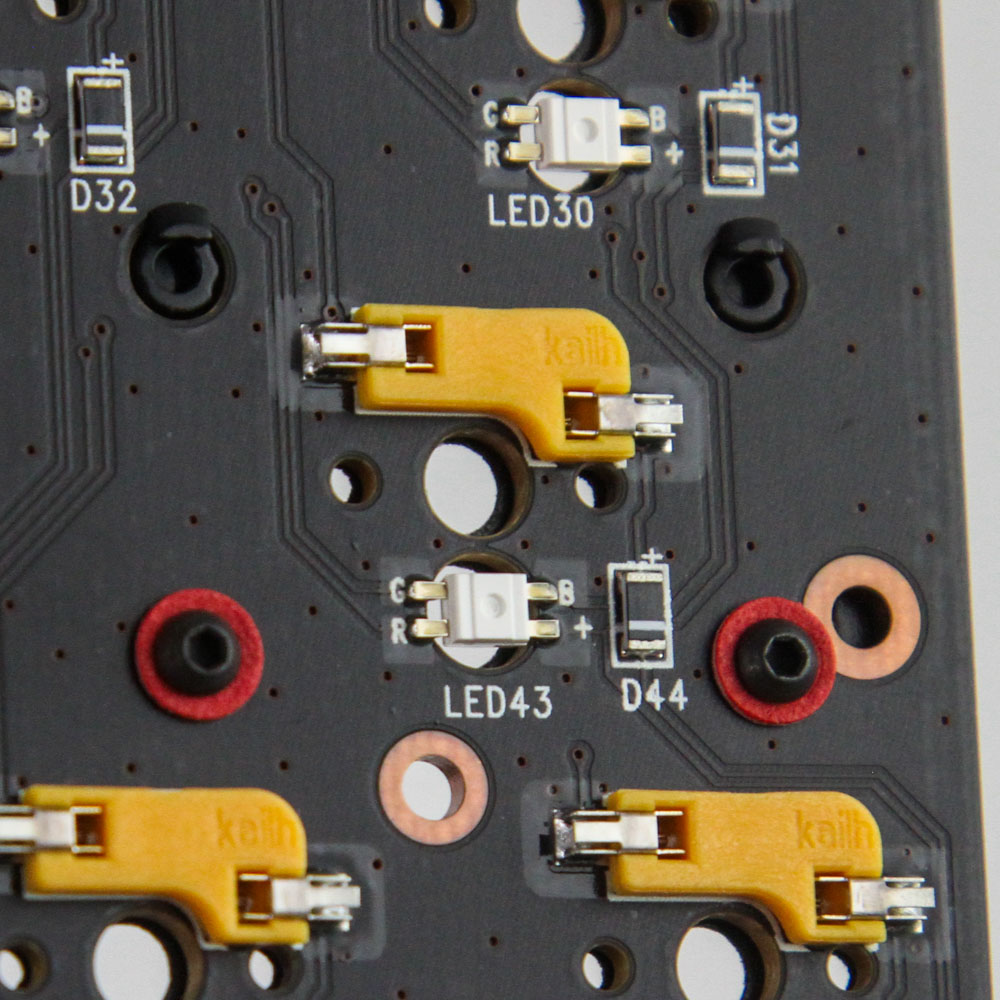
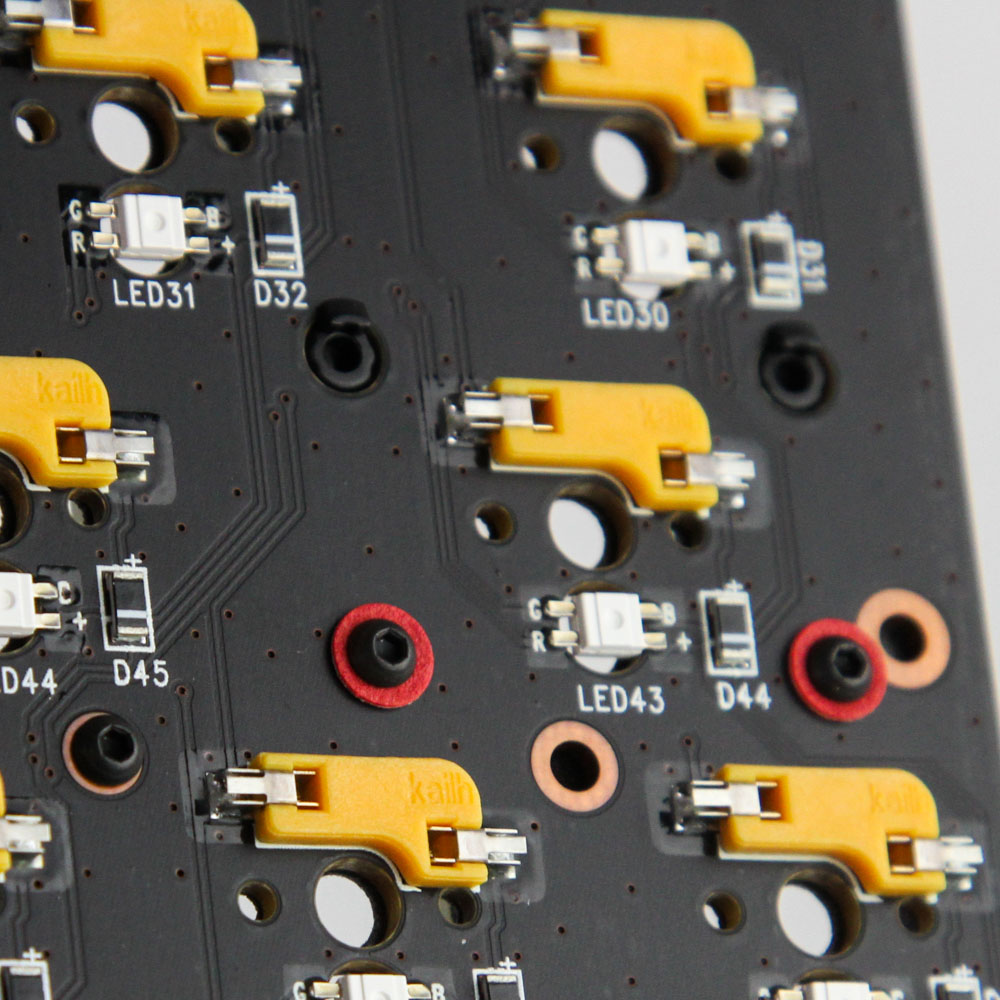
The next pouch included two plates to choose between—a black FR4 glass epoxy plate which will be stiffer and a translucent white POM one for those who prefer a smoother material. There is also a Poron foam sheet which goes between the plate and the PCB to dampen and support your keystrokes. Speaking of which, the PCB and two other thinner foam sheets are in the final pouch, with one of the foam sheets going between the PCB and the case and the other being a switch pad as we will see on the next page. The PCB is black in color with excellent build quality. It uses Kailh hot-swap switch sockets with 3/5-pin switch support and has a Westberry Technology WB32FQ95 32-bit USB microcontroller which has QMK/VIA open-source support. There's also a reset button on the other side of this multi-layer PCB by the space bar key should you need it.
ProjectD Outlaw 65: Closer Examination and Assembly
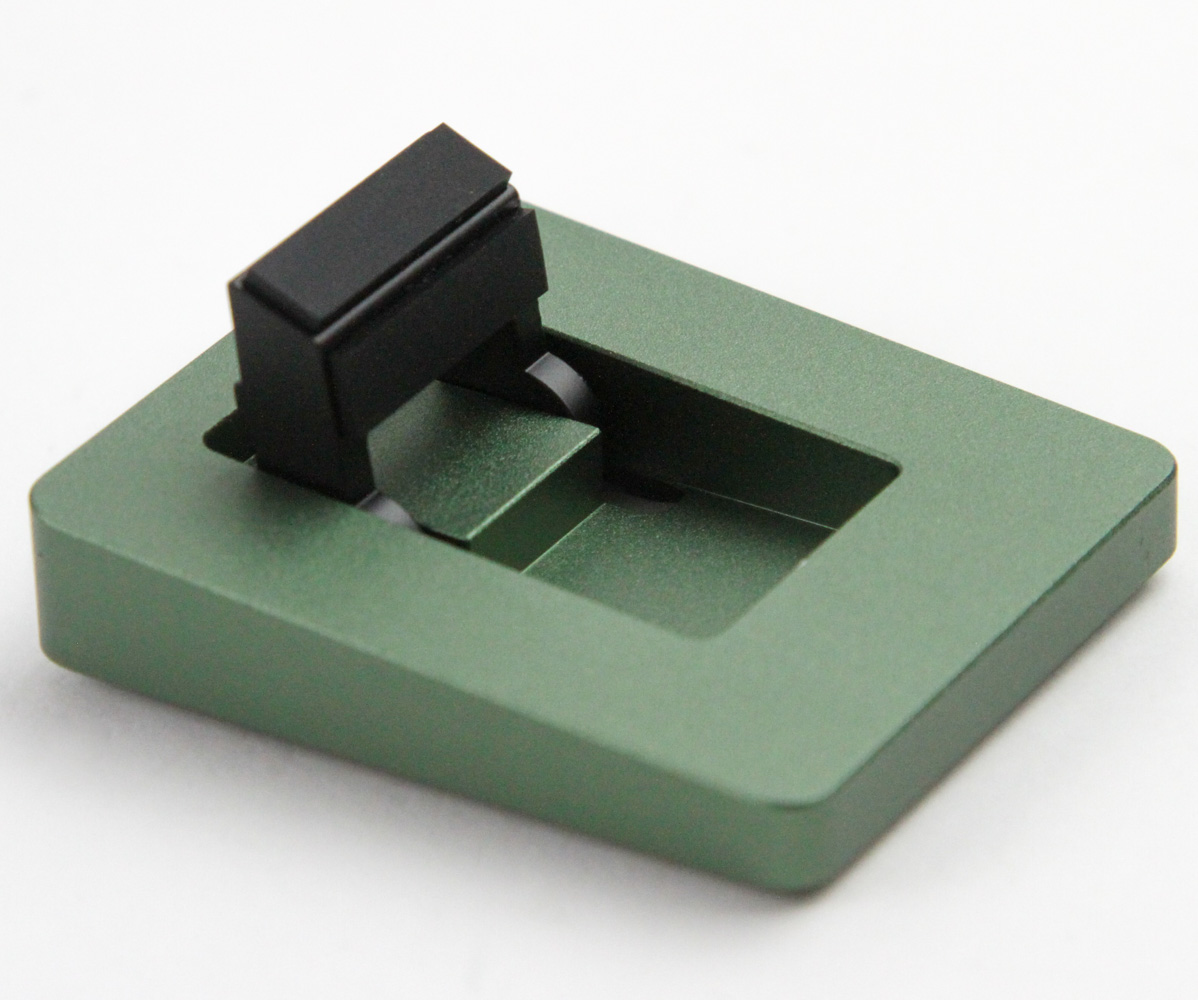
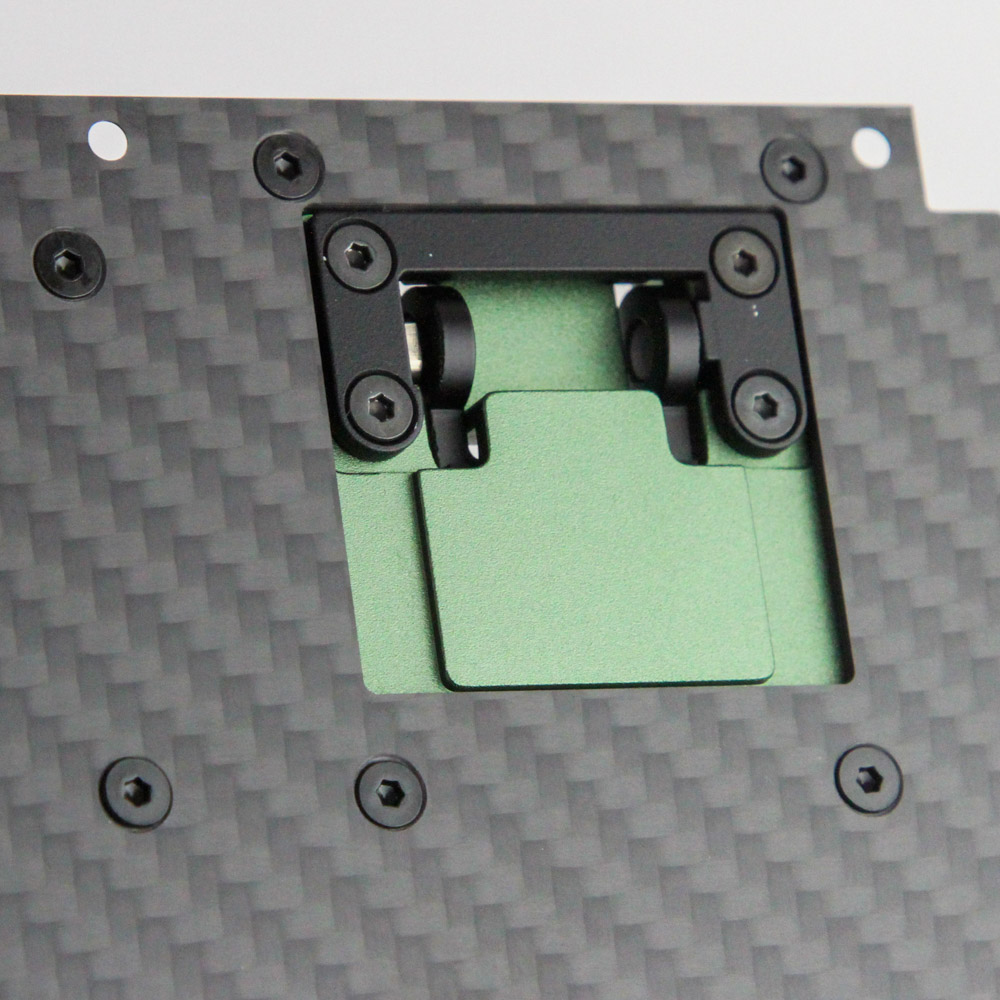

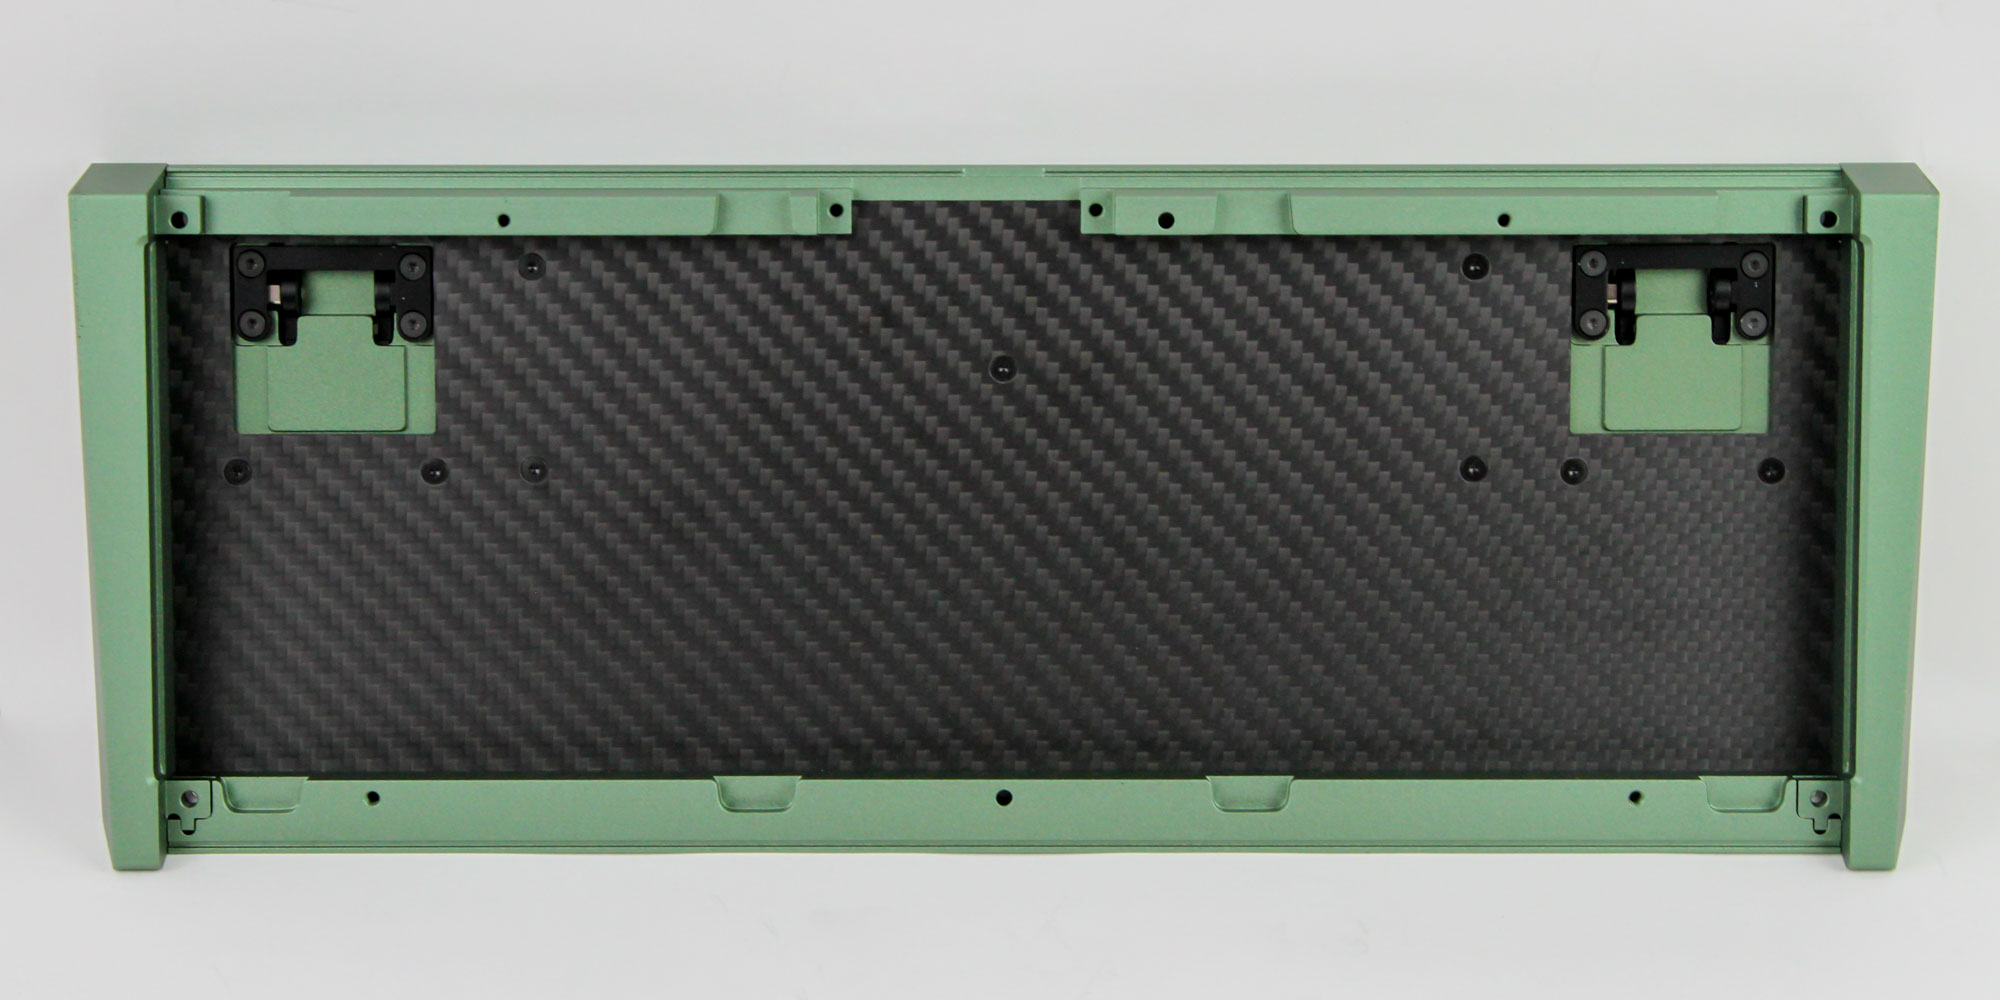
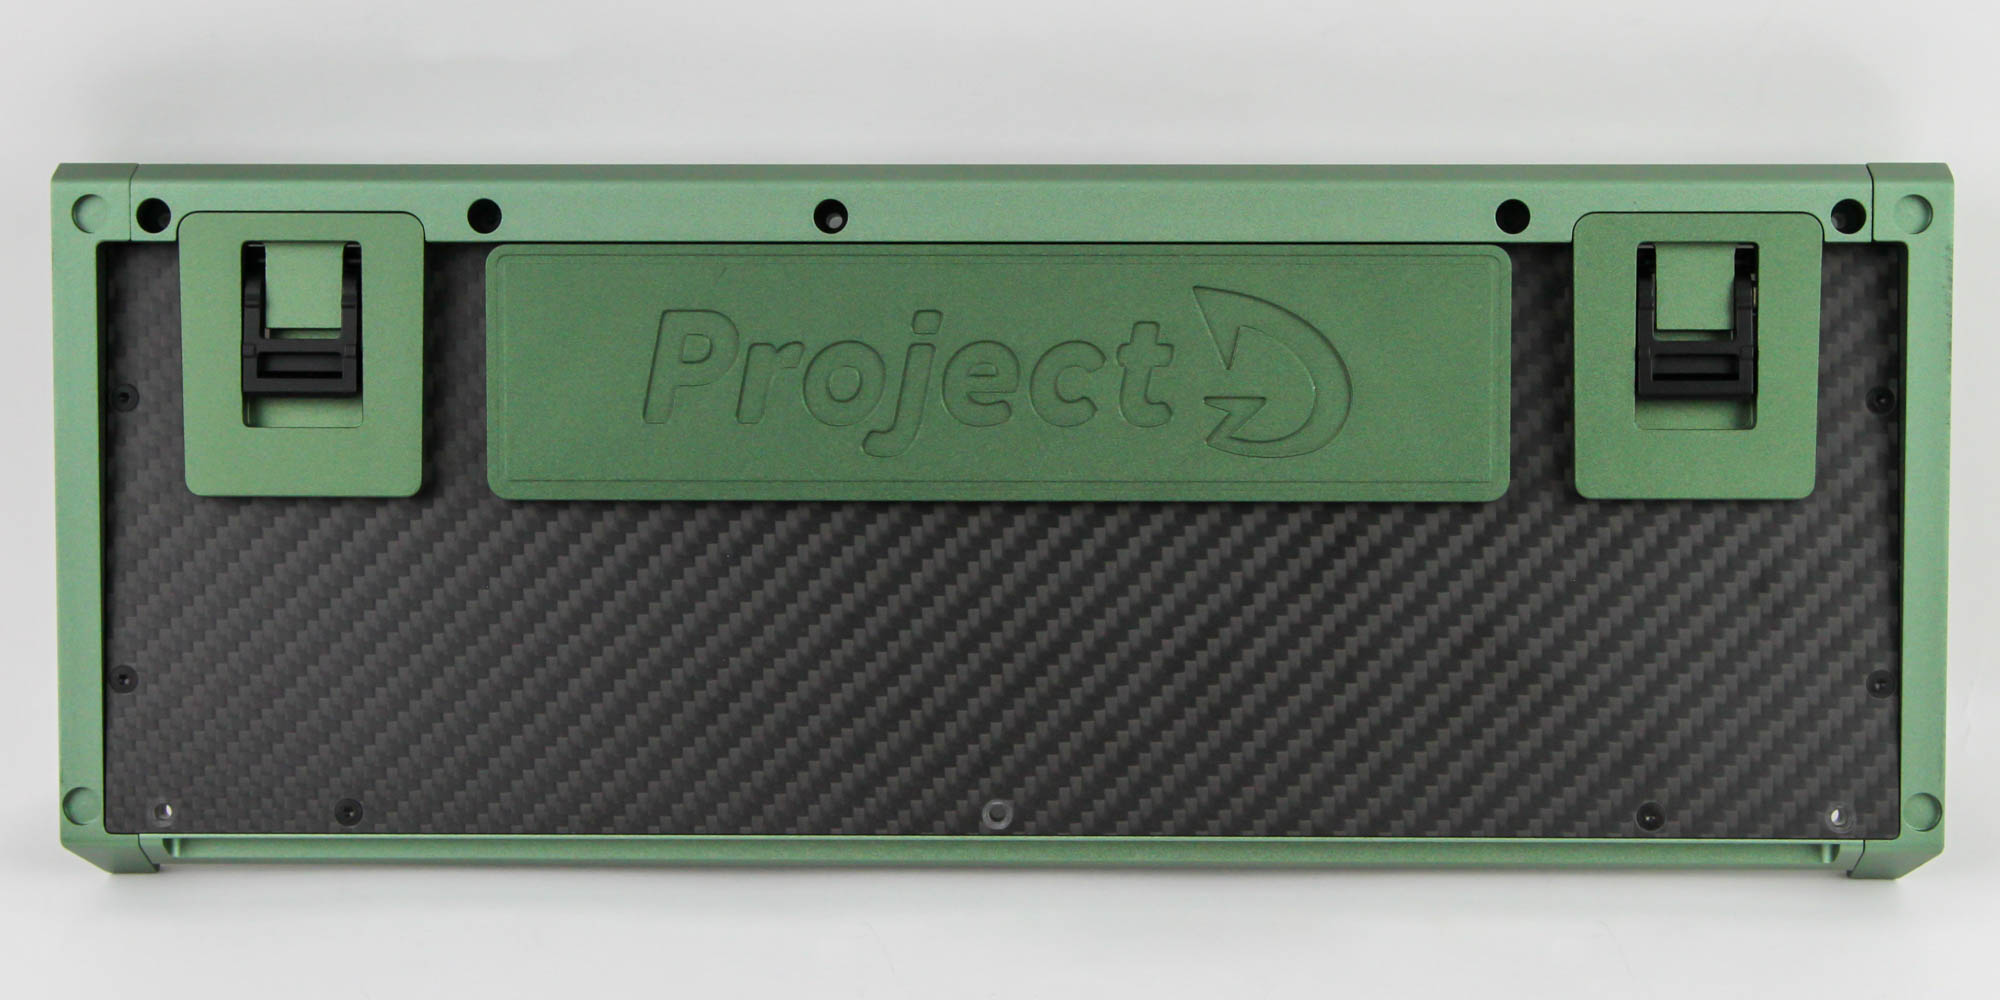
The ProjectD Outlaw 65 kit currently sells in black or silver color options, however I have seen a blue kit and of course I have a green one here. So presumably Ducky will look into some limited edition colors. For all other purposes, these kits are identical so the colors will only be to see what you like more and whether there is a specific keycap set you have in mind for the available colors. You can see the aluminium used is quite thick and very well machined, and having keyboard feet for an aluminium chassis is also quite rare to where this is already a nice feature helping distinguish the Ducky offering compared to many others on the market. Begin by screwing in the feet and the weight followed by the four side plates as seen above. The instructions and the nicely labeled parts help a lot to get going.
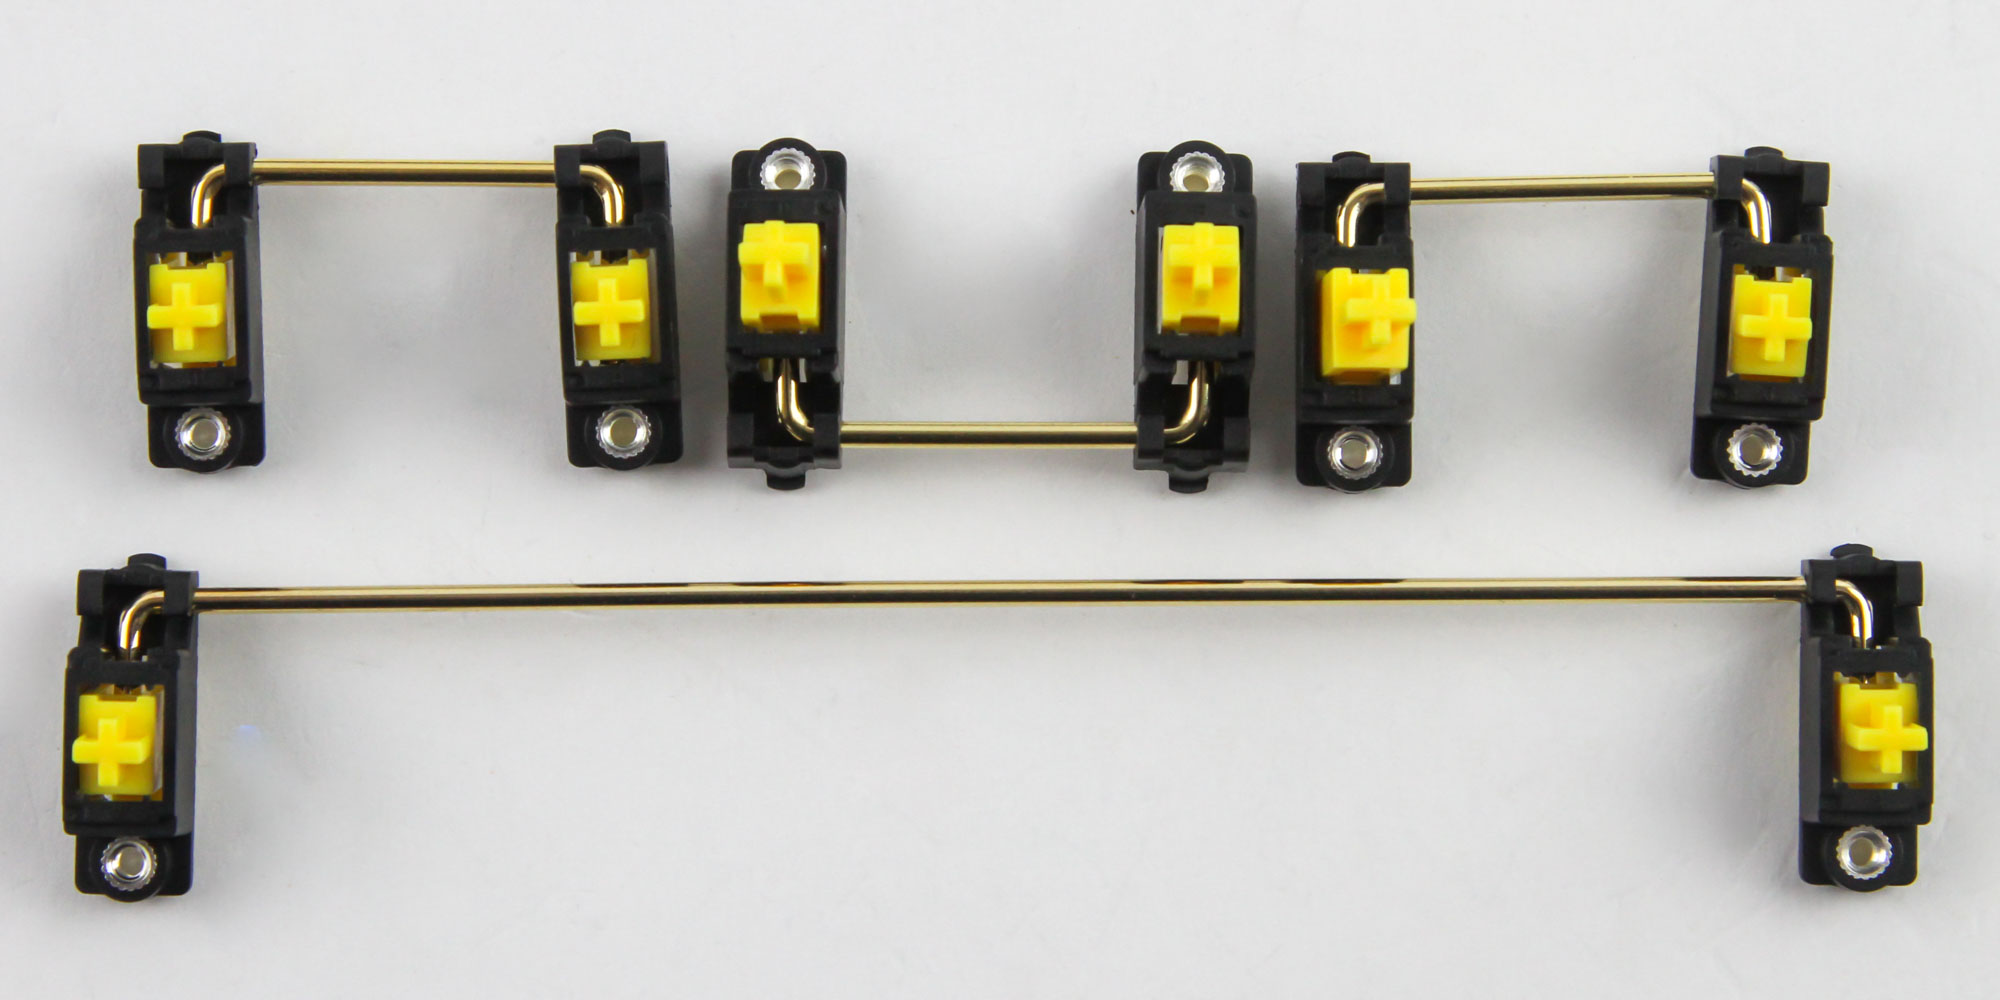

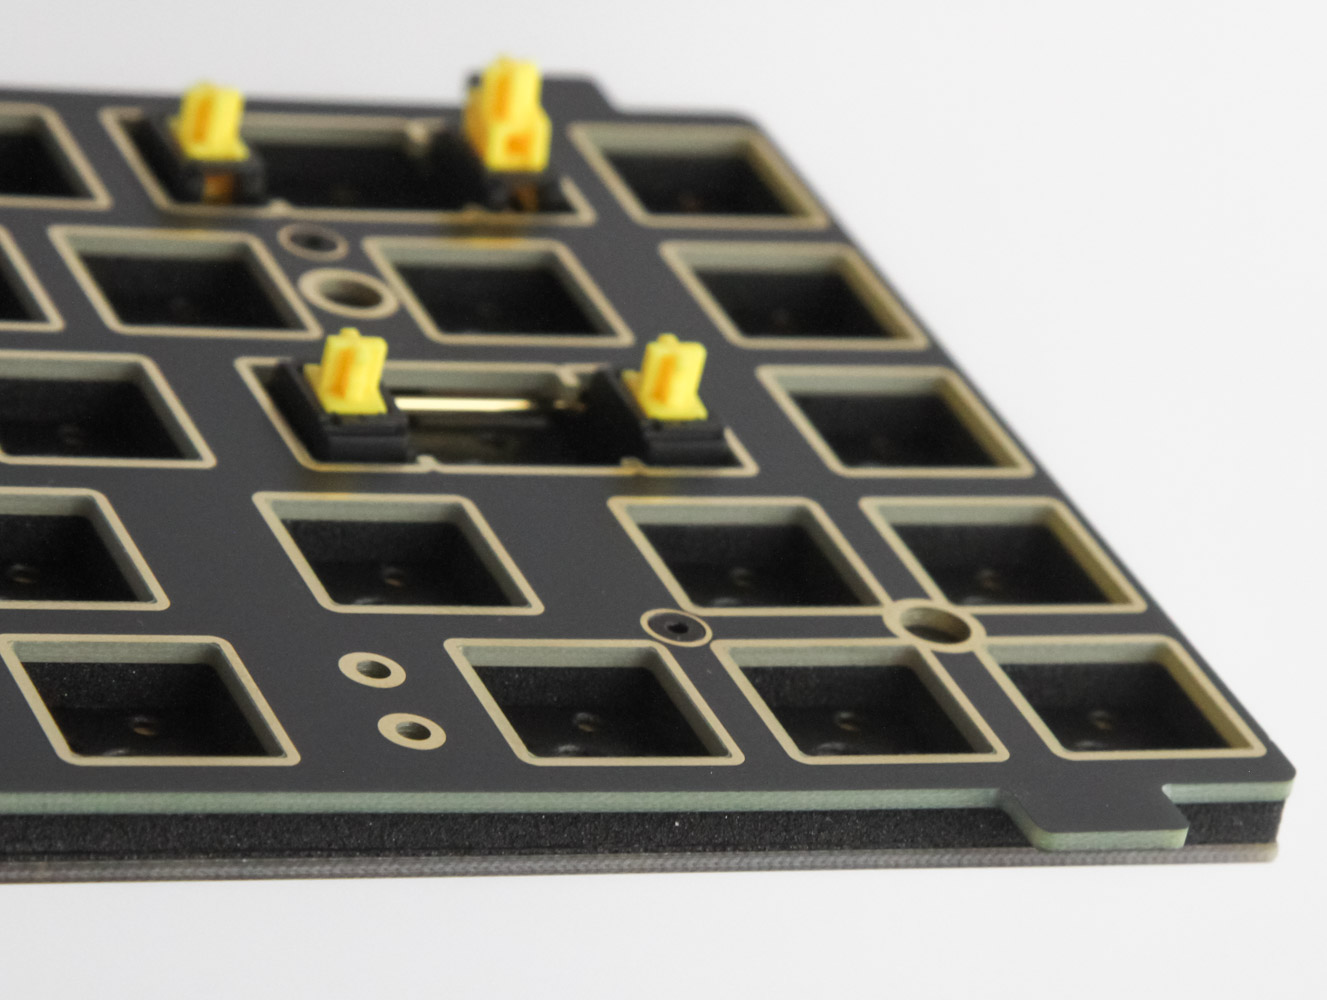
This is a wired-only kit so there are no batteries or battery foams to consider. Instead, the next step is to start assembling the PCB. Ducky provides four screw-in stabilizers that ship in individual parts so that you can lube them as indicated in the manual using the provided lube jar and brush. Putting together the stabilizers is simple enough although you may want to wash your hands later in case you have lube on the fingers. Now place the switch pad on the front of the PCB to help align where the stabilizers are supposed to go. Screw the stabilizers from the back and then do the same for four brass standoffs—this can be fiddly since you need to go with washers and a tiny screw that the smaller Allen key is used to tighten.
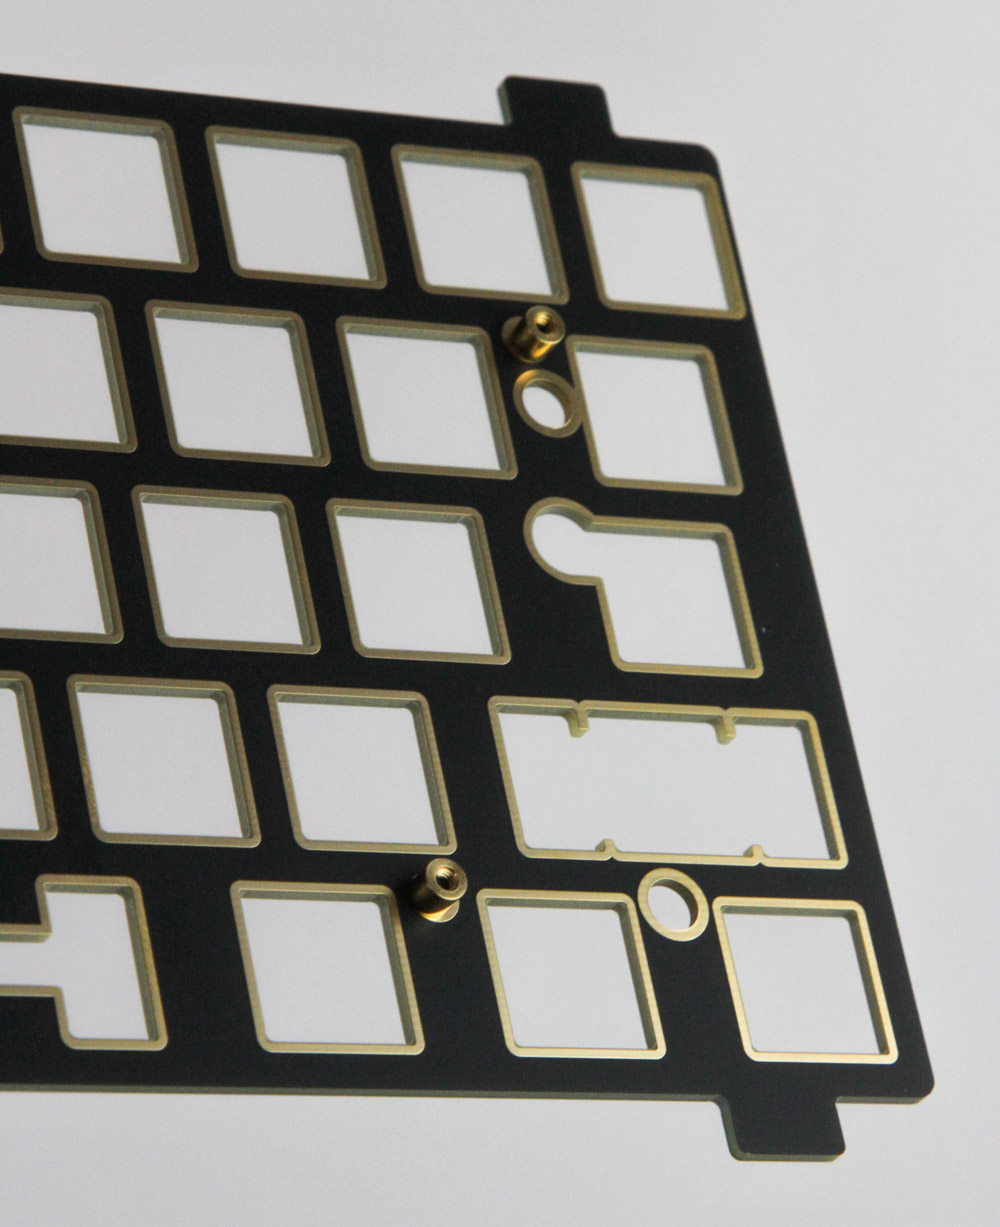
Choose the plate you want—I went with the FR4 plate—and use the correct screws that fit flush in the countersunk holes along with brass standoffs to get it ready. Then pair the plate, the thicker Poron foam sheet, and the PCB together and screw the set together using one more set of specific screws from the back of the PCB to make a compact sandwich.

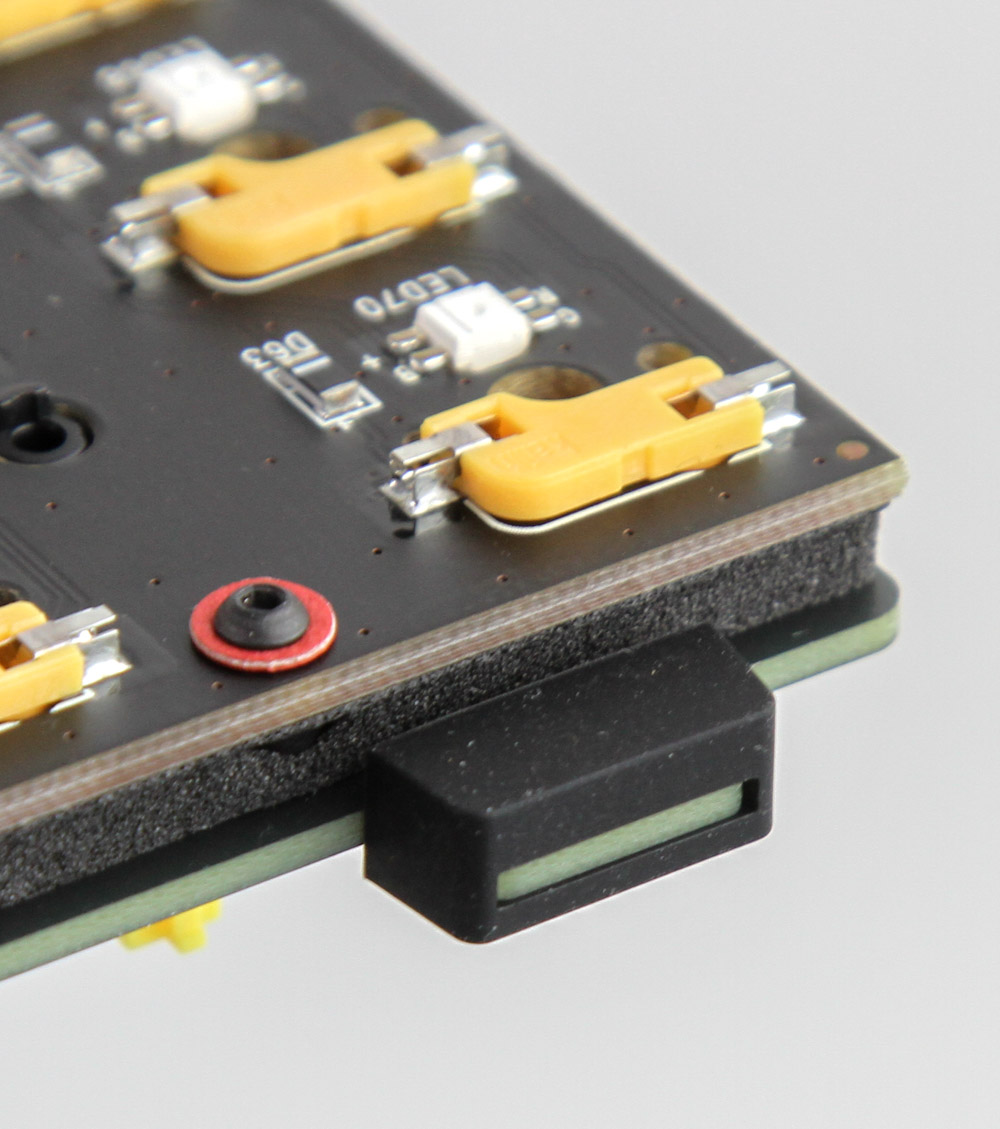
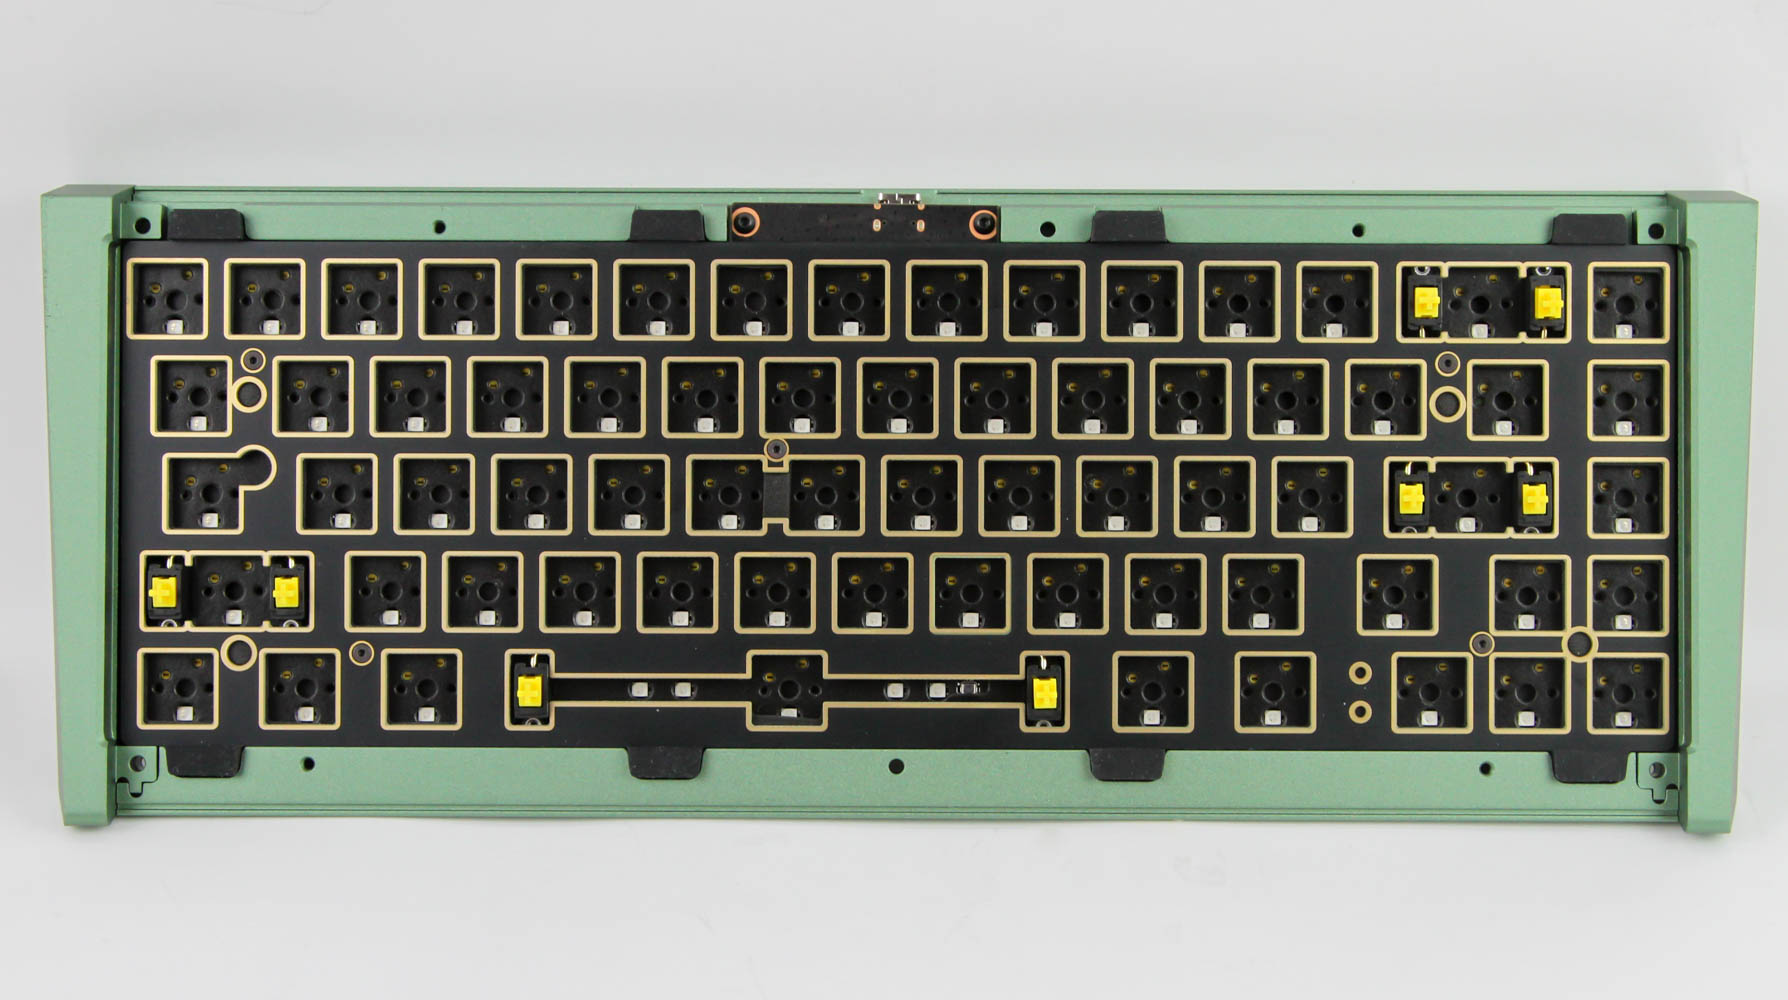
Things are getting close to completion as you now take out the daughter PCB hosting the USB Type-C connector and connect it to the primary PCB using the tiny internal cable. The bottom piece of the aluminium case is also getting ready now with a small divider piece getting attached. Now it's time to choose if you want to go with foam or silicone gaskets and I went with the latter which is easier but can be perhaps too thick/stiff for some. Place the hot-swap foam sheet on the underside of the PCB and then carefully position the plate/PCB piece in the case aligning the gaskets in the recesses and then screw the daughter PCB down. This can require more force than you think since the internal cable is longer than I'd have liked, so you need to squeeze it in to align the screw holes. Thankfully the added stress does not seem to hurt anything in the long run.


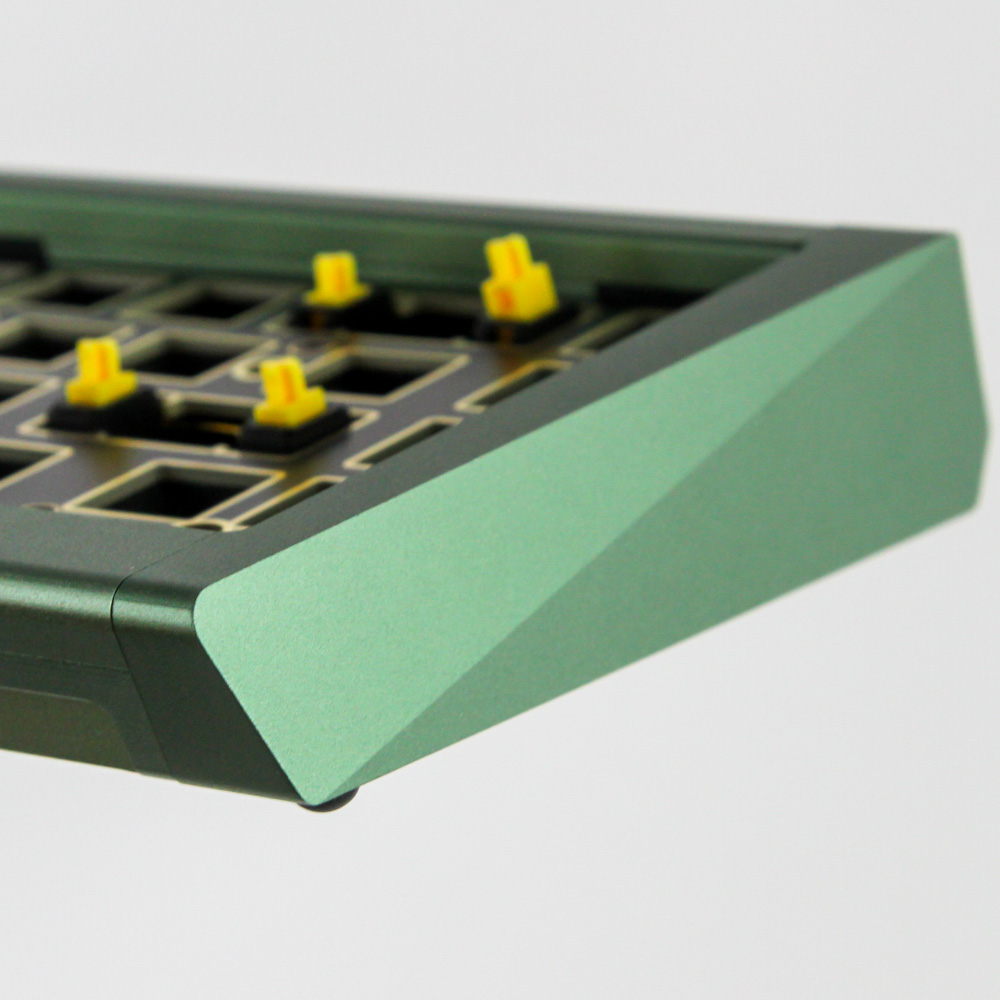
The rest of the panels on the front are now installed using the final set of screws and the keyboard kit is ready to go. Oh, make sure you have the four circular rubber pads on the corners on the back to help raise the kit off the desk to avoid scratches and also add some friction against the resting surface. The net result is a gasket-mount kit that weighs ~1.1 kg and is 333 x 128 x 48 cm with two elevation angles of 5° and 8° to choose from. There is branding on the side facing away from the user where you will also see the USB Type-C port for wired connectivity—there is no wireless option for this kit.
Our Patreon Silver Supporters can read articles in single-page format.
May 15th, 2024 23:19 EDT
change timezone
Latest GPU Drivers
New Forum Posts
- RMAd every single component in my PC, and it's still crashing (15)
- Ryzen Owners Zen Garden (7363)
- Last game you purchased? (296)
- RTX 4090 VS Titan Volta or titan RTX (7)
- MSI Z370 SLI PLUS + i9 9900k bad perfomance. (0)
- 20 Years? (14)
- I just succesfully baked DDR4 (96)
- Homeworld 3 [Official Thread] (41)
- Air makes its way from the reservoir into the radiator. (79)
- Double radiator setup with GPU fans on top (0)
Popular Reviews
- Homeworld 3 Performance Benchmark Review - 35 GPUs Tested
- Enermax REVOLUTION D.F. X 1200 W Review
- Upcoming Hardware Launches 2023 (Updated Feb 2024)
- Lofree Edge Ultra-Low Profile Wireless Mechanical Keyboard Review
- ZMF Caldera Closed Planar Magnetic Headphones Review
- AMD Ryzen 7 7800X3D Review - The Best Gaming CPU
- Corsair MP700 Pro SE 4 TB Review
- ASUS Radeon RX 7900 GRE TUF OC Review
- ThundeRobot ML903 NearLink Review
- Sapphire Radeon RX 7900 GRE Pulse Review
Controversial News Posts
- Intel Statement on Stability Issues: "Motherboard Makers to Blame" (267)
- AMD to Redesign Ray Tracing Hardware on RDNA 4 (227)
- Windows 11 Now Officially Adware as Microsoft Embeds Ads in the Start Menu (172)
- NVIDIA to Only Launch the Flagship GeForce RTX 5090 in 2024, Rest of the Series in 2025 (152)
- AMD Hits Highest-Ever x86 CPU Market Share in Q1 2024 Across Desktop and Server (137)
- AMD RDNA 5 a "Clean Sheet" Graphics Architecture, RDNA 4 Merely Corrects a Bug Over RDNA 3 (124)
- AMD's RDNA 4 GPUs Could Stick with 18 Gbps GDDR6 Memory (114)
- AMD Ryzen 9 7900X3D Now at a Mouth-watering $329 (104)