 14
14
Cooler Master Lab Test Bench Review
Value & Conclusion »Assembly
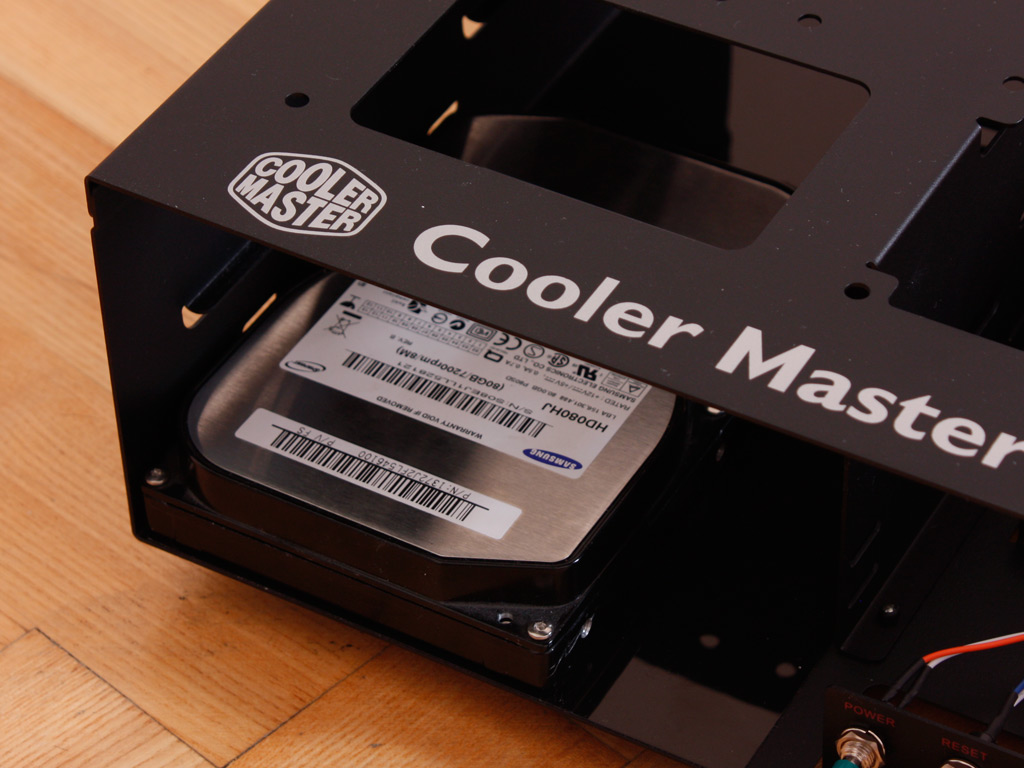

Assembling all the necessary parts within the Lab is quite easy. First off I have placed the 3.5 inch hard drive in the only available slot in the front. Above that I have inserted the optical drive. A black one was used for good measure, as it fits nicely with the identically colored Lab.

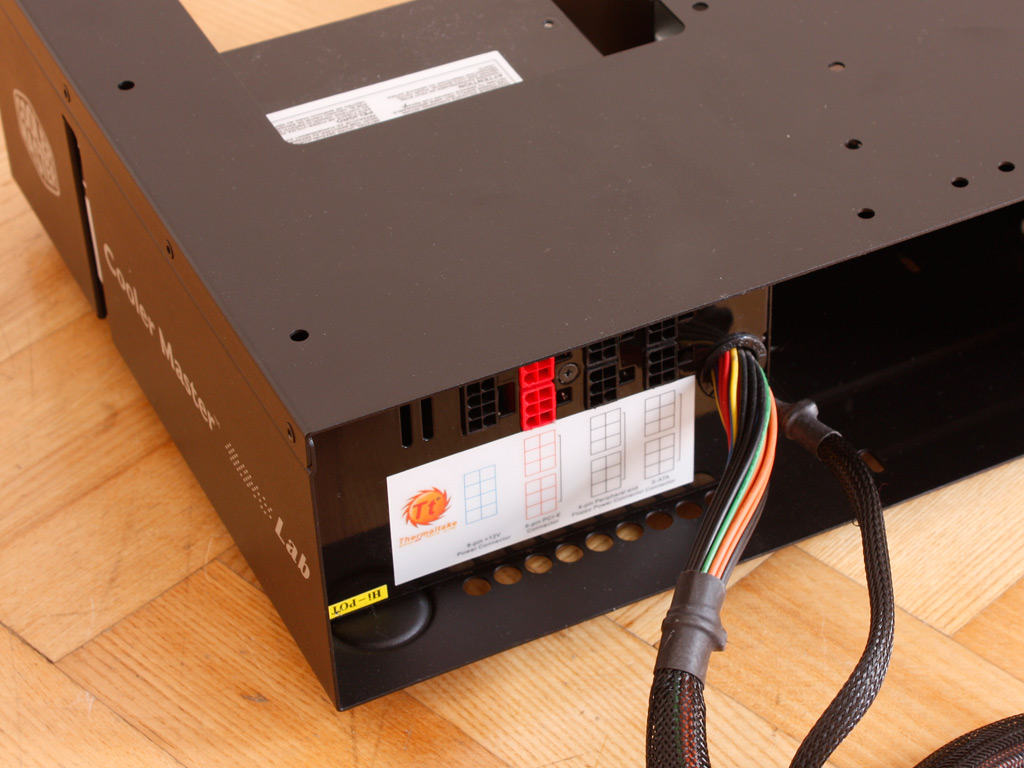
The power supply is simply inserted into the rear right corner of the unit and secured with the power connector facing toward the front. This means that all internal cables run out the back of the rack, which should make it easy to hide any unnecessary cables and thus reduce clutter.
The next step is pushing the white plastic mainboard spacers into the appropriate holes on the upper shelf of the Lab. These are larger than the usual ones used in enclosures and seem to hold quite well. Now everything is ready to place the motherboard on top of the Lab and to connect things.
Finished Looks
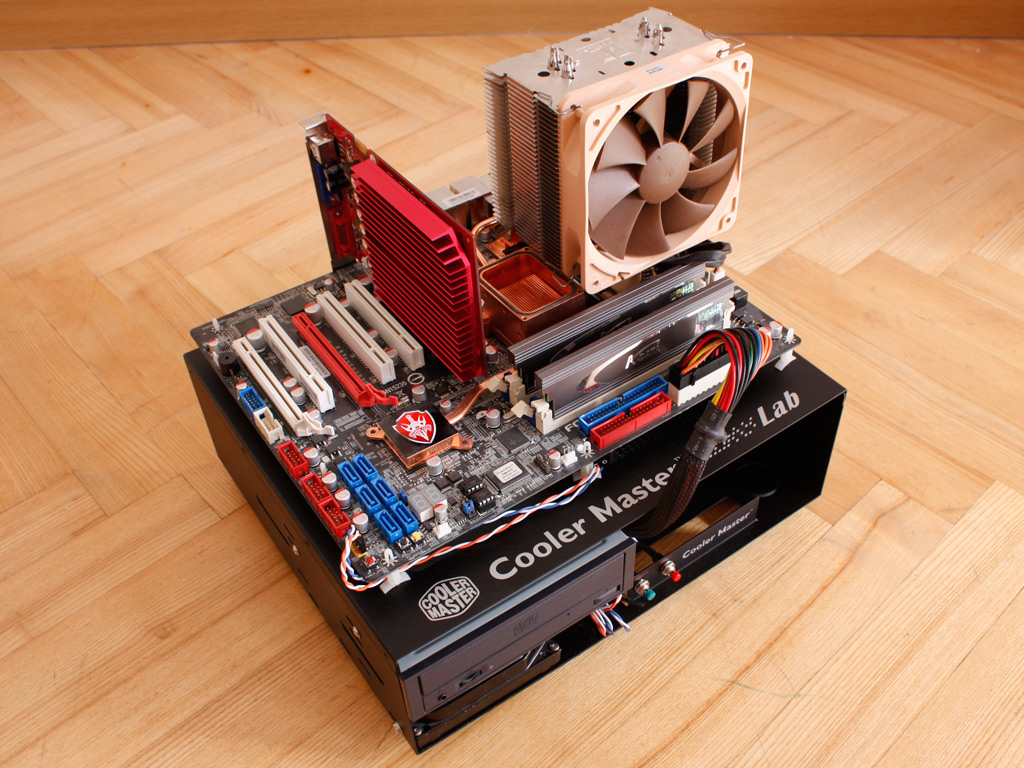
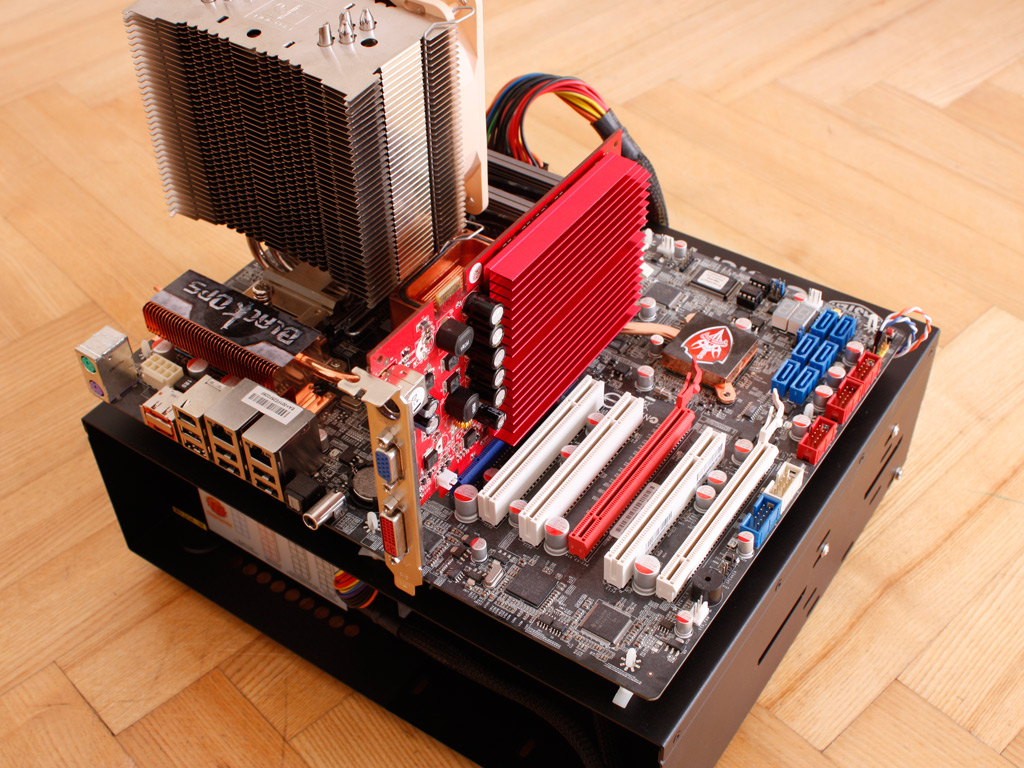
The last step consists of placement of the mainboard along with the expansion cards. As you can see these are not secured in any way, so you want to be careful when attaching or detaching any cables while the system is up and running. All other racks or bench tables we have reviewed in the past have offered a possibility to screw these down, which I do see as a necessity instead of a simple bonus feature.
Apr 25th, 2025 00:01 EDT
change timezone
Latest GPU Drivers
New Forum Posts
- Cracks in my cpu waterblock should I be concerned? (13)
- What's your latest tech purchase? (23595)
- Have you got pie today? (16677)
- Are the 8 GB cards worth it? (177)
- pc randomly blackscreening (0)
- What are you playing? (23462)
- I dont understand the phone OS world..... (49)
- New OLED monitor makes PC unresponsive sometimes (28)
- RTX 5070ti - Which MSRP model has the better/quieter cooler design, ASUS Prime, Gigabyte Windforce or PNY? (7)
- I tried to use AMD Auto Overclock, and now my PC has been freezing up sometimes. Afterwards, the screen goes black or displays artifacts. (29)
Popular Reviews
- NVIDIA GeForce RTX 5060 Ti 8 GB Review - So Many Compromises
- Crucial CUDIMM DDR5-6400 128 GB CL52 Review
- Colorful iGame B860M Ultra V20 Review
- ASUS GeForce RTX 5060 Ti TUF OC 16 GB Review
- Upcoming Hardware Launches 2025 (Updated Apr 2025)
- Sapphire Radeon RX 9070 XT Pulse Review
- Sapphire Radeon RX 9070 XT Nitro+ Review - Beating NVIDIA
- ASRock X870E Taichi Lite Review
- AMD Ryzen 7 9800X3D Review - The Best Gaming Processor
- ASUS GeForce RTX 5080 TUF OC Review
Controversial News Posts
- NVIDIA GeForce RTX 5060 Ti 16 GB SKU Likely Launching at $499, According to Supply Chain Leak (182)
- NVIDIA Sends MSRP Numbers to Partners: GeForce RTX 5060 Ti 8 GB at $379, RTX 5060 Ti 16 GB at $429 (127)
- NVIDIA Launches GeForce RTX 5060 Series, Beginning with RTX 5060 Ti This Week (115)
- Nintendo Confirms That Switch 2 Joy-Cons Will Not Utilize Hall Effect Stick Technology (105)
- Nintendo Switch 2 Launches June 5 at $449.99 with New Hardware and Games (99)
- Sony Increases the PS5 Pricing in EMEA and ANZ by Around 25 Percent (84)
- NVIDIA PhysX and Flow Made Fully Open-Source (77)
- Windows Notepad Gets Microsoft Copilot Integration (75)