 5
5
Cougar Panzer EVO RGB Review
Value & Conclusion »Test System
| System Parts for Case Reviews | |
|---|---|
| Processor: | Intel Core i7-8600K |
| Motherboards: | ATX: MSI Z370 GAMING PRO CARBON AC MATX: Z370M GAMING PRO CARBON Mini-ITX: MSI Z370i GAMING PRO CARBON Provided by: MSI |
| Graphics Card: | Long: ASUS Radeon RX580 Short: HIS Radeon 5350 HD |
| Memory: | 16 GB XPG Dazzle DDR4 2800 MHz CL17-17-17 1.25 V 32 GB GB XPG SPECTRIX D40 3000 MHz. CL16-18-18 1.35 V 16 GB XPG GAMMIX D10 DDR4 2400 MHz CL16-16-16 1.20 V Provided by: ADATA |
| HDD: | Western Digital 320 GB 7200 RPM |
| SSD: | ADATA XPG SX850 256 GB ADATA Ultimate SU800 3D 256 GB ADATA Ultimate SU700 240 GB Provided by: ADATA |
| Power Supply: | Antec High Current Gamer 650 W Antec High Current Gamer 750 W Provided by: Antec |
| Cooling: | be quiet! Dark Rock 4 be quiet! Pure Slim be quiet! Shadow Rock 2 be quiet! Shadow Rock LP Provided by: be quiet! |
Assembly

Installing the motherboard is done by traditional means, with included screws and spacers. There is plenty of space on the top, right, and bottom edge to work with, but even though I directly connected the I/O and case cables to the board, you will see that I re-routed them through the opening in the shroud for a cleaner look.

Adding an SSD is easy as can be. Simply slide the drive into place and let the plastic clip snap down. The only downside is the fact that the brackets are meant to take thick, old-fashioned drives too, so you may want to use a single screw to hold thin and light SSDs in place properly. Once filled, simply place the bracket back into its original position and use the thumbscrew to secure the whole contraption.


The 3.5" trays are actually completely tool-less by default. Simply pluck one off the chassis wall, snap a drive into place, and put it back. Gravity and friction hold things in place well enough, but a drop will probably be enough to shake it loose. But if that happens, you probably need to worry about your heavy GPU or CPU cooler more.

There is plenty of space for a power supply, and you are to use normal screws to secure it in place as well. Thanks to the dimensions of the Cougar Panzer EVO RGB, even the longest PSUs will fit without issue. While there is the possibility to install a 120 or 140 mm fan on the floor of the chassis, there is really no reason to do so.
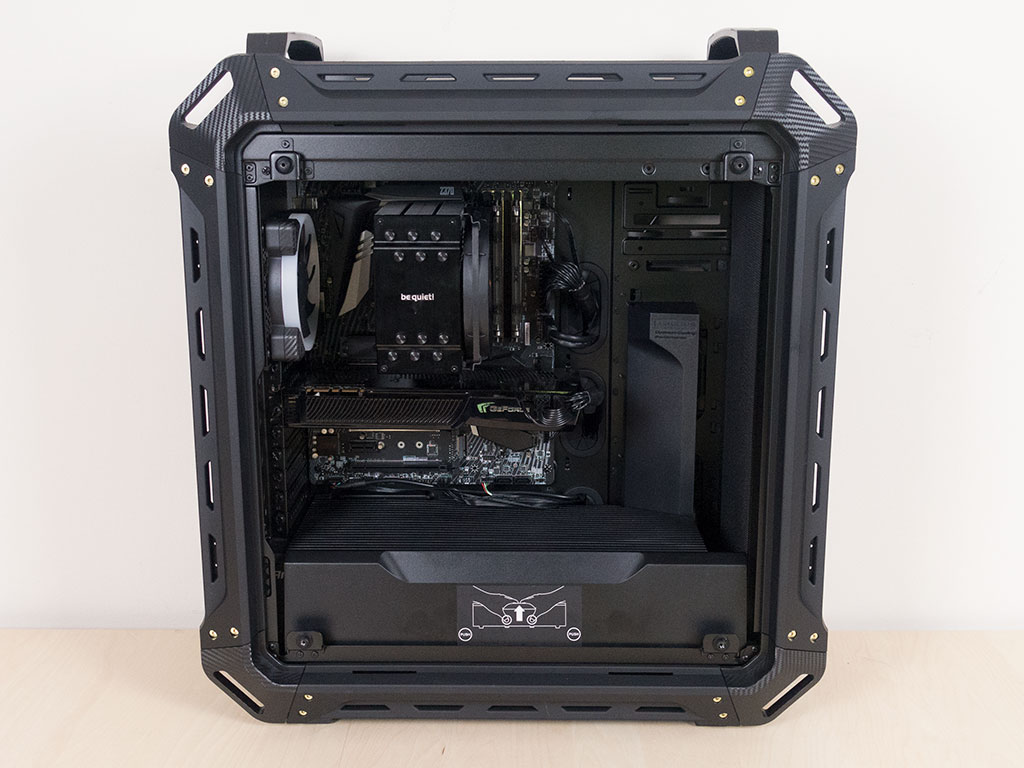

With the shroud back in place, the interior of the Panzer EVO RGB looks alright in terms of cleanliness, but only so much can be done to hide all the cables at the bottom edge of the motherboard due to the lack of routing options through the shroud. The backside of the motherboard tray holds the cable mess, but can be made to look reasonably organized as well, which is somewhat important with the glass panel there.
Finished Looks
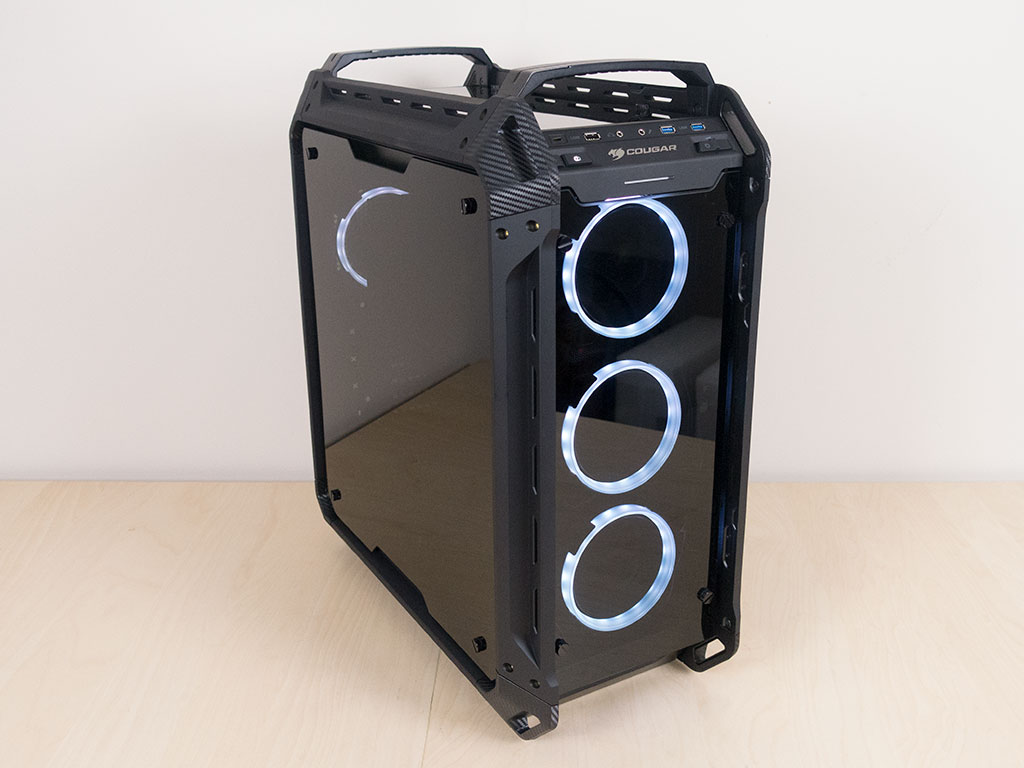


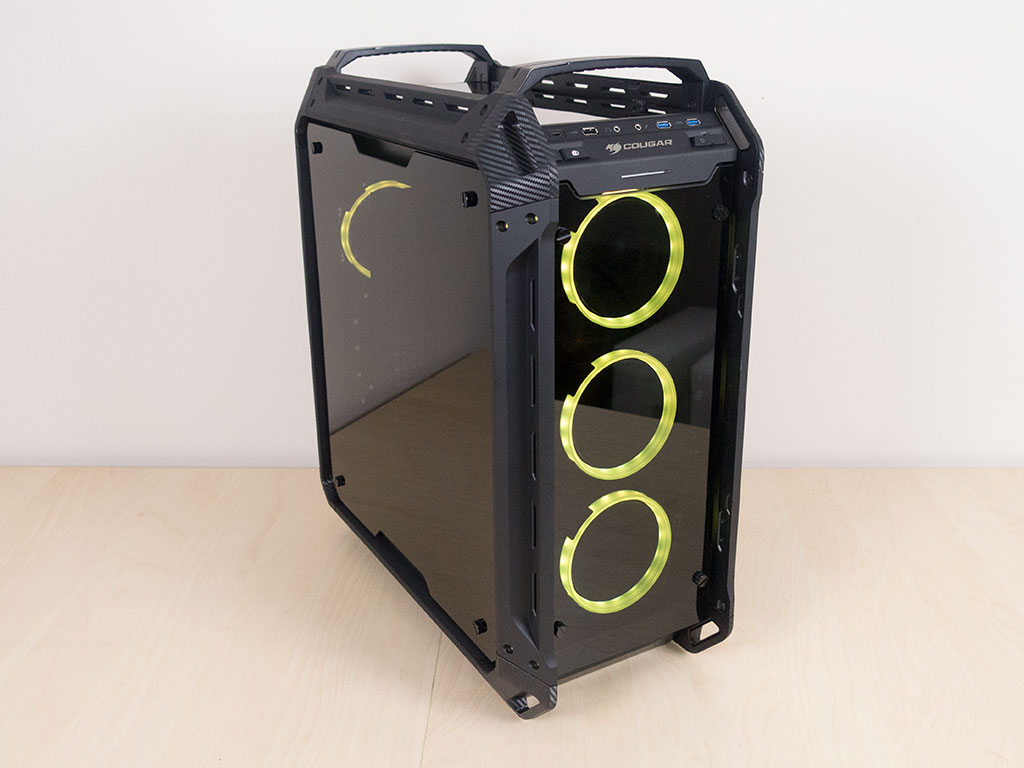


Thanks to the RGB fans inside the case, you are able to easily toggle through ten different solid colors as well as numerous mixes and animations. There are too many to count really, especially as you can also control the speed of those visuals.
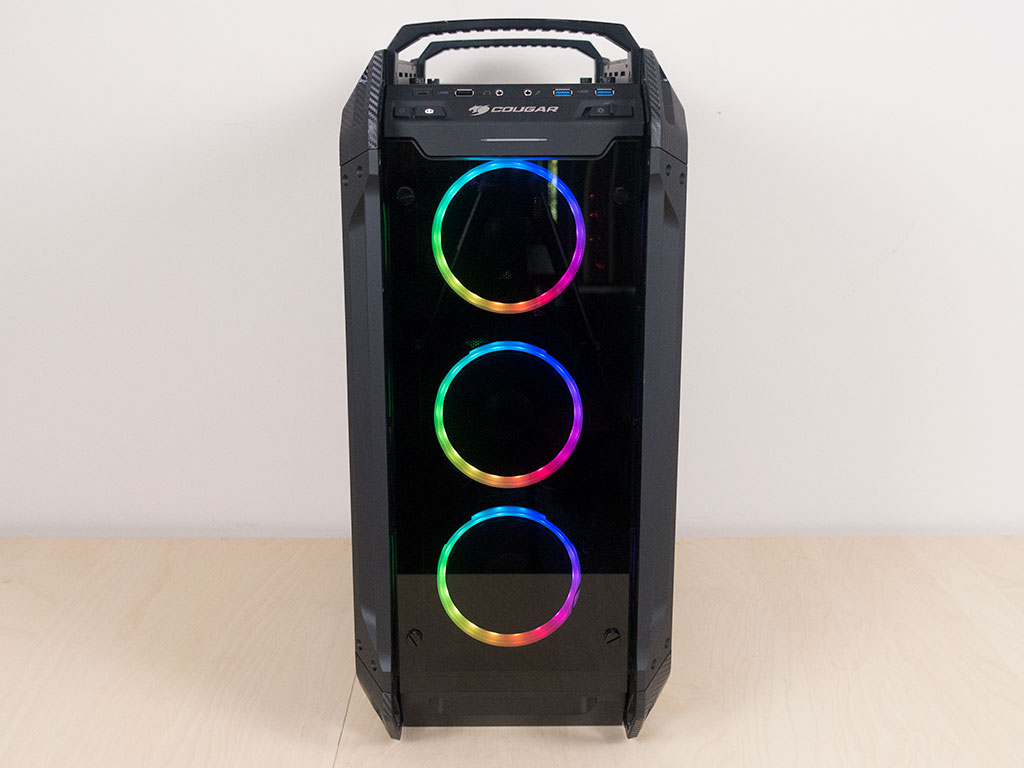

All three fans in the front are clearly visible and look pretty spiffy. For the perfectionists out there, the gap between the fans is not 100% symmetrical, but that is just a minor adjustment issue. The power LED in the button lights up white to let you know the system is up and running.


In the rear, everything looks like you would expect it to, and all the external leads can be plugged in without issue. Due to the heavy tint, it is actually pretty difficult to see the hardware inside the chassis, even with the four LED-equipped fans. It would have been prudent of Cougar to tint this panel less to maximize the visual element. However, on the opposite side, the heavy tint works well as it hides the cable mess.
Apr 25th, 2025 00:07 EDT
change timezone
Latest GPU Drivers
New Forum Posts
- Cracks in my cpu waterblock should I be concerned? (13)
- What's your latest tech purchase? (23595)
- Have you got pie today? (16677)
- Are the 8 GB cards worth it? (177)
- pc randomly blackscreening (0)
- What are you playing? (23462)
- I dont understand the phone OS world..... (49)
- New OLED monitor makes PC unresponsive sometimes (28)
- RTX 5070ti - Which MSRP model has the better/quieter cooler design, ASUS Prime, Gigabyte Windforce or PNY? (7)
- I tried to use AMD Auto Overclock, and now my PC has been freezing up sometimes. Afterwards, the screen goes black or displays artifacts. (29)
Popular Reviews
- NVIDIA GeForce RTX 5060 Ti 8 GB Review - So Many Compromises
- Crucial CUDIMM DDR5-6400 128 GB CL52 Review
- Colorful iGame B860M Ultra V20 Review
- ASUS GeForce RTX 5060 Ti TUF OC 16 GB Review
- Upcoming Hardware Launches 2025 (Updated Apr 2025)
- Sapphire Radeon RX 9070 XT Pulse Review
- Sapphire Radeon RX 9070 XT Nitro+ Review - Beating NVIDIA
- ASRock X870E Taichi Lite Review
- AMD Ryzen 7 9800X3D Review - The Best Gaming Processor
- ASUS GeForce RTX 5080 TUF OC Review
Controversial News Posts
- NVIDIA GeForce RTX 5060 Ti 16 GB SKU Likely Launching at $499, According to Supply Chain Leak (182)
- NVIDIA Sends MSRP Numbers to Partners: GeForce RTX 5060 Ti 8 GB at $379, RTX 5060 Ti 16 GB at $429 (127)
- NVIDIA Launches GeForce RTX 5060 Series, Beginning with RTX 5060 Ti This Week (115)
- Nintendo Confirms That Switch 2 Joy-Cons Will Not Utilize Hall Effect Stick Technology (105)
- Nintendo Switch 2 Launches June 5 at $449.99 with New Hardware and Games (99)
- Sony Increases the PS5 Pricing in EMEA and ANZ by Around 25 Percent (84)
- NVIDIA PhysX and Flow Made Fully Open-Source (77)
- Windows Notepad Gets Microsoft Copilot Integration (75)