 8
8
EVGA Z15 RGB Gaming Keyboard Review
Disassembly »Closer Examination


The EVGA Z15 is a departure and a half from the design of their previous Z10 keyboard. The biggest change no doubt is the omission of the integrated LCD display—we instead have a keyboard that looks more like a lot of other keyboards. The case uses ABS plastic at the bottom and a brushed aluminium frame in black at the top, with a mostly monochrome finish for contrast with the blingy EVGA logo at the top and beveled edge with a chrome finish. There are dedicated volume and media controls in the top-right corner, in the form of buttons and a volume wheel identical to what we saw on the Z20.
Bezels are slightly bigger than average throughout, which results in a keyboard that is on the larger side of average even for full-size keyboards. On the keycaps, secondary legends have been put below the primary ones unless there are also tertiary ones, as those displace the secondary legends. As seen above, single legend placement is in the top left of the keycap, which suggests that backlighting is stronger towards the top of the keycaps. As such, legends placed further below may not be backlit to the same extent.


Flipping the keyboard around, we see a textured finish similar to what we saw on the underside of the wrist rest. There is an EVGA logo in the plastic case panel, as well as the usual certification sticker with another logo and the product certification. We also see five long rubber pads along the top and bottom edges for friction against the resting surface and to prevent scratches to the case itself. There are also two sets of keyboard feet at the top corners, each of which allows for two optional elevations. Continuing the design scheme, these feet have rubber pads, which prevents scratching the feet as well.


Installing the wrist rest is the simple given the magnets at the base of the keyboard and the top of the wrist rest. Simply align accordingly and you are done! The wrist rest is comfortable enough to use despite the harder top surface relative to the plush foam on the Z20 wrist rest, though you may want to try typing without it first to see if it is ergonomically better for you. I do miss the one on the Z20, but it is one of the ways EVGA sets the two keyboards apart.


EVGA has gone with an attached cable, and a thick one at that. It protrudes from the middle at the top facing away from the user and is braided in black. The cable terminates in a male USB Type-A connector, which is gold-plated for additional oxidation resistance. A spare USB port on your computer is needed here thus, and USB 3.2 Gen 1 is recommended. No USB or audio passthrough anywhere, unlike the Z20.


EVGA is using the OEM profile for the keycaps, with the standard 104 keys all sculpted and angled as with your average pre-built mechanical keyboard. The included keycap puller works, but its ring design can scratch the sides of keycaps. The stock keycaps are all thin ABS plastic (average wall thickness 0.89 mm) with laser-etched legends, which unfortunately does mean they will wear out sooner rather than later. The keycaps are backlighting compatible, although as we speculated above, the legends below the primary ones do not get as brightly backlit because of the north-facing LEDs.


There are two switch options for the EVGA Z15 keyboard, and both happen to be Kailh Speed switches in the form of the Speed Silver and Speed Bronze. Yes, the Kailh naming is exactly the same as for Cherry switches. What Kailh did do is to go beyond linear switches with a faster actuation and by offering tactile and clicky switches. My sample uses the Kailh Speed Silver linear switches, and the replacement switches we saw before are the Kailh Speed Bronze clicky switches. The larger keycaps use Cherry style stabilizers which are an improvement compared to those on the Z20, though still quite rattly and mushy. No lubrication to be seen anywhere here.


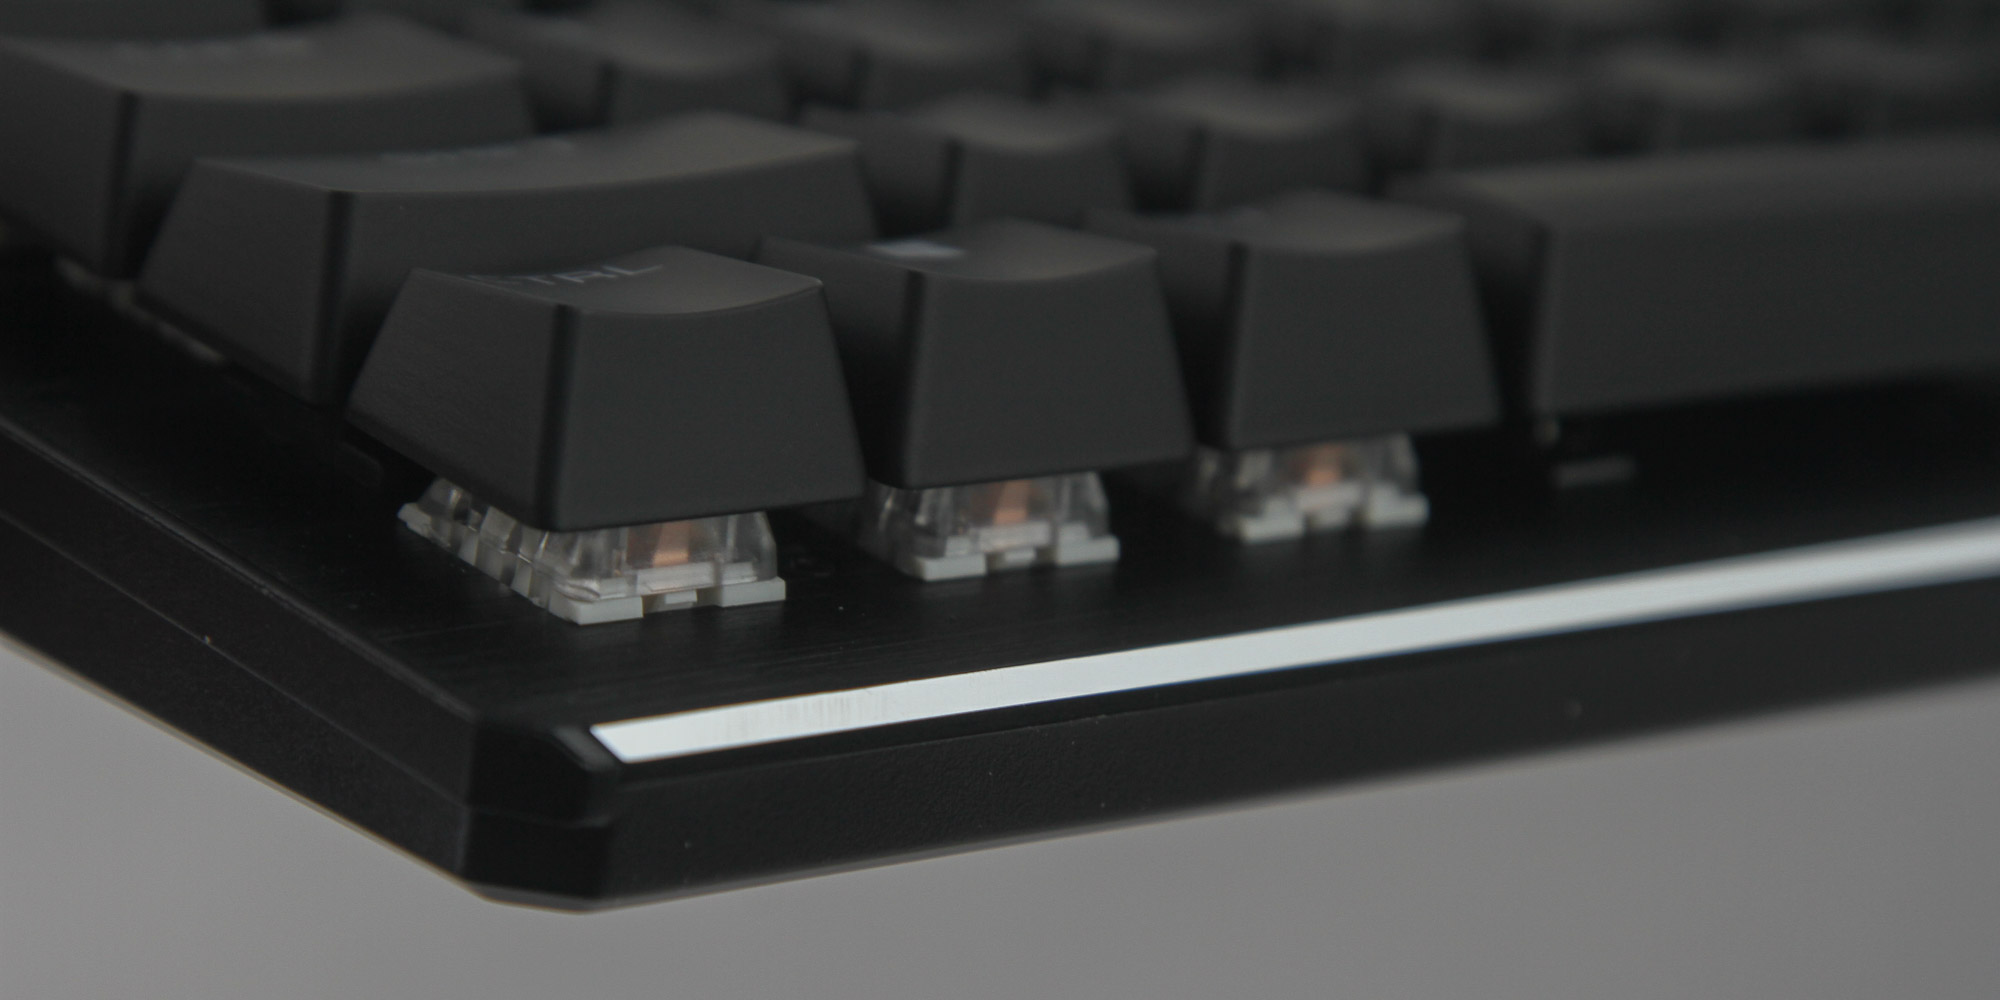
As the Z15 has hot-swappable switches, the provided switch remover can be used to remove every mechanical switch (the four buttons for media playback and volume mute toggle are not) by simply hooking into a switch at the top and bottom and pulling upwards. It is alright at best, and the switches are also quite firmly attached with more substantial metal contacts than most others. But once done, we can get a good look at the top of the socket, including the SMD RGB LED for each switch. As with the provided Speed Bronze switches, replacing the switches is as simply as pushing down a compatible switch. The tactile and clicky action here is best used with deliberate strokes; say, for RPGs, or even modifiers given we only have eight.


As with the Speed Bronze, the Kailh Speed Silver adopts a Cherry MX style construction and keycap compatibility, and an RGB switch design with translucent housing and gaps for LED light to shine through. These are 3-pin switches too, and the stem has a silver finish. In fact, if you removed the company branding on the top housing, it would be quite hard to tell these apart from the Cherry MX Speed (Silver) switches.
Aug 2nd, 2025 01:52 CDT
change timezone
Latest GPU Drivers
New Forum Posts
- What antivirus do you use? (61)
- Laptop WWAN SSD? (4)
- What's your latest tech purchase? (24428)
- I just bought an RX570 4Gb (27)
- TechPowerUp Screenshot Thread (MASSIVE 56K WARNING) (4285)
- Question about Intel Optane SSDs (90)
- memory used for store firmware in adapters wifi usb (3)
- Calling all 6950XT owners, what's your max daily stable OC? (1)
- 9800x3d apart from gaming (26)
- My UPS keep sending alarm when I game (38)
Popular Reviews
- ASUS ROG Crosshair X870E Apex Review
- MSI Claw 8 AI+ A2VM Review
- Montech X5 Review
- Orbital Pathfinder Review
- Herman Miller Logitech G Embody Review - No Pain, No Gain
- Lenovo Legion 5i (15IRX10) Review - Feature-Rich and Wallet Friendly
- Lian Li HydroShift II LCD-C 360TL Review
- Upcoming Hardware Launches 2025 (Updated May 2025)
- Noctua NF-A12x25 G2 PWM Fan Review
- Lian Li O11 Dynamic Mini V2 Review
TPU on YouTube
Controversial News Posts
- AMD's Upcoming UDNA / RDNA 5 GPU Could Feature 96 CUs and 384-bit Memory Bus (137)
- AMD Radeon RX 9070 XT Gains 9% Performance at 1440p with Latest Driver, Beats RTX 5070 Ti (131)
- Intel "Nova Lake-S" Core Ultra 3, Ultra 5, Ultra 7, and Ultra 9 Core Configurations Surface (110)
- DDR6 Memory Arrives in 2027 with 8,800-17,600 MT/s Speeds (102)
- NVIDIA to Debut GeForce RTX 50-series SUPER GPUs by Christmas (101)
- AMD Sampling Next-Gen Ryzen Desktop "Medusa Ridge," Sees Incremental IPC Upgrade, New cIOD (97)
- Intel CEO Confirms SMT To Return to Future CPUs (95)
- NVIDIA Becomes First Company Ever to Hit $4 Trillion Market-Cap (94)