 4
Gigabyte MO27Q28GR Review - Gloss Without the Glare
Picture Quality, Uniformity & Viewing Angles »Controls and OSD
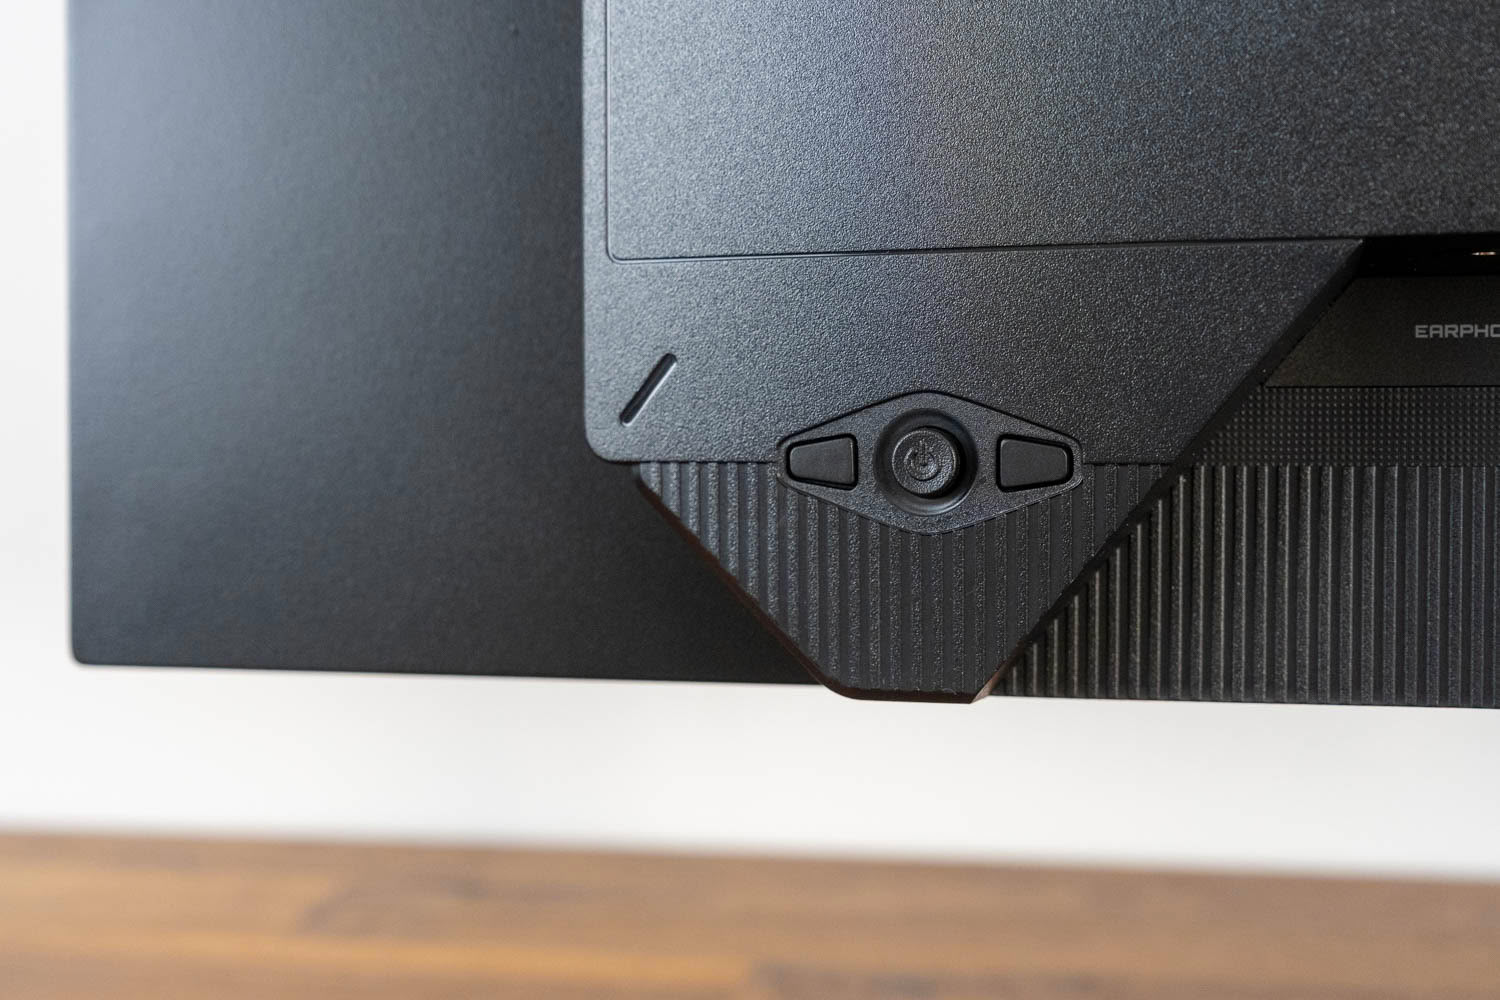
Control sits under the lower right corner of the panel, where a four-way joystick is flanked by a button on each side. The left button powers the monitor, the right one is the Tactical Switch 2.0, and a slim status LED sits on the housing just above them. Reaching the cluster blind takes a day or two to learn, after which it becomes muscle memory, though the placement means you are always reaching around the right side of the display rather than underneath the center.
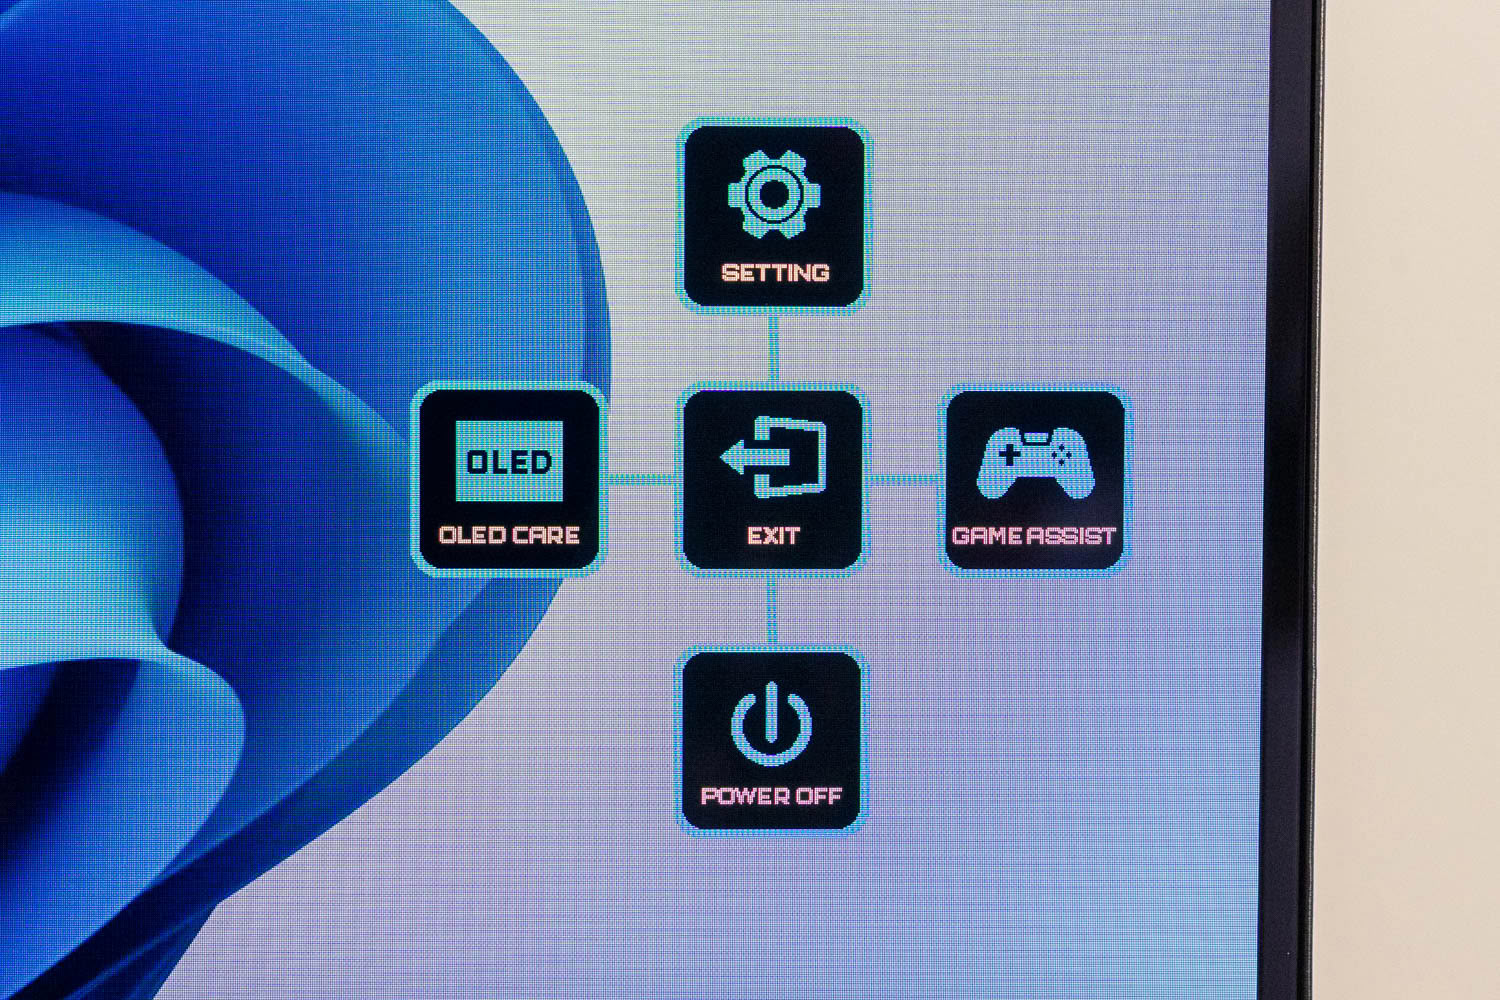
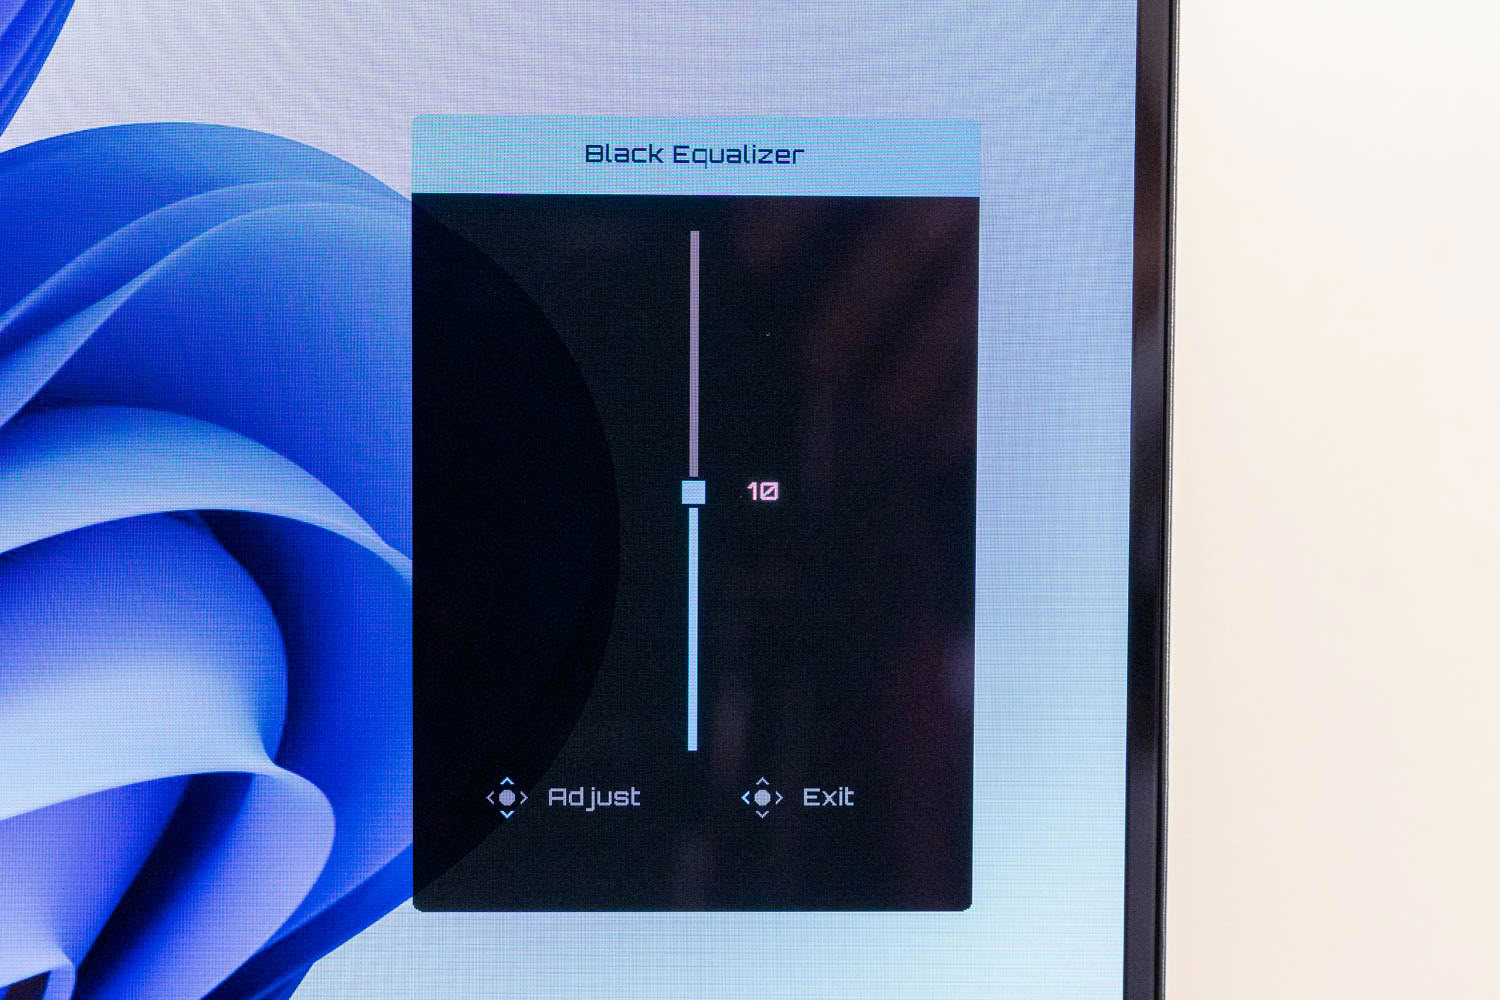
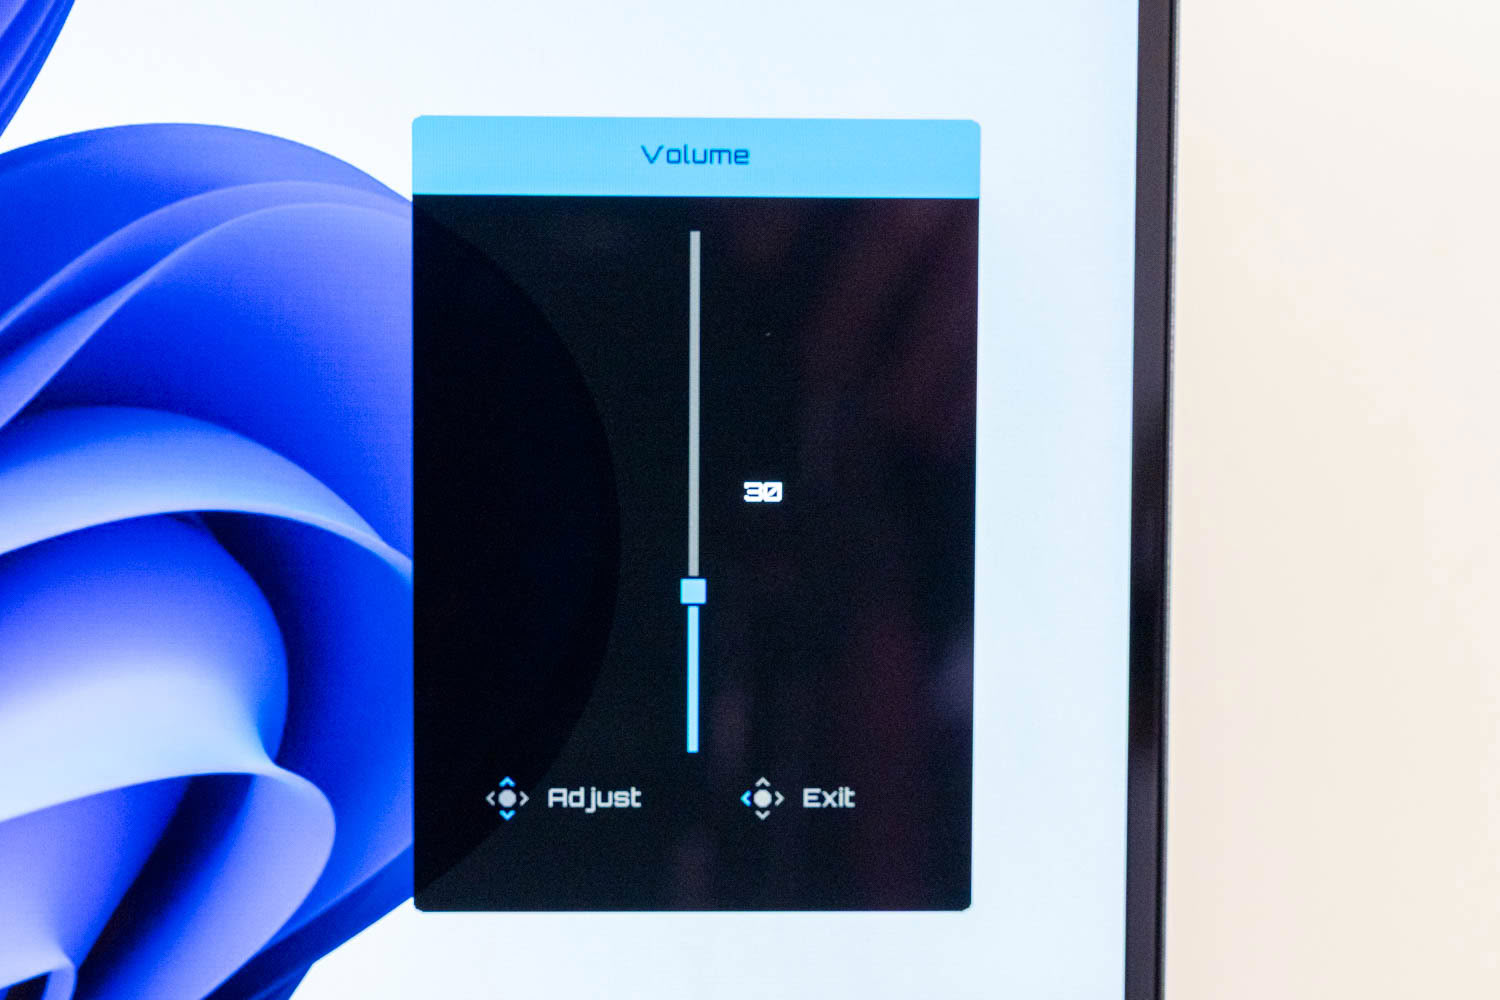
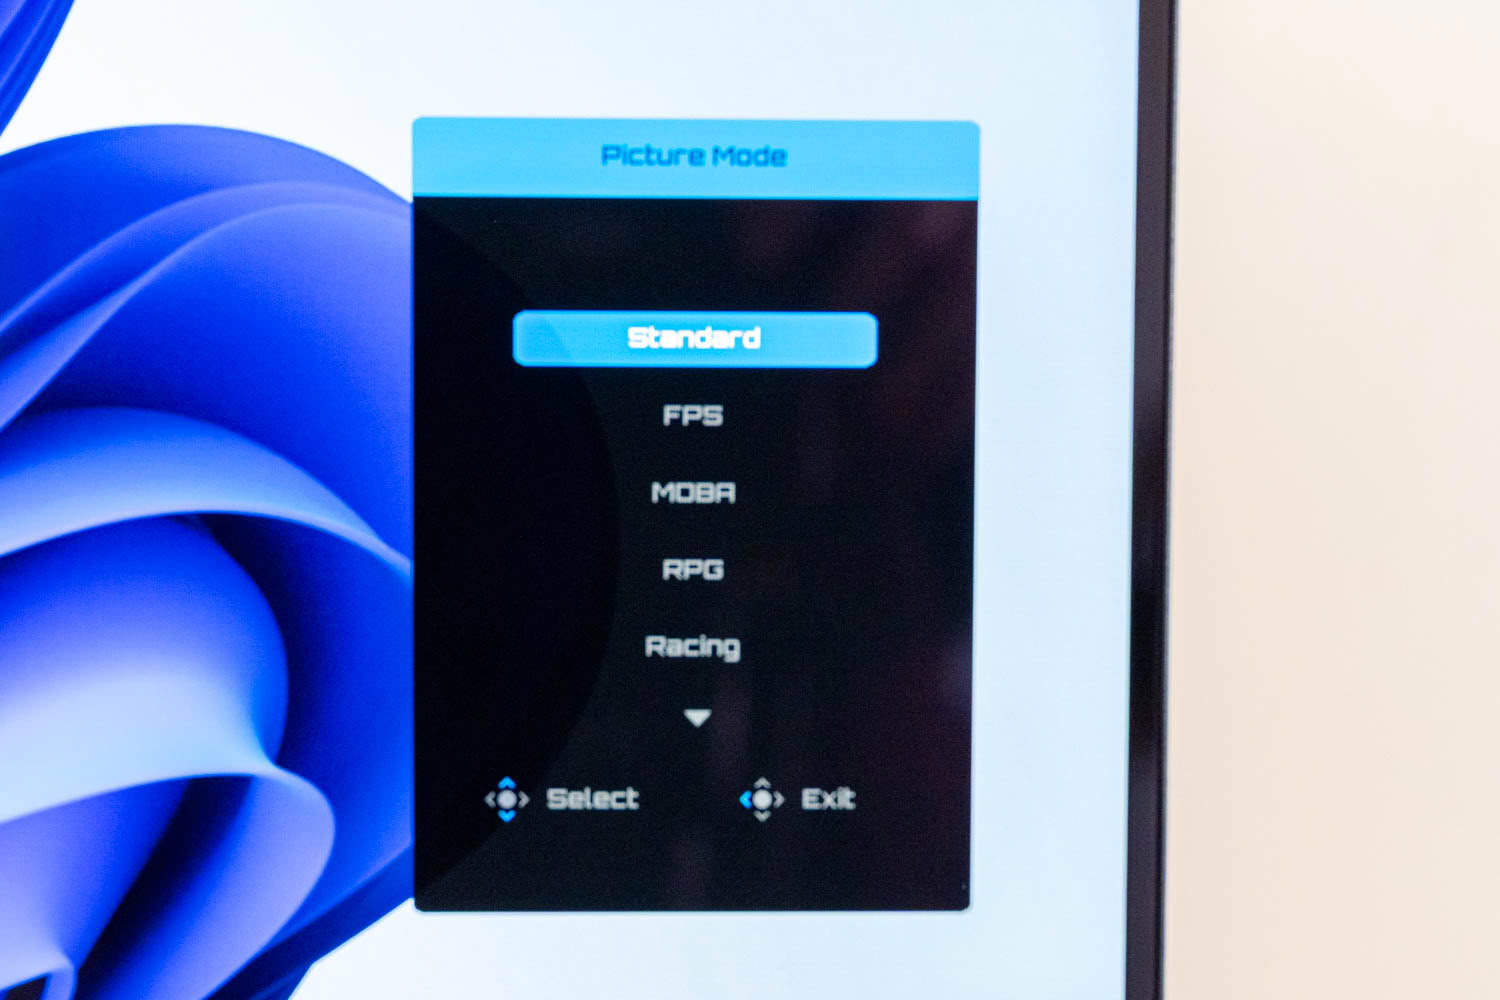
Pressing the joystick brings up a compass-style quick menu with Setting at the top, OLED Care to the left, Game Assist to the right, Power Off below and Exit in the middle. What is worth noticing here is what Gigabyte chose to promote to this level. OLED Care and Game Assist are one button press away rather than buried inside a menu tree, which is a sensible reading of what people on an OLED gaming monitor actually open repeatedly. The Setting option leads to the full menu structure. Nudging the joystick in any of the four directions jumps straight to a designated setting.
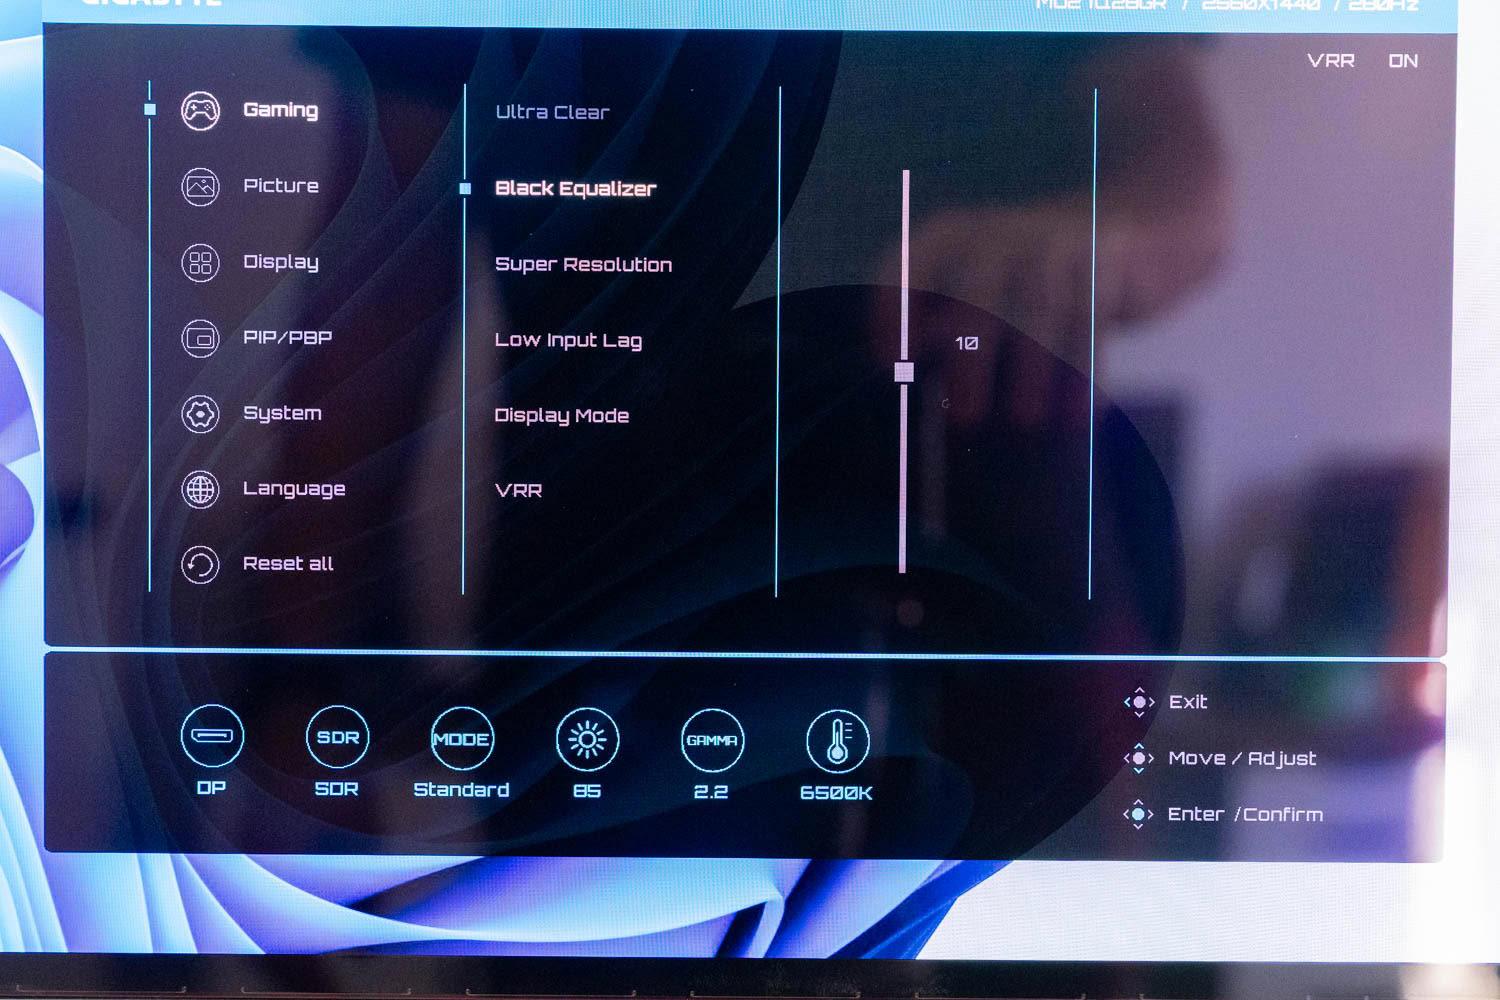
The full menu opens from Setting and lays itself out in columns, with the top-level categories on the left and each selection expanding to the right rather than replacing what you were looking at. Gigabyte has been using this layout for a while, and it remains one of the better OSD designs in the segment because you can always see where you are in the tree. Two details deserve credit. A persistent status bar runs along the bottom showing active input, dynamic range, picture mode, brightness, gamma and color temperature at a glance, which saves a great deal of menu diving when you are checking whether a setting actually took. The header carries the model name, current resolution and refresh rate, with VRR state and firmware version in the corners. The Gaming menu holds Ultra Clear, Black Equalizer, Super Resolution, Low Input Lag, Display Mode and VRR options.
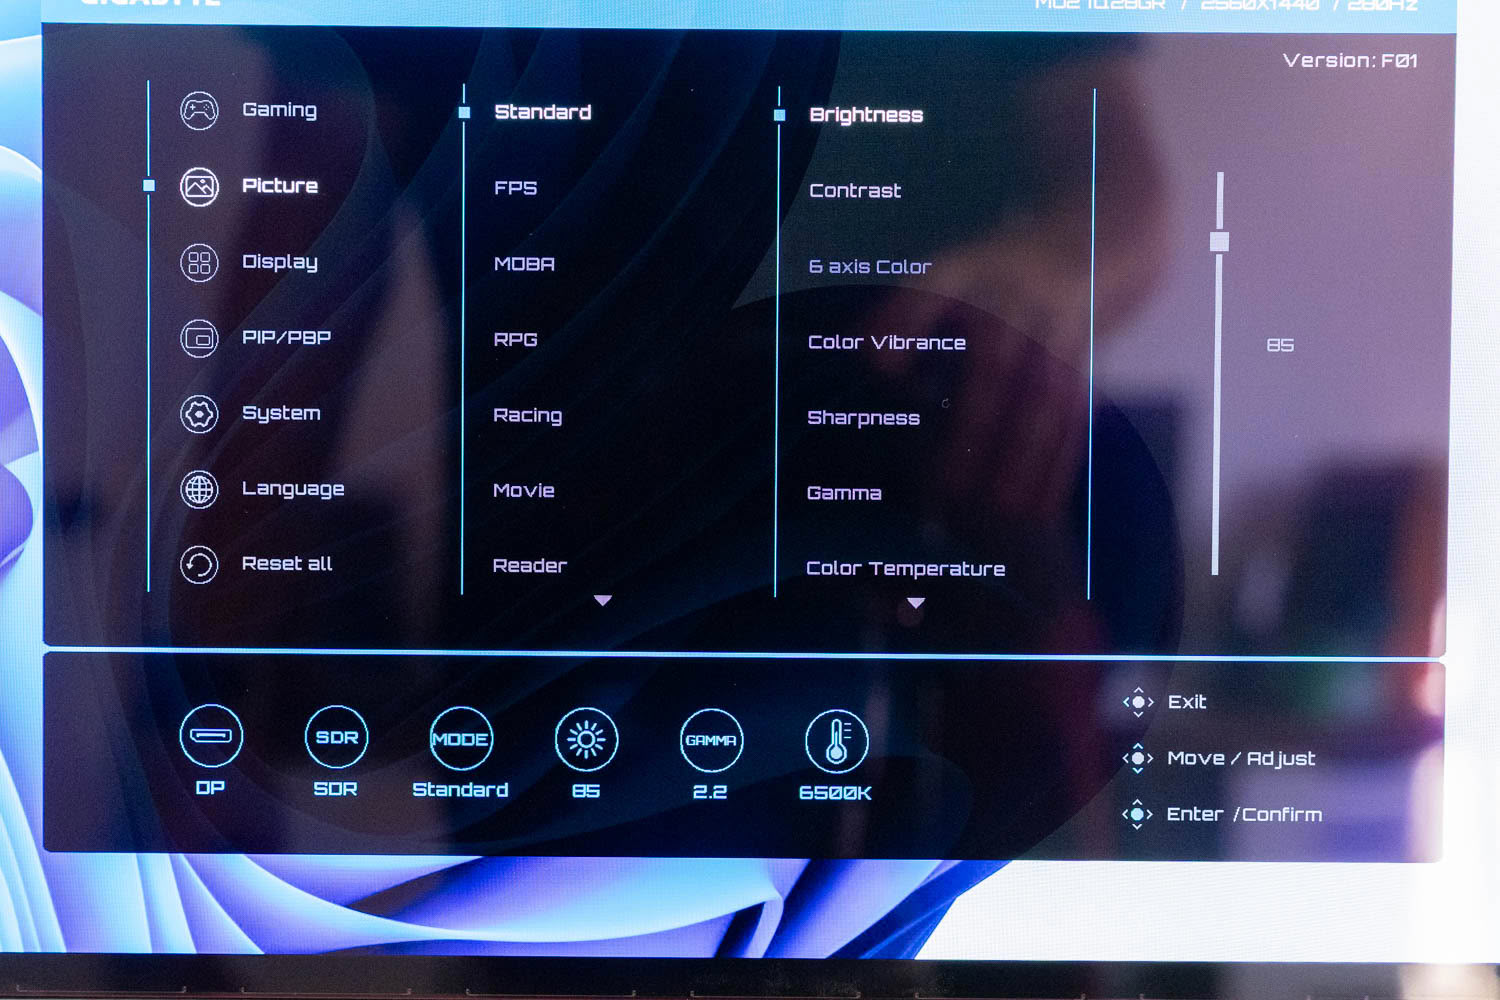
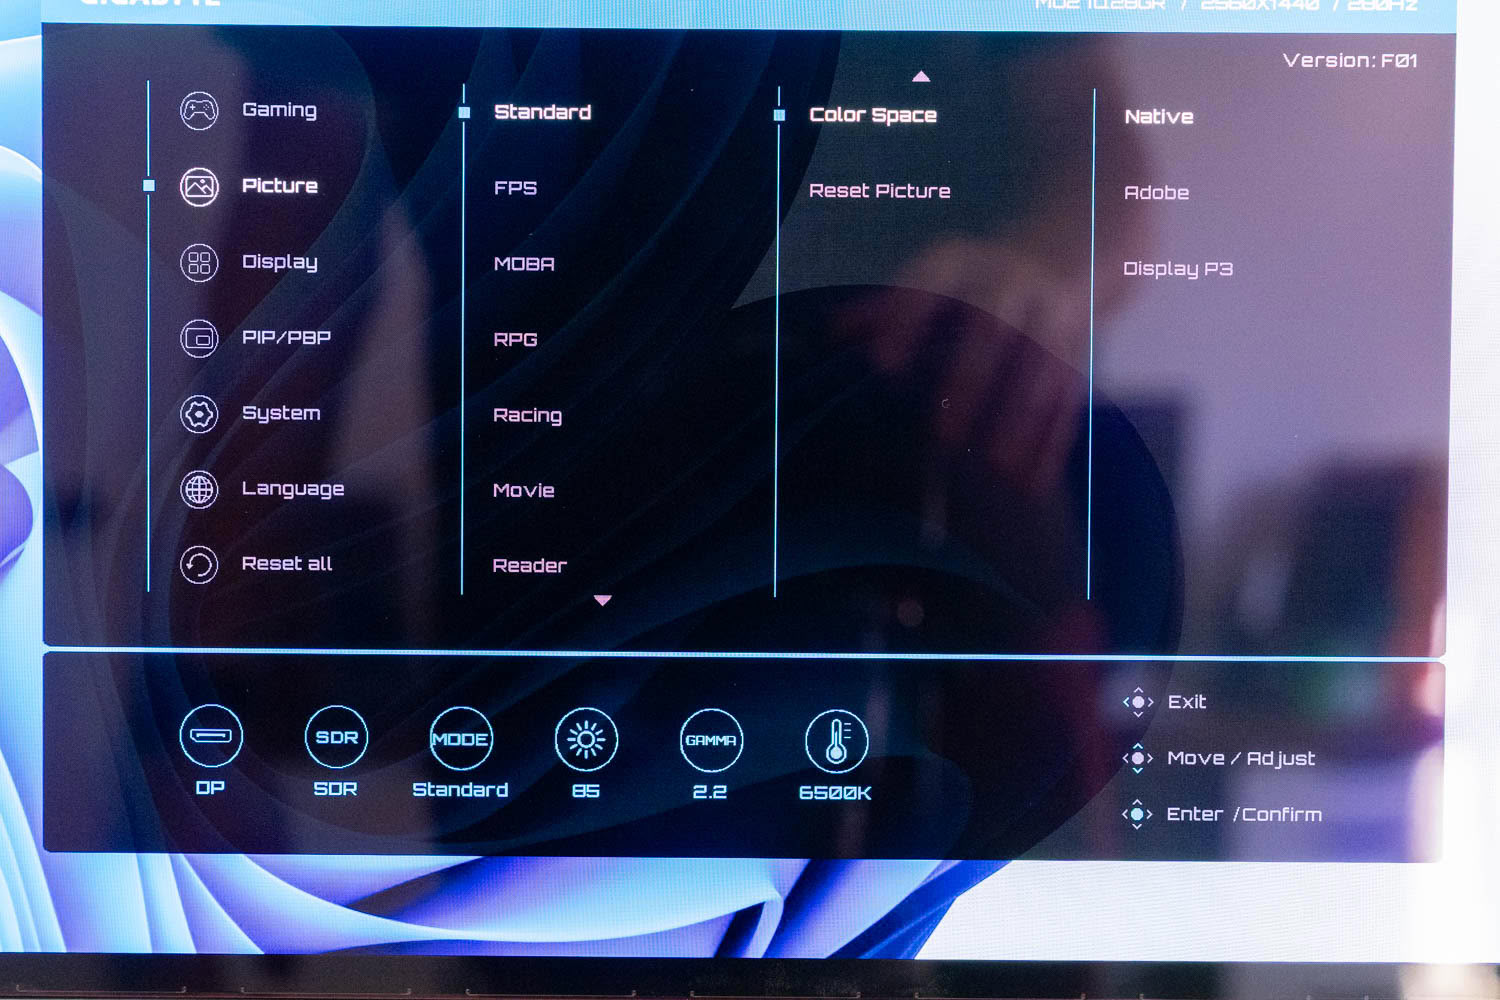
Picture opens with the preset list, Standard, FPS, MOBA, RPG, Racing, Movie and Reader among them, and each preset carries its own independent set of adjustments: brightness, contrast, six axis color, color vibrance, sharpness, gamma and color temperature. Scrolling further down the same column reveals Color Space and Reset Picture.
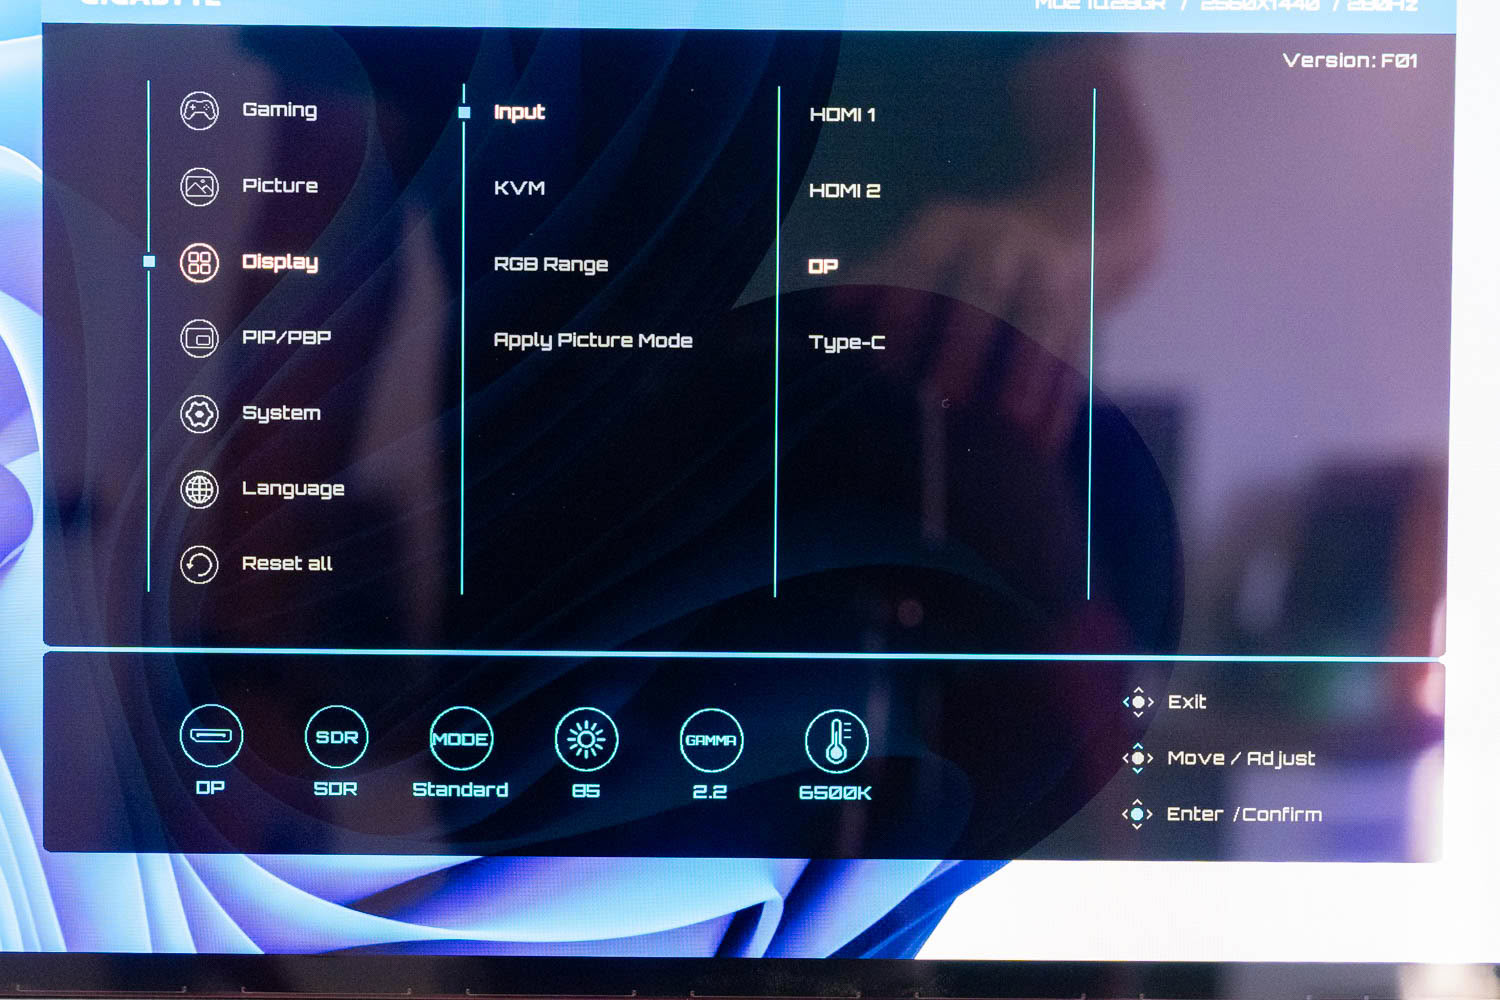
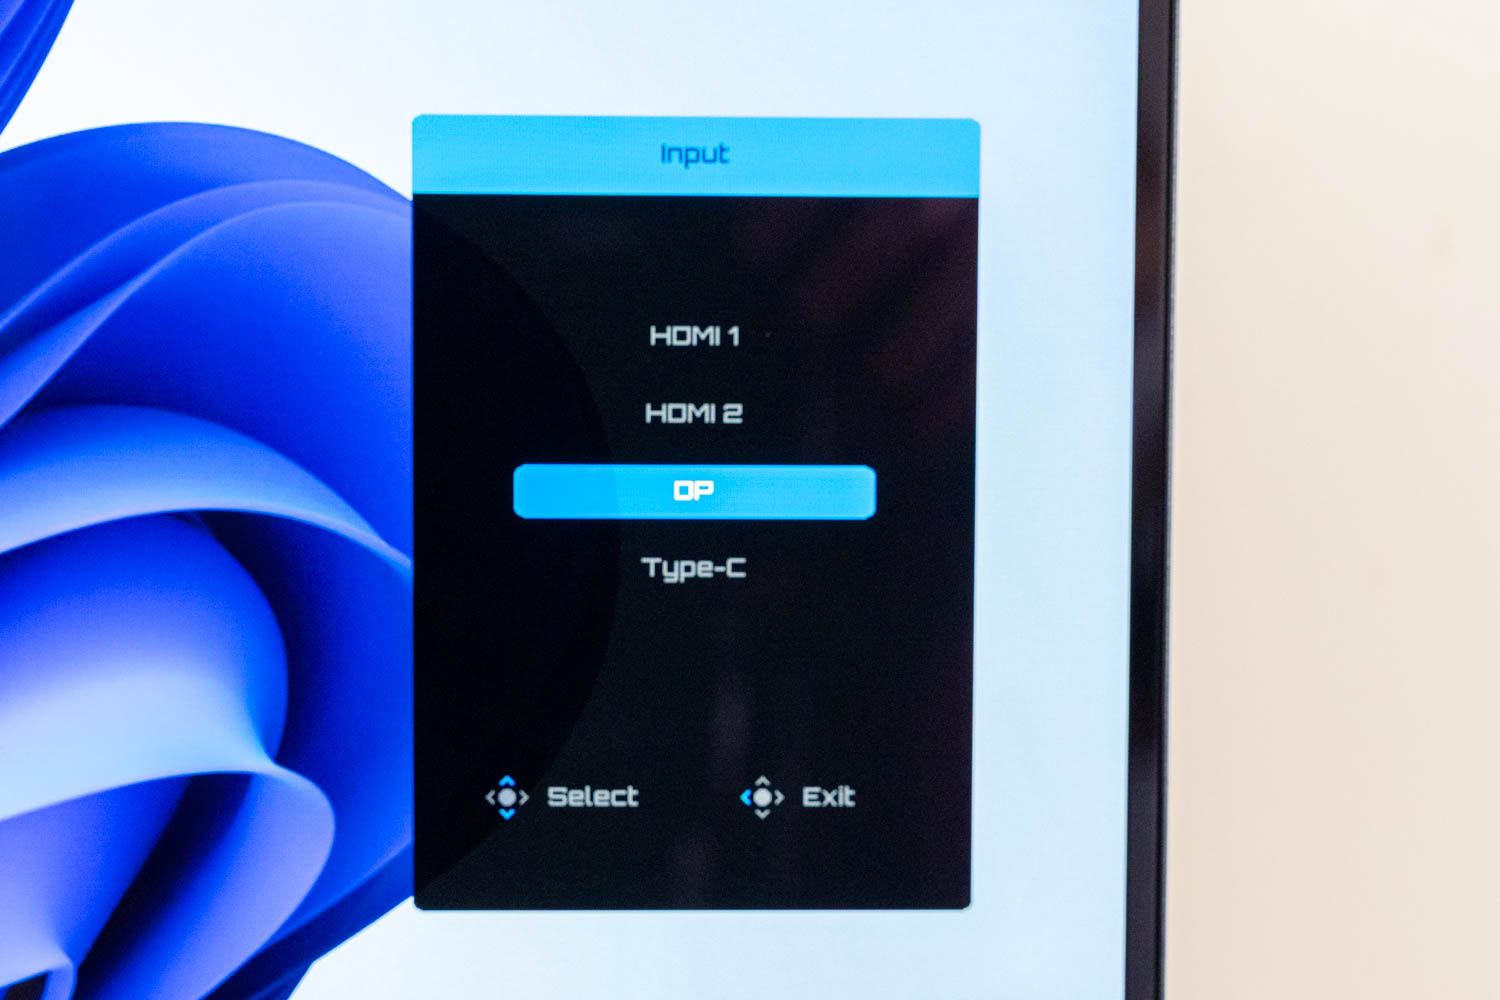
Display covers Input, KVM, RGB Range and Apply Picture Mode. That last option is more useful than its name suggests, since it binds a picture preset to a specific input, so a console on HDMI 2 can sit in Movie while the PC on DisplayPort stays in your corrected Custom profile, without you touching anything.
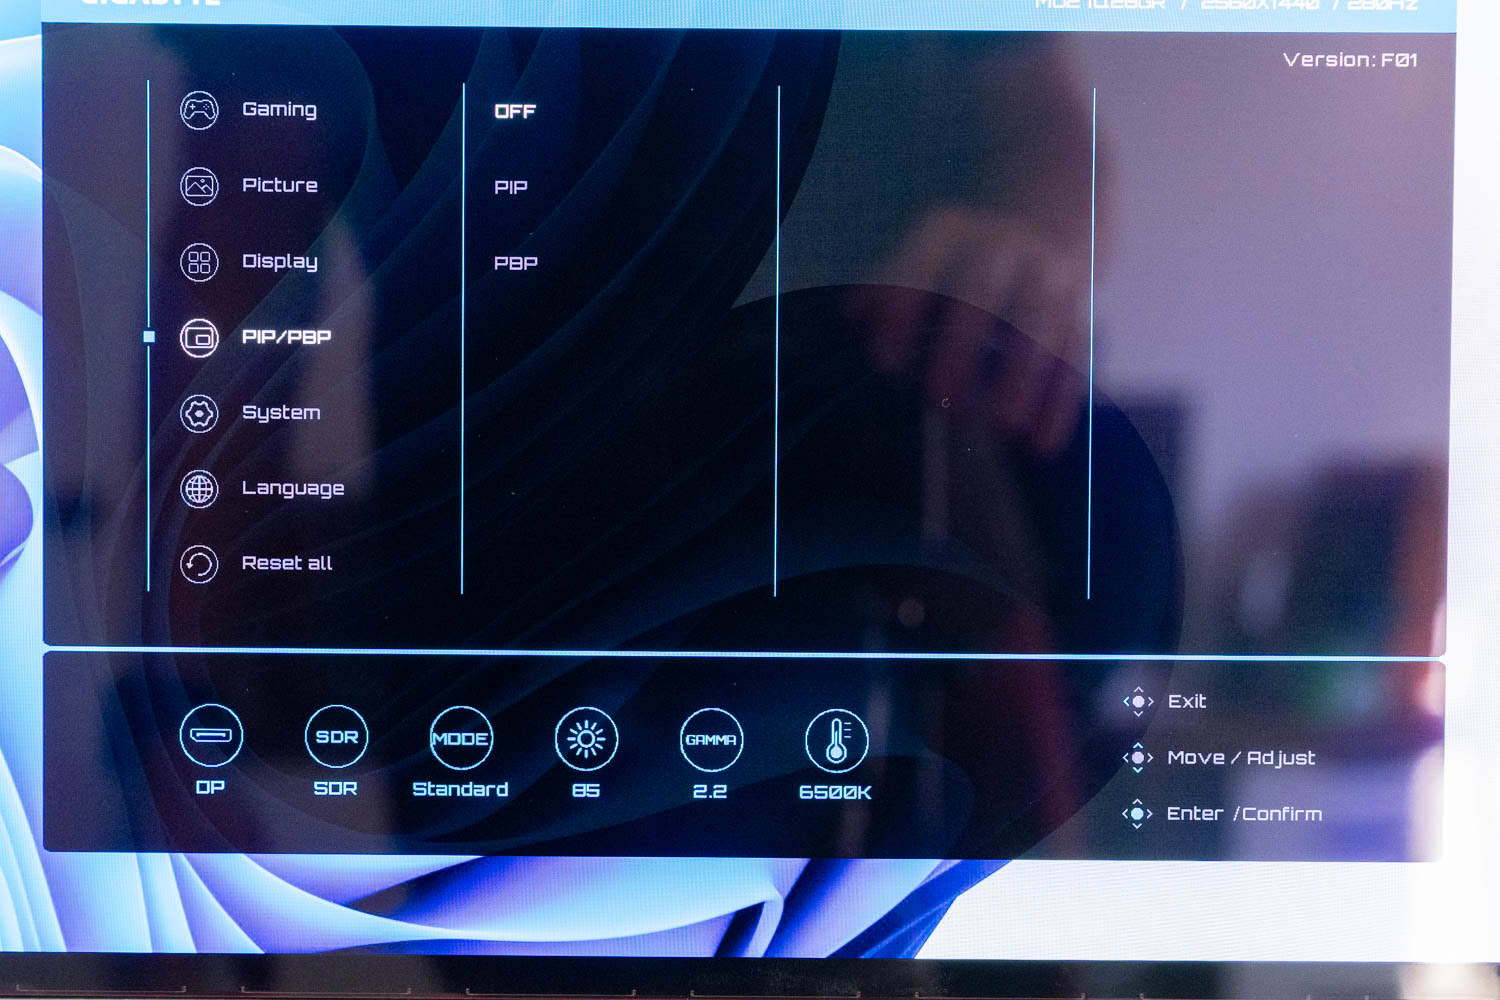
PIP/PBP is a straight three-way choice between off, picture-in-picture and picture-by-picture.
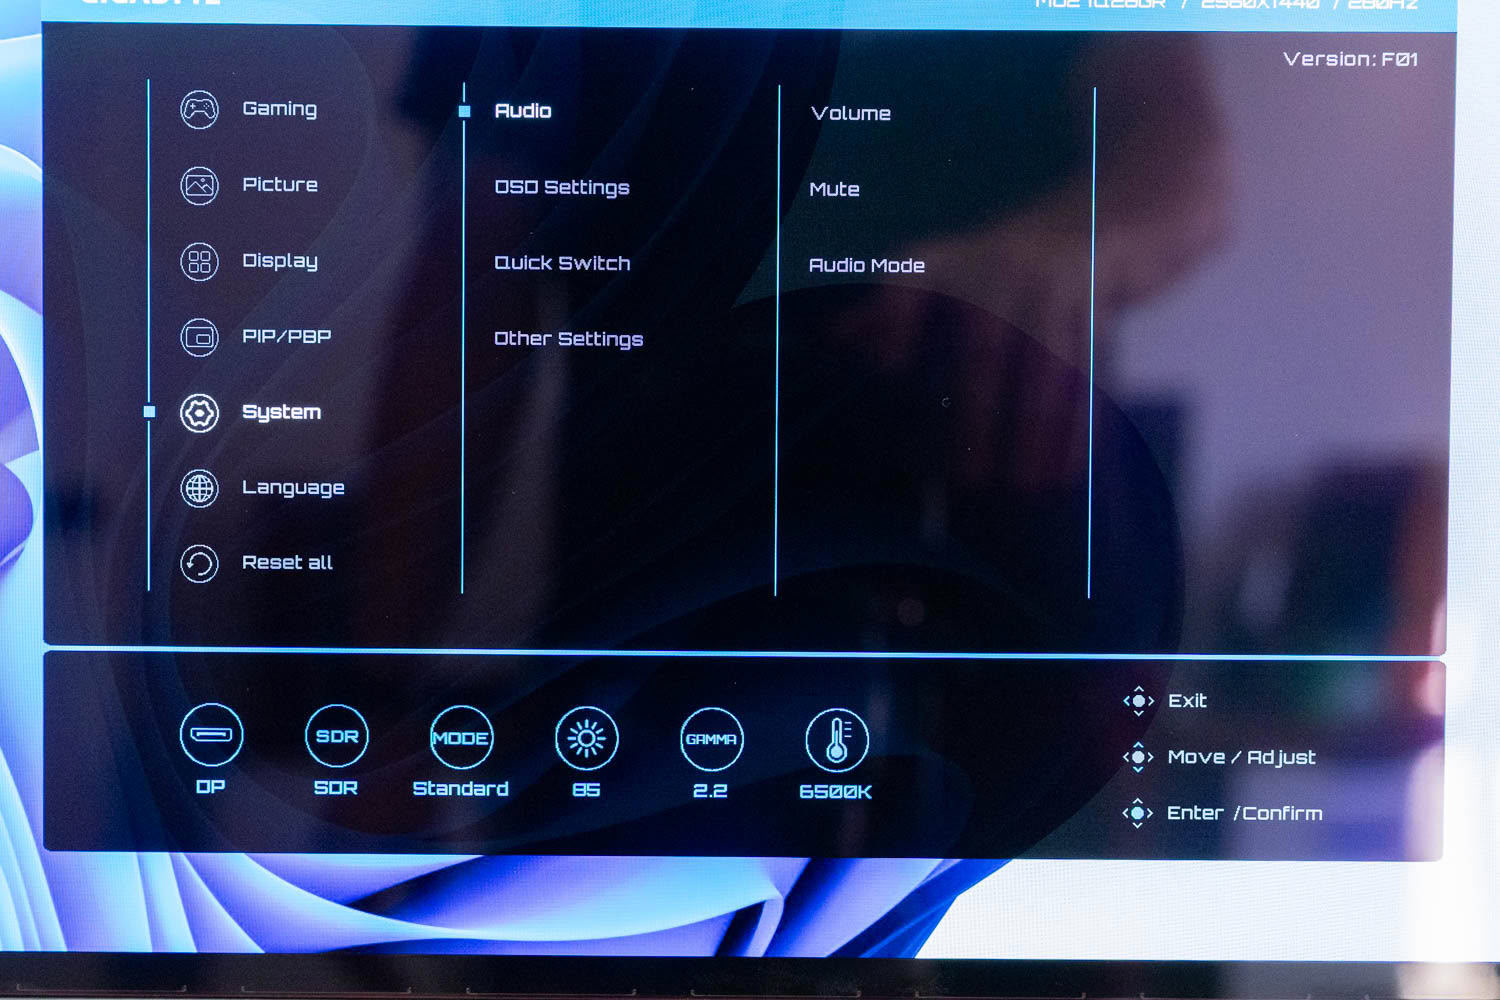
System gathers audio, with volume, mute and audio mode, alongside OSD Settings, Quick Switch and Other Settings. Quick Switch is where you assign what the four joystick directions do, so the shortcuts shown earlier are yours to rearrange.

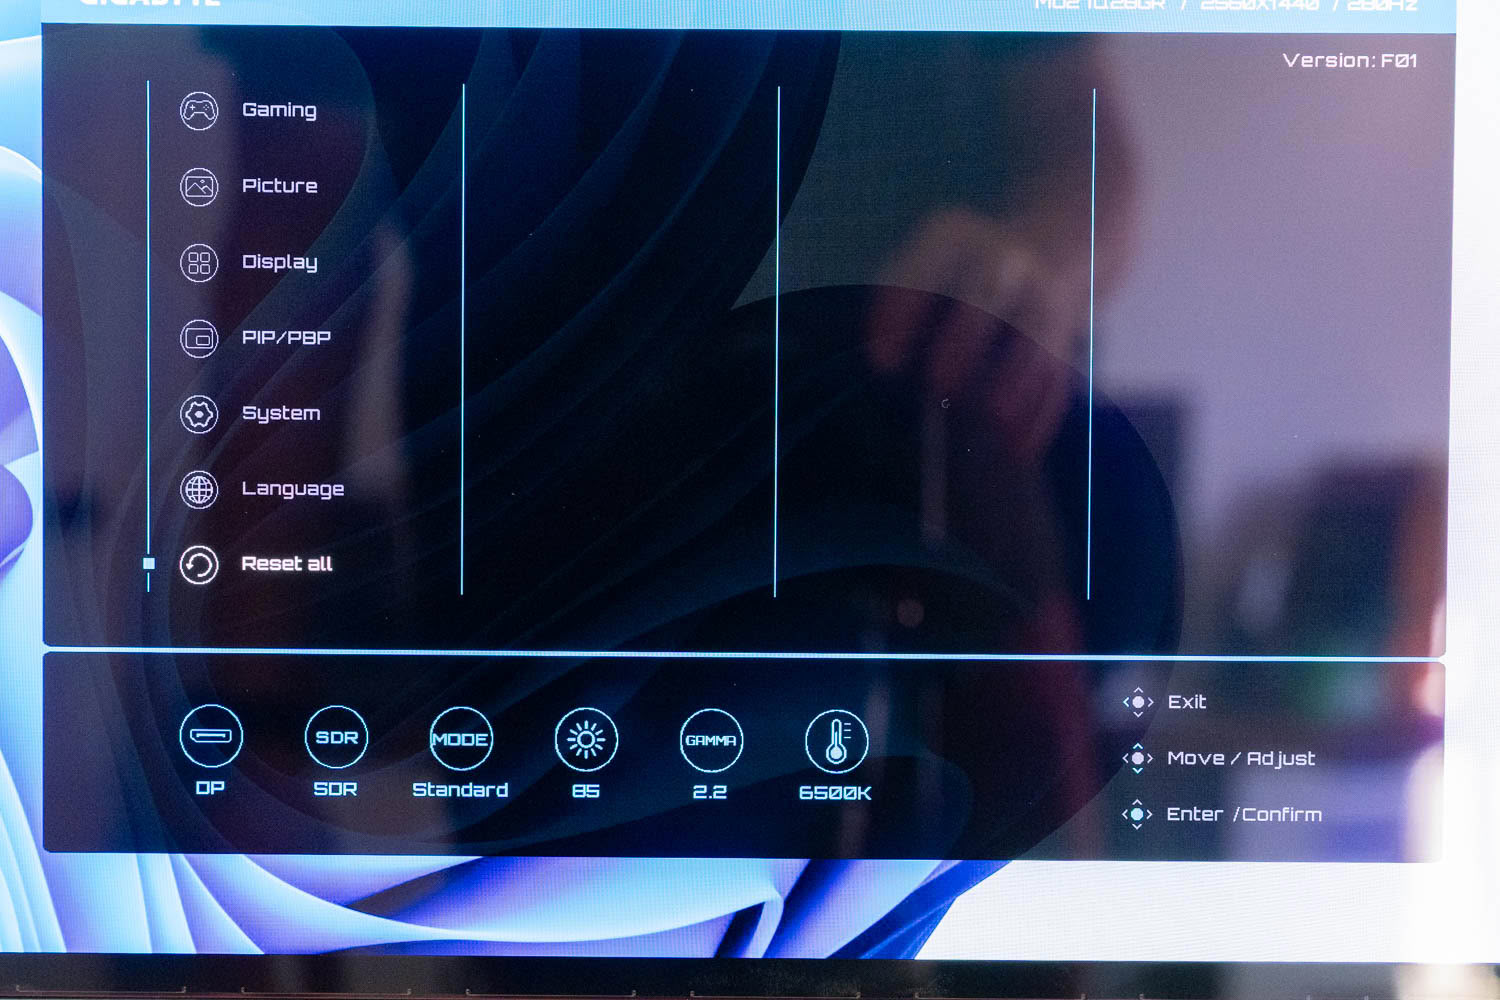
Language and Reset all round out the structure.
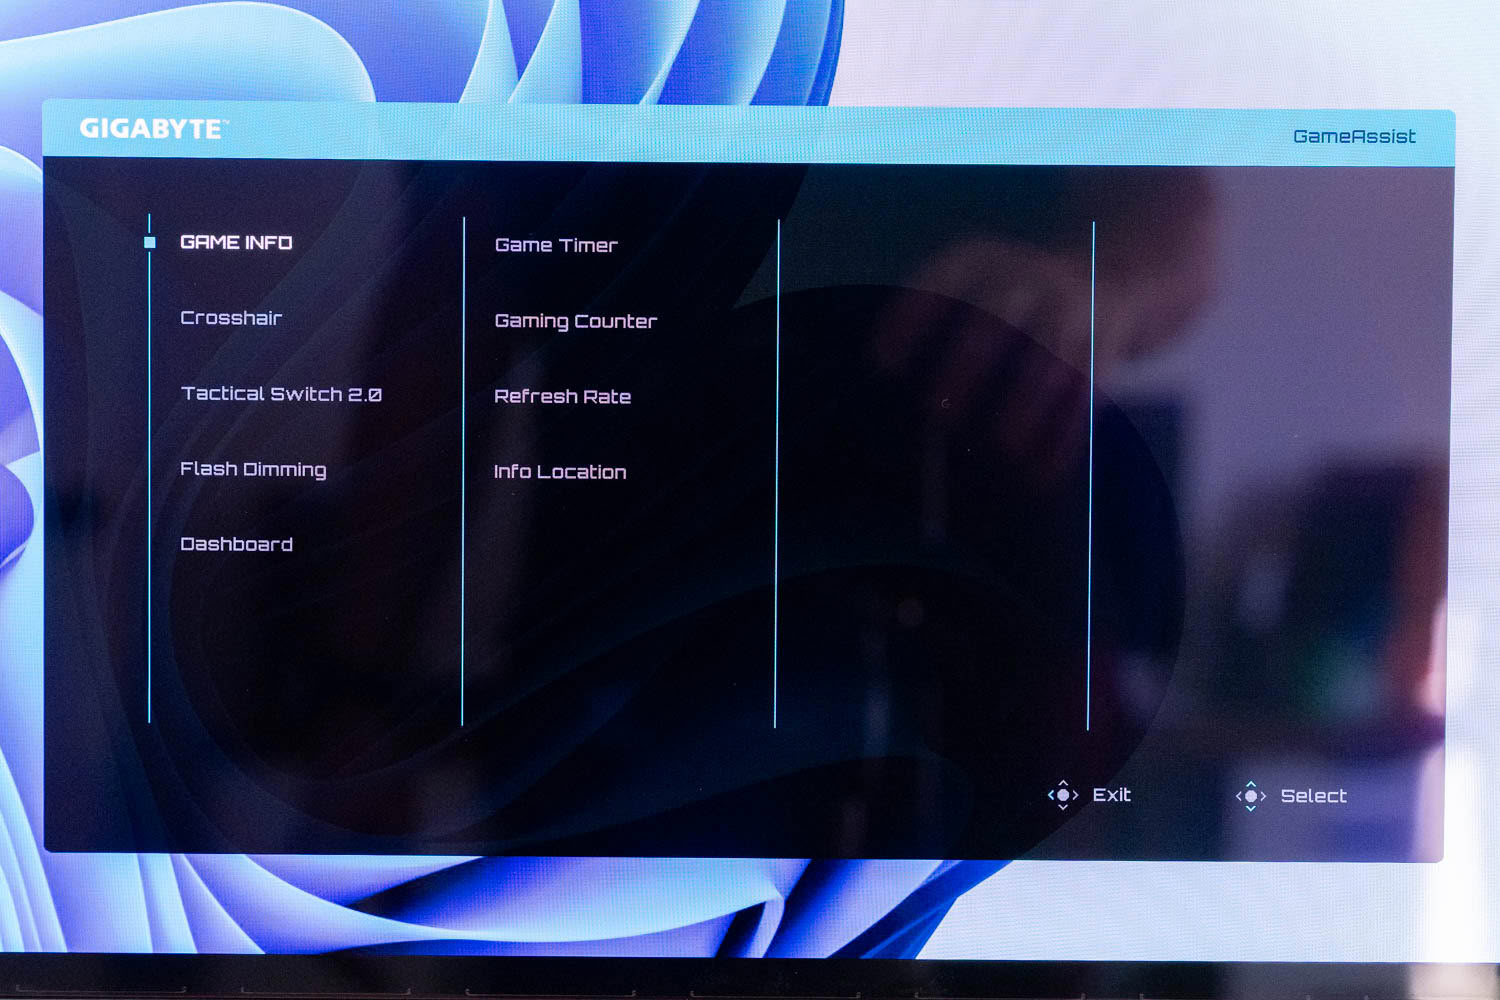
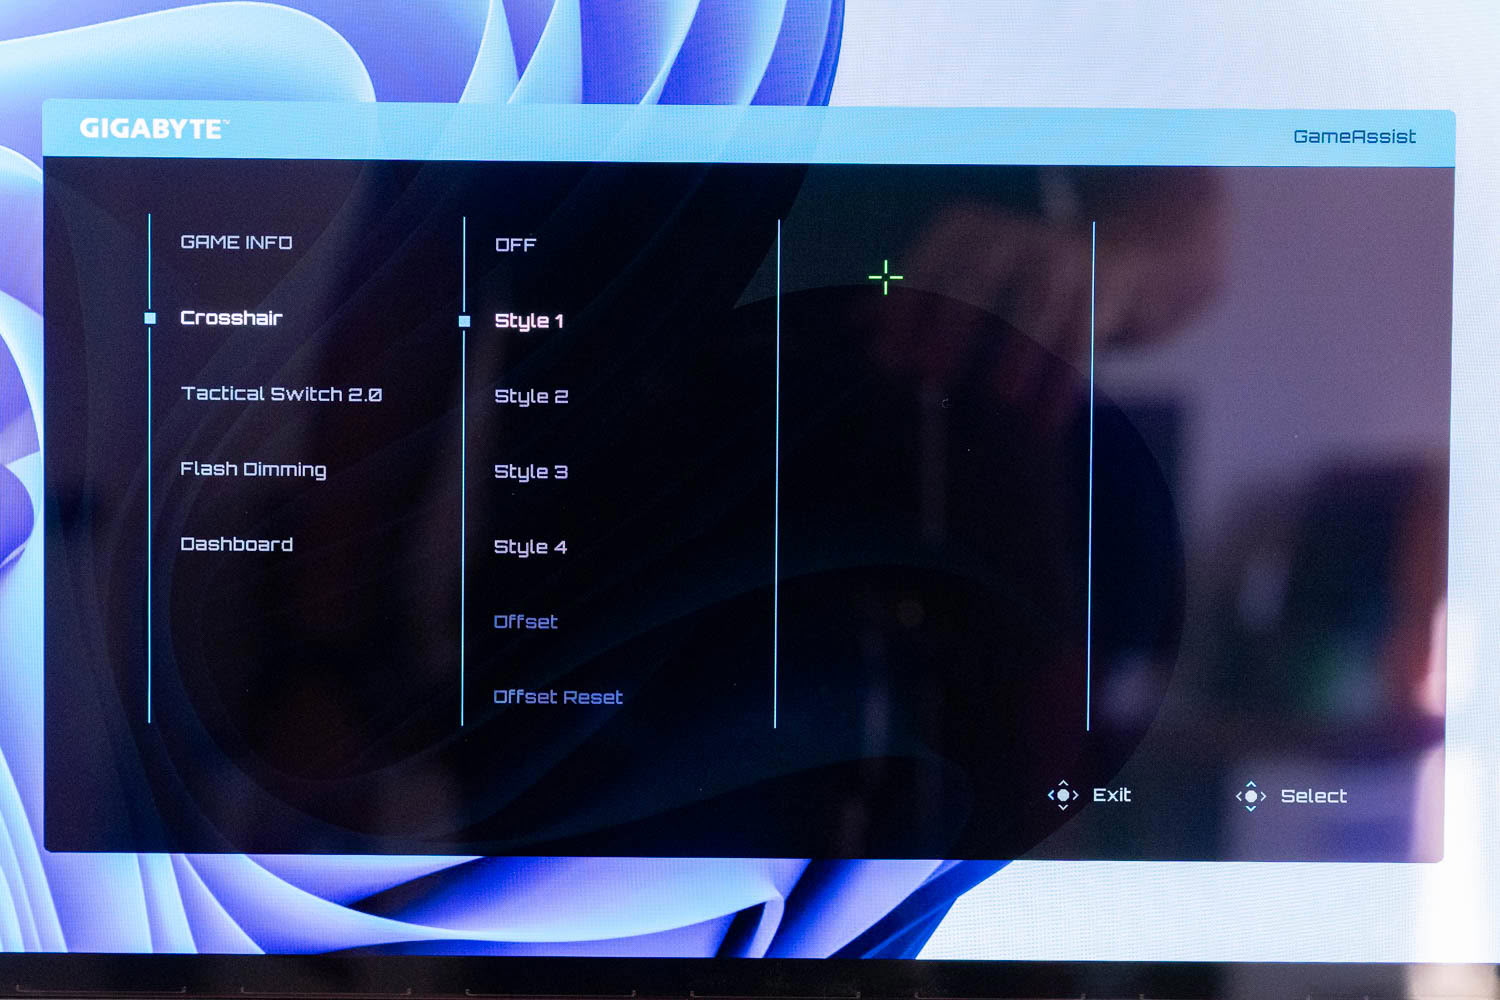
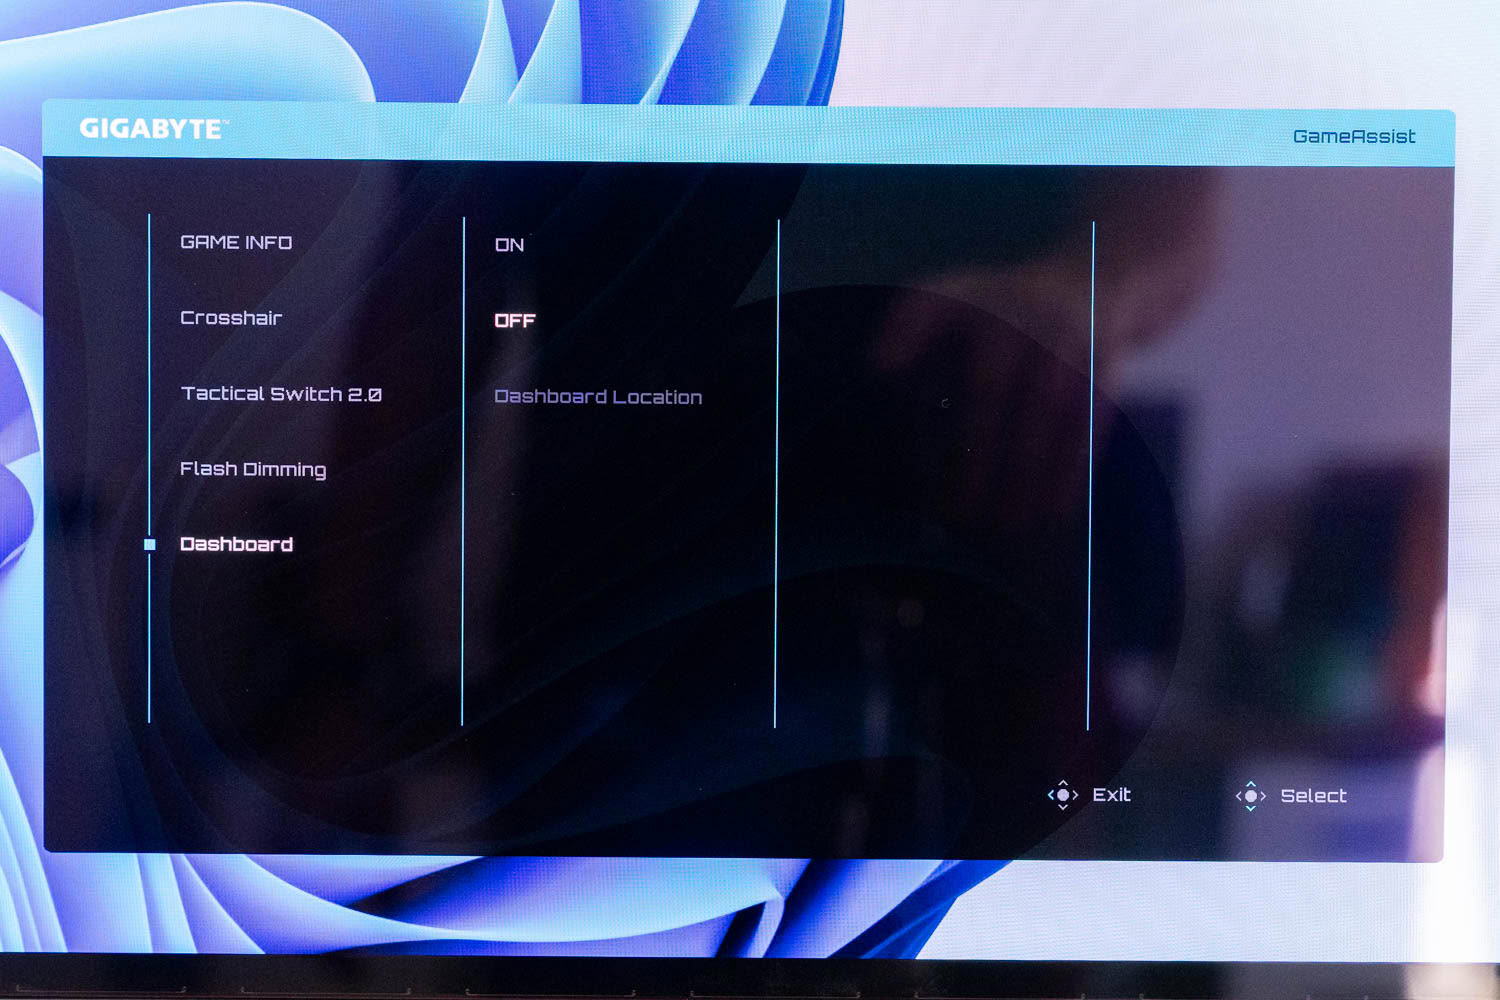
Game Assist opens from the quick menu compass and gathers five tools under its own interface. Game Info handles on-screen overlays, offering a game timer, a gaming counter, a refresh rate readout and a position selector for where any of it sits. Crosshair draws one of four green reticle styles over whatever is underneath, with an offset adjustment and a reset. Flash Dimming and Dashboard round out the list, the latter putting a hardware monitoring overlay on screen at a position you choose.
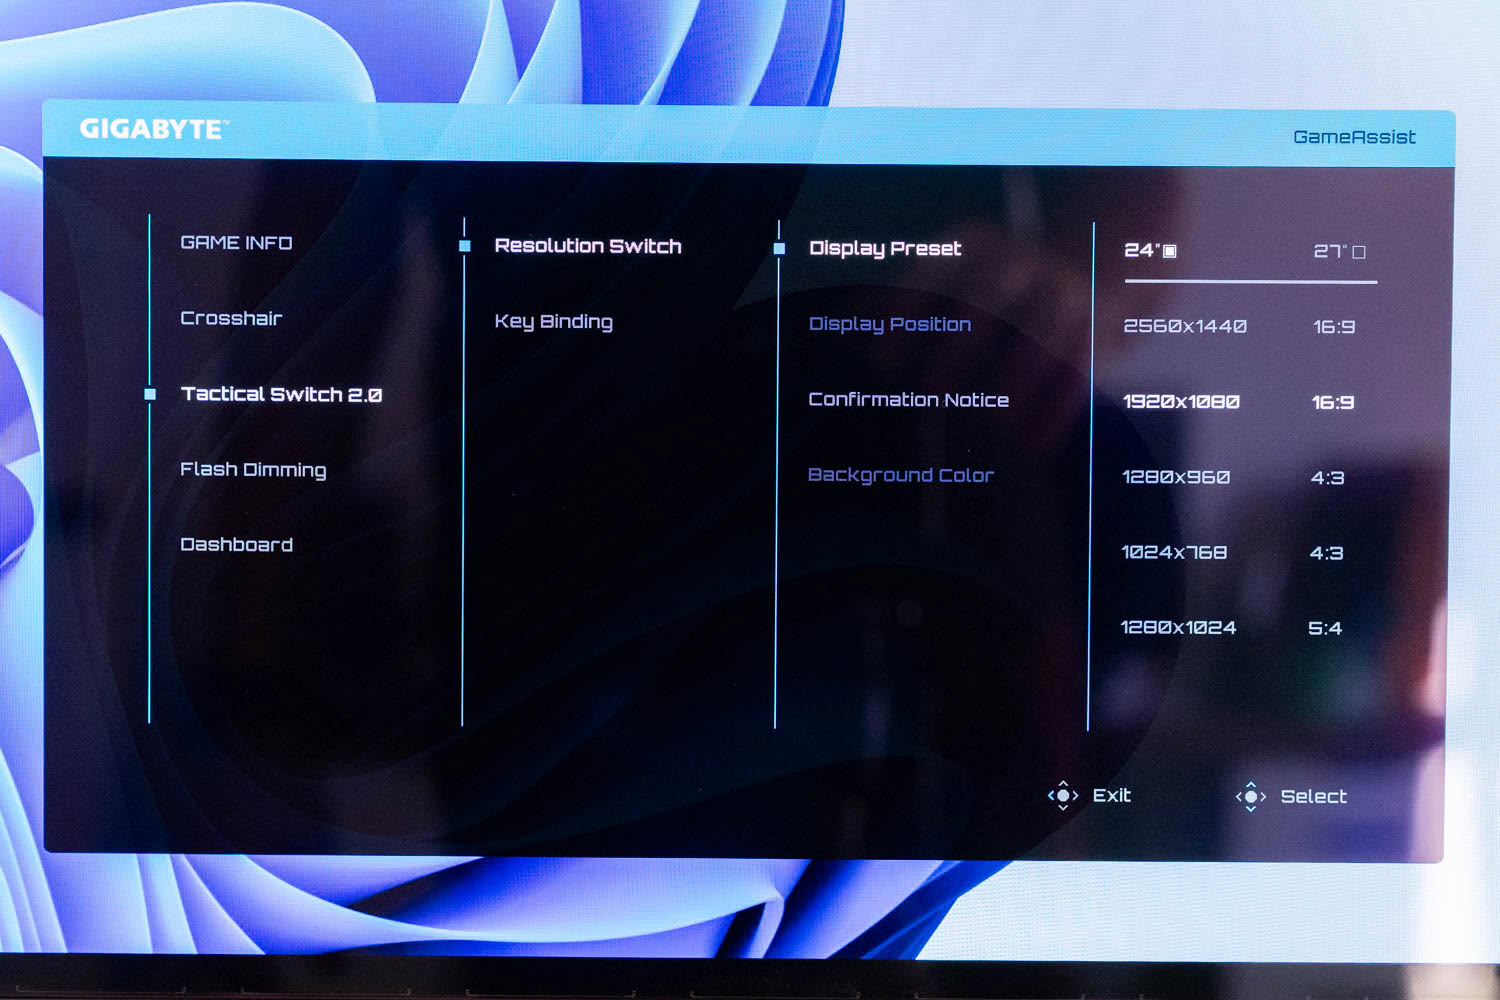
Tactical Switch 2.0 is the one worth dwelling on, because it is what the physical button beside the joystick actually does. It presents two display presets, 24 inch and 27 inch, each listing 2560×1440 and 1920×1080 in 16:9, 1280×960 and 1024×768 in 4:3, and 1280×1024 in 5:4, alongside display position, a confirmation prompt, a background color for the unused area and the key binding itself. The 24 inch preset is the interesting half: shrinking the active area on a 27 inch panel pulls everything closer to the center of your vision, which is a long-standing preference among competitive shooter players who came up on 24 inch displays. Pair that with a stretched 4:3 or 5:4 resolution, which makes enemy models visually wider and easier to hit, and you have the configuration a meaningful slice of the CS player base genuinely uses. Having it on a hardware button rather than buried in Windows display settings is the entire point.
OSD Sidekick
OSD Sidekick lives inside the Gigabyte Control Center and mirrors the monitor's settings into a Windows application, so you can adjust everything with a mouse instead of reaching around the back for the joystick. It needs the USB Type-B cable connected between the PC and the monitor, which is the same link the hub and KVM use.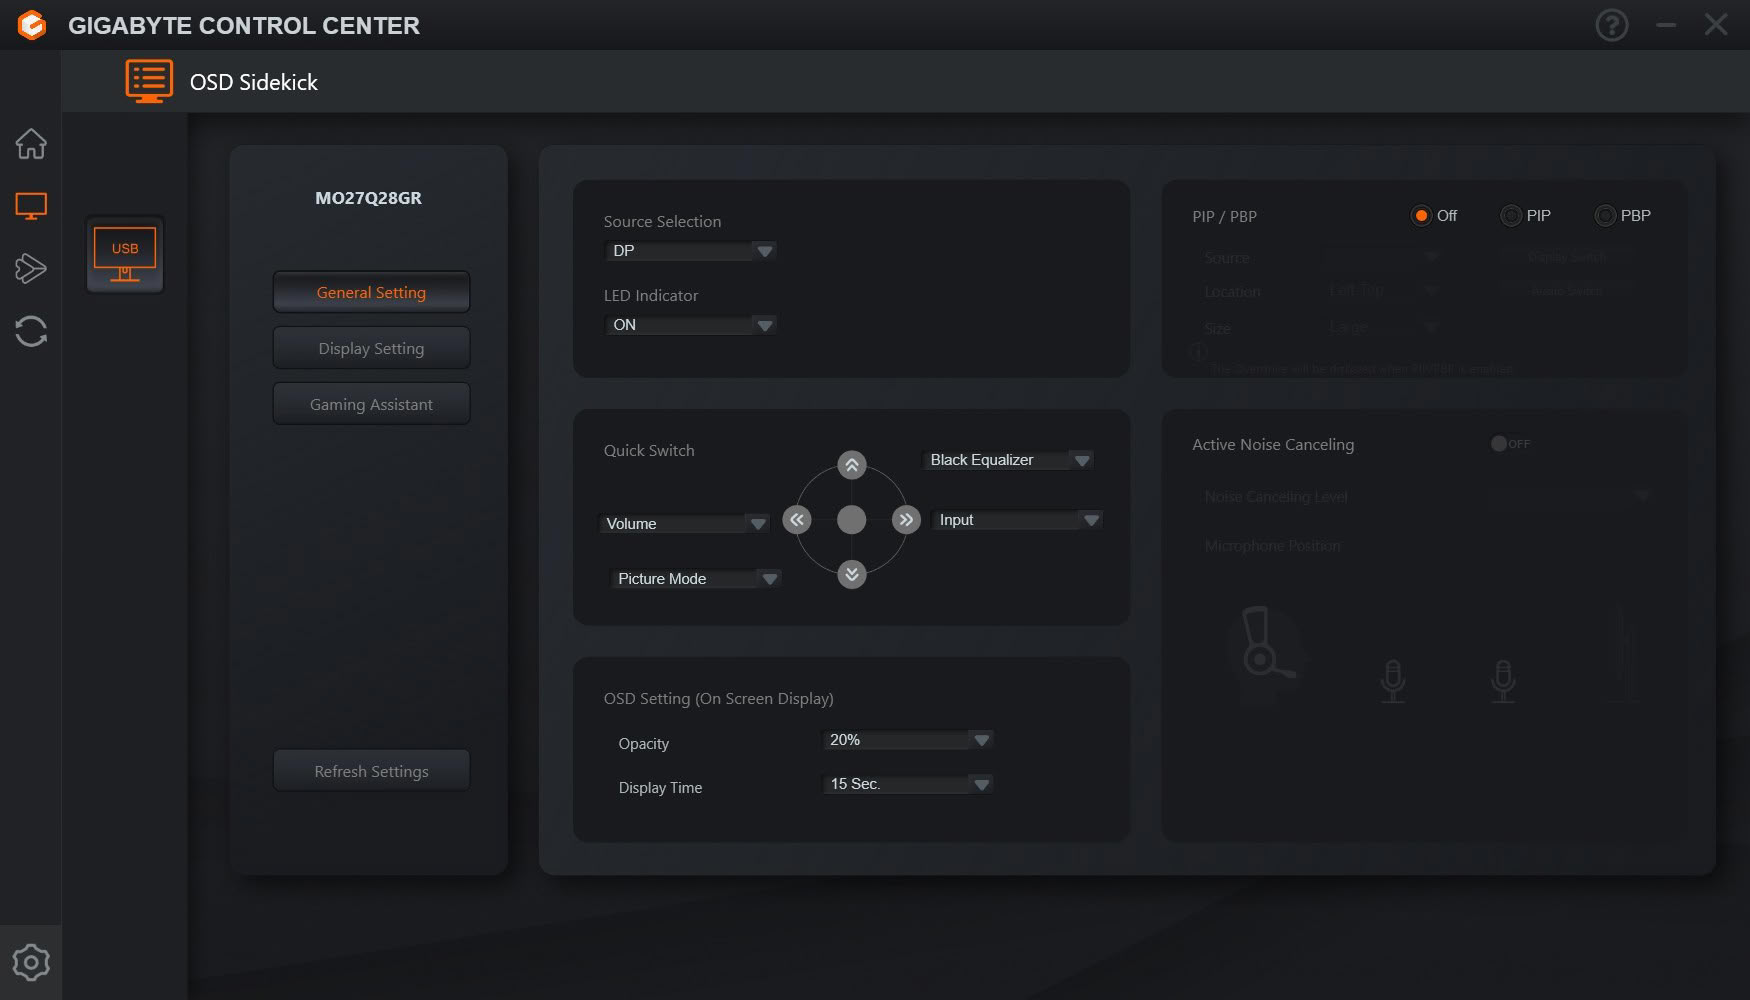
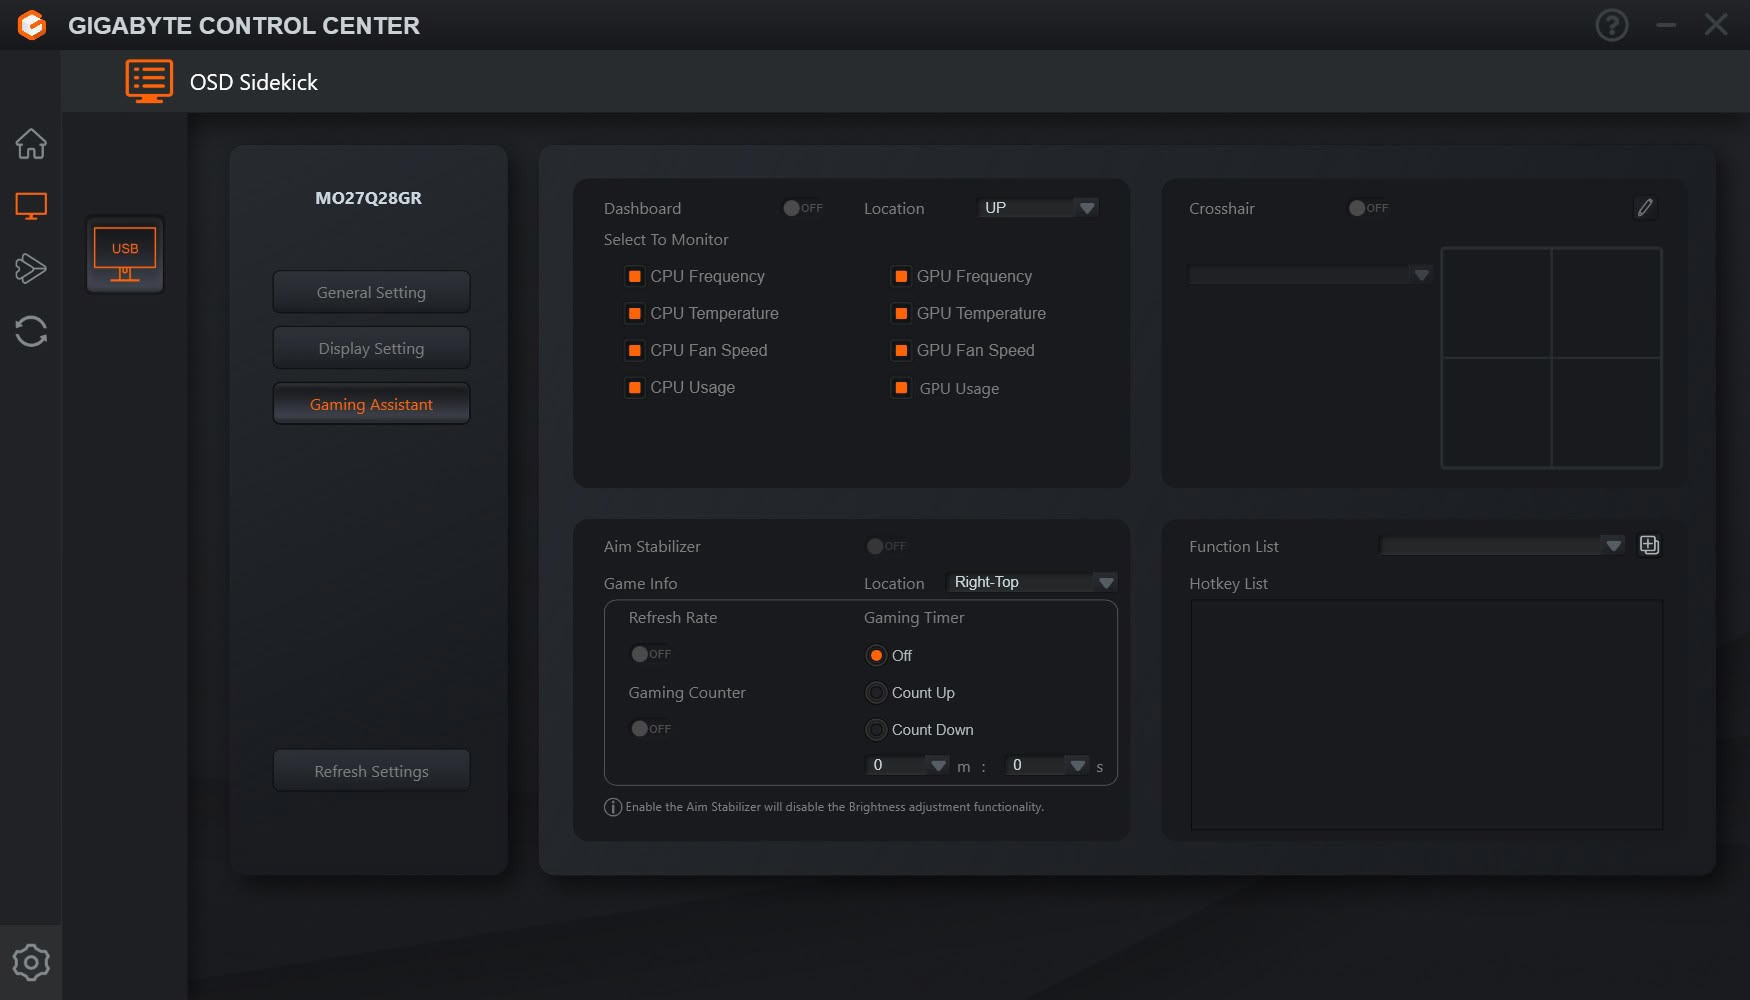
General Setting covers source selection, the LED indicator, PIP and PBP configuration, OSD opacity and timeout, and the Quick Switch assignments for the four joystick directions, laid out as a compass so you can see what each one does at a glance. Active Noise Canceling sits in the same pane but greyed out, since it belongs to models with a microphone.
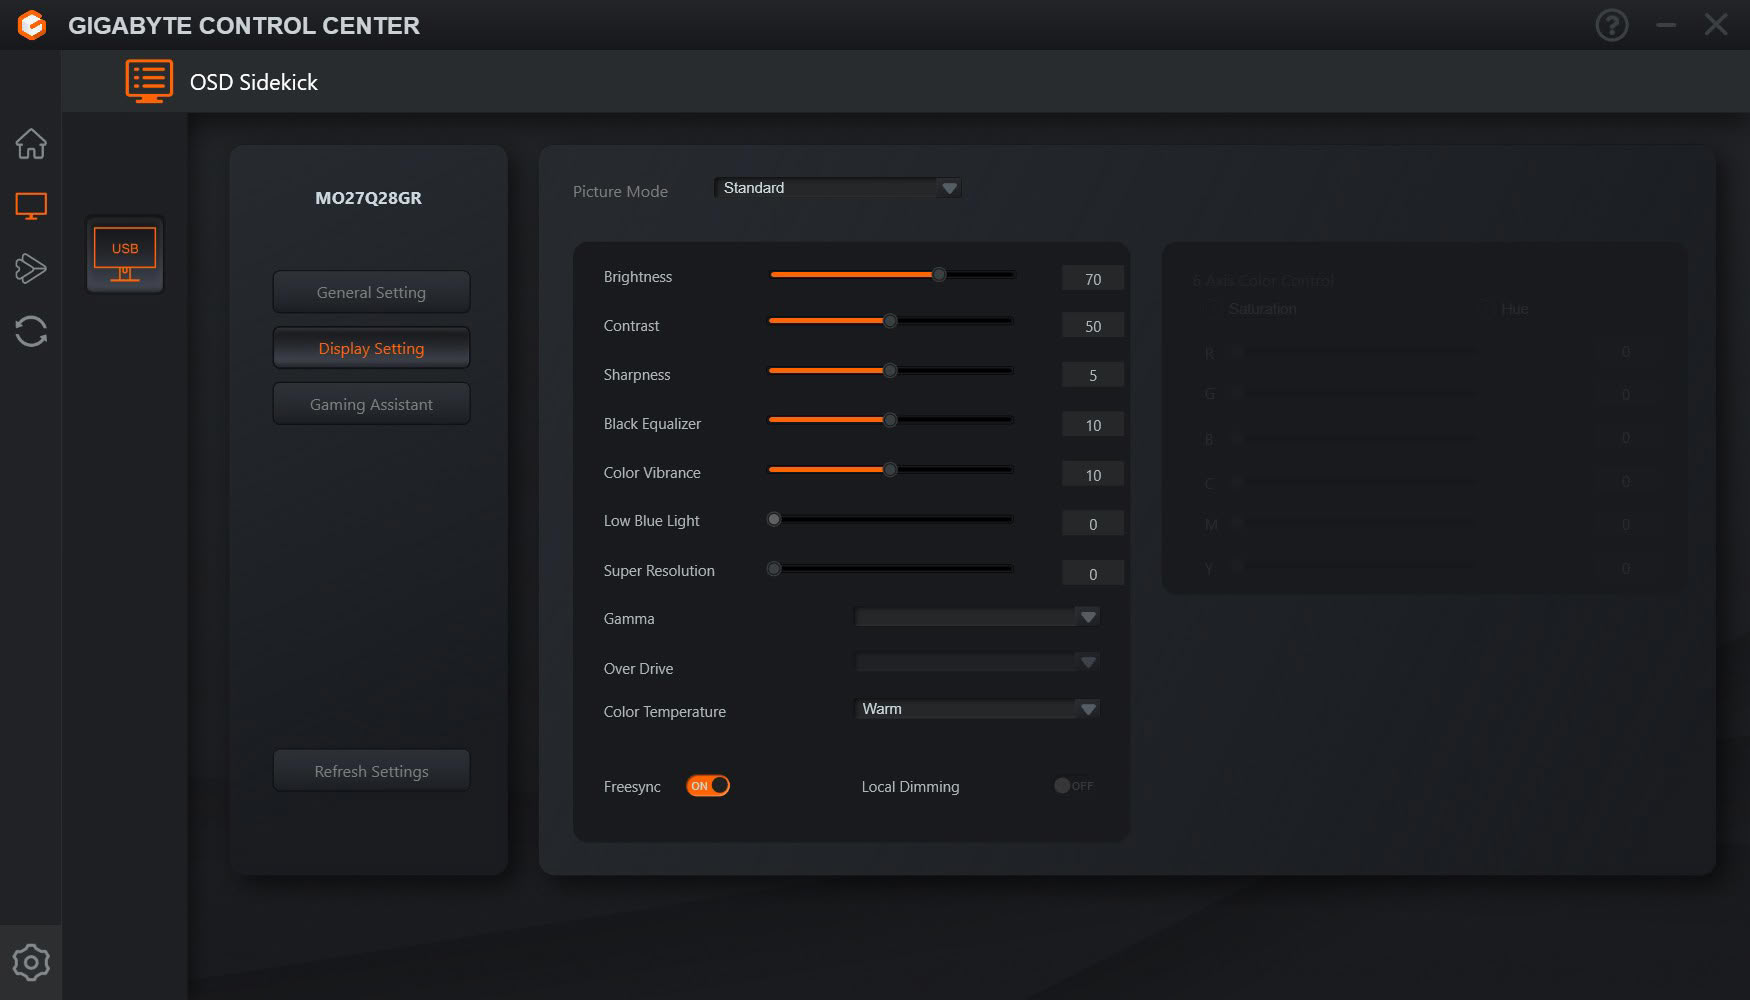
Display Setting is the pane that matters. Picture mode selection sits at the top and everything below it applies to whichever preset is active: brightness, contrast, sharpness, Black Equalizer, Color Vibrance, Low Blue Light, Super Resolution, gamma, color temperature and the 6 axis color controls. Two entries are greyed out because they do not apply to this panel, Over Drive and Local Dimming, which is a small honesty worth noting since plenty of software leaves dead controls active.
This is where the calibration work described later in this review is easiest to do. Nudging red down a point and checking the result against a colorimeter is a great deal less tedious with sliders on screen than with a joystick behind the panel, and the values apply live.
Gaming Assistant duplicates Game Assist and adds to it. Dashboard is configured here rather than just toggled, with individual checkboxes for CPU and GPU frequency, temperature, fan speed and usage, so you choose exactly what the overlay shows. Crosshair gets a visual editor, Game Info covers refresh rate, gaming counter and a count-up or count-down timer, and there is a hotkey list for binding monitor functions to keyboard shortcuts.
Aim Stabilizer appears here too, with a note in the interface that enabling it disables brightness adjustment. That is the software exposing the same trade the OSD makes with Ultra Clear, since both are black frame insertion by another name.
Nov 19th, 2026 22:52 PST
change timezone
Latest GPU Drivers
New Forum Posts
- Honestly, do you care about GTA VI? (178)
- Anthrophics IPO (10)
- WarpCoreBench scores! (78)
- Upgrade Considerations: CPU (12/13/14) and Motherboard (B660/B760 and Z690/Z790) (62)
- How to prevent OLED burn damage due to PC freezes or power outtages? (39)
- TPU's Nostalgic Hardware Club (22172)
- RX 7600 + Ryzen 5 5600GT getting the same FPS as my old RX 6500 XT – What am I missing? (5)
- GTA VI (11)
- GPU Temperatures Rise Very Quickly in FurMark – Is This Normal? (18)
- Time to upgrade CPU and MOBO (72)
Popular Reviews
- AMD Zen 6 Technical Deep Dive
- Ugreen NASync DXP4800 GT Review
- Acemagic Retro X3 Review
- Upcoming Hardware Launches 2027 (Updated Nov 2026)
- Corsair RM1200e (Second Generation) Review
- Pulsar Office Tour & First Look at P1 Dual-Sensor Mouse
- Biwin Black Opal NV7400 2 TB Review
- Chieftec Iceberg PRO 360 DARK Review
- AMD Ryzen 7 9800X3D Memory Performance Scaling
- AMD Ryzen 7 9800X3D Review - The Best Gaming Processor
TPU on YouTube
Controversial News Posts
- NVIDIA Co-Founder and CEO Jensen Huang Officially Resigns (490)
- Report: Jensen Huang Eyes NVIDIA Comeback (224)
- Open Letter Asking NVIDIA to Reinstate Jensen Huang Passes 115,000 Signatures (184)
- OpenAI CEO Argues Home PCs Waste the World's Limited DRAM Supply (152)
- NVIDIA Launches Investigation Into Jensen Huang's Relationship With Suspected Chinese Spy (136)
- Intel "Raptor Lake Next" 16-Core and 20-Core CPUs Surface (130)
- Legendary Game Studio BioWare Shuts Down Following EA Layoffs (104)
- Dell CEO Says the Memory Shortage Will Get Worse in 2027 (95)