 17
17
Lian Li PC-Q11 Mini-ITX Review
Value & Conclusion »Assembly

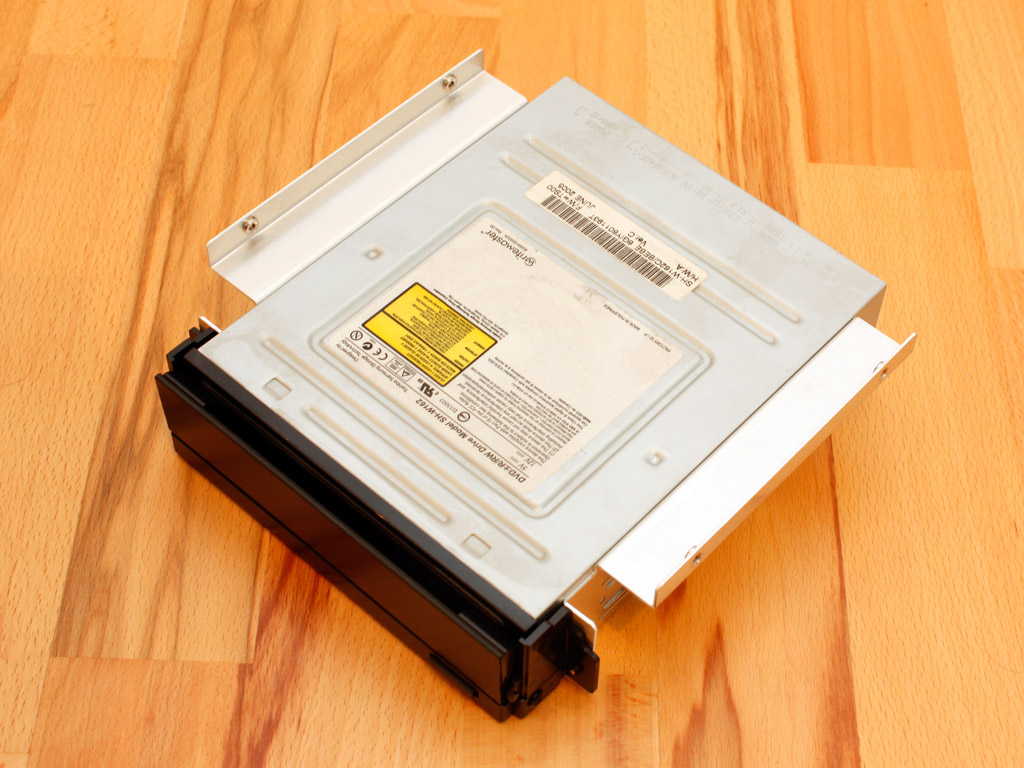
Instead of installing the mainboard first, you will need to insert the drive bays as a first step. This is due to the construction and size of the chassis and mainly attributed to the fact, that Lian Li uses a front drive bay cover for the 5.25 inch bay. If you were to remove that, it should be no problem to install an optical drive after the mini-ITX board is placed within the case. You will have to fiddle around a bit with the perfect distance to this front cover, as you do not want it pushing the flip-down out when closed down, but still being able to reach the ODD eject button. The Samsung ODD seems to be a bad choice for this design, as the optical drive tray extrudes a bit out of the front, but I managed to get it lined up fine after a few tries.
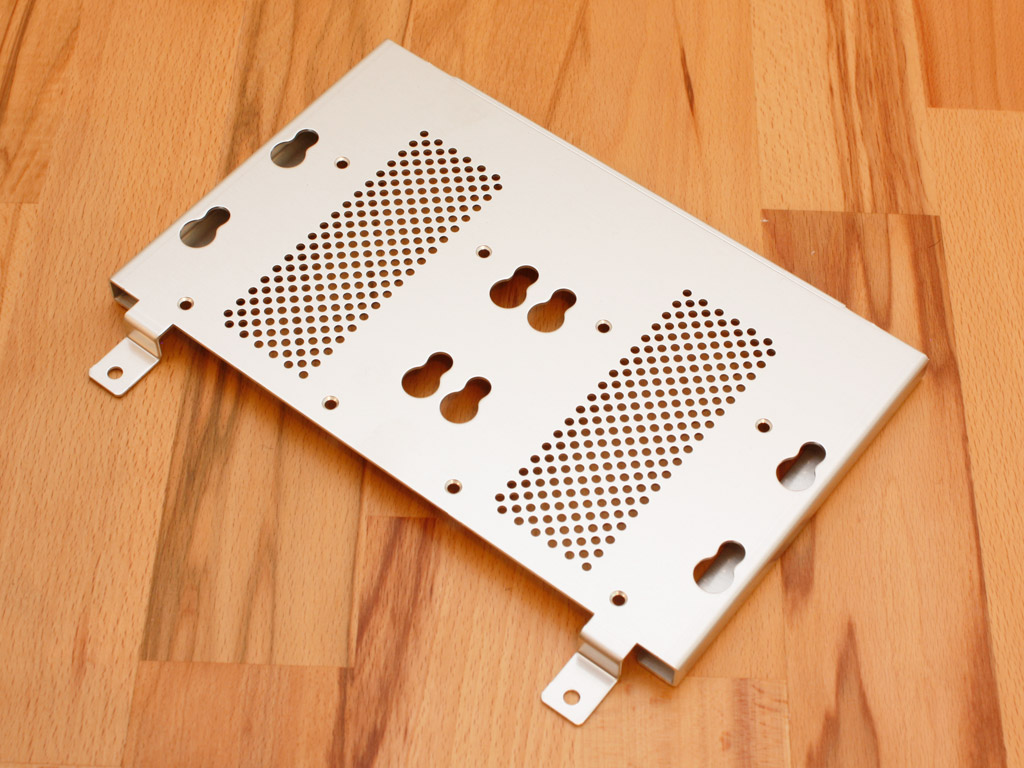


The second step requires you to install all your hard drives. To do so, the cage needs to be removed by simply unscrewing two thumb screws and pulling it off the floor of the Q11. no matter if you install a 3.5 inch drive or an SSD, you will need to use the screw holes on the bottom of the drives instead of the ones to the sides. I have placed a Mushkin SSD on the bottom, with the connectors looking out the "front" away from the mainboard. You could do it the other way around, but have to use a modular power supply or detachable power cables which can be connected to the hard drives and routed before placing the cage back into the Q11. Once back in the chassis you can clearly see the hard drive SATA connectors, with very little space towards the side of the chassis.

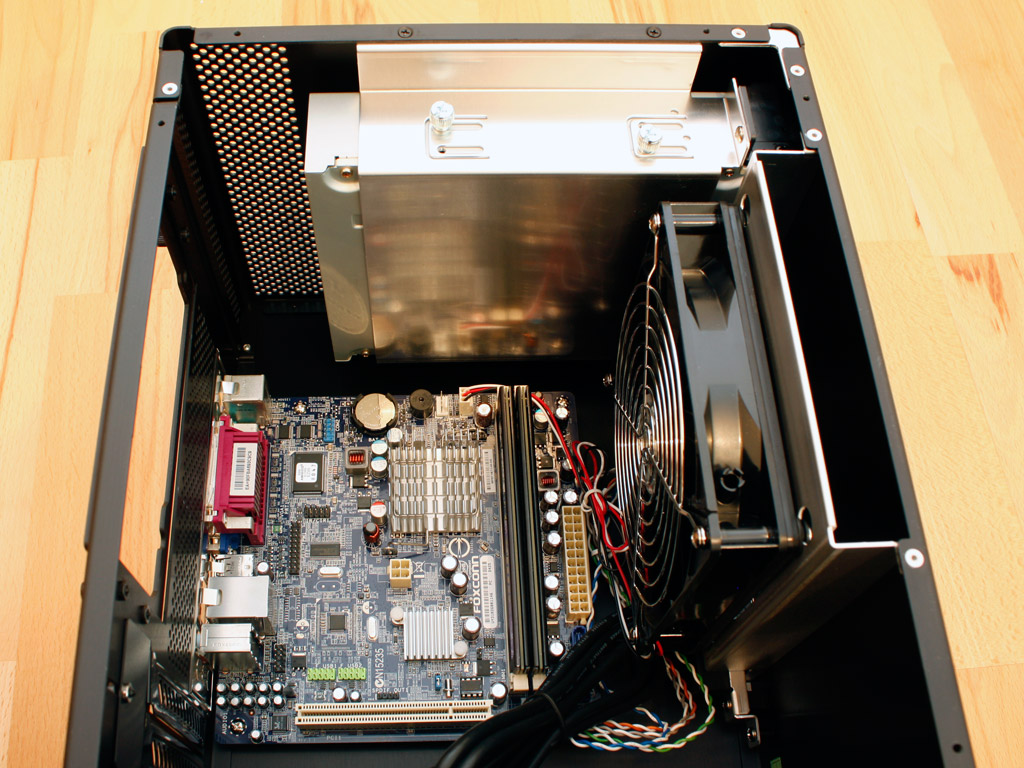
Once all the drives are installed, one can go about placing the mainboard within the chassis. To do so, simply screw it onto the side panel and then screw that plate back unto the enclosure itself. As you can see, there is very little space around the board. This order of assembly is necessary, as the side panel covers the screws which hold the optical drive bay in place.


The last and possibly most frustrating step of assembly is the power supply. Lian Li has designed the Q11 in a manner that allows you to slide it into place from the rear by using a PSU bracket. Once secured unto the power supply, you can force the unit into case. I use the word force, as I had to exert a lot of pressure, scratching the PSU in the process. It would have been better if Lian Li would have made the opening just a millimeter larger instead.
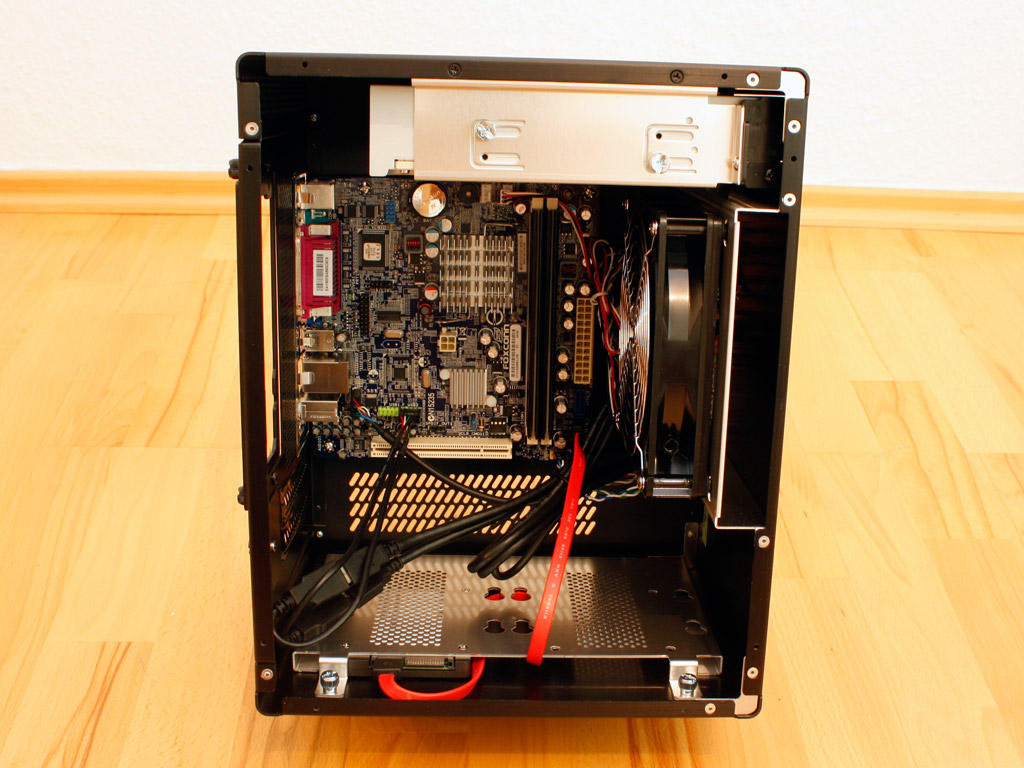

The next issue I encountered was due to the large and rather inflexible cable tree on the PSU. As you can clearly see in the image above, putting away all the cables resulted in jamming them into the little space I had. Using a modular power supply should lessen the problem, but as there is so little space between the unit and the front fan and the fact that any modular connectors add to the overall length of the PSU. Granted, I used a 650W unit so a less powerful one may be just a tad bit shorter.
Finished Looks


Even though everything was stuffed into the chassis, powering up the system put a smile on my face. Lian Li is well known for using silent fans and the 140 mm intake is no exception. Coupled with the quiet PSU and the purely passively cooled mainboard this overall system is extremely quiet. The full size optical drive bay looks good behind the flip-down cover and the overall design of the cover works well with the optical drive.
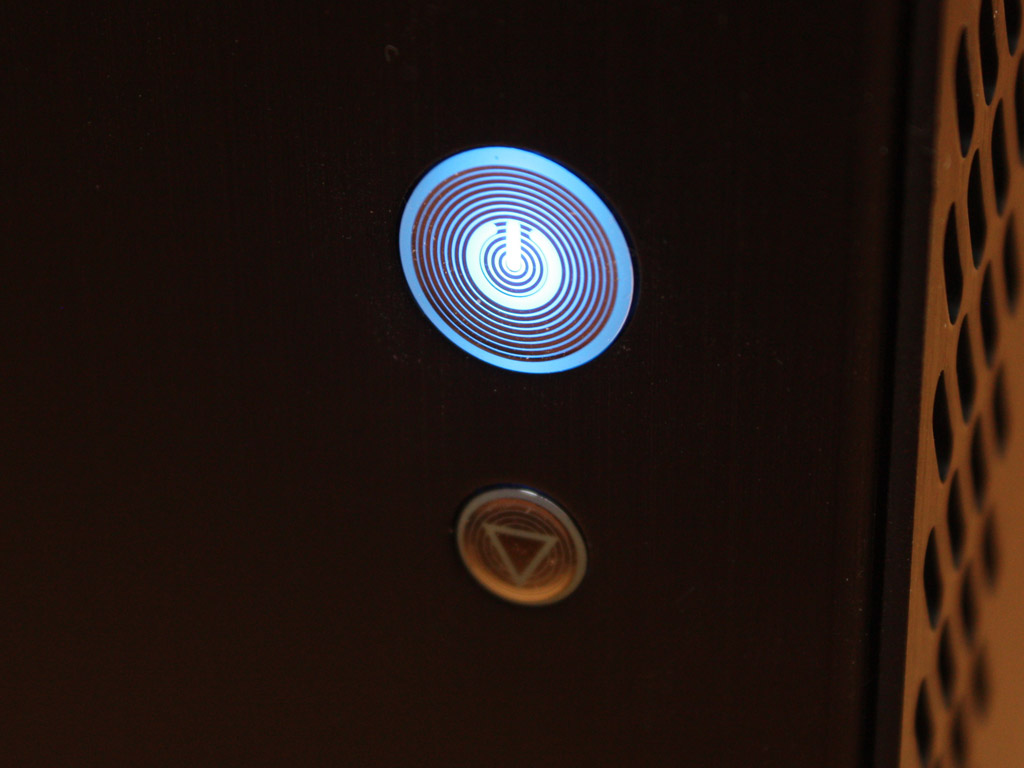
The power and reset buttons also act as the blue power and red hard drive activity LEDs. Both are rather bright, which may be a bit too much when sitting in a dark room watching a movie with the HTPC on. It would have been a tad bit better to use small LED within the frame of the chassis or even better, passive lighting instead.


All connectivity in the rear is easily accessible and can be found where you would expect it. I did not use a graphics card within this chassis, but the air vents allow for air to pass through the rear of the chassis.
Aug 1st, 2025 14:45 CDT
change timezone
Latest GPU Drivers
New Forum Posts
- Blender 4.0.1 BMW27 demo test (22)
- AMD Radeon 6900 XT Limited Black Edition Bios Problems - Boost Problems (7)
- TPU's Rosetta Milestones and Daily Pie Thread (2419)
- Folding Pie and Milestones!! (9661)
- 3DMARK "LEGENDARY" (357)
- AAF Optimus Modded Driver For Windows 10 & Windows 11 - Only for Realtek HDAUDIO Chips (590)
- 3D Printer Club (582)
- Question Wi-fi adapters (15)
- TPU's Nostalgic Hardware Club (20588)
- My UPS keep sending alarm when I game (35)
Popular Reviews
- MSI Claw 8 AI+ A2VM Review
- Lenovo Legion 5i (15IRX10) Review - Feature-Rich and Wallet Friendly
- ASUS ROG Crosshair X870E Apex Review
- Herman Miller Logitech G Embody Review - No Pain, No Gain
- Orbital Pathfinder Review
- Montech X5 Review
- Upcoming Hardware Launches 2025 (Updated May 2025)
- Lian Li O11 Dynamic Mini V2 Review
- Noctua NF-A12x25 G2 PWM Fan Review
- AMD Ryzen 7 9800X3D Review - The Best Gaming Processor
TPU on YouTube
Controversial News Posts
- AMD's Upcoming UDNA / RDNA 5 GPU Could Feature 96 CUs and 384-bit Memory Bus (137)
- AMD Radeon RX 9070 XT Gains 9% Performance at 1440p with Latest Driver, Beats RTX 5070 Ti (131)
- Intel "Nova Lake-S" Core Ultra 3, Ultra 5, Ultra 7, and Ultra 9 Core Configurations Surface (110)
- DDR6 Memory Arrives in 2027 with 8,800-17,600 MT/s Speeds (102)
- NVIDIA to Debut GeForce RTX 50-series SUPER GPUs by Christmas (101)
- AMD Sampling Next-Gen Ryzen Desktop "Medusa Ridge," Sees Incremental IPC Upgrade, New cIOD (97)
- Intel CEO Confirms SMT To Return to Future CPUs (95)
- NVIDIA Becomes First Company Ever to Hit $4 Trillion Market-Cap (94)