 38
38
Lian Li PC-T1R Spider Case Review
Assembly & Finished Looks »Preparation
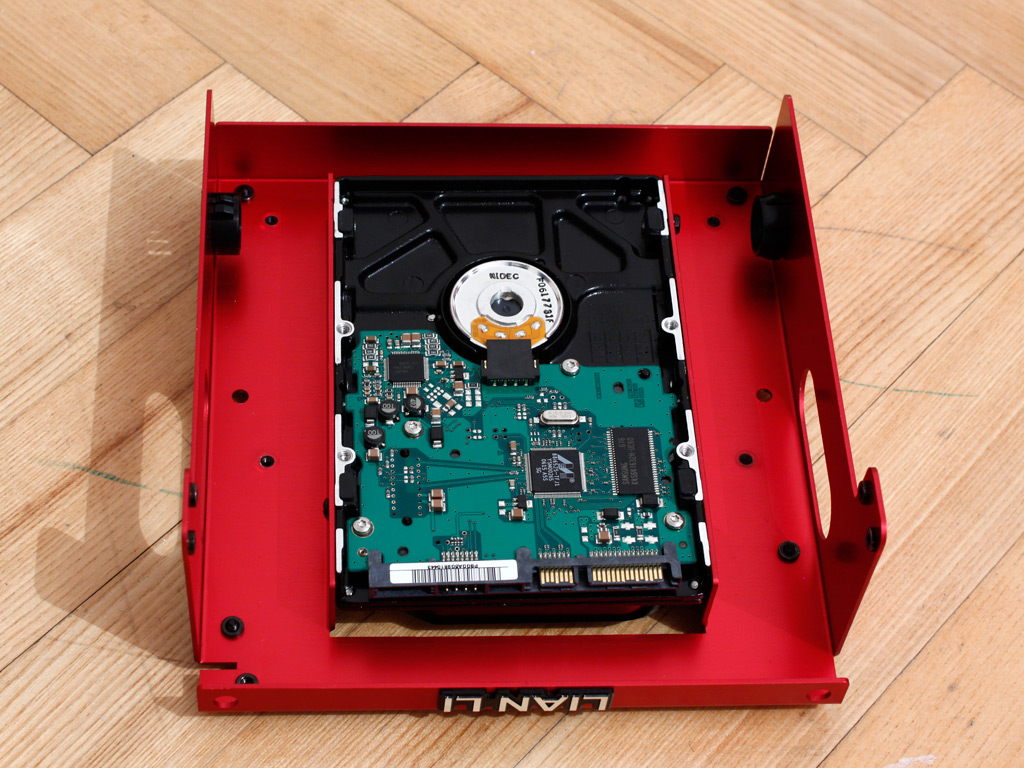

Since I do not have a manual, some of the preparation was figured out by trial and error. At first I was baffled by the inability to secure the hard drive, but then figured out that one has to remove the bottom tray for the slim-line drive to give way to the holes of the hard drive bay. It holds a standard 3.5 inch drive, but it is possible to use traditional rails to install an SSD as well. It would certainly be nice if Lian Li could include such rails for the retail version. The drive lines up perfectly with the upper edge of the head component of the spider and will later be covered by the ITX mainboard.

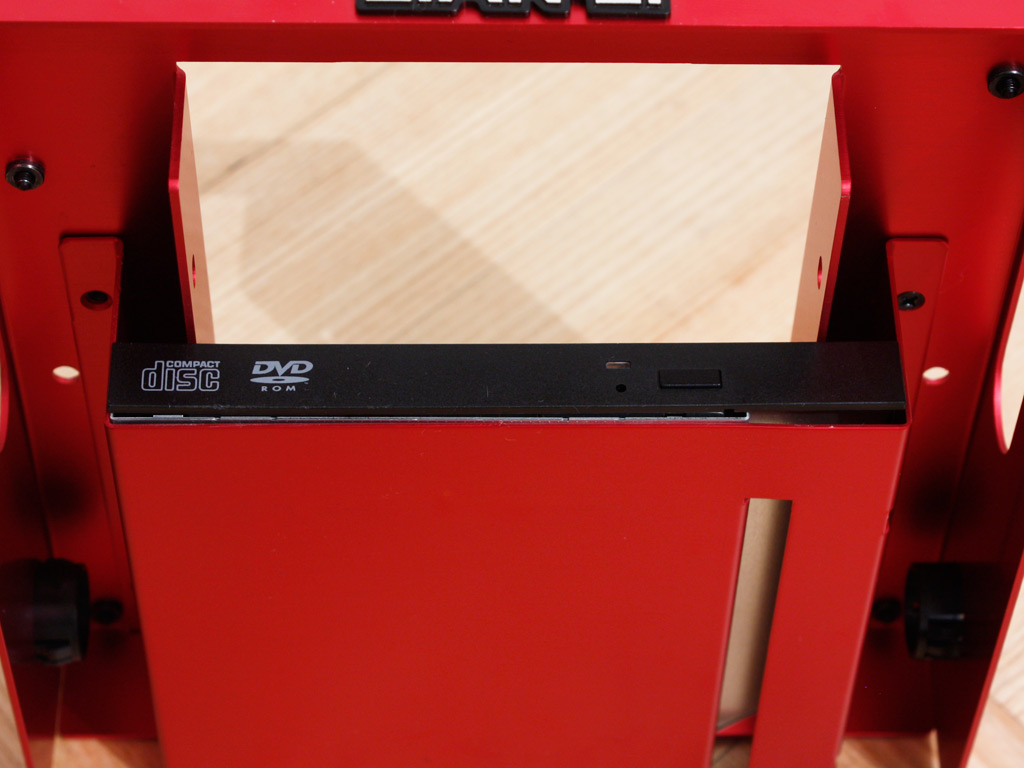

Installing the slim-line optical drive is done as you would in any HTPC with such a bay. Four tiny screws are needed to hold it in place. At first I was aiming the ODD facing to the front of the entire case, but quickly realized during installation, that it should be placed in the opposite direction. You will see later on, how the correct installation looks. Nonetheless, for those with a slot loading unit, tilting the head back far enough should give you the angle needed to literally feed discs to the spider and make it spit them out too. This would simply not be possible with a tray loading drive, as the bay is placed too far back under the head to give you good access to an ejected tray, no matter how flat of an angle you have. You would be prone to damaging the hard drive PCB right above the drive instead.


Once both the hard drive and the optical drive are placed in their respective bays, the head piece is ready for the mainboard. Lian Li supplies tall and slim thumb screws and the ITX standard only has four holes on the board, thus securing the Zotac ION board is a quick and painless task. One obvious downside of the current setup is the lack of a frame to secure an expansion card like a graphics card. Such a unit should be easy to design and cheap to produce, but does expand the functionality of the PC-T1 nicely. Lian Li may well be preparing to ship such a part in the final product, as there is a screw hole right in line with the PCIe slot of the mini ITX board.

Preparing the power supply is very similar to installing it in any traditional PC, but here you place the plates on either side and secure the PSU with the included black screws. This contraption then forms the tail of the spider.
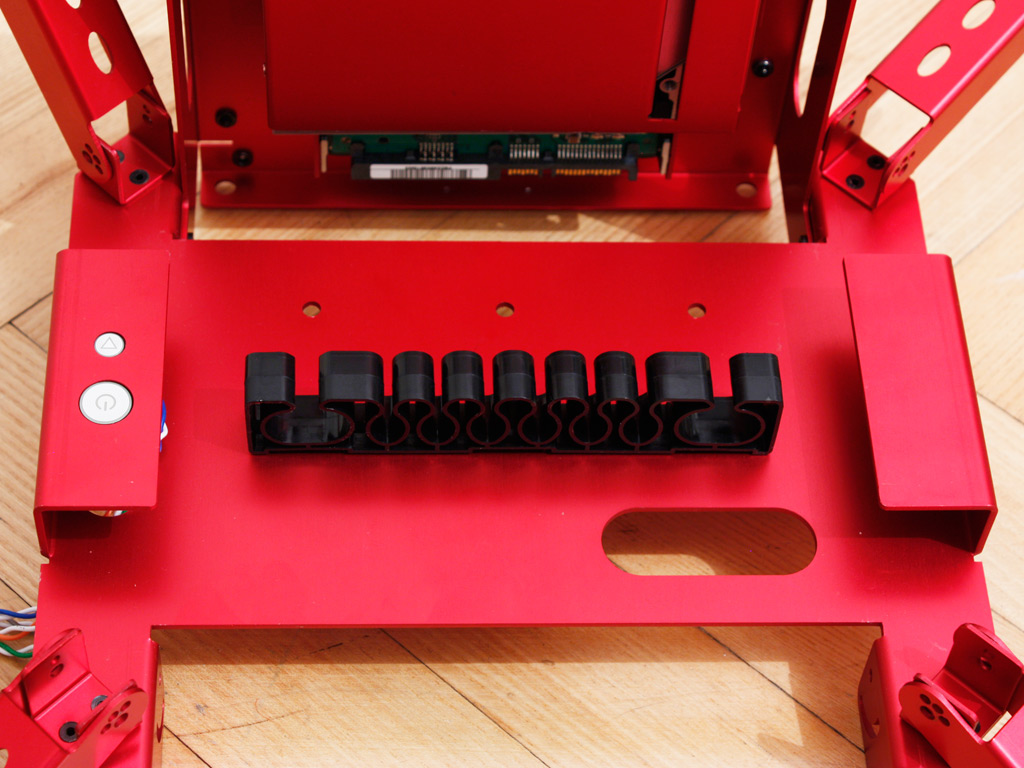
Placing the cable management clip unto one of the two possible locations is the last and only part required for the center piece of the spider. Now we can move to the fun part - connecting all the major body parts.
Apr 18th, 2024 21:23 EDT
change timezone
Latest GPU Drivers
New Forum Posts
- DDR5 RAM Speeds and the future (39)
- XFX RX560 1024 shaders 16 CU 4GB from Aliexpress (6)
- Is it possible that the atmosphere is losing less of its "shield" capabilities due to more and more jets/rockets puncturing it daily? (25)
- Do you use Linux? (228)
- FINAL FANTASY XIV: Dawntrail Official Benchmark (55)
- Why is SteamOS taking so long to come to desktop for AMD users, when ChimeraOS is the same thing almost? (16)
- MSI Z790 owners - be careful, the screw can crack the chipset (5)
- Should the CDPR make the Fallout 5 instead? (12)
- Cinebench crashed my PC. My Wi-Fi stopped working, and I keep getting a "Please wait" screen when I boot up my PC. (1)
- TPU's Nostalgic Hardware Club (18452)
Popular Reviews
- Horizon Forbidden West Performance Benchmark Review - 30 GPUs Tested
- PowerColor Radeon RX 7900 GRE Hellhound Review
- Fractal Design Terra Review
- Corsair 2000D Airflow Review
- Minisforum EliteMini UM780 XTX (AMD Ryzen 7 7840HS) Review
- Thermalright Phantom Spirit 120 EVO Review
- Creative Pebble X Plus Review
- FiiO KB3 HiFi Mechanical Keyboard Review - Integrated DAC/Amp!
- ASUS GeForce RTX 4090 STRIX OC Review
- NVIDIA GeForce RTX 4090 Founders Edition Review - Impressive Performance
Controversial News Posts
- Sony PlayStation 5 Pro Specifications Confirmed, Console Arrives Before Holidays (109)
- NVIDIA Points Intel Raptor Lake CPU Users to Get Help from Intel Amid System Instability Issues (102)
- US Government Wants Nuclear Plants to Offload AI Data Center Expansion (98)
- Windows 10 Security Updates to Cost $61 After 2025, $427 by 2028 (82)
- Developers of Outpost Infinity Siege Recommend Underclocking i9-13900K and i9-14900K for Stability on Machines with RTX 4090 (82)
- TechPowerUp Hiring: Reviewers Wanted for Motherboards, Laptops, Gaming Handhelds and Prebuilt Desktops (71)
- Intel Realizes the Only Way to Save x86 is to Democratize it, Reopens x86 IP Licensing (70)
- AMD Zen 5 Execution Engine Leaked, Features True 512-bit FPU (63)