 1
1
Sunbeam UFO Acrylic Cube Case Review
(1 Comment) »Introduction

TechPowerUp would like to thank Sunbeam for supplying the review sample.
Do you remember the day when the only colors you could buy a computer in were beige or gray? These days computer cases come in a variety of colors: black, silver, white, blue, red, yellow, green. The list goes on and on. With that much variety, it can be difficult to make a case stand out from the rest. The UFO Acrylic Cube Case from Sunbeam tries to do just that. And while its size and format may not be for everybody, the UFO is definitely worth taking a look at.
Features:
- Easy to install or uninstall CD-ROM
- Two 120mm fans improve air flow
- UV reactive acrylic panels
- Front mounted USB and audio ports
- Compact cube shape
Specifications:
Color: Transparent (ACUF-T);
UV-Blue (ACUF-HUVB)Drive Bay: 5.25" Drives Bay (x 2)
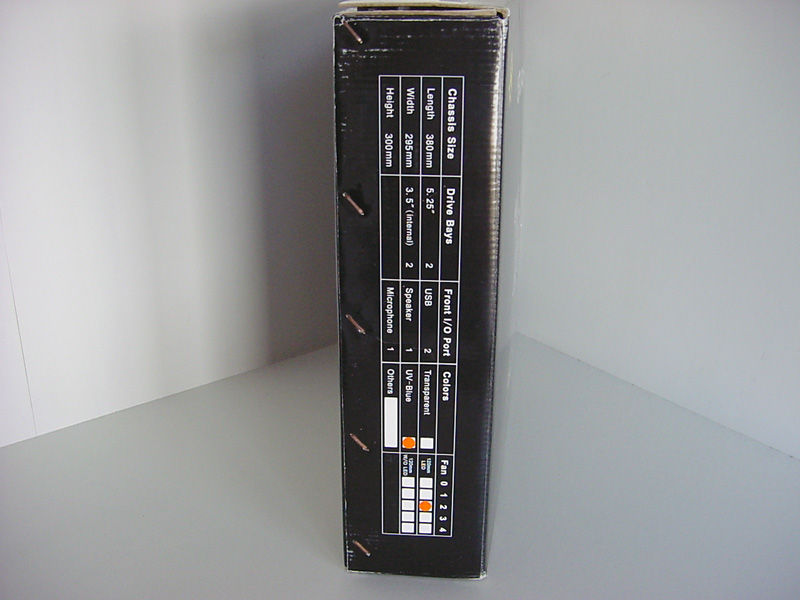
3.5" Drives Bay (x 2) ( Internal )Front I/O Port: USB 2.0 (x 2) + Speaker + Microphone Weight: N. W. 5.1 kg; G. W. 6.2 kg Dimension (H*W*D): H 300mm x W 295mm x D 380mm Motherboard Type: Standard ATX and Micro ATX
Packaging & Contents
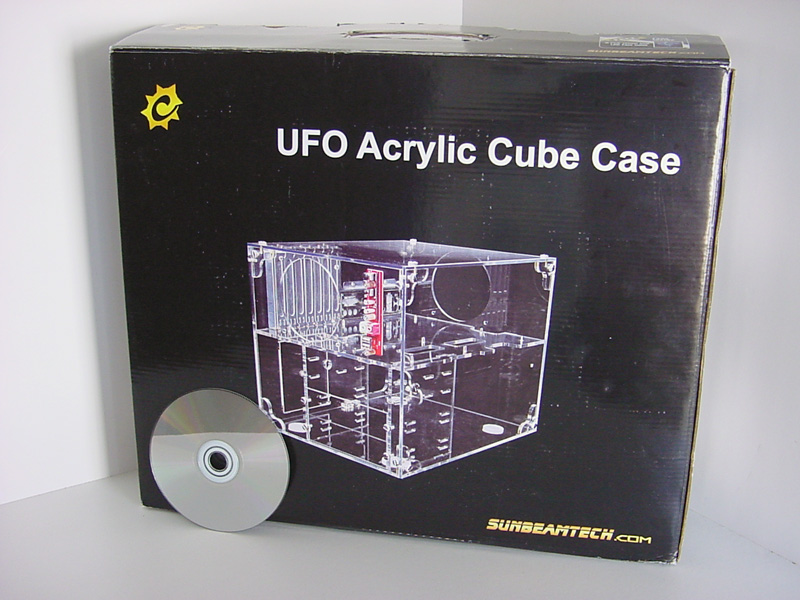
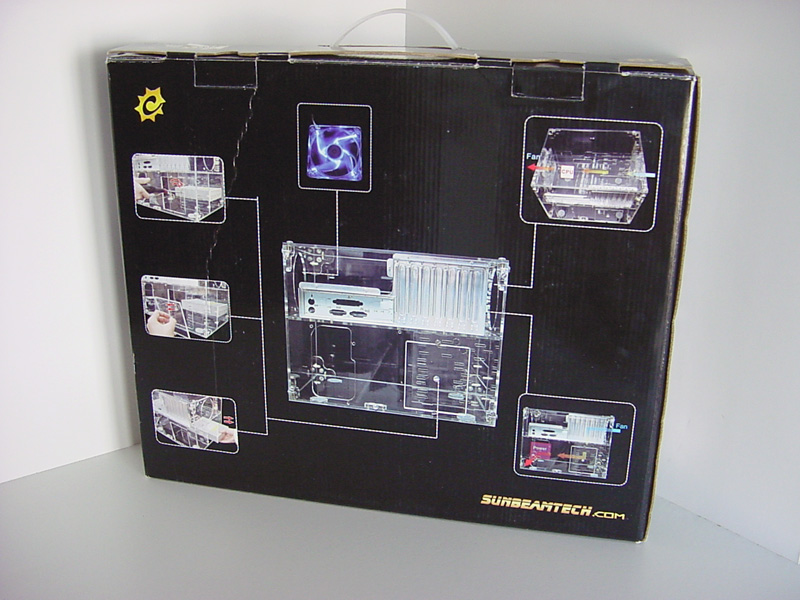
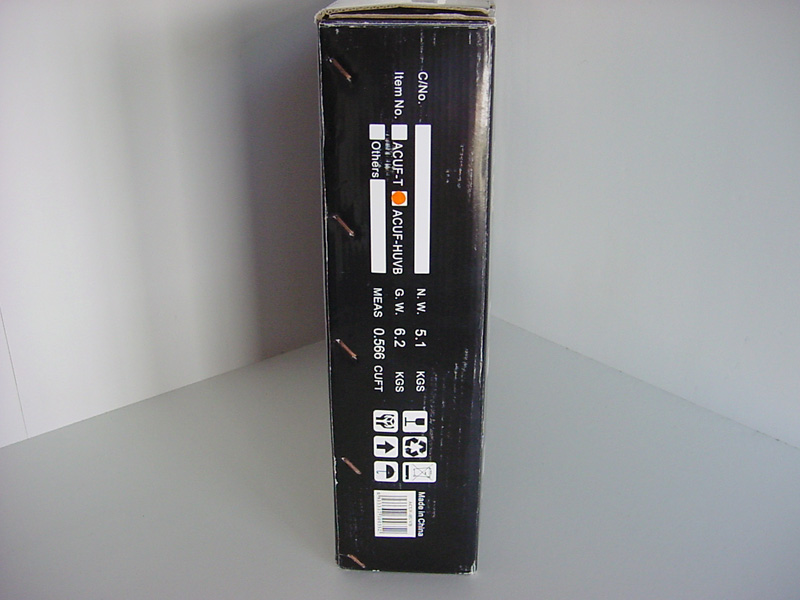
Sunbeam's UFO Acrylic Case comes in a small flat box. Yes, there is assembly required. The package is similar to most other Sunbeam products, with color pictures, features and specifications listed on the box. Sunbeam makes two versions of this case; one is completely clear, while our review sample is UV blue.
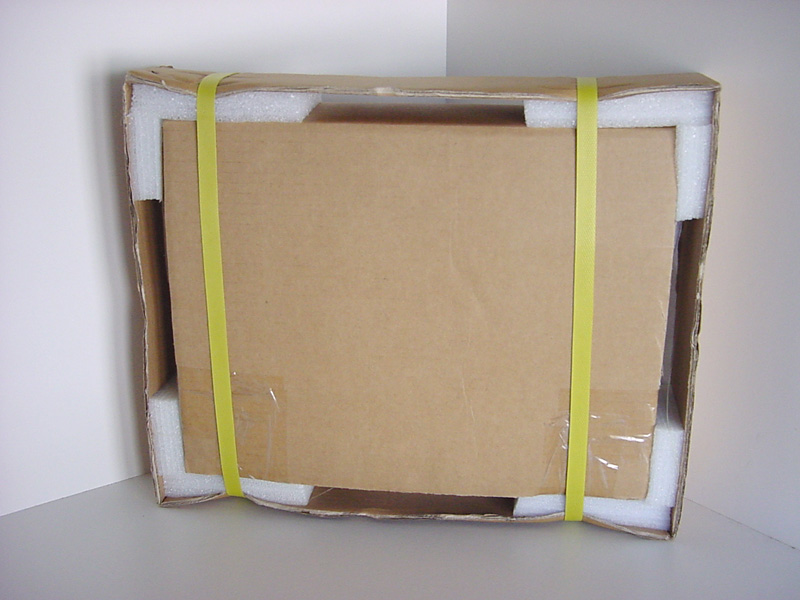
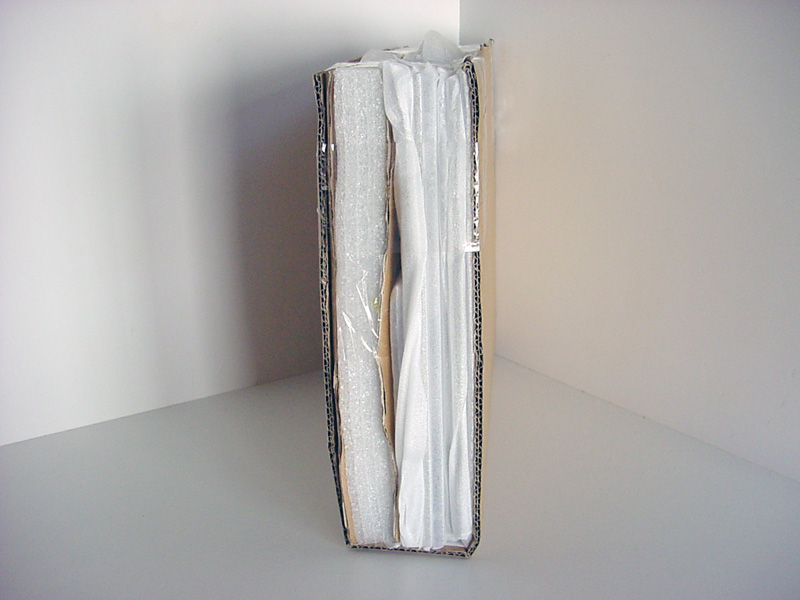
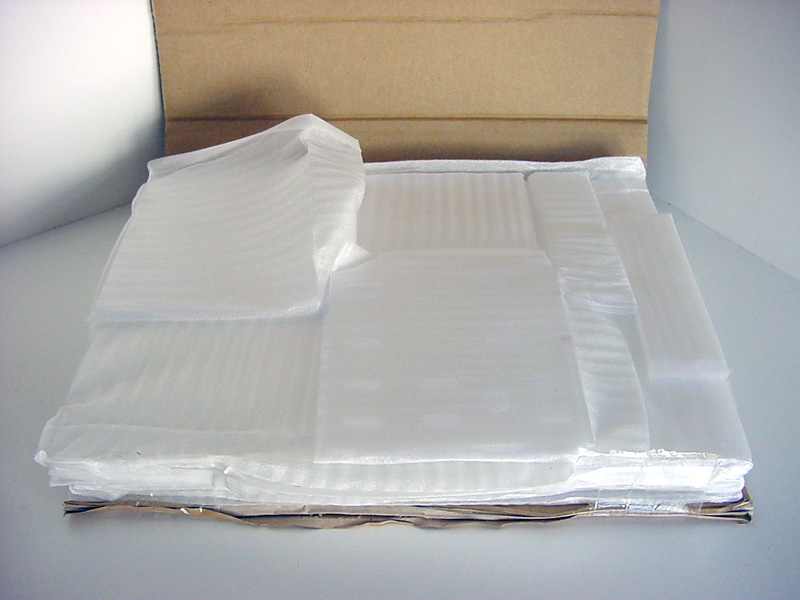
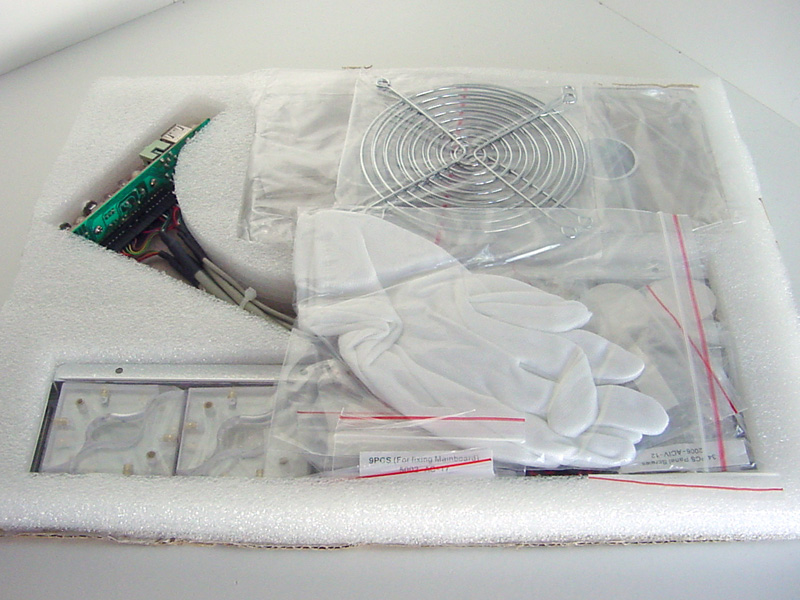
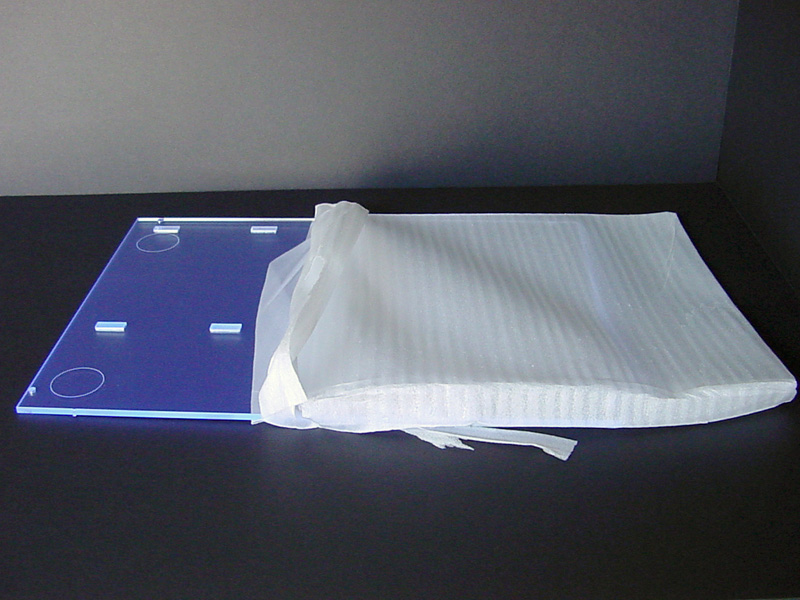
Inside the box the contents are packed very tightly and cushioned to avoid breakage during shipment. The center part contains all the components, while there is extra foam padding in the corners. Everything is banded with two yellow straps to hold it together. Looking from the side shows the package is divided into two sections. The case panels are individually wrapped in while foam sheets and stacked tightly, while the rest of the components are packed in a layer of stiff foam.
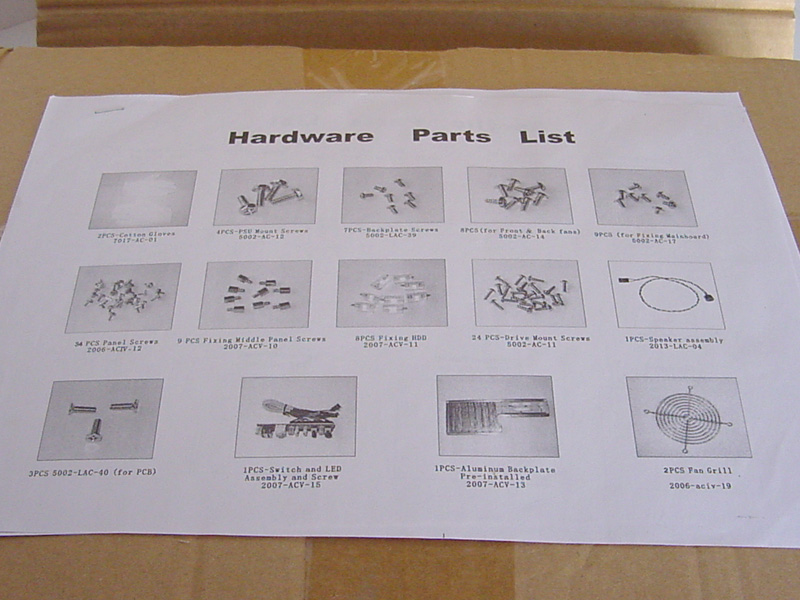
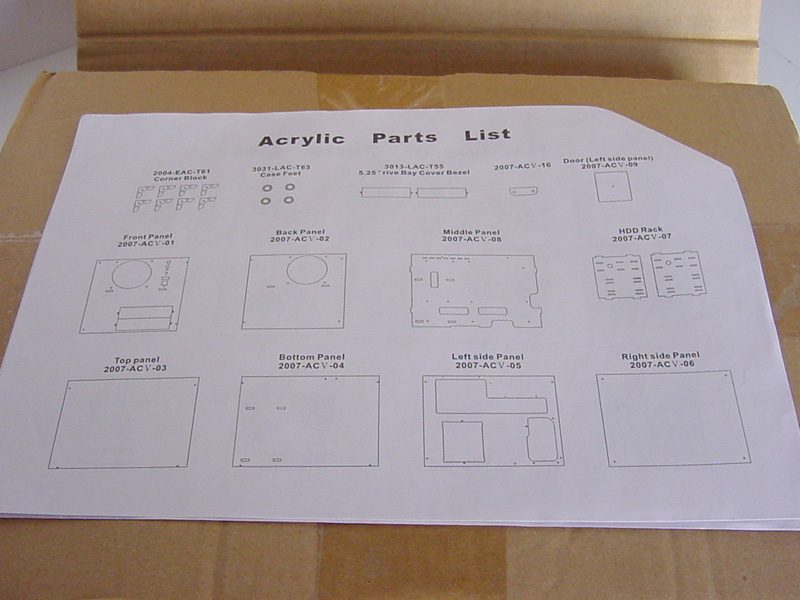
There are several photocopied pages of parts lists and assembly instructions. The instructions are fairly clear, though there are a few minor things missing.
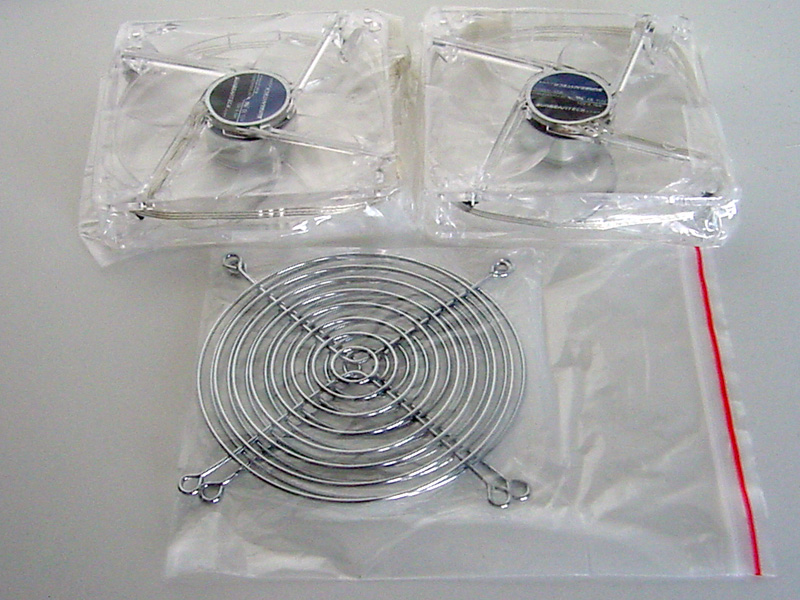
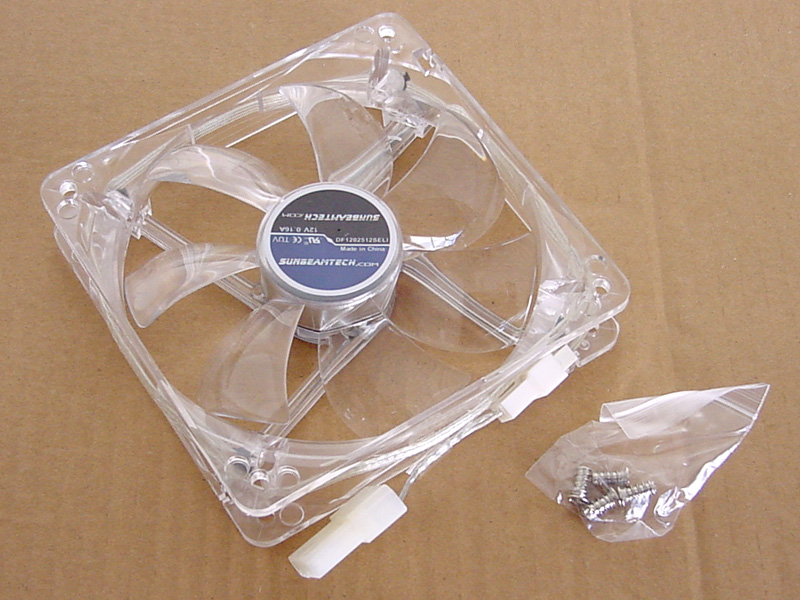
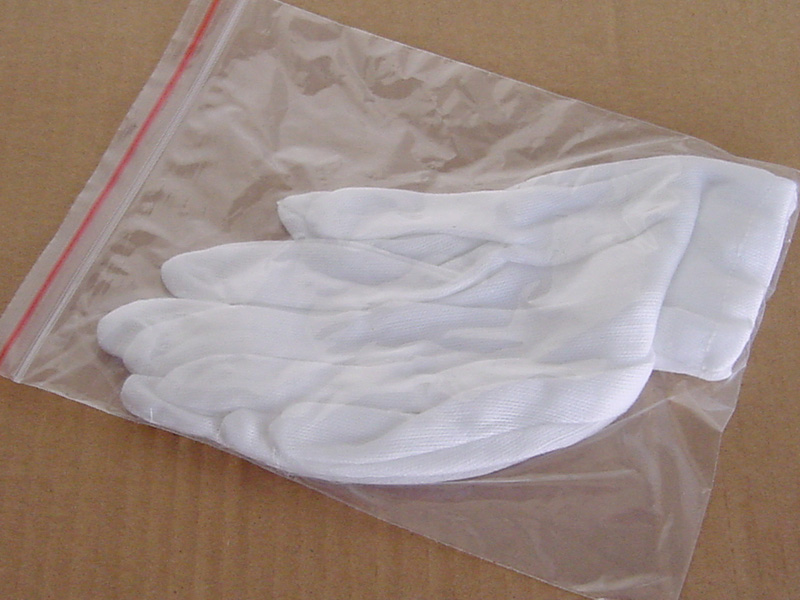
Included with the case are two blue LED fans with chrome wire grills. These grills are individually wrapped and come with 3-pin to 4-pin adapters and some extra case screws, however these screws are not long enough to use with the thicker acrylic panels. Also with the kit are a pair of white cloth gloves to help avoid fingerprints while assembling the case.
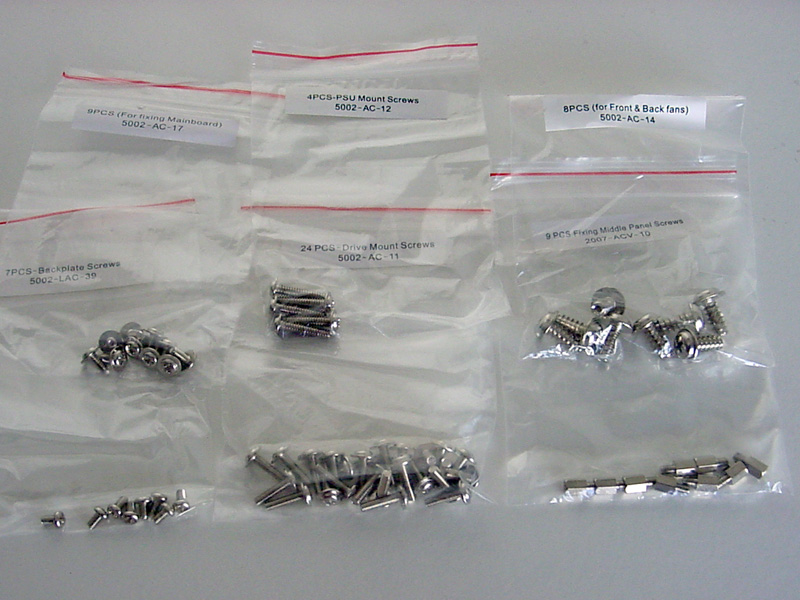
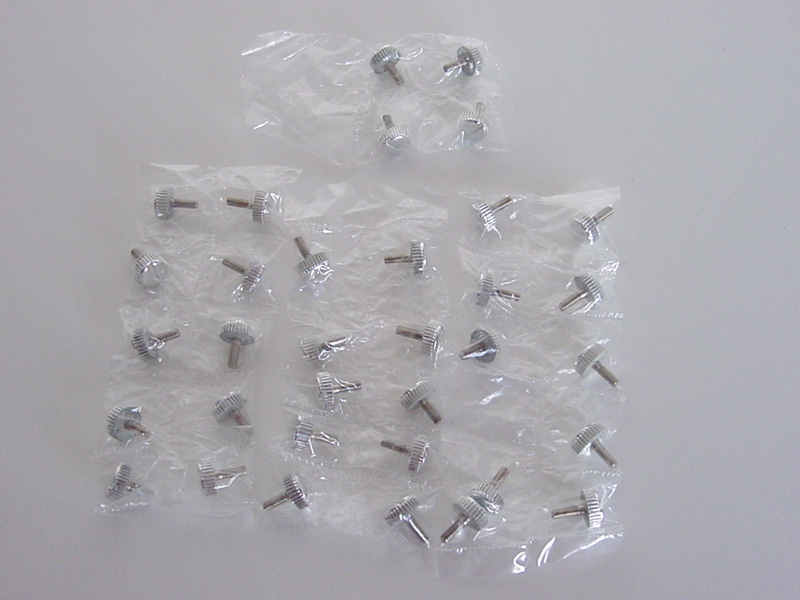
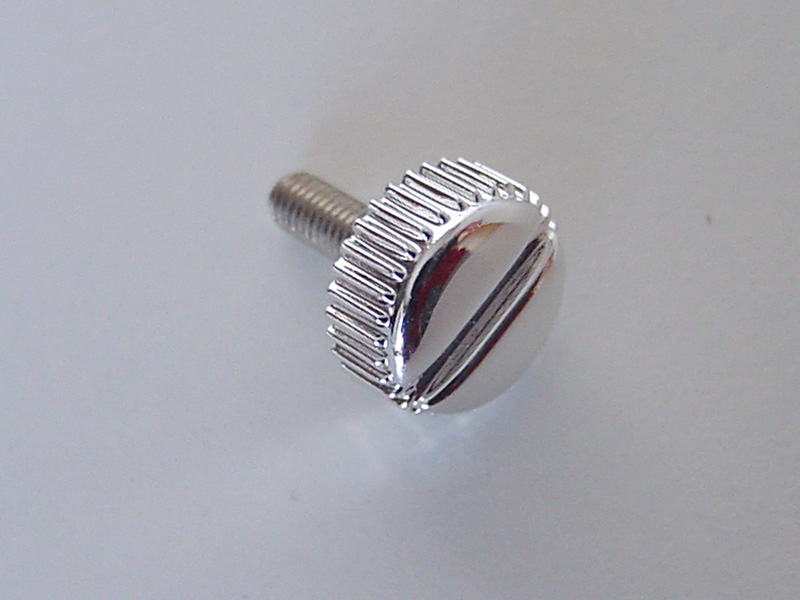
All of the hardware is neatly separated into small resealable bags with the part numbers labeled on the outside. The manual tells which screws to use by the number, so leave all the screws in their individual bags until needed. There are over 30 thumbscrews in this kit that will be used to join the panels. Although the shafts are metal, the heads are chrome-colored plastic. They have a slot in them so a screwdriver can be used, but care must be taken wto avoid breaking the slots out.
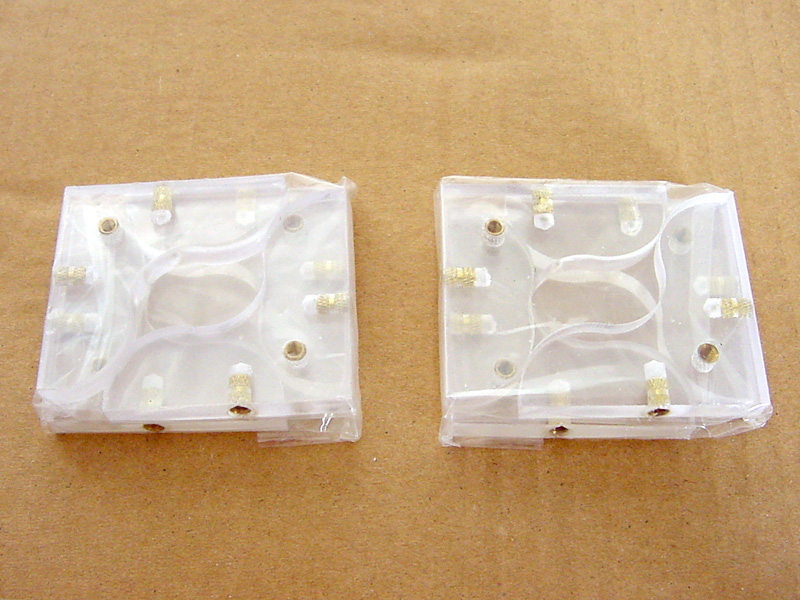
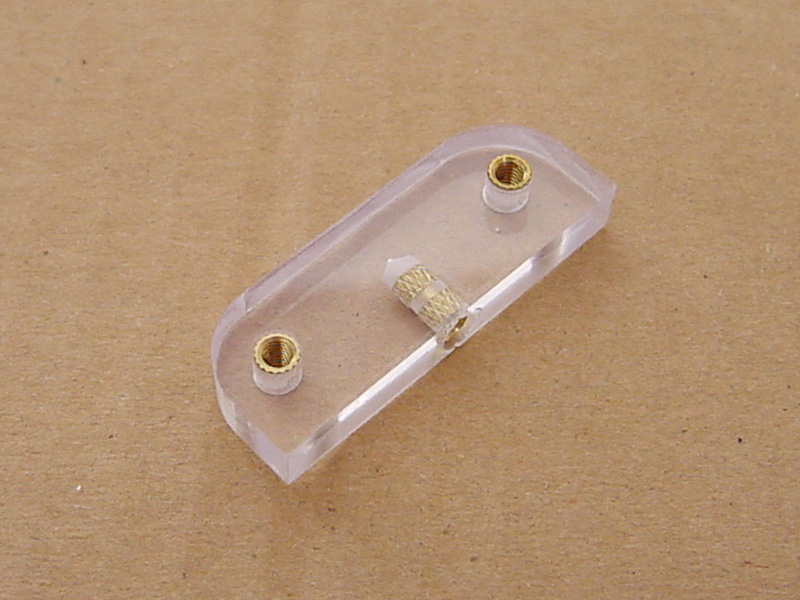
The panels are joined to each other with small acrylic brackets. There are eight L-shaped brackets that are used for most of the assembly, and one small bracket that helps to support the panels near the power supply.
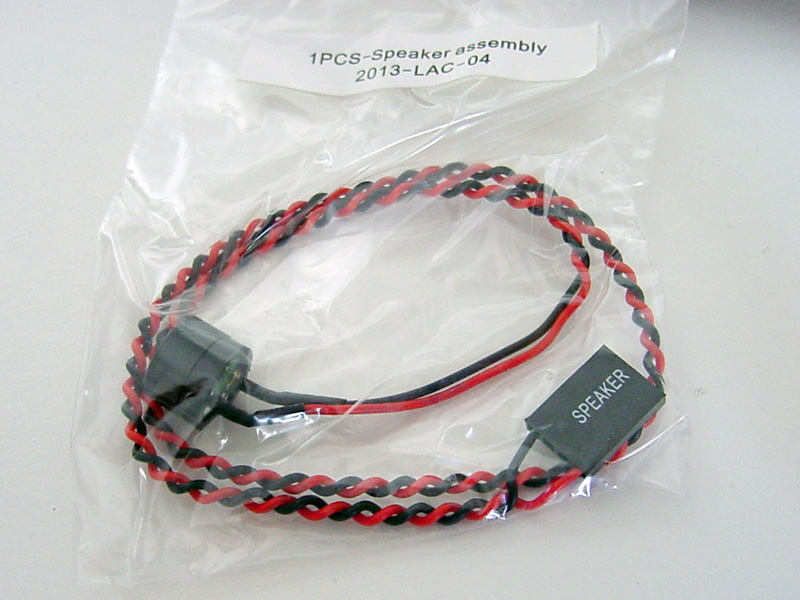
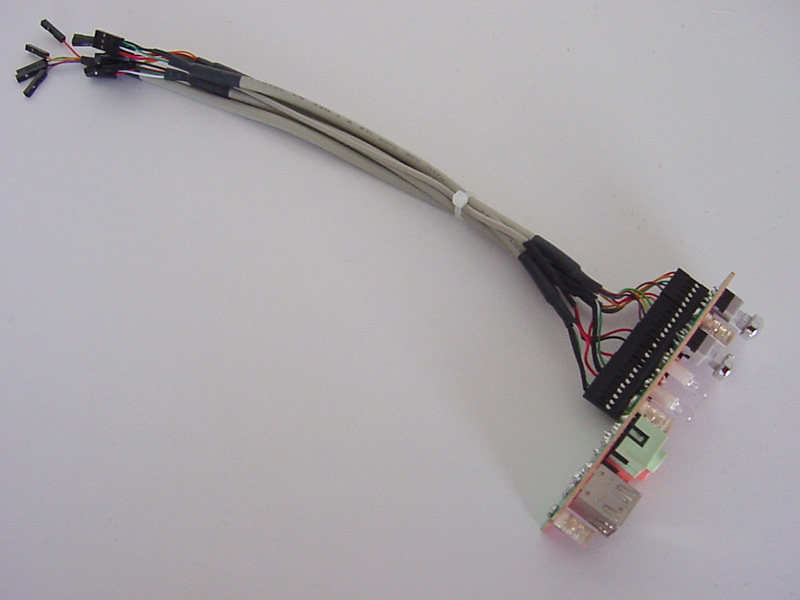
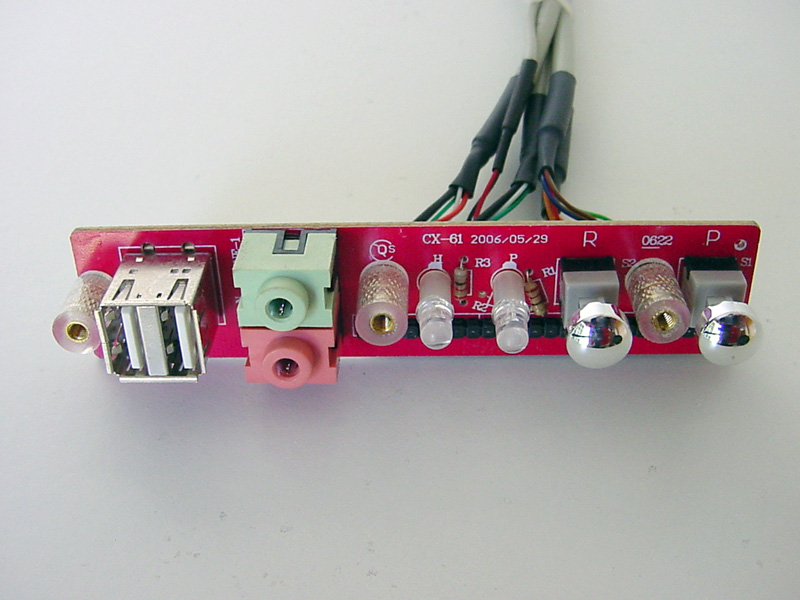
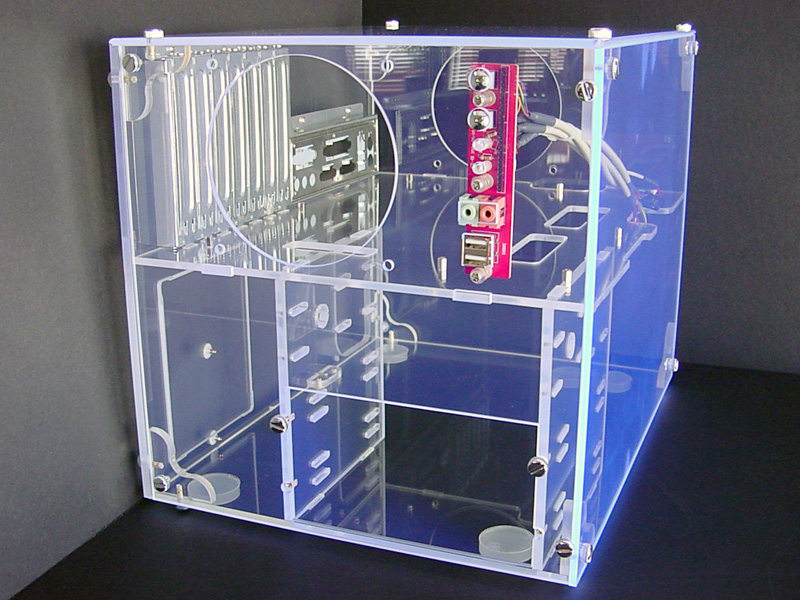
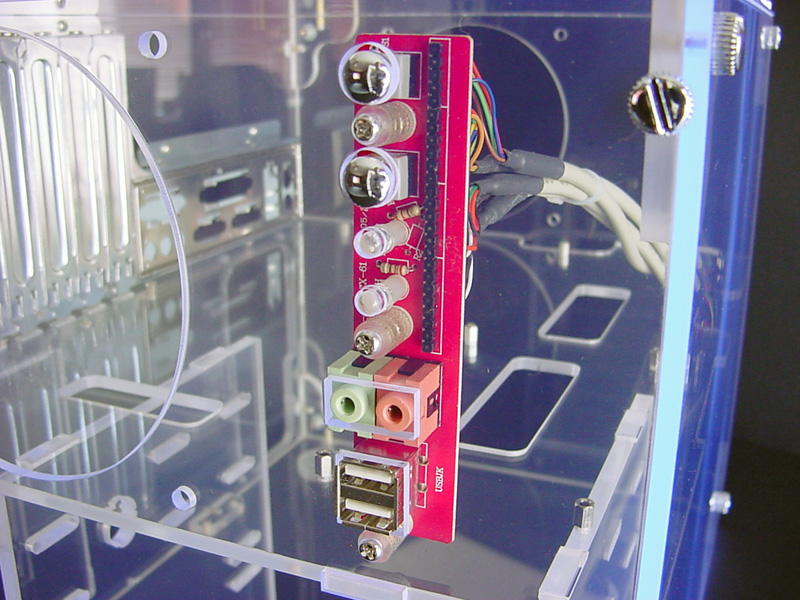
As with any case, there are the necessary power and reset buttons, as well as power and HDD activity LEDs. Sunbeam includes two audio ports, two USB 2.0 ports and a system speaker.
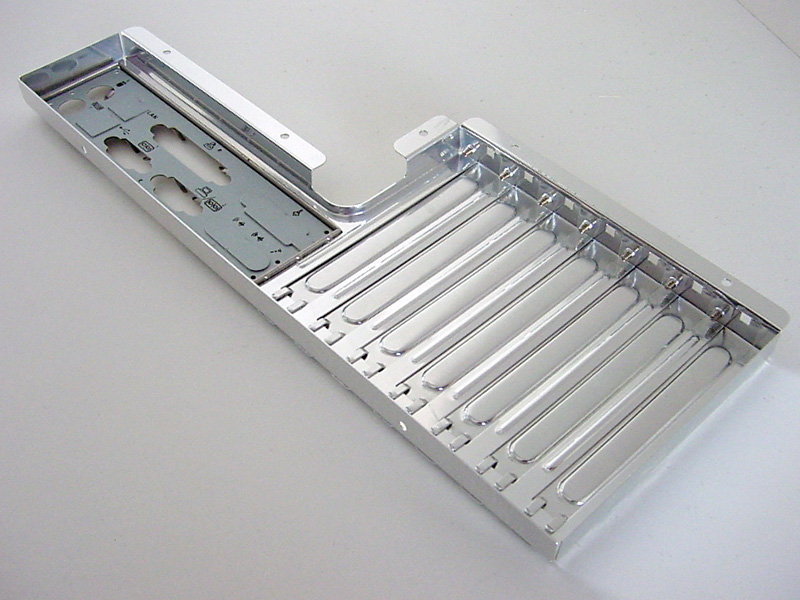
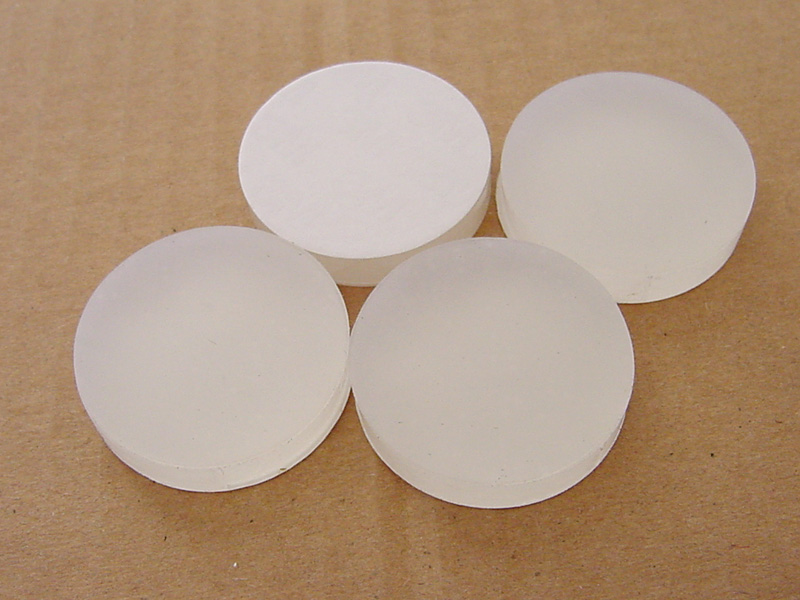
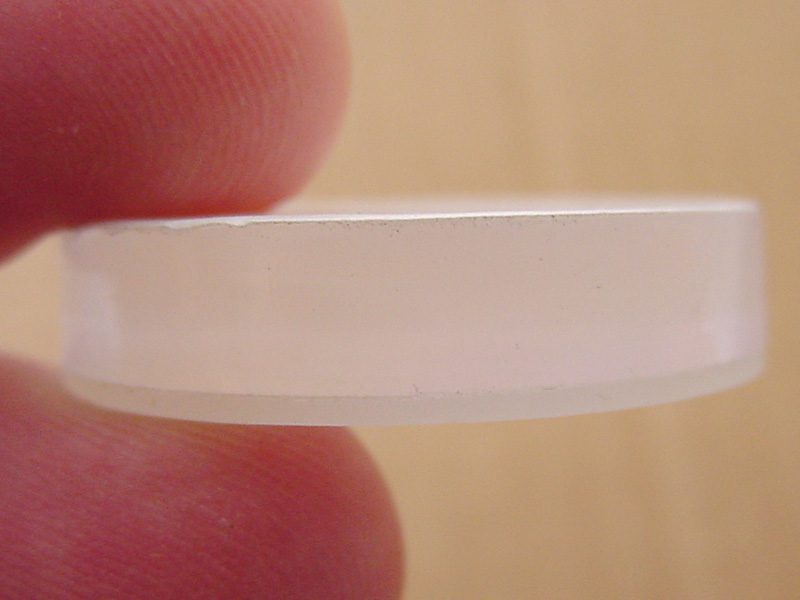
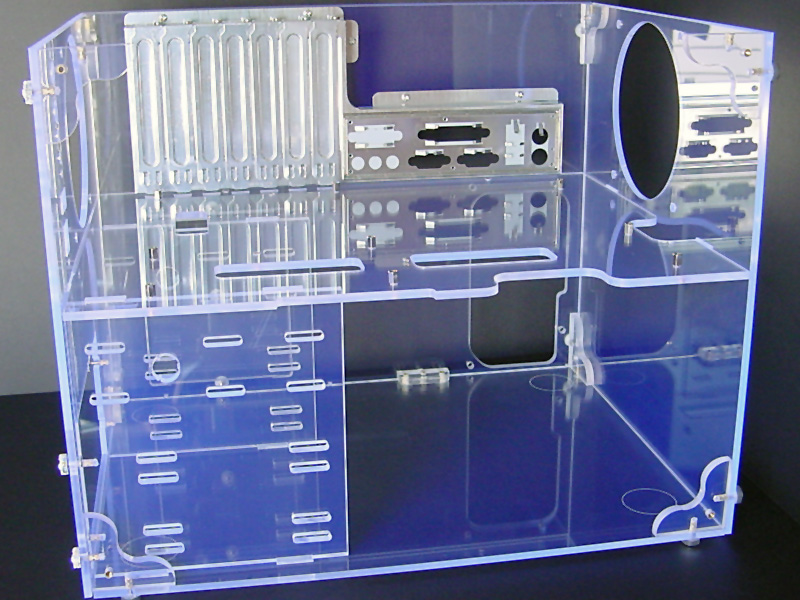
Aside from the hardware, the only metal part of the case is the rear panel for the I/O shield and expansion slots. There are seven slots as usual, and Sunbeam has included a generic I/O shield. For the case feet, Sunbeam used round pieces of acrylic sandwiched between double-sided adhesive and a thin piece of rubber. The plastic in the middle helps to maintain the look if the case, but the rubber on the bottom keeps the case from sliding around.
Assembly
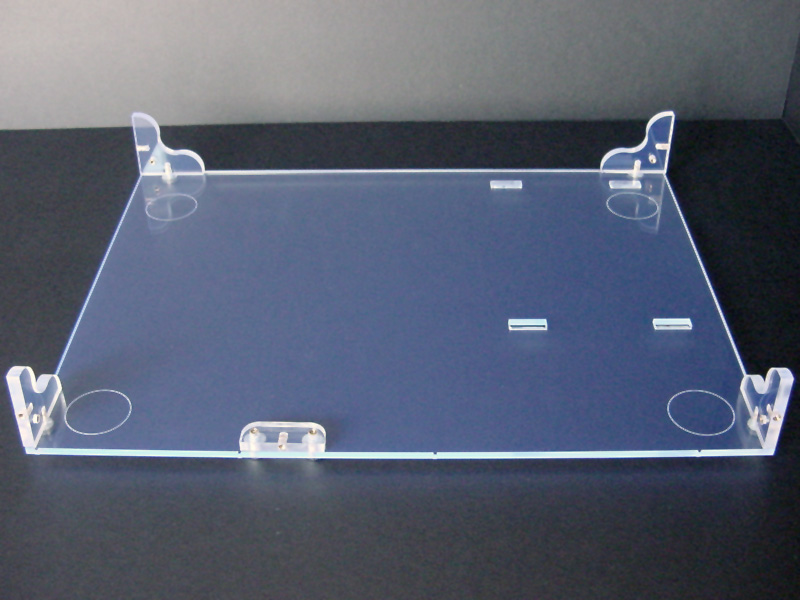
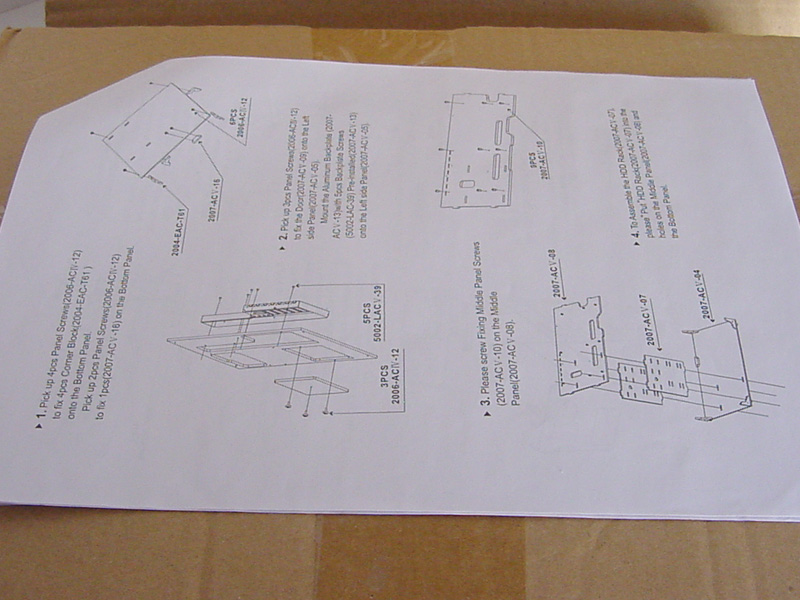
As stated before, the panels for the UFO Cube Case are individually wrapped in soft white foam. To start the installation, follow the manual carefully and unwrap only the parts needed for the current step. Lay them on top of the foam to keep them clean and lint-free. The assembly starts with the bottom panel and adding four L-shaped brackets and then one PSU support bracket. When adding the thumbscrews, be sure to not tighten them all the way. This will give you a little bit of slack to work with and make small adjustments easier.

Next the metal expansion panel was added to the rear acrylic panel and the thumbscrews are added to the access panel. This small panel can be removed to allow the user to swap out or add drives and bay devices. This is a great improvement over other plastic cases that need a lot of disassembly to perform basic upgrades.
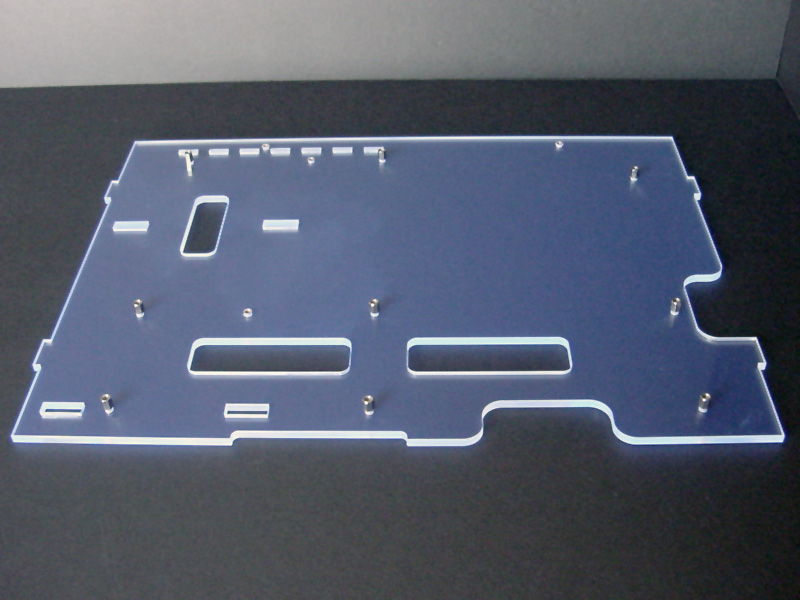
The motherboard tray has three holes and three notches to allow wires and cables to run between the top and bottom portions of the case. Sunbeam has done a great job of making sure these are in the right place to keep the cables neat. There are also slots and tabs in various places on the tray to help provide a little extra support for the case where it is needed most.
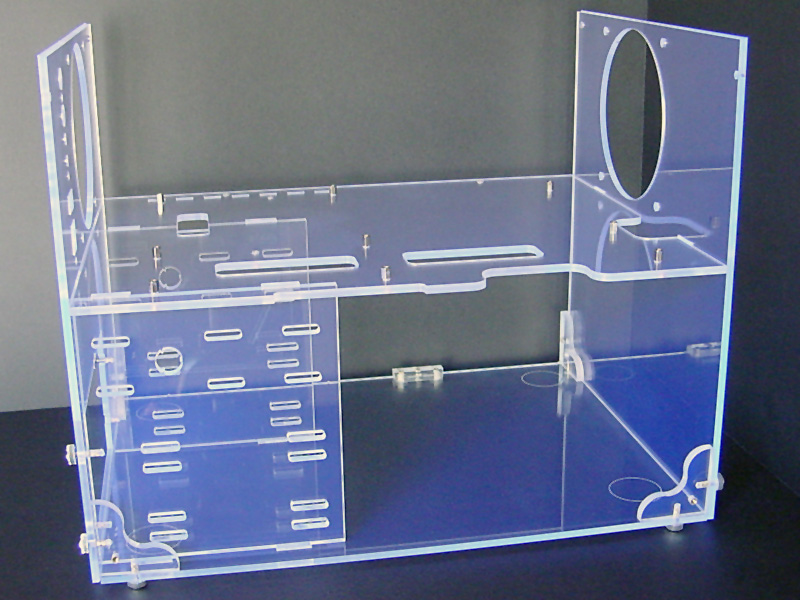
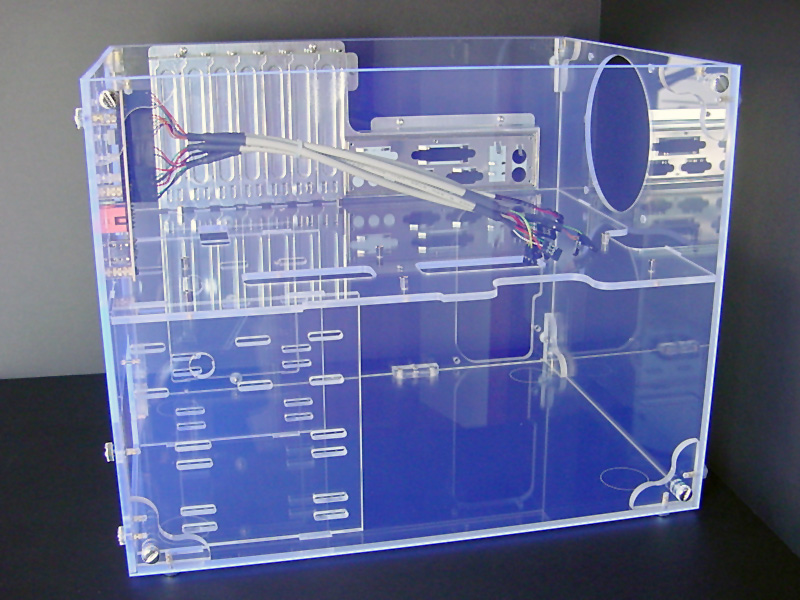
There are two sides to the drive cage which have tabs that fit into slots on the bottom and the motherboard tray. Once assembled these tabs and the drives installed actually help to hold everything in place. This unique approach keeps unnecessary hardware out of the case, and simplifies the assembly. The whole process of putting the case together takes about an hour, and that is with taking time and using great care to keep the case panels neat and smudge-free.
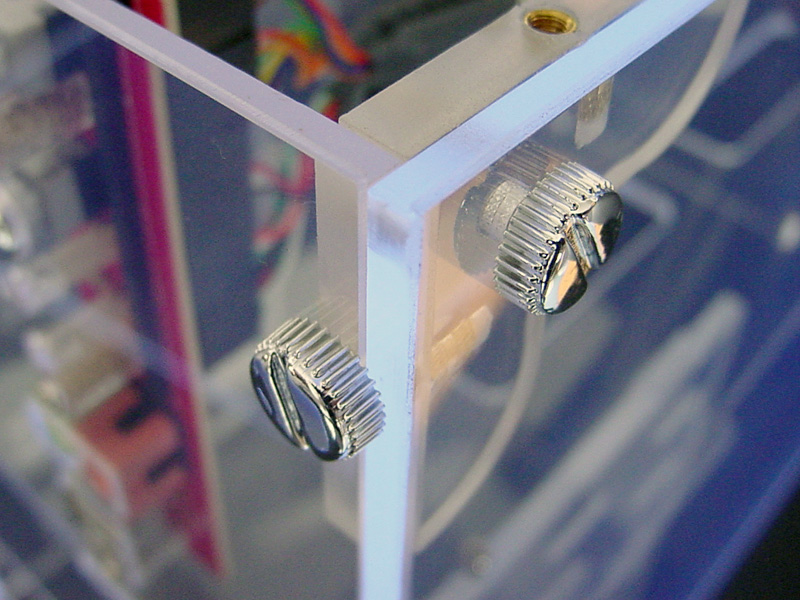
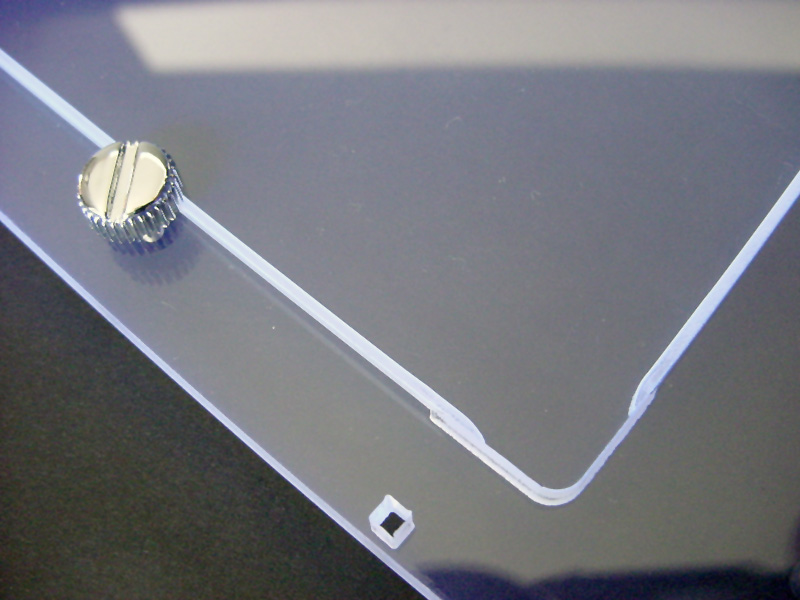
Here the corner is shown to help understand how the parts fit together. One L-bracket is used on each corner to connect all three panels. Each thumbscrew goes into a threaded insert, which is much stronger than just going into a threaded hole in the plastic. This does add to the cost of the case, but greatly increases the construction quality.

The final step is to add the front I/O ports and add the top. Two things missing from the instructions were the installation of the front ports and the fans. However, anyone buying a case like this who has the skills to put it together should have no trouble figuring out how to do so and which screws to use.
Our Patreon Silver Supporters can read articles in single-page format.
Jul 29th, 2025 14:43 CDT
change timezone
Latest GPU Drivers
New Forum Posts
- What antivirus do you use? (46)
- Looking To Make List Of Keyboard Manufacturers (17)
- What's your latest tech purchase? (24391)
- Upgrade from old x58 system (56)
- Have you got pie today? (16814)
- What are you playing? (24024)
- 9070XT Bios Flashed Fail (6)
- PC upgrade after many years (15)
- LCD IPS display (6)
- Weird issue with Worms: Armageddon on NV GPUs (5)
Popular Reviews
- Herman Miller Logitech G Embody Review - No Pain, No Gain
- Lian Li O11 Dynamic Mini V2 Review
- Lenovo Legion 5i (15IRX10) Review - Feature-Rich and Wallet Friendly
- Upcoming Hardware Launches 2025 (Updated May 2025)
- Noctua NF-A12x25 G2 PWM Fan Review
- Sapphire Radeon RX 9060 XT Pulse OC 16 GB Review - An Excellent Choice
- AMD Ryzen 7 9800X3D Review - The Best Gaming Processor
- VAXEE XE V2 Wireless Review
- AQIRYS Sirius Pro Review
- NVIDIA GeForce RTX 5050 8 GB Review
TPU on YouTube
Controversial News Posts
- AMD's Upcoming UDNA / RDNA 5 GPU Could Feature 96 CUs and 384-bit Memory Bus (134)
- AMD Radeon RX 9070 XT Gains 9% Performance at 1440p with Latest Driver, Beats RTX 5070 Ti (131)
- NVIDIA GeForce RTX 5080 SUPER Could Feature 24 GB Memory, Increased Power Limits (115)
- Intel "Nova Lake-S" Core Ultra 3, Ultra 5, Ultra 7, and Ultra 9 Core Configurations Surface (110)
- DDR6 Memory Arrives in 2027 with 8,800-17,600 MT/s Speeds (99)
- AMD Sampling Next-Gen Ryzen Desktop "Medusa Ridge," Sees Incremental IPC Upgrade, New cIOD (97)
- Intel CEO Confirms SMT To Return to Future CPUs (95)
- NVIDIA Becomes First Company Ever to Hit $4 Trillion Market-Cap (94)