 5
XMG Apex 17 (M25) Review - RTX 5070 12 GB Tested
Display Testing »Disassembly and Teardown
Disassembling the XMG Apex 17 (M25) is almost identical to the approach I showed in the XMG Focus 17 (M25) teardown. That's because both machines are very similar, inside and out.
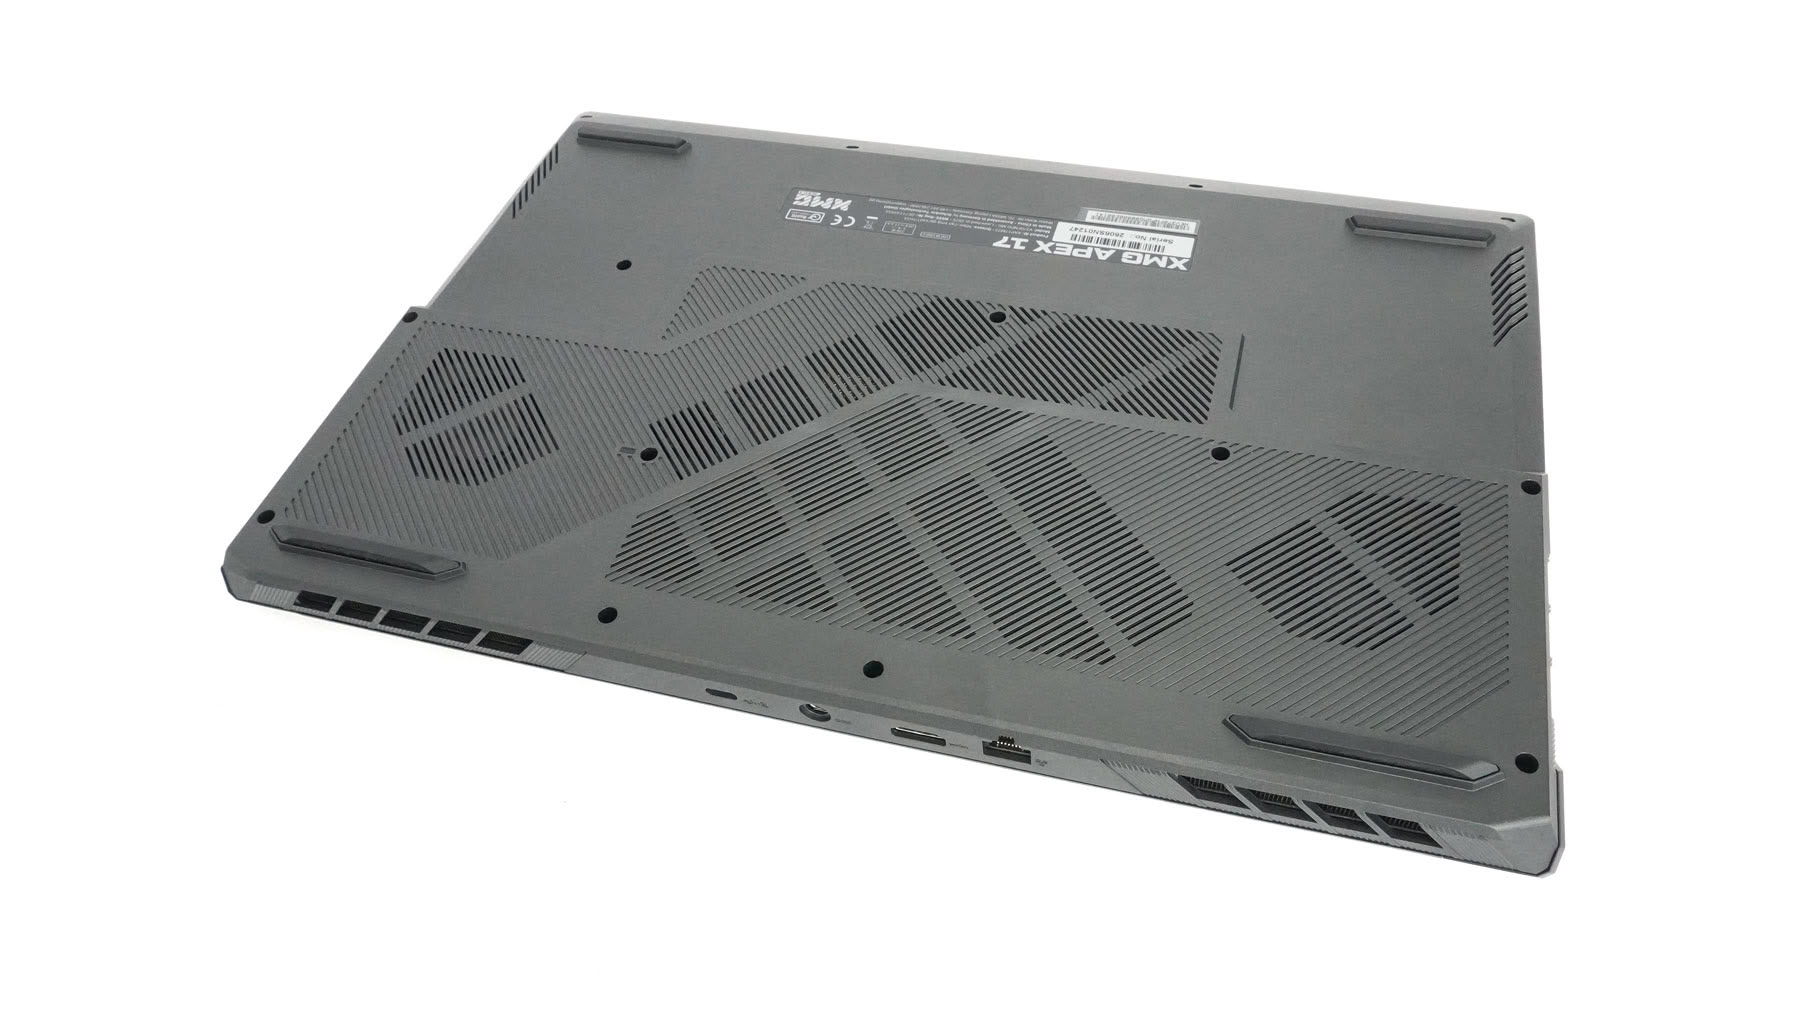
Fourteen Phillips-head screws are waiting to be undone. Then, hold firmly onto the back vents, press the panel slightly with the backs of your wrists, and carefully pop off the entire rear or work side by side.
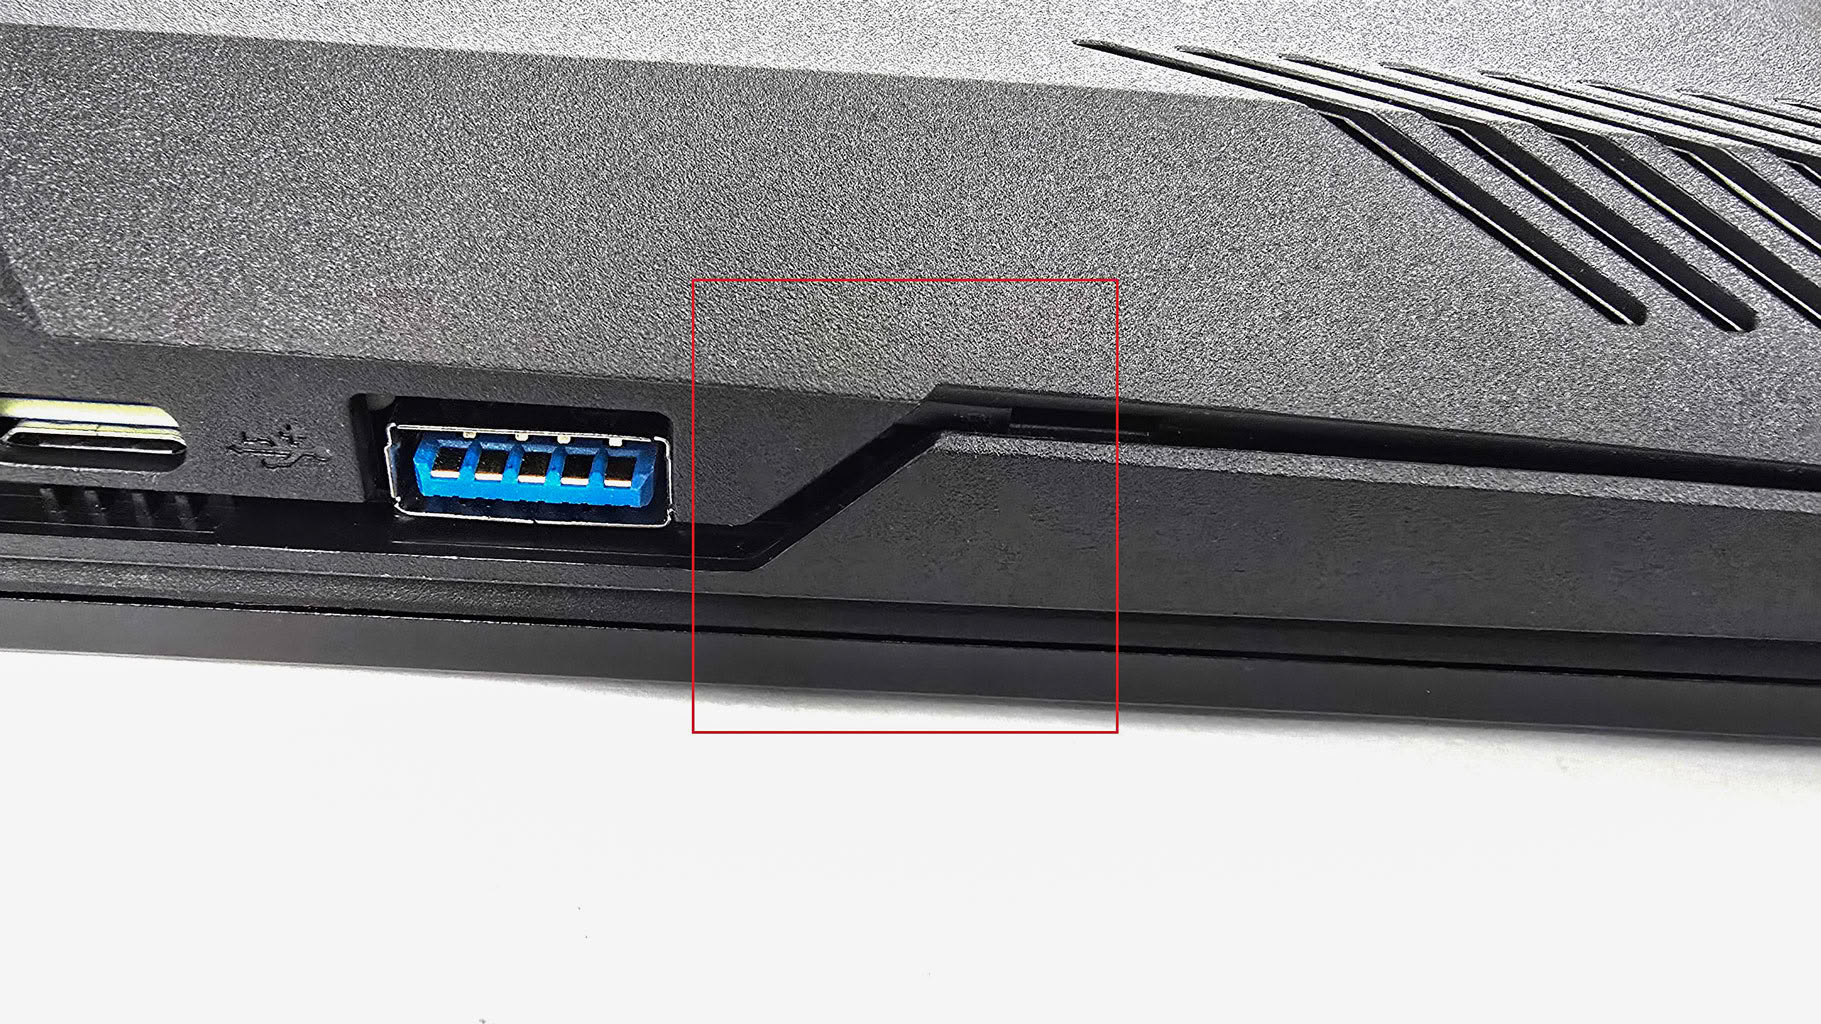
Doing this should release the panel up to the ports where the edge is angled. Pry this tricky section open with a thin plastic tool, then move on to the front and the remaining side.
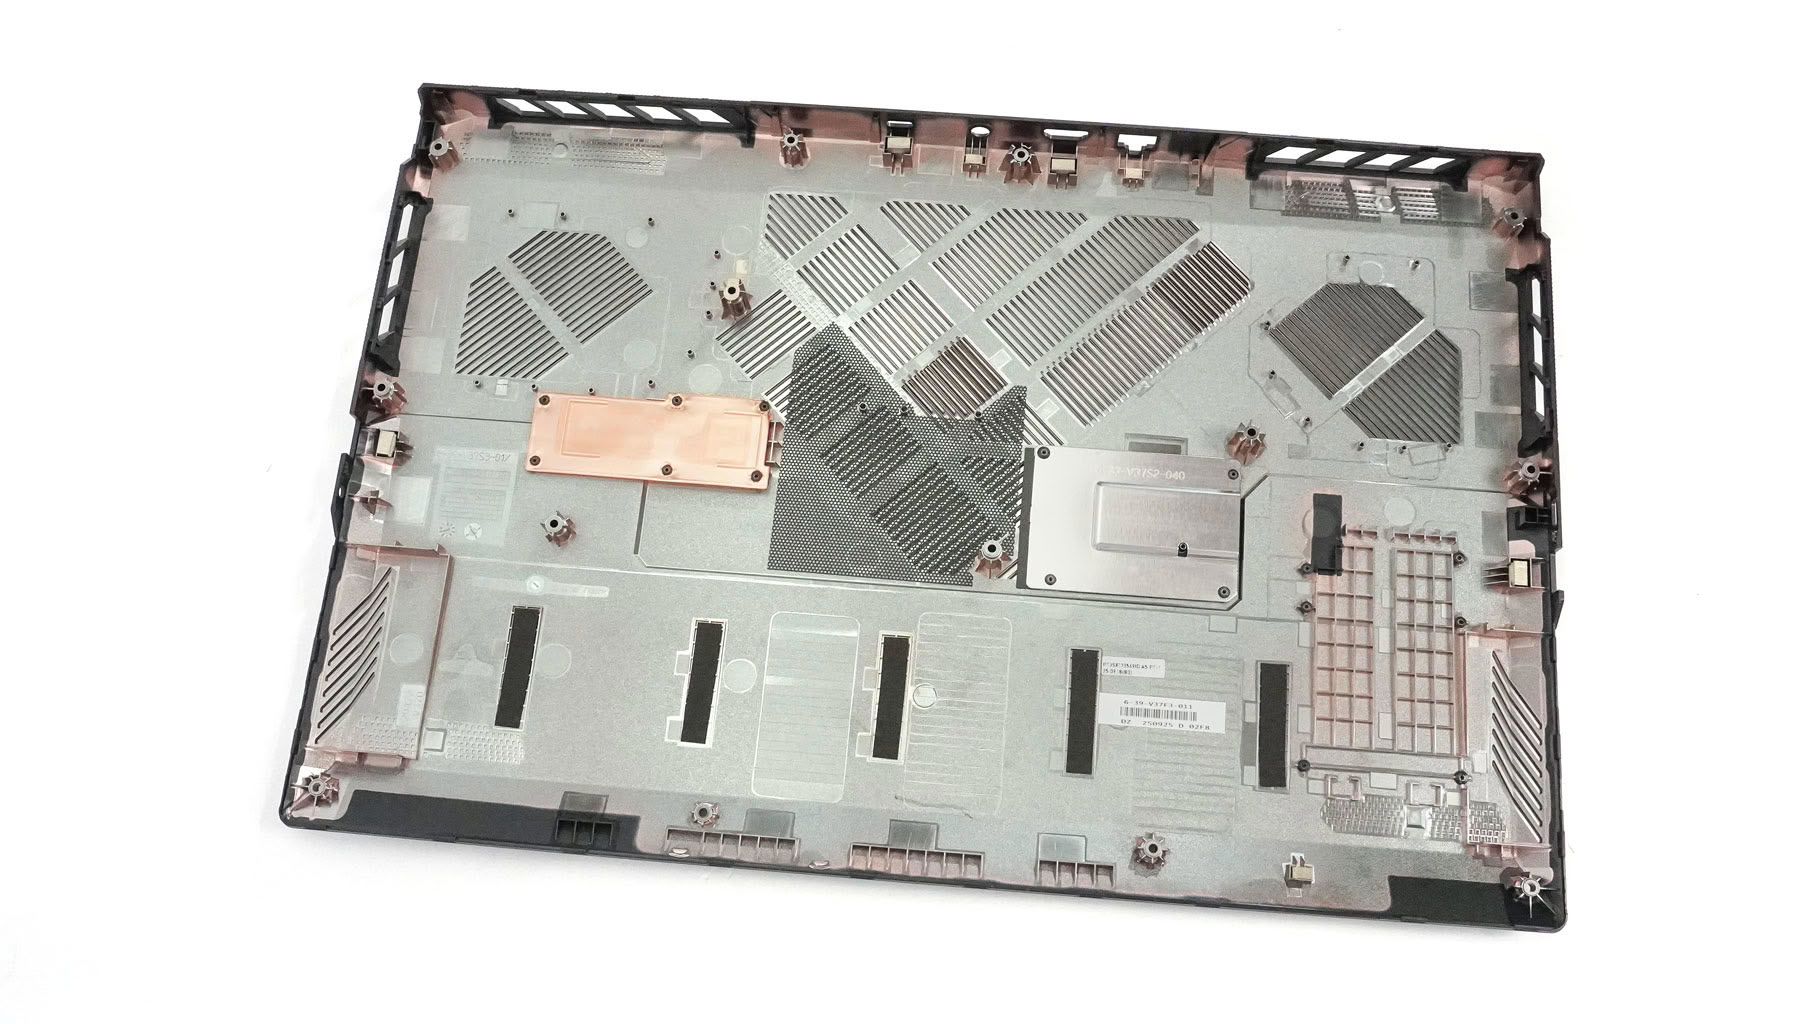
Two metal sheets are attached to the inside of the bottom panel. They act as heat spreaders for the SSDs when paired with a thermal pad on top. The small dust filter between the metal plates sits directly over the memory section. Thanks to this perforated area, the top RAM stick gets decent cooling.
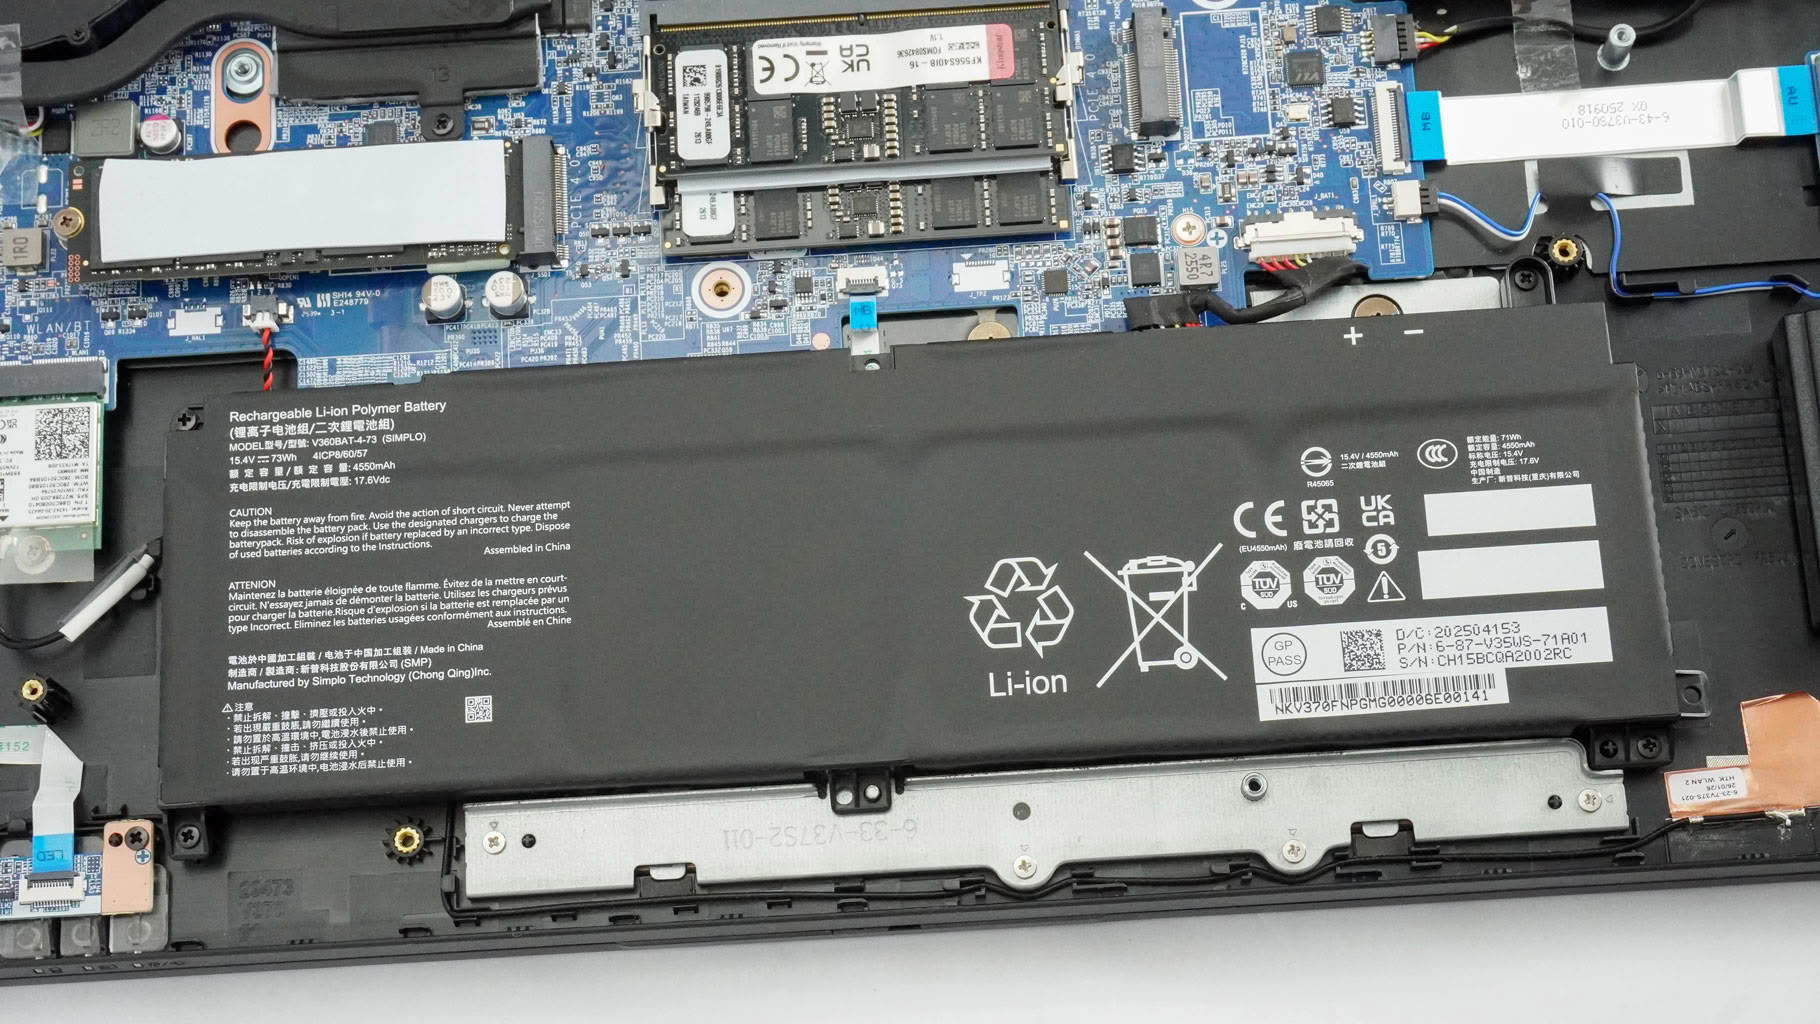
This notebook packs a 73 Wh battery. Removing it is business as usual—disconnect the cable and undo four screws.
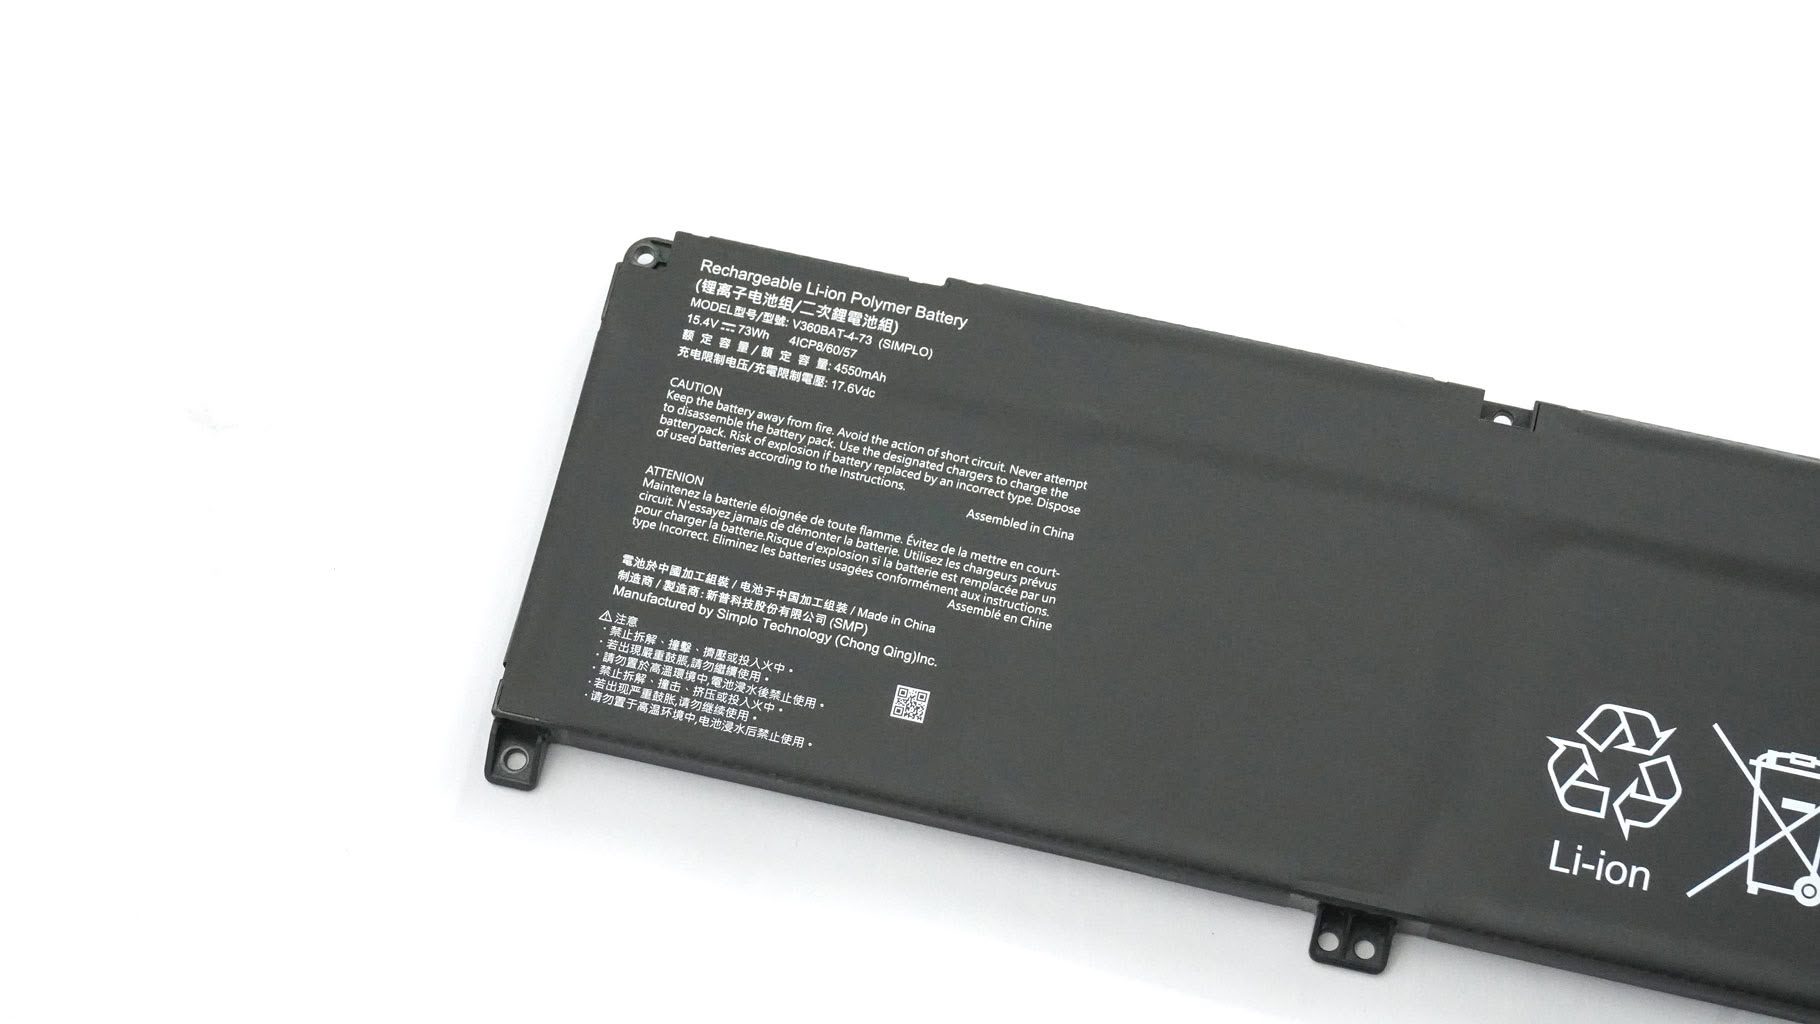
This capacity is good for almost four hours of 4K YouTube playback. Not impressive, but not terrible either.
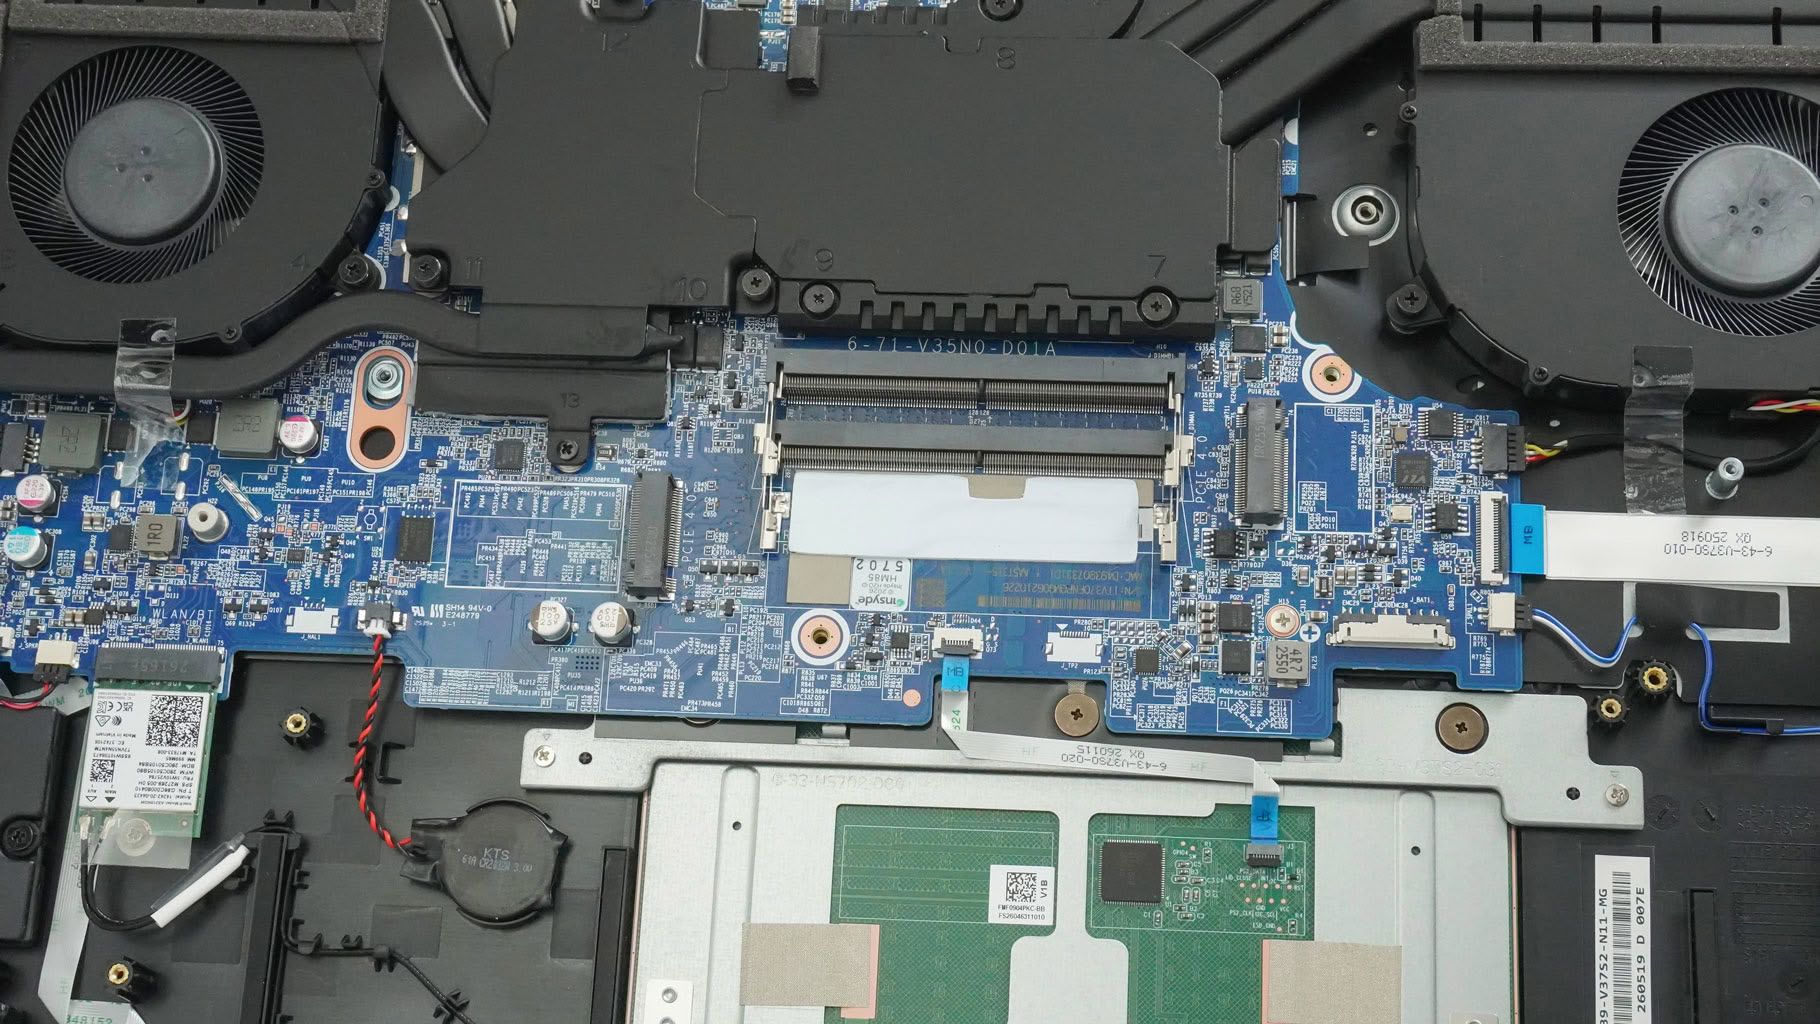
Here are your upgrade options. The two SODIMM slots support up to 128 GB of DDR5-5600 memory.
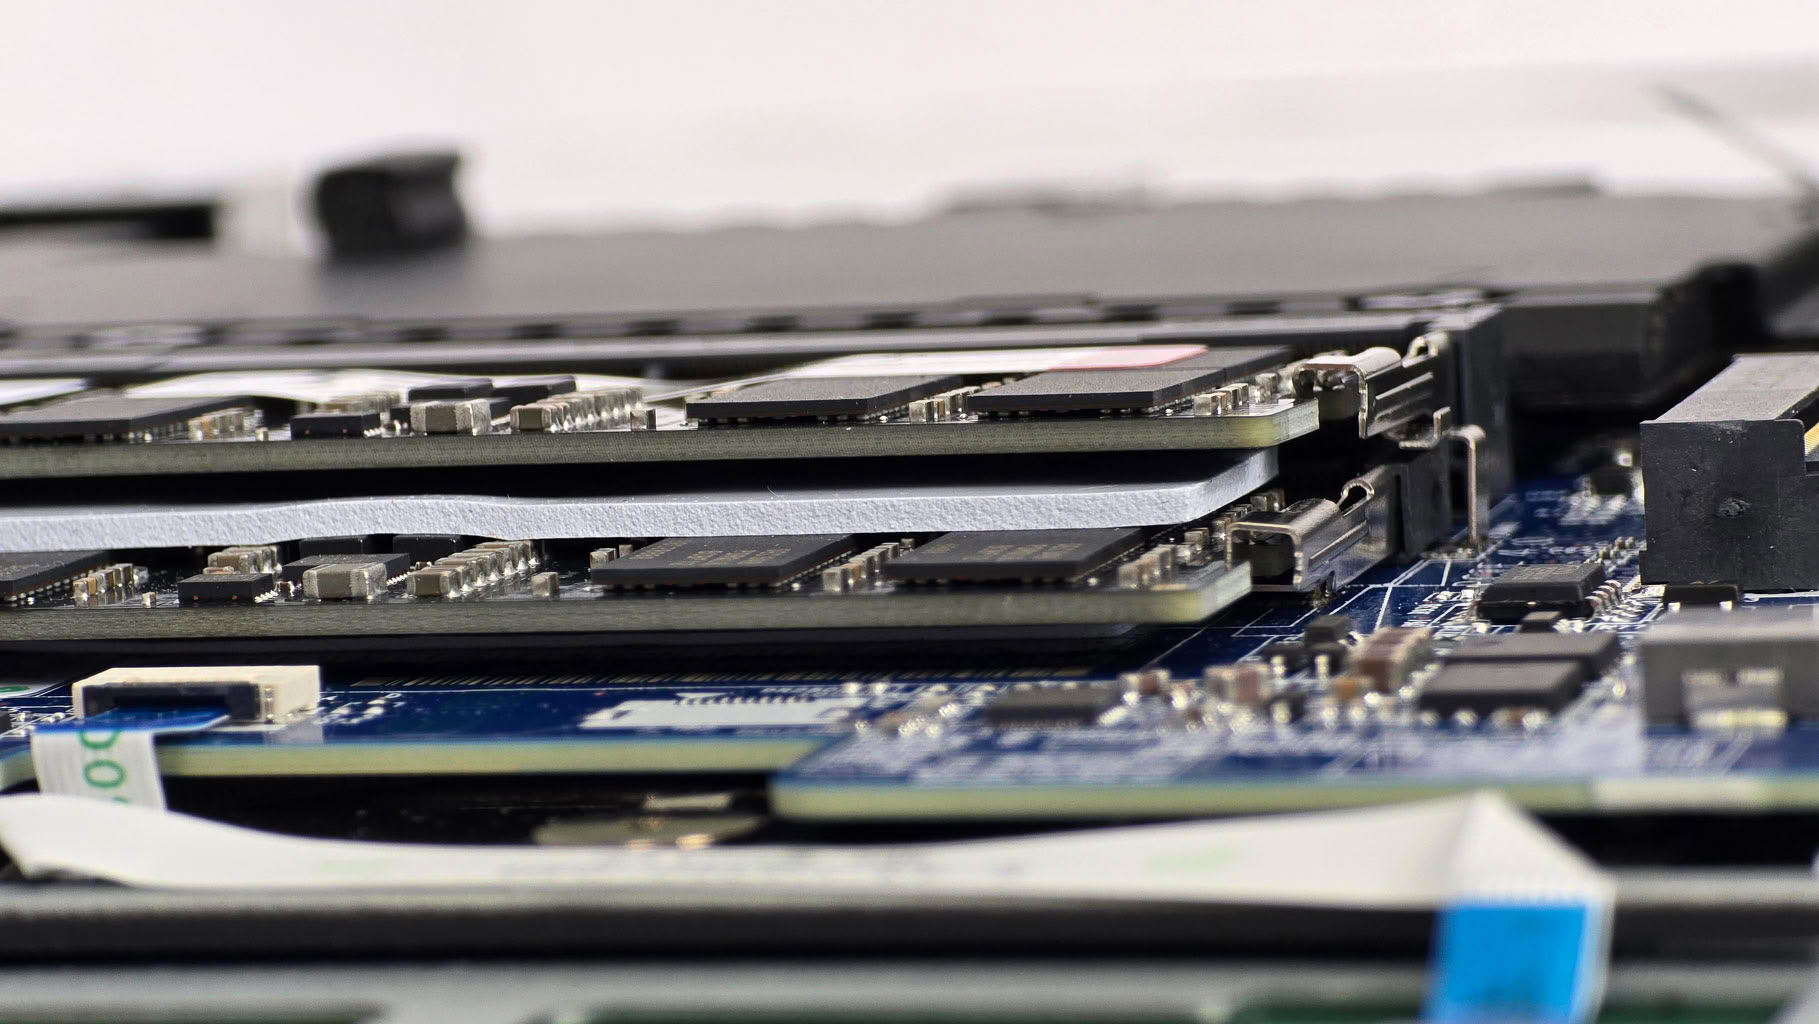
The bottom stick is cooled on both sides, while the top one relies on airflow through the ventilation grille directly above it.
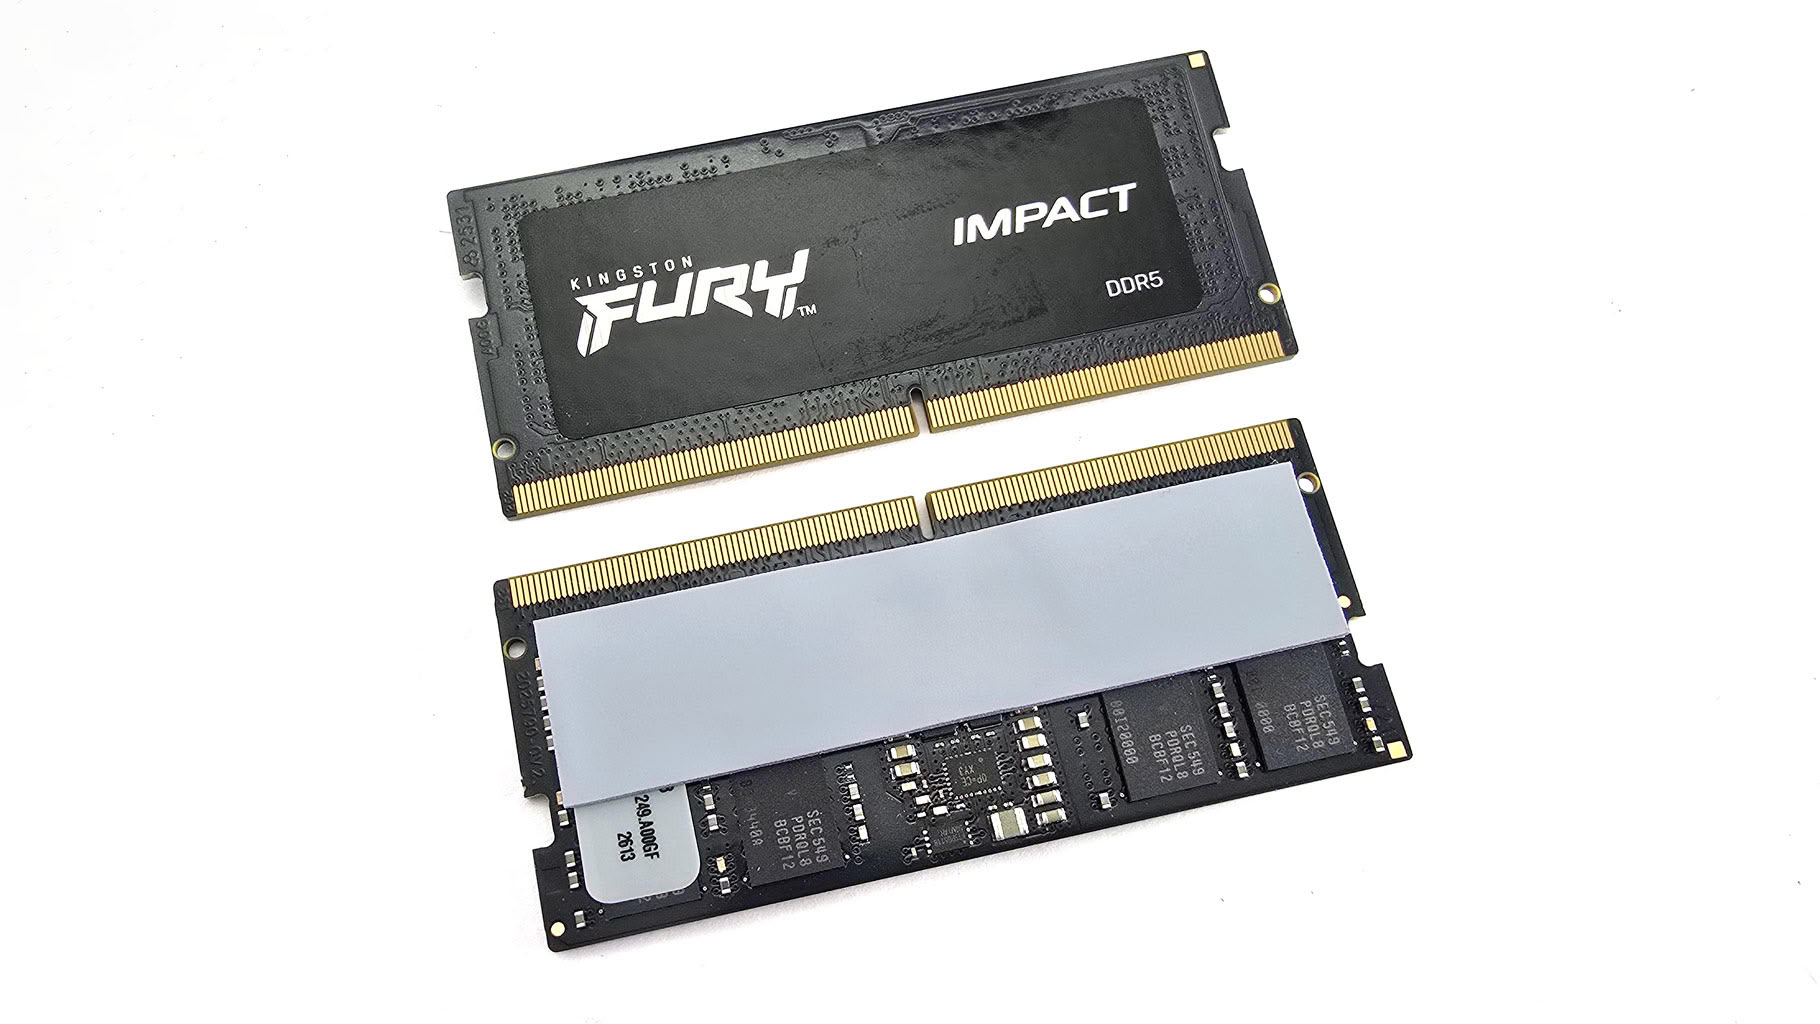
As always, you can take a close look at the memory sticks.
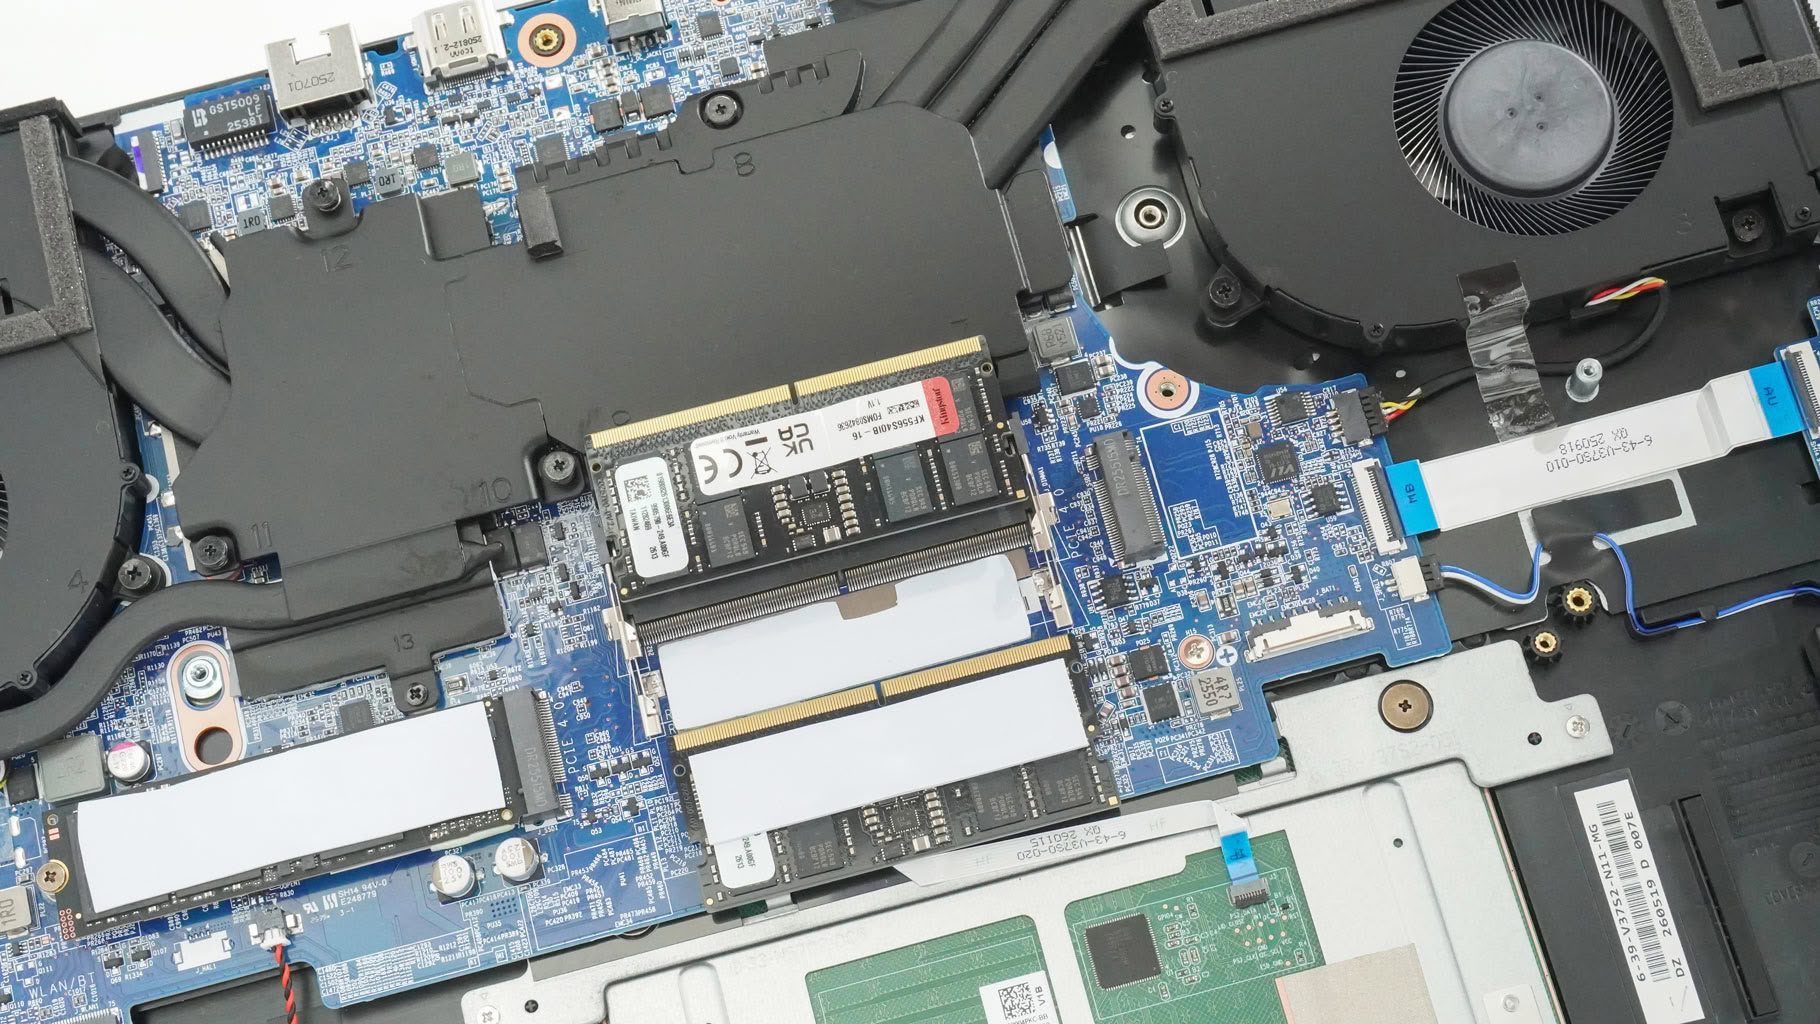
Storage upgradeability is typical for a laptop of this caliber. You get two M.2 slots compatible with 2280 Gen 4 SSDs. The preinstalled system NVMe is sandwiched between two thermal pads as well. Nice! There's also support for RAID 0 and RAID 1 on board. Desktop-like features in a mid-range laptop are always welcome.
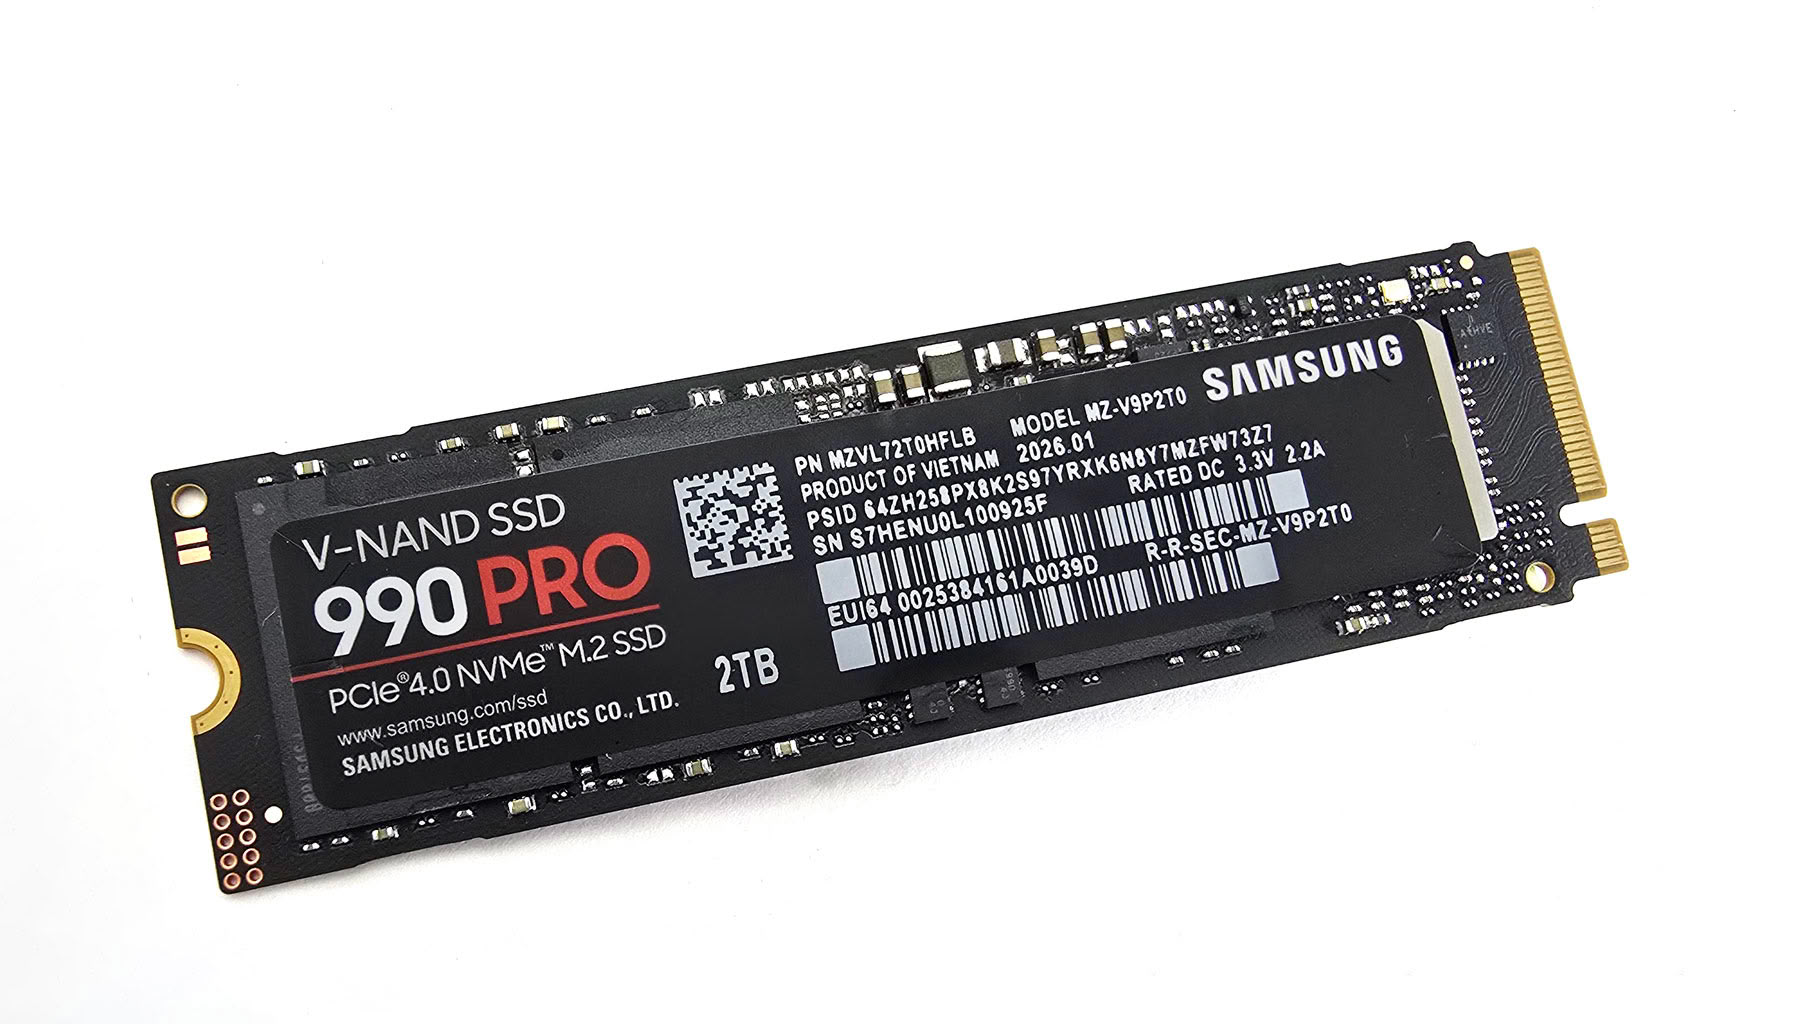
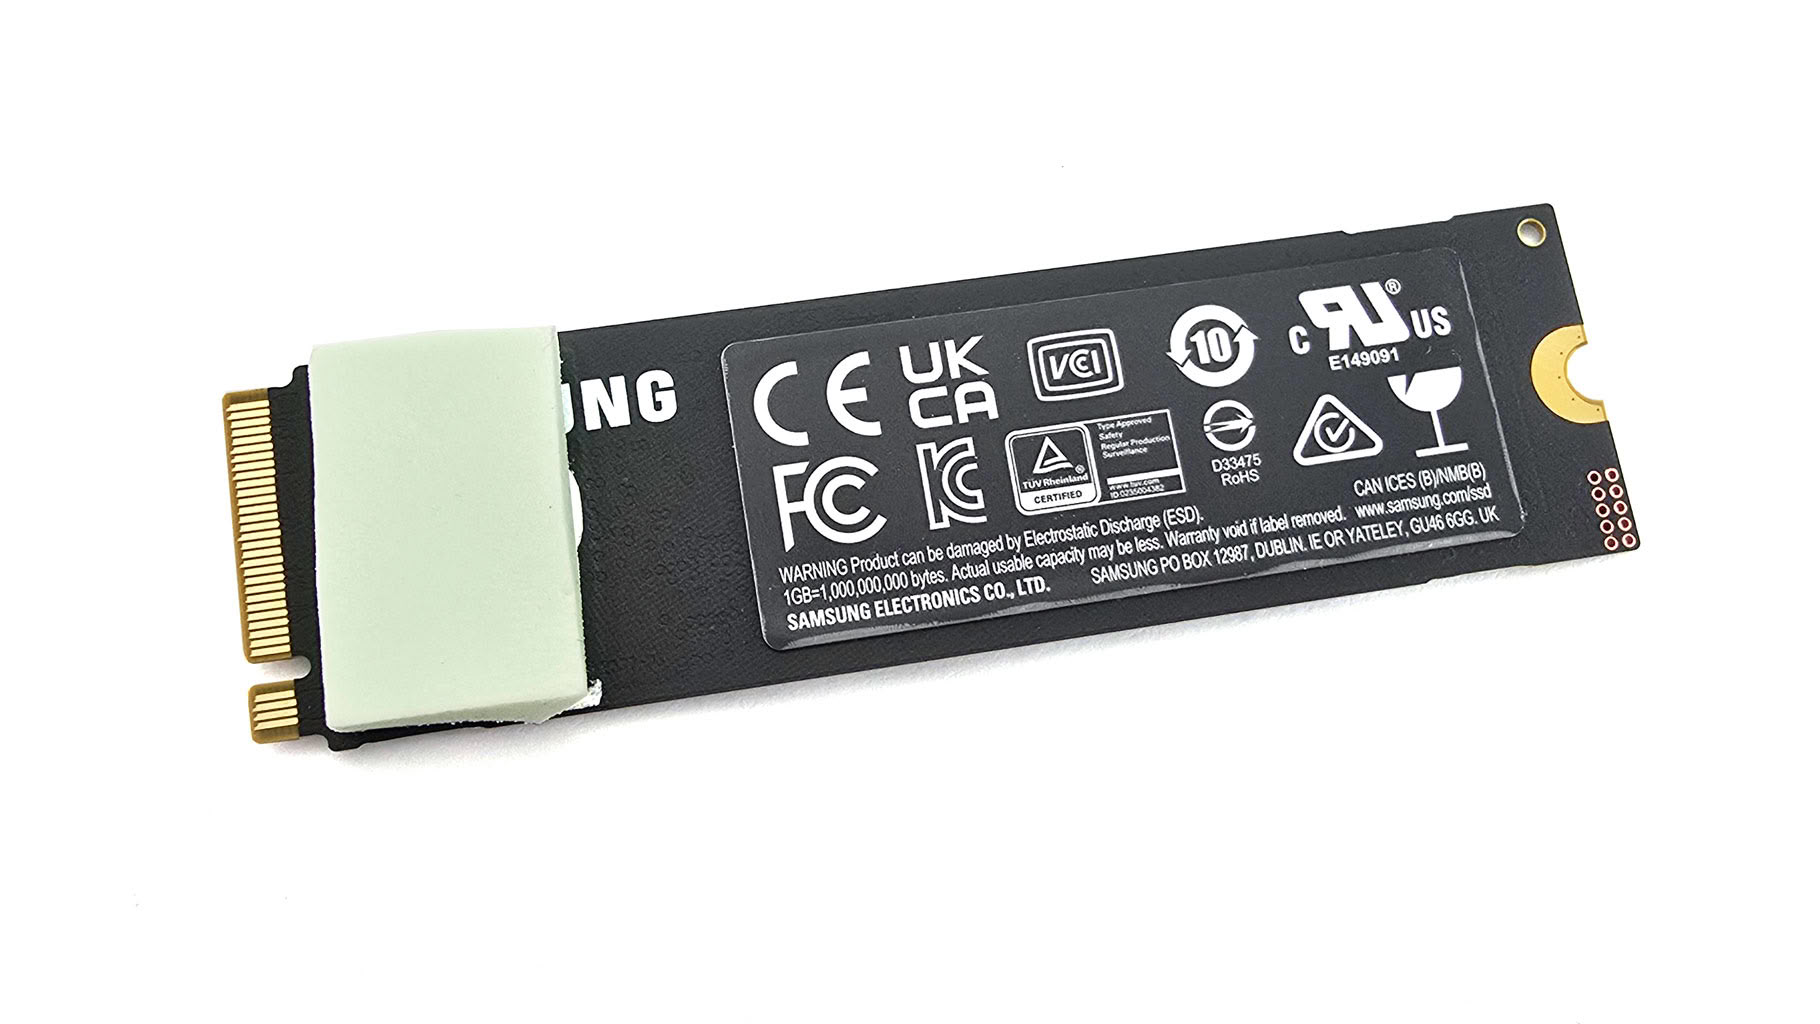
That's the system NVMe drive.
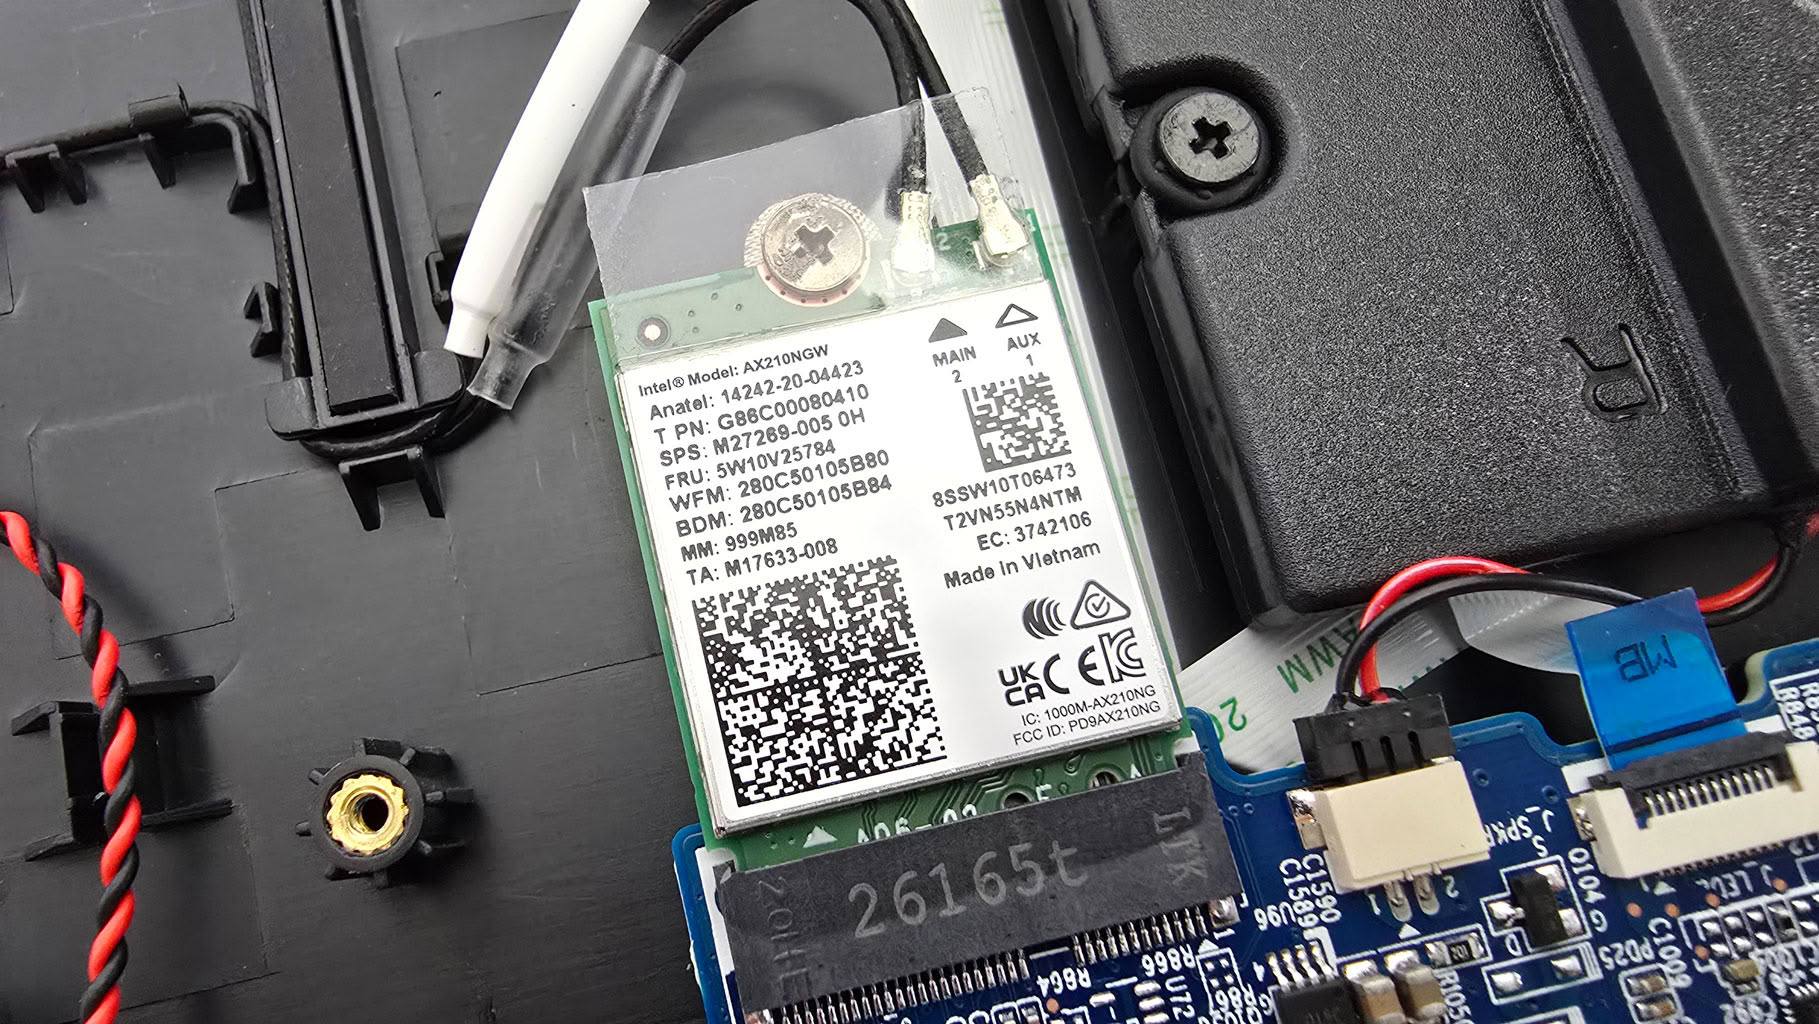
The Wi-Fi 6E card is user-replaceable too, and unlike on its Focus 17 sibling, it's not sitting in front of an NVMe slot—a clever design change.
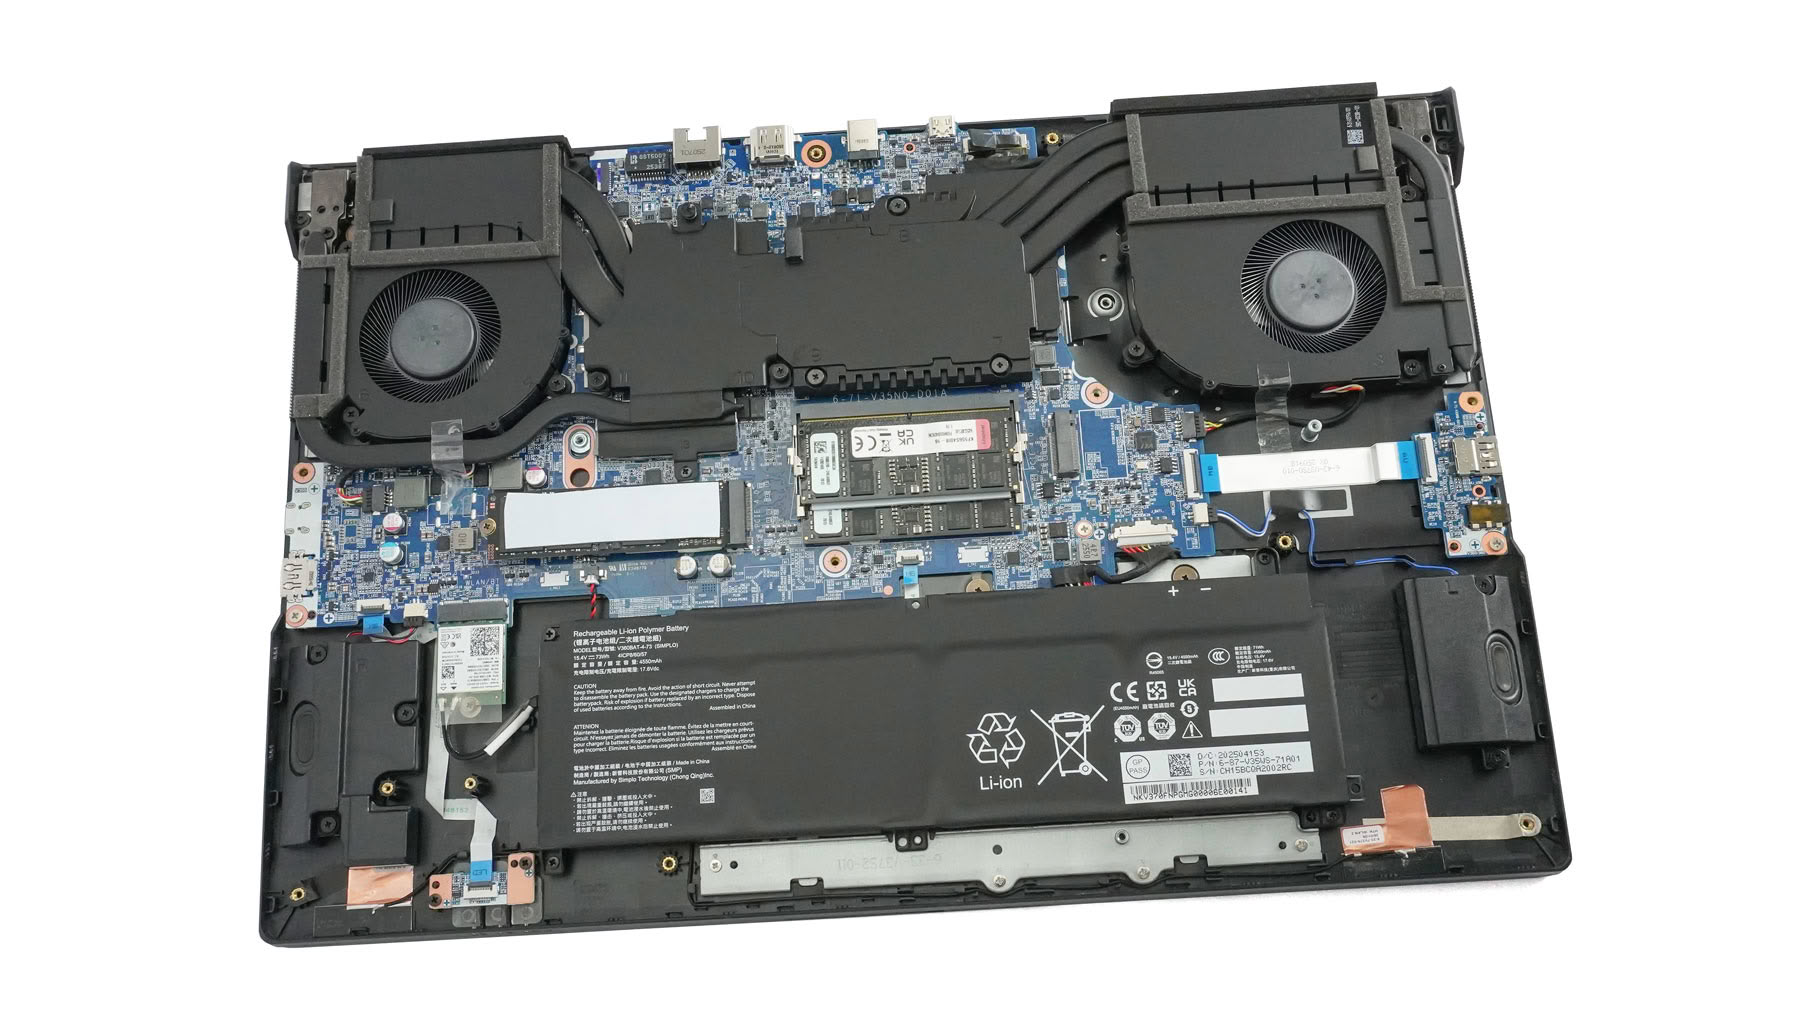
Thanks to the 17.3-inch form factor, there's plenty of room on the inside. And yes, the cooling system is big. You get two fans and two heat pipes shared between the two chips and the main fin stacks. There's an extra pipe on the top right for the CPU and its VRM section, plus another on the bottom left dedicated solely to the GPU and its power delivery zone. That makes four heatsinks in total, plus two massive cooling plates over the chips.
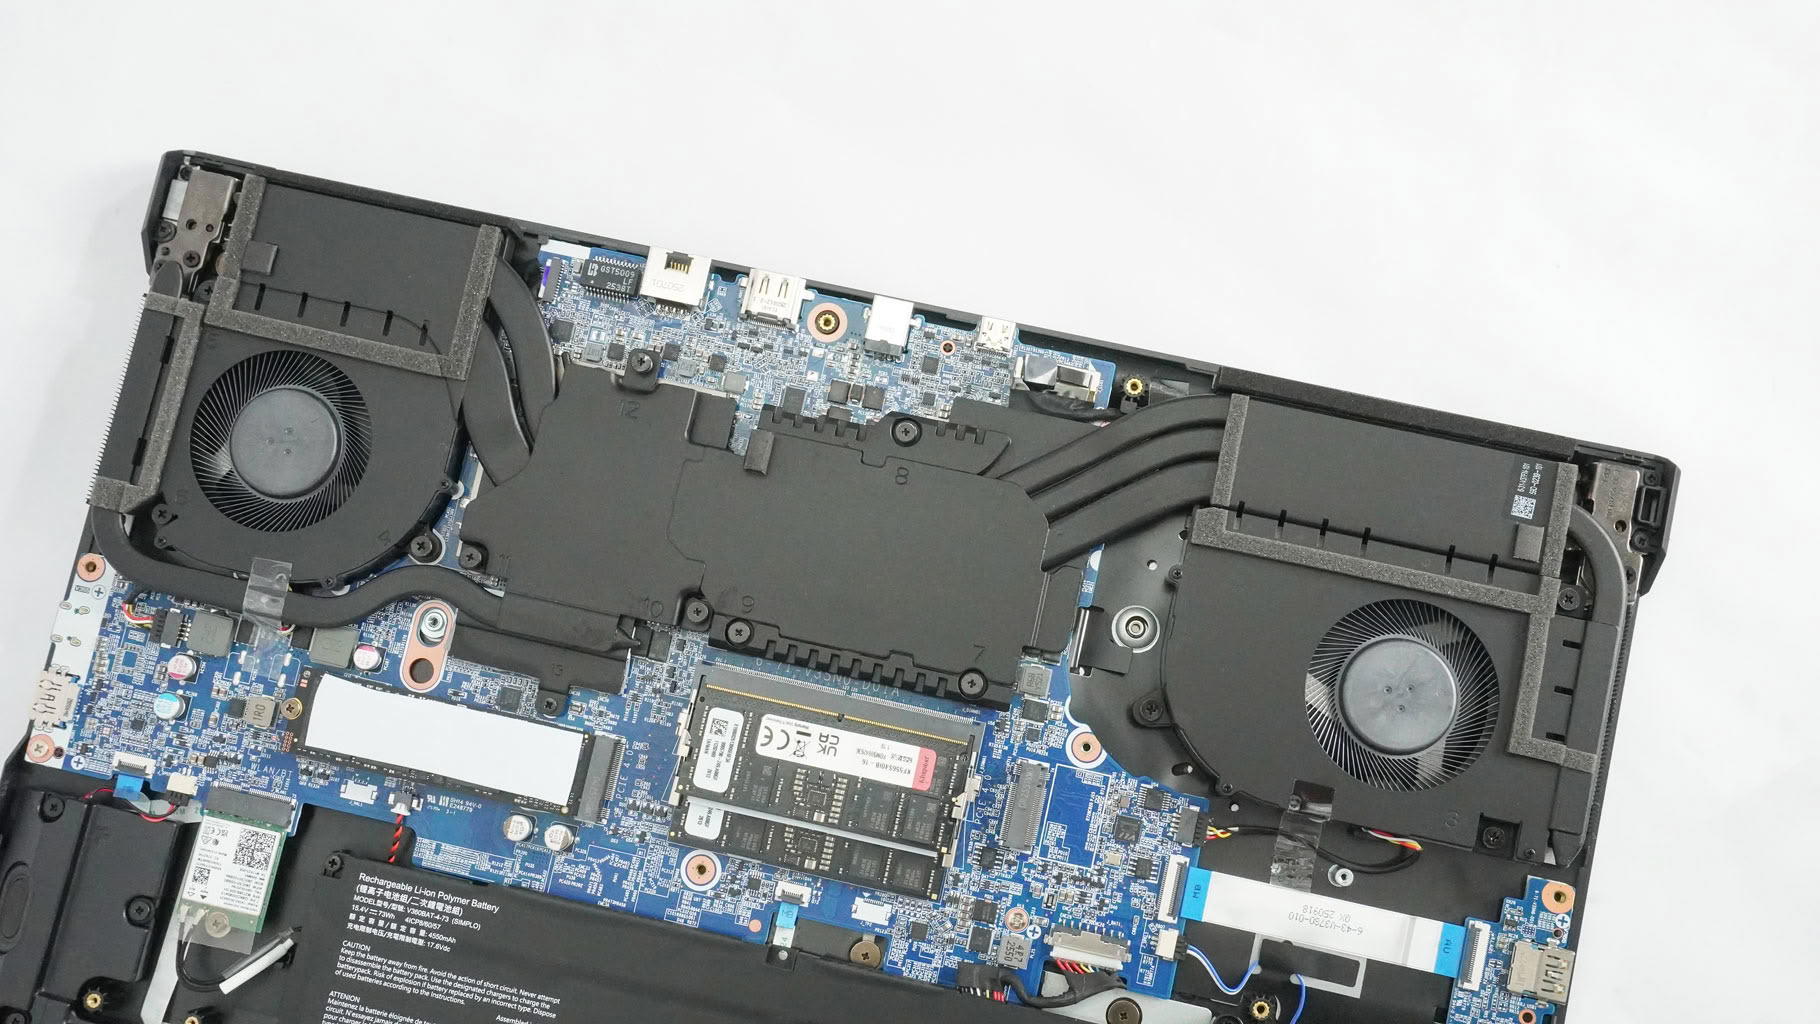
Time to pull off the cooling system in the name of science! Disconnect the two fan cables and undo three screws around each fan housing. All the screws except one are captive, which is great—you can't lose them. Next, undo three more screws around each chip. Don't forget the small screw underneath the GPU. Carefully pry up the cooling assembly with a plastic lever tool.
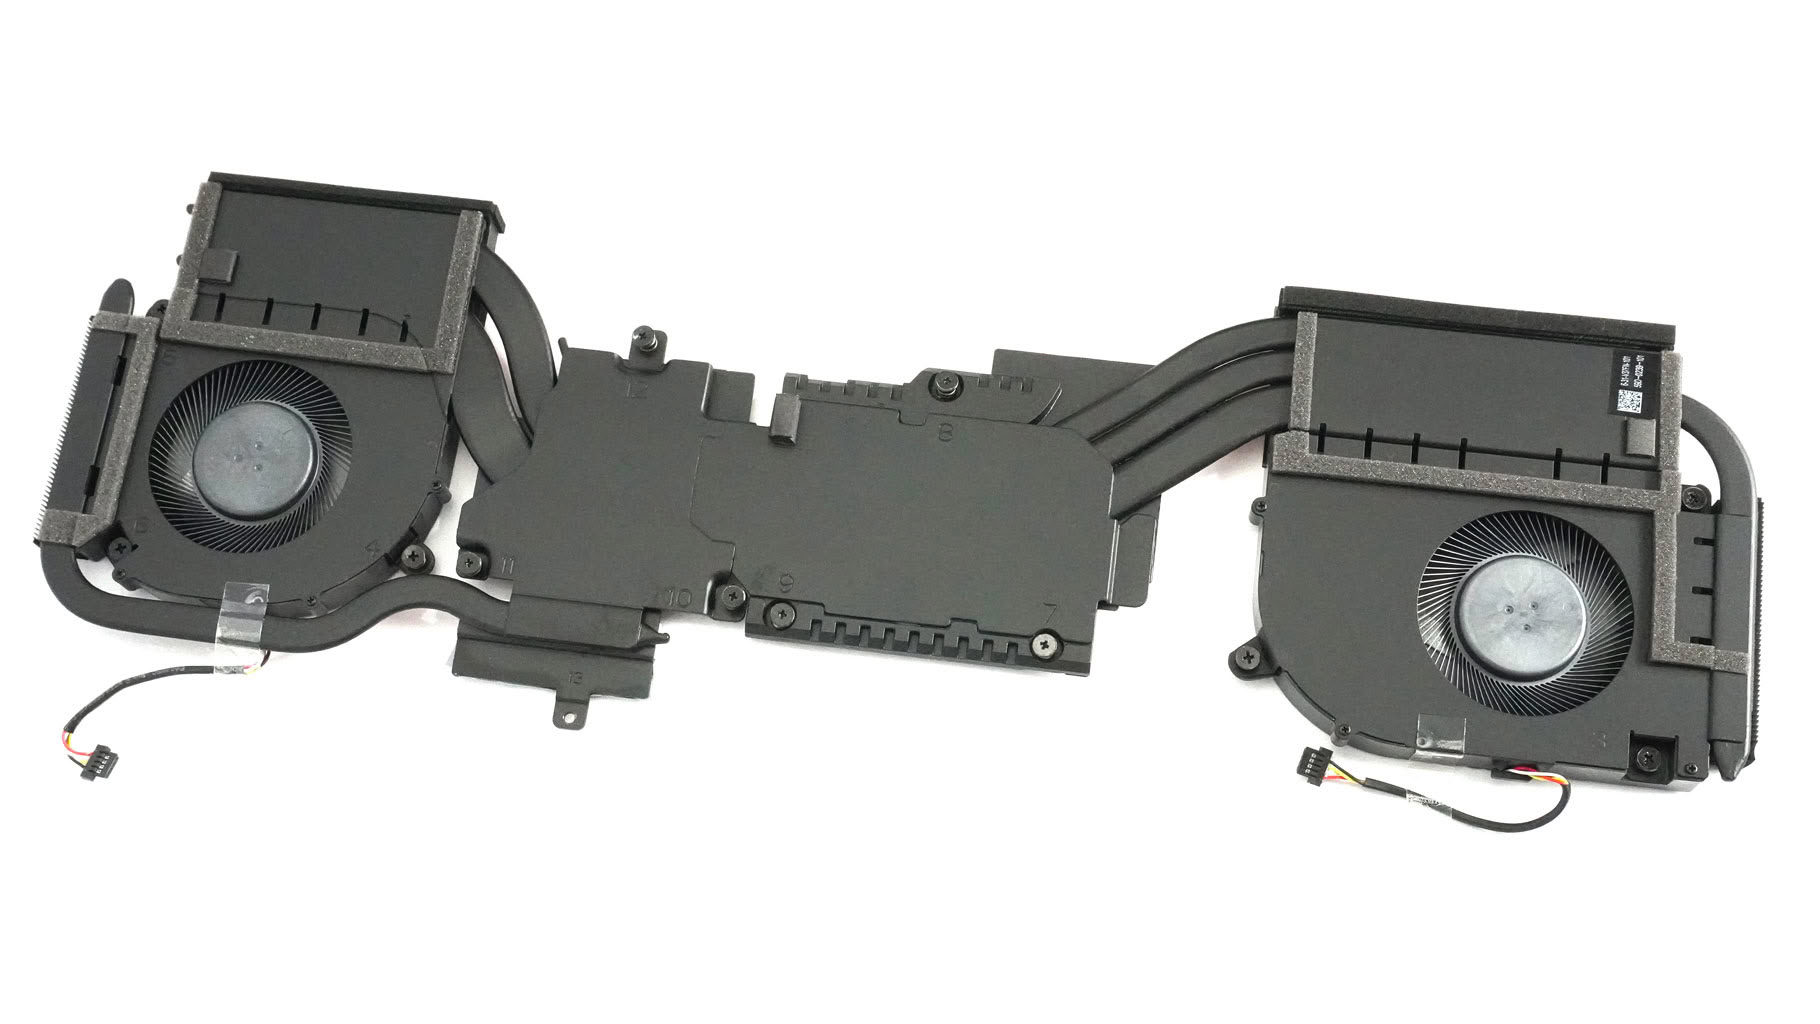
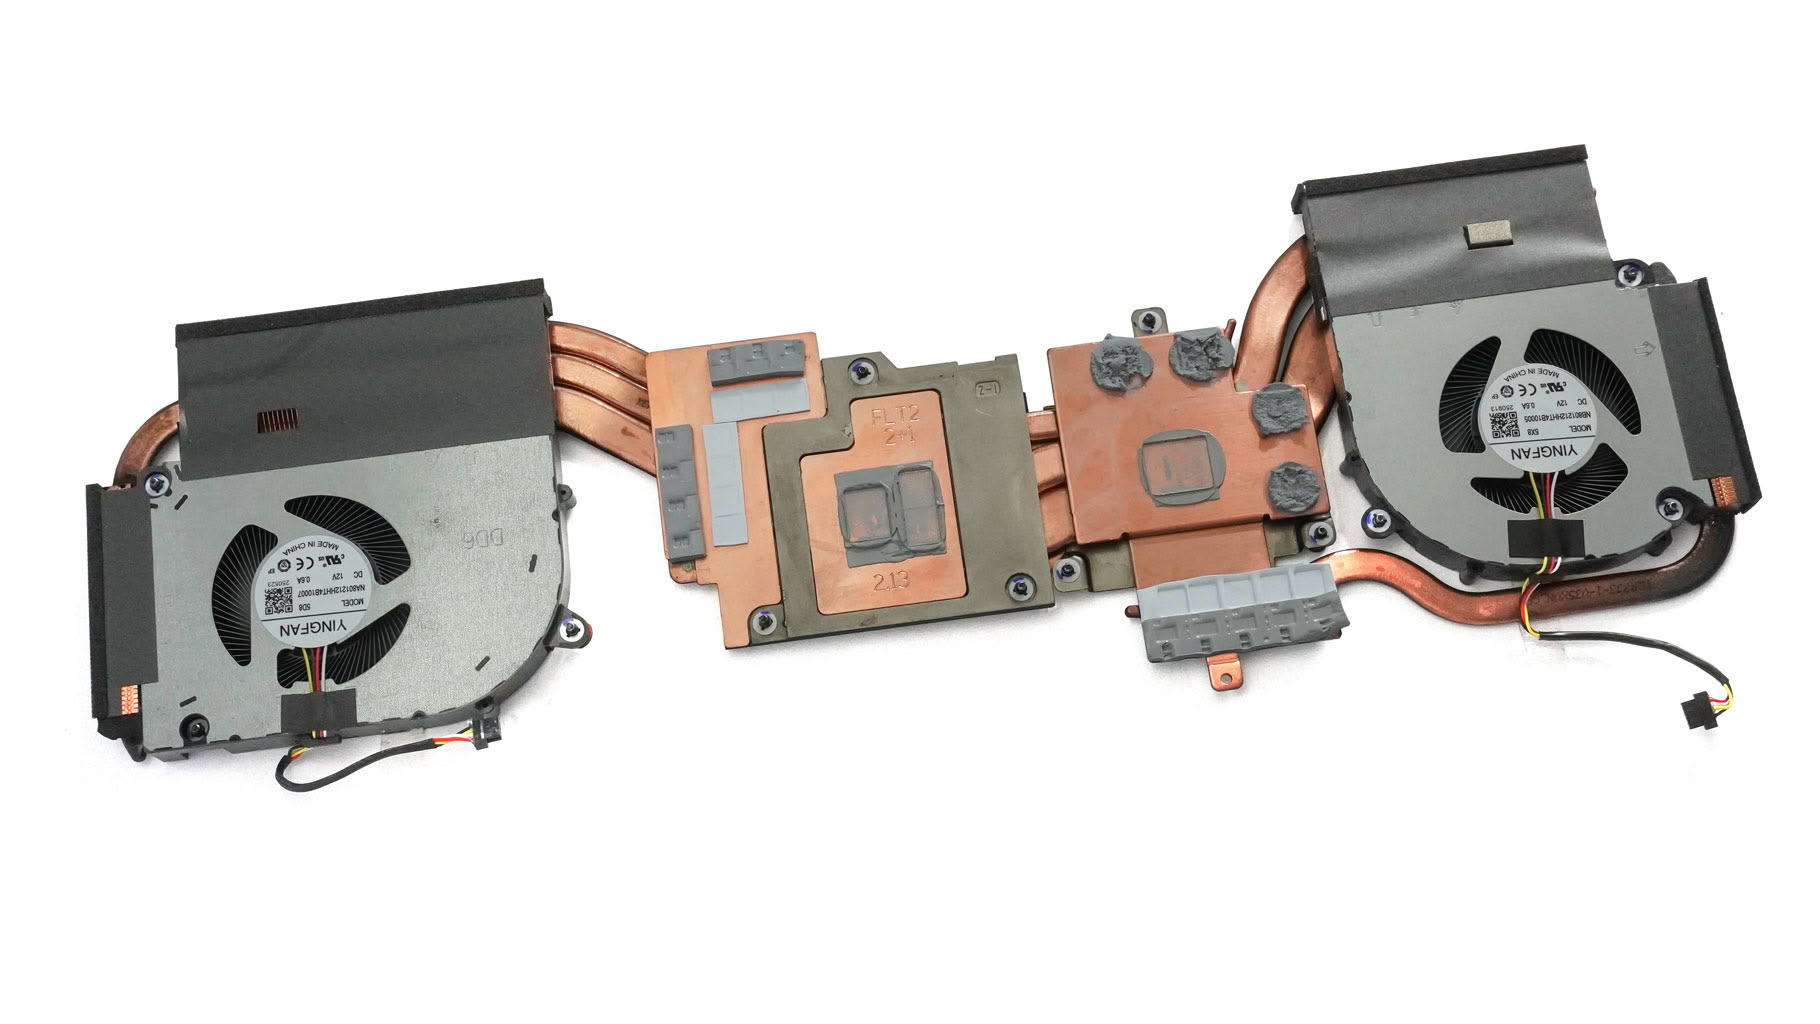
With the cooling system out of the way, we can check out its underside, which fully reveals the copper heat pipes. Note that the fans aren't detachable, though.
Finally, the cooling is entirely taken out.
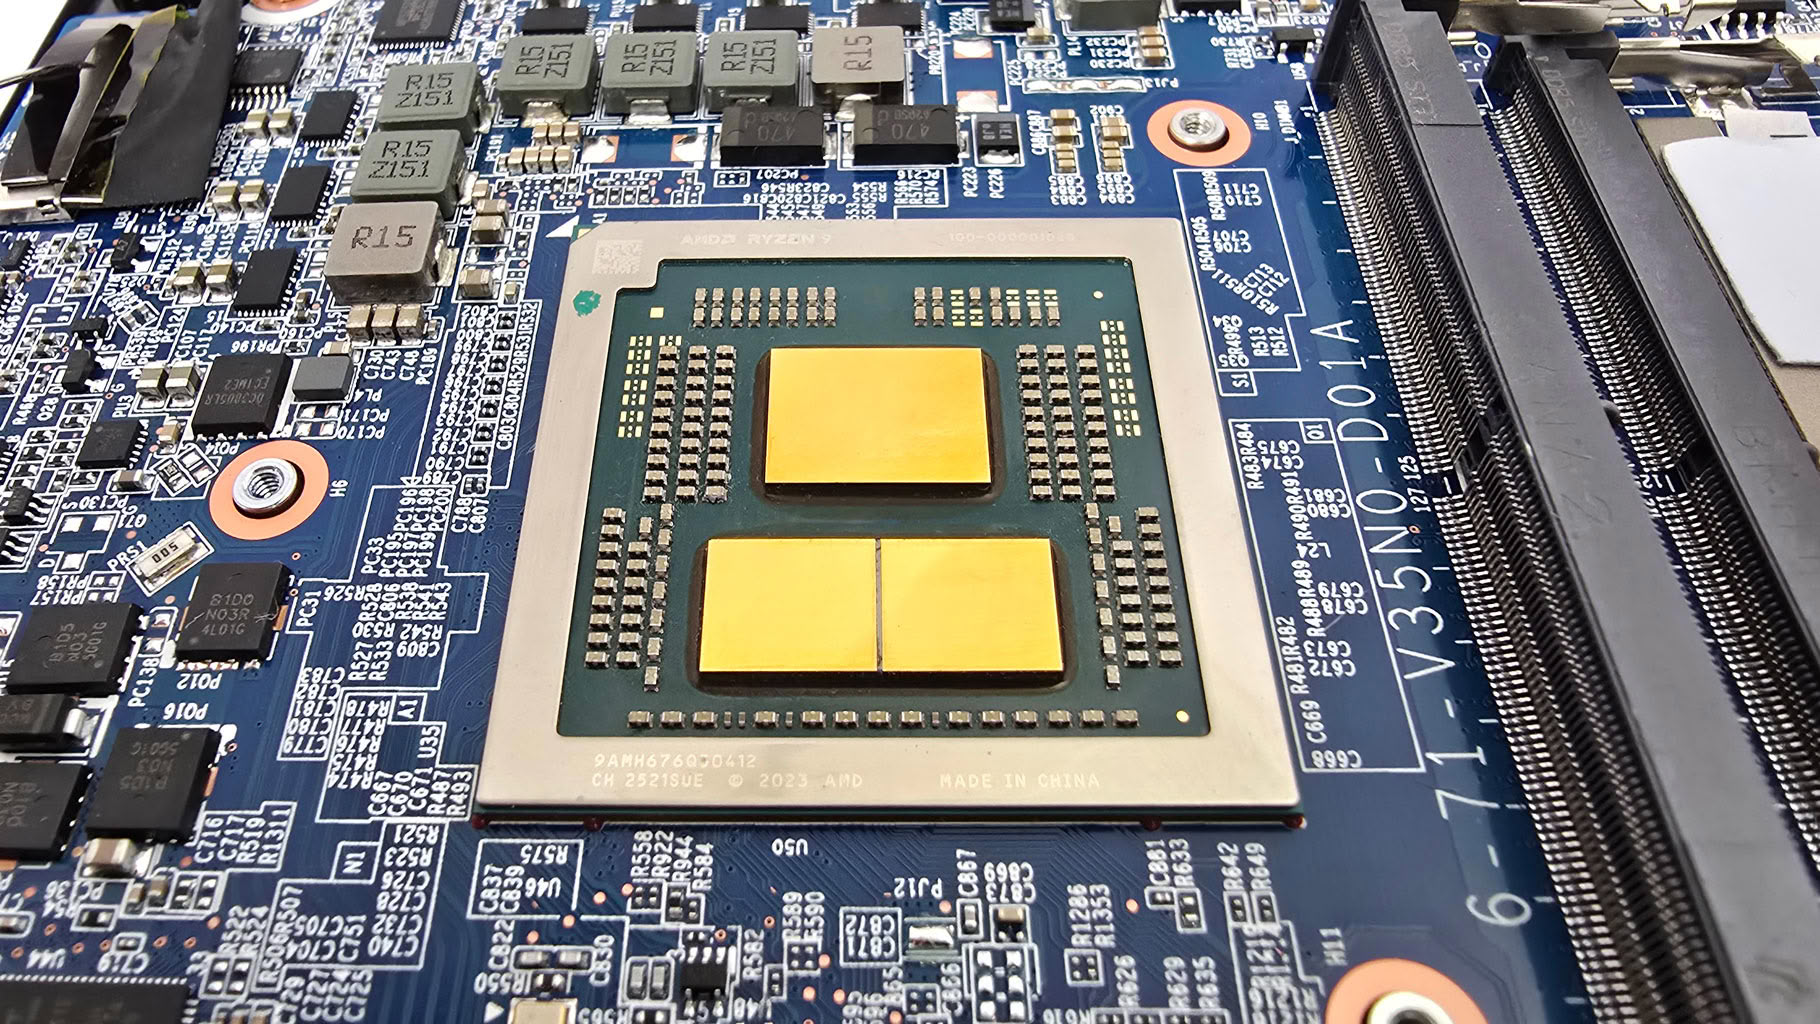
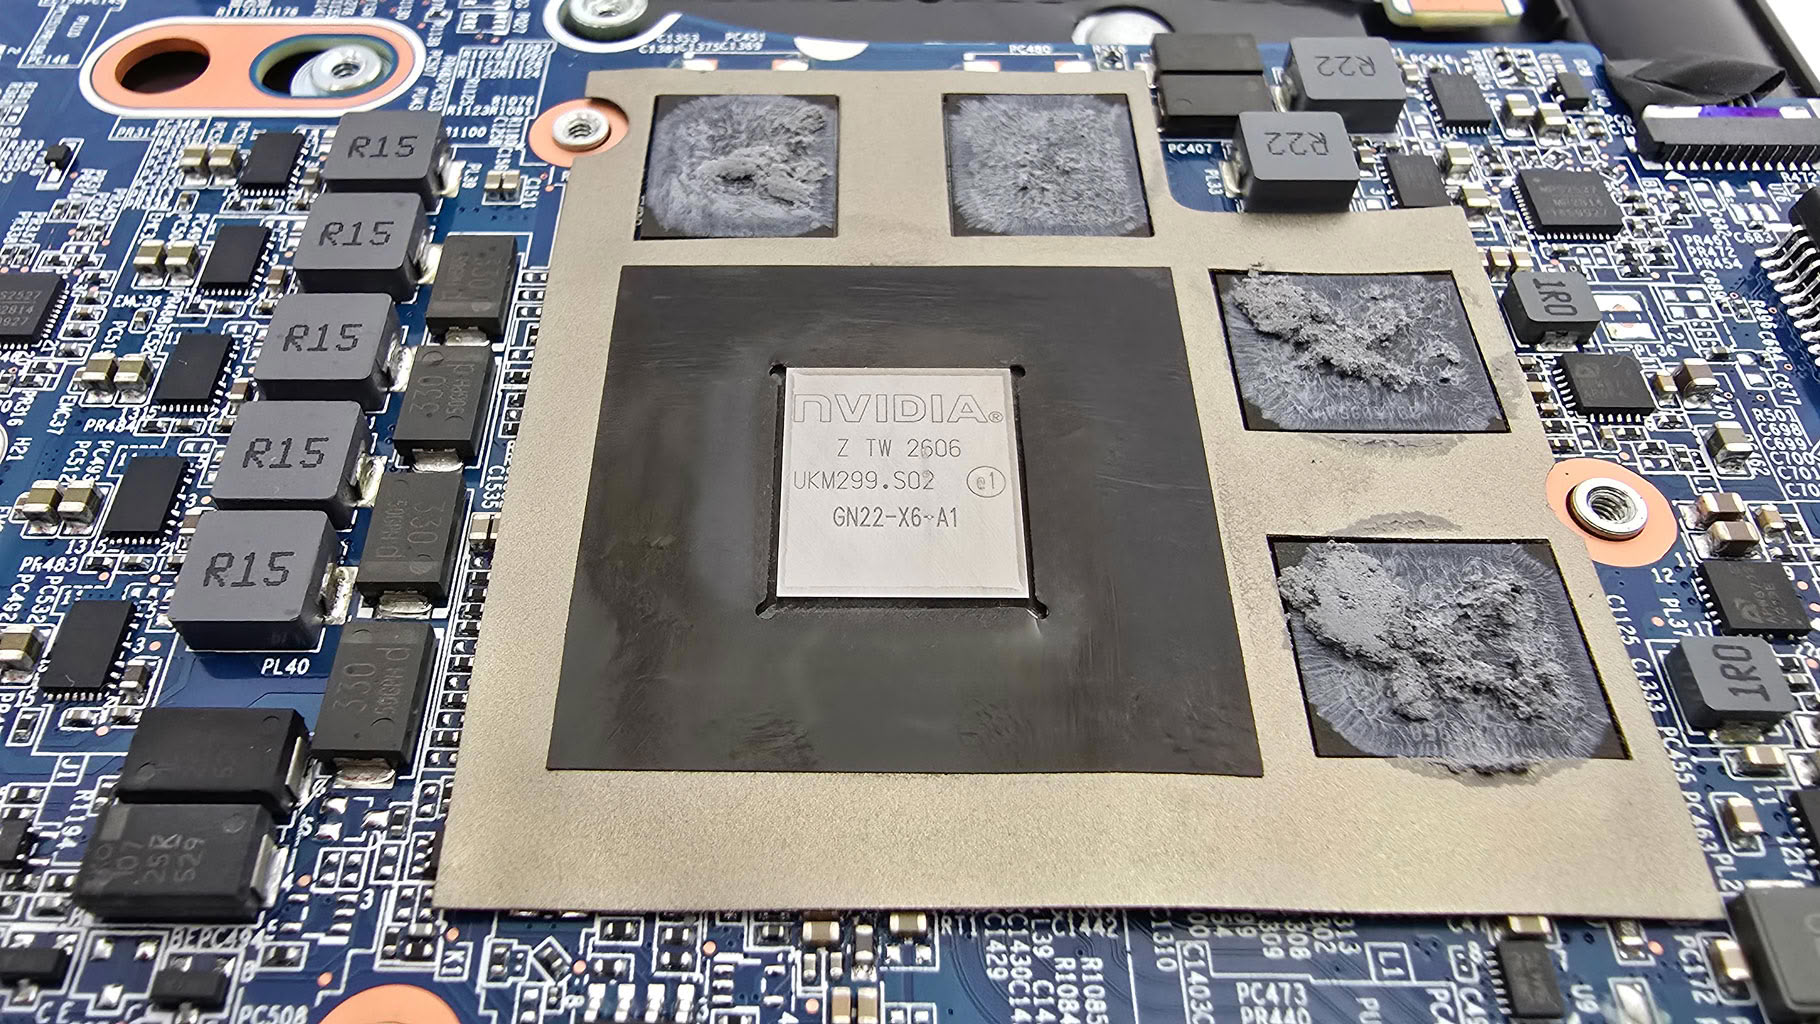
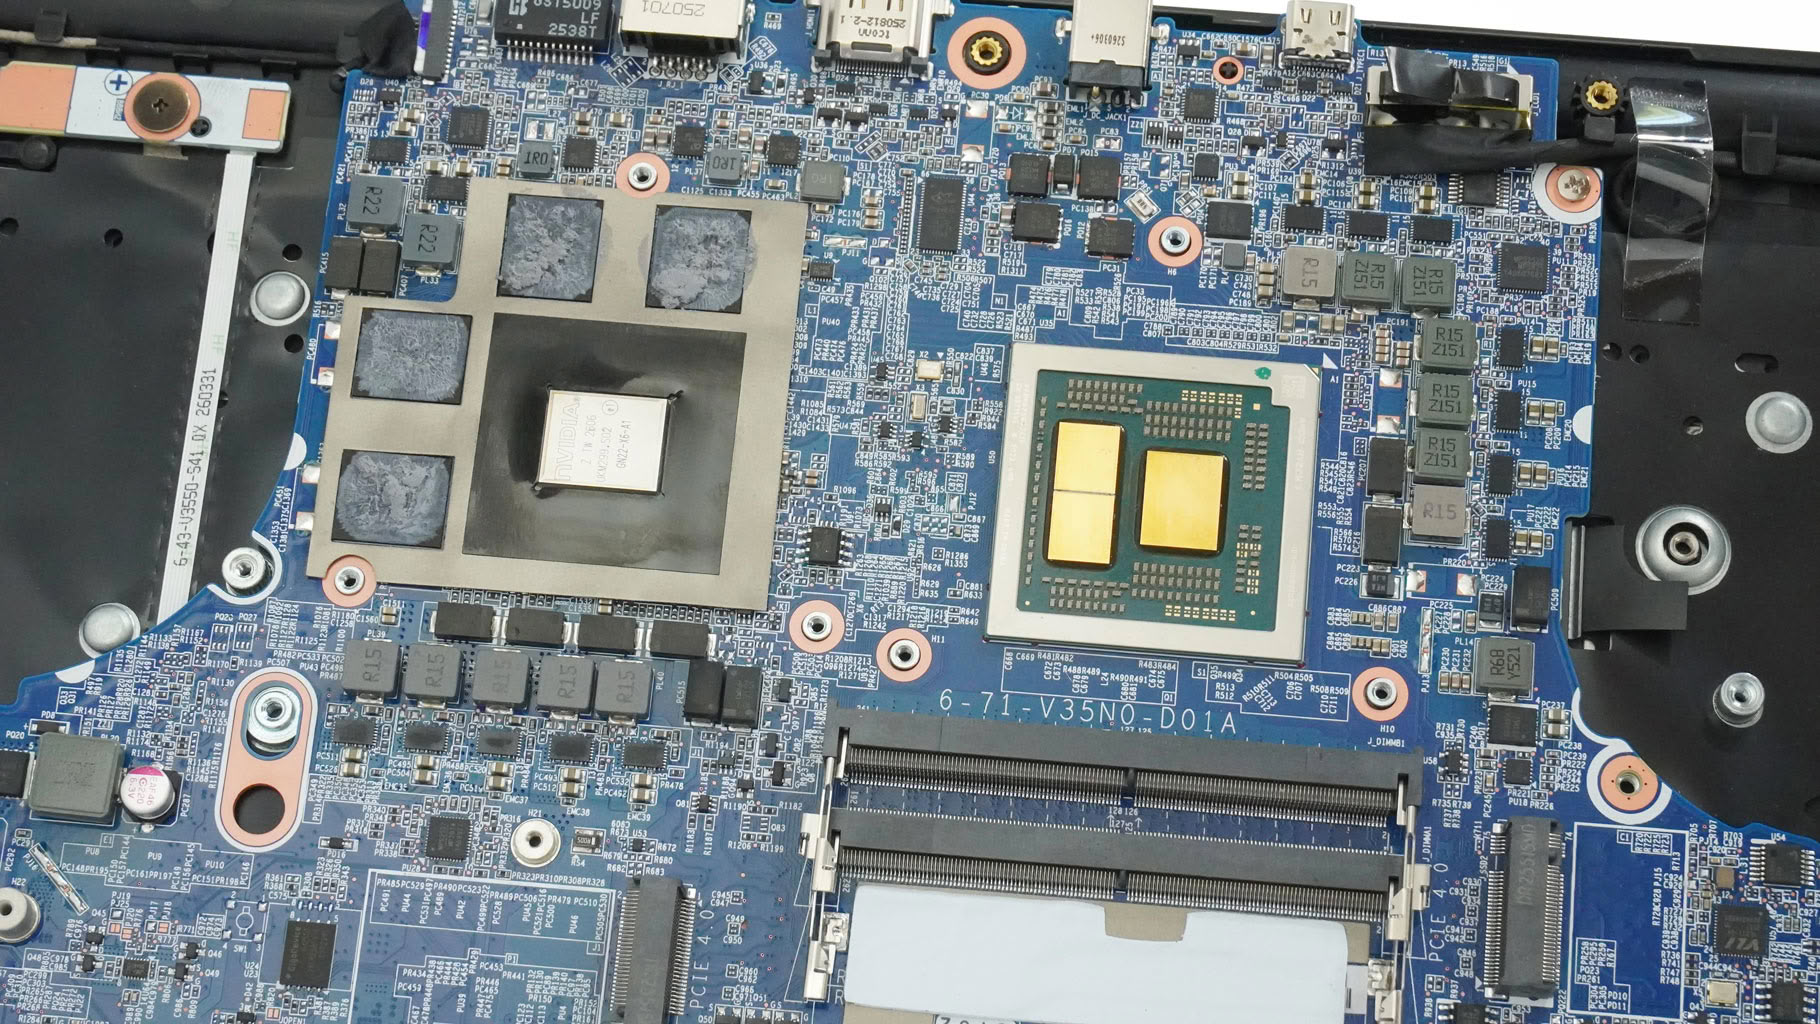
Moving onto the motherboard, we see the Ryzen 9 9955HX with its two CCDs and the 12 GB RTX 5070. PTM7950 thermal compound is applied to each die.
Nov 21st, 2026 05:01 PST
change timezone
Latest GPU Drivers
New Forum Posts
- Without Jensen, PC gaming will be (53)
- Anthrophics IPO (30)
- WarpCoreBench scores! (88)
- What's your latest tech Freebie? (86)
- TPU's Nostalgic Hardware Club (22179)
- [Poll] 12V-2x6 Connector Protection: What Are You Using? (WireView / Ampinel / Equalizer / Other / Nothing) (50)
- UPS what one to get? (1)
- RX 9000 series GPU Owners Club (2252)
- Windows 11 General Discussion (7743)
- Zen 3 IF/IMC degradation (242)
Popular Reviews
- Microsoft Surface Laptop Ultra Review - The Next-gen Arm Laptop
- Ugreen NASync DXP4800 GT Review
- Corsair RM1200e (Second Generation) Review
- Pulsar Office Tour & First Look at P1 Dual-Sensor Mouse
- Upcoming Hardware Launches 2027 (Updated Nov 2026)
- Acemagic Retro X3 Review
- Biwin Black Opal NV7400 2 TB Review
- AMD Ryzen 7 9800X3D Review - The Best Gaming Processor
- AMD Zen 6 Technical Deep Dive
- Chieftec Iceberg PRO 360 DARK Review
TPU on YouTube
Controversial News Posts
- NVIDIA Co-Founder and CEO Jensen Huang Officially Resigns (491)
- Report: Jensen Huang Eyes NVIDIA Comeback (258)
- Open Letter Asking NVIDIA to Reinstate Jensen Huang Passes 115,000 Signatures (184)
- OpenAI CEO Argues Home PCs Waste the World's Limited DRAM Supply (152)
- NVIDIA Launches Investigation Into Jensen Huang's Relationship With Suspected Chinese Spy (136)
- Intel "Raptor Lake Next" 16-Core and 20-Core CPUs Surface (130)
- Legendary Game Studio BioWare Shuts Down Following EA Layoffs (104)
- NVIDIA GeForce RTX 50-Series Scheduled for up to $500 Price Hike This Week (89)