 3
3
XPG Battlecruiser Review
A Closer Look - Inside »A Closer Look - Outside

Out of the box, the XPG Battlecruiser does not only feel sturdy, but the asymmetrical design is a pretty nifty touch. The front glass panel is pretty far away from the fans, so lack of airflow should not be a worry. You can clearly see the three pre-installed fans behind the glass as well.


I am quite happy with the choice of materials in the front as XPG has placed a branded aluminium strip to the right of the glass. You may take the front panel off by first unscrewing two thumb screws on the underside of the chassis, after which the whole contraption may be lifted up and away. A well-placed, fine dust filter protects all three ARGB fans from dirt and grime and allows for easy maintenance. In the rear, the Battlecruiser provides us with a glimpse of its internal layout, which can be considered appropriate for a modern enclosure.
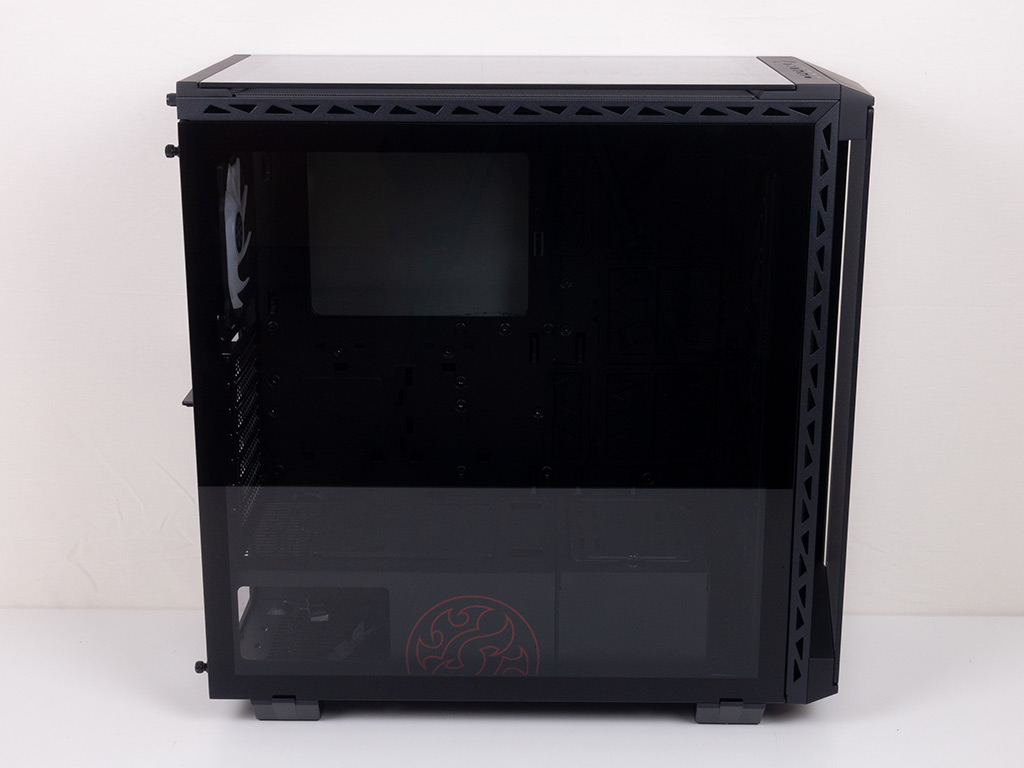

The two full glass side panels on the case are held in place by a pair of thumb screws each. XPG has done a great job at keeping the panels themselves clean and tidy for the best looks, and the level of tint is a good compromise between visibility and the ability to hide imperfections. That having been said, many other cases with two such panels actually tint the one covering the backside of the motherboard tray more so that your cables aren't too visible.

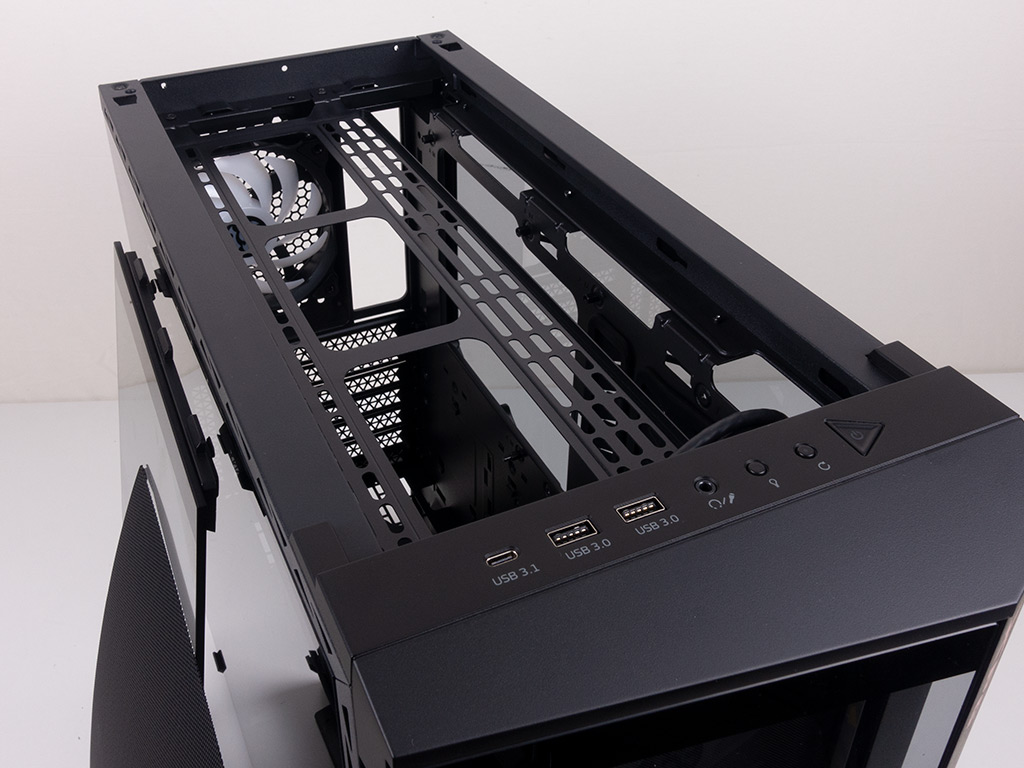

On top, you will find the fourth and final glass panel which once again gives you plenty of room for any ceiling mounted fans to push hot air out easily. A magnetic metal mesh filter has been placed over the entire top to keep dirt out as well. Thanks to the mounting frame, you may install up to three 120 mm fans or a 360 mm radiator here without sacrificing any component compatibility. The XPG Battlecruiser comes with a modern set of IO which ditches the aging USB 2.0 ports and instead goes for two 3.0 and a USB 3.1 Gen2 Type-C connector. Naturally, you will also find a pair of audio plugs alongside the power and reset buttons. There is also a small RGB light toggle switch. While this is great, it looks just like the reset button right next to it. This means odds are high that you will end up power cycling your system instead if you are not careful.


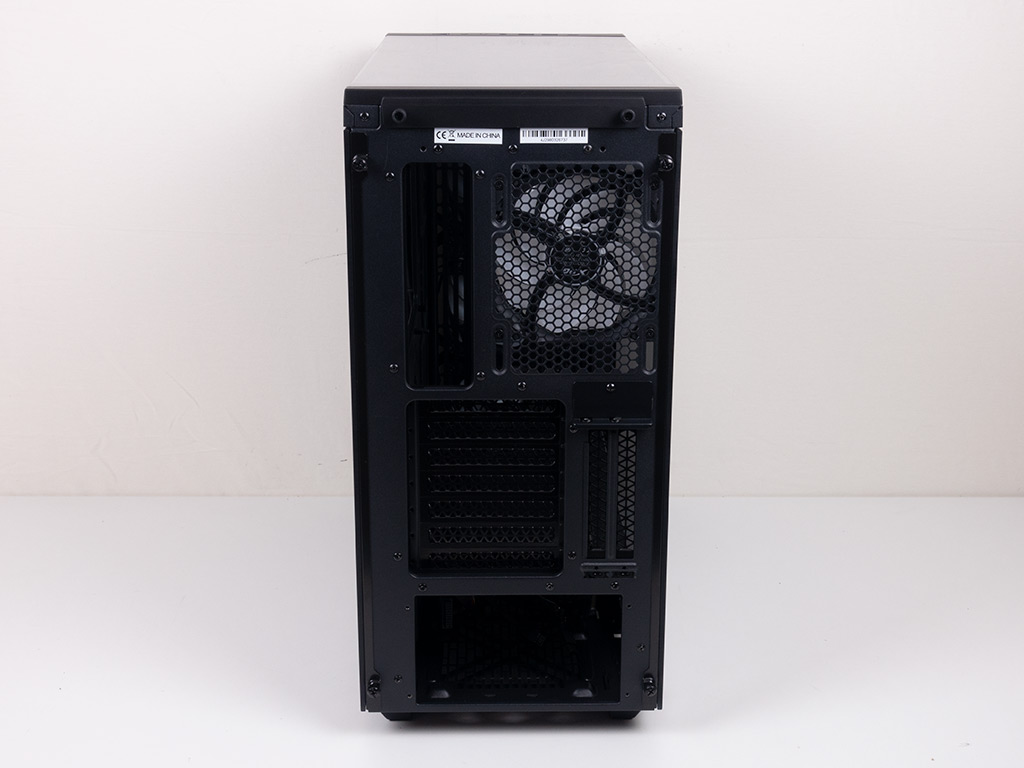
The 120 mm exhaust fan in the top of the rear sits in elongated mounting holes, so you may adjust its height to best suit your internal cooling needs. Below that are the seven traditional fans and two vertical ones, so any GPU could be shown off to curious onlookers. As is the case most of the time, the required ribbon cable is an additional purchase and not includes with the XPG Battlecruiser. A square cutout in the very bottom is where you will slide in your power supply during assembly.
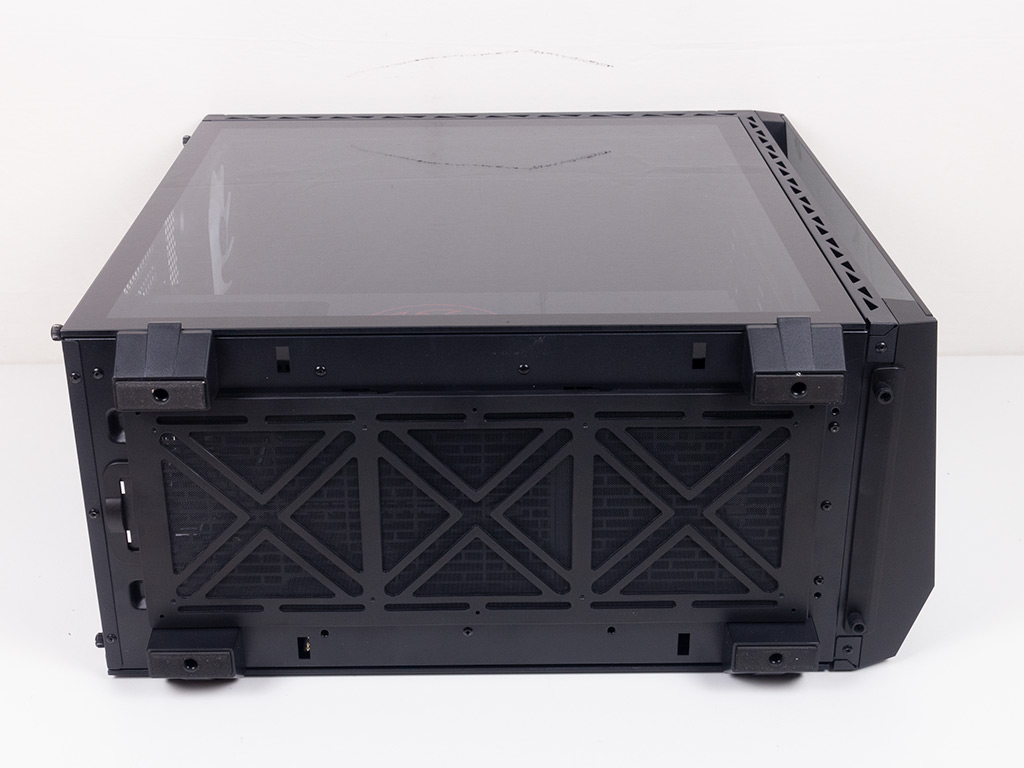
A full-sized dust filter on the underside means that all possible intake areas are covered, so you won't have to worry about your system clogging up over time.
Apr 19th, 2024 20:08 EDT
change timezone
Latest GPU Drivers
New Forum Posts
- GTX 1060 6GB ASUS GPU Shuts Down after 5min of Gaming (0)
- AMD RX 7000 series GPU Owners' Club (1068)
- I just succesfully baked DDR4 (69)
- I9 13890HX undervolting Suggestions (4)
- Undervolting Dell XPS 14 9440 is it possible? (7)
- Share your AIDA 64 cache and memory benchmark here (2884)
- Roccat Kone AIMO has developed a double left click, when I click it once. Any fix out there? (34)
- The TPU UK Clubhouse (24738)
- XFX RX580 stock Bios (7)
- Looks like the Z80 is finished (2)
Popular Reviews
- Horizon Forbidden West Performance Benchmark Review - 30 GPUs Tested
- Fractal Design Terra Review
- Corsair 2000D Airflow Review
- Thermalright Phantom Spirit 120 EVO Review
- Minisforum EliteMini UM780 XTX (AMD Ryzen 7 7840HS) Review
- Creative Pebble X Plus Review
- FiiO KB3 HiFi Mechanical Keyboard Review - Integrated DAC/Amp!
- ASUS GeForce RTX 4090 STRIX OC Review
- NVIDIA GeForce RTX 4090 Founders Edition Review - Impressive Performance
- ASUS GeForce RTX 4090 Matrix Platinum Review - The RTX 4090 Ti
Controversial News Posts
- Sony PlayStation 5 Pro Specifications Confirmed, Console Arrives Before Holidays (111)
- NVIDIA Points Intel Raptor Lake CPU Users to Get Help from Intel Amid System Instability Issues (102)
- US Government Wants Nuclear Plants to Offload AI Data Center Expansion (98)
- AMD "Strix Halo" Zen 5 Mobile Processor Pictured: Chiplet-based, Uses 256-bit LPDDR5X (84)
- Windows 10 Security Updates to Cost $61 After 2025, $427 by 2028 (82)
- Developers of Outpost Infinity Siege Recommend Underclocking i9-13900K and i9-14900K for Stability on Machines with RTX 4090 (82)
- TechPowerUp Hiring: Reviewers Wanted for Motherboards, Laptops, Gaming Handhelds and Prebuilt Desktops (72)
- Intel Realizes the Only Way to Save x86 is to Democratize it, Reopens x86 IP Licensing (70)