 11
11
Aerocool P7-C1 Review
Value & Conclusion »Test System
| System Parts for Case Reviews | |
|---|---|
| Processor: | Intel Core i5-6600K |
| Motherboards: | ATX: Fatal1ty Z170 Gaming K6+ mATX: ASRock Z170M Pro4S mini-ITX: ASRock Z170M-ITX/ac Provided by: ASRock |
| Graphic Card: | Long: NVIDIA GeForce GTX 280 OEM Short: HIS Radeon 5350 HD |
| Memory: | 16 GB ADATA XPG Dazzle DDR4 2800 MHz CL17-17-17 1.25V 16 GB ADATA XPG Z1 DDR4 3000 MHz CL18-18-18 1.35V 16 GB ADATA XPG Z1 DDR4 2400 MHz CL16-16-16 1.20V Provided by: ADATA |
| HDD: | Western Digital 320 GB 7200 RPM |
| SSD: | ADATA Premier Pro SP920 MLC 256 GB ADATA Ultimate SU800 3D TLC 256 GB ADATA Premier SP550 TLC 240 GB Provided by: ADATA |
| Power Supply: | Seasonic Platinum Series 660 W ATX 2.3 Provided by: Seasonic |
| Cooling: | Air Cooling Mini-ITX: Thermalright AXP-100R Air Cooling mATX: Thermalright Macho 90 Air Cooling ATX: Thermalright Macho 120 Provided by: PC-COOLING.de |
Assembly

Installing the motherboard is done by simply using traditional spacers and screws. There is plenty of space above the board, so you may route cables or install a radiator without issue. With no 3.5'' drive bays in front, not even a thick radiator will interfere with the vast majority of GPUs out there.


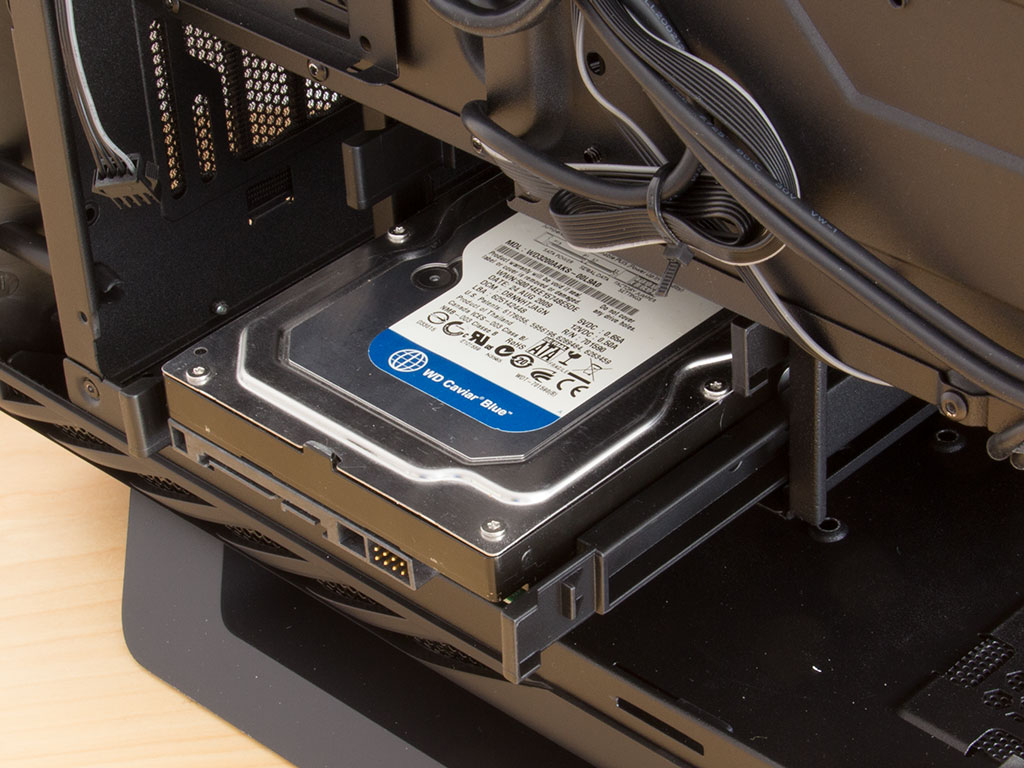

The Aerocool P7-C1 comes with flexible plastic trays. They are quite sturdy even though the drive is held in place by plastic pins. Rubber rings around these act as a measure against vibrations. Once you have placed the drive into the tray, slide it back in until it snaps into place securely.


SSDs require the use of tools as you have to secure them to these metal trays with traditional screws. Once mounted, you can put the tray into one of four positions and use the thumbscrew to keep it in place.

Installing the power supply is quite straightforward as well. Slide it into the chassis underneath the shroud and secure it with traditional screws. There is enough space to fit most units out there. You won't have to worry about whether you'll be able to fit a unit capable of supplying an adequate amount of power for powerful components.


Once everything is installed, the P7-C1 makes a clean impression thanks to the shroud. Only the audio cable and two leads from the fan in front disturb the look a bit. All the cable mess is hidden behind the motherboard tray, but I had to get a bit creative with securing the cables properly as there is very little space and an inadequate number of hooks for zip ties, which could cause some issues if you choose to install SSDs there.
Finished Looks

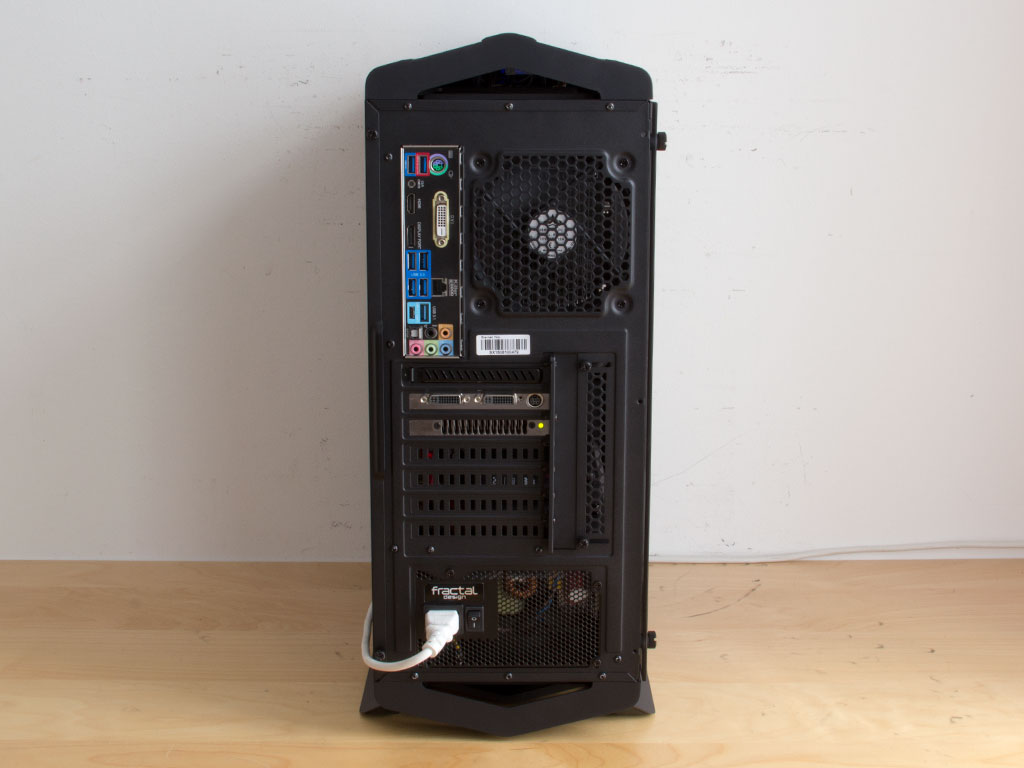

With the side and glass panels back in place, the P7-C1 lights up in quite the obvious fashion. In the rear, everything is where you would expect to find it, and the glass gives you an unobstructed view of what makes your system tick. You can clearly see the memory LED and motherboard status lights through the tinted panel.
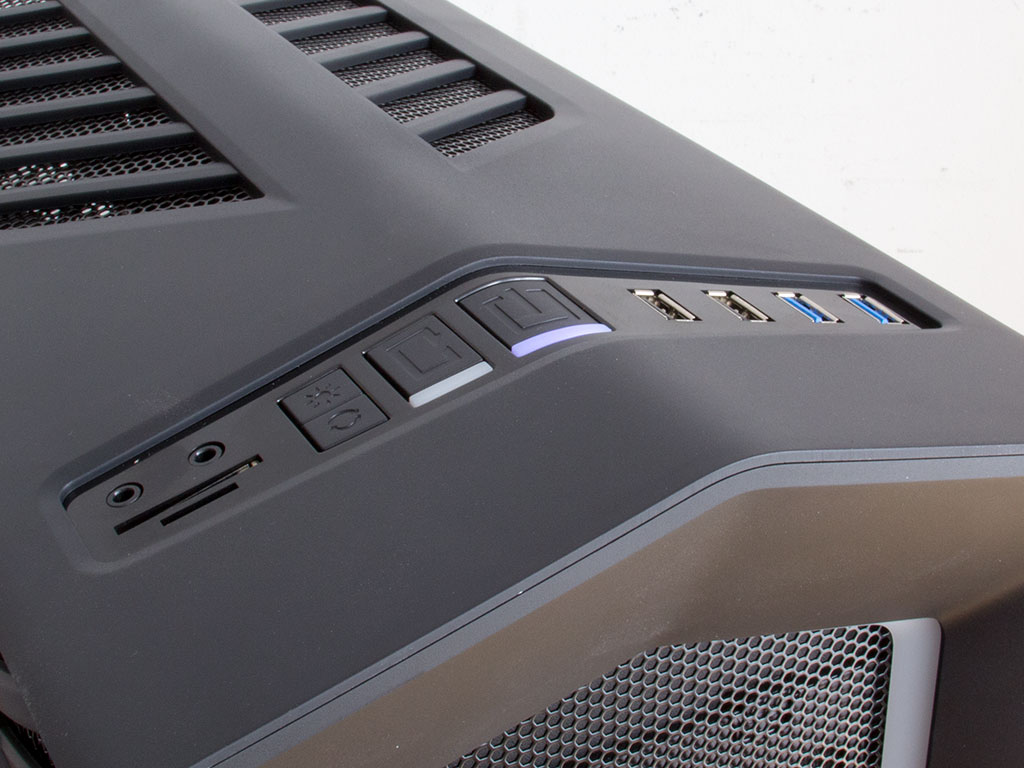
The power button lights up blue in the front of the top, right at the edge. It is not very strong but should be visible in darker surroundings.
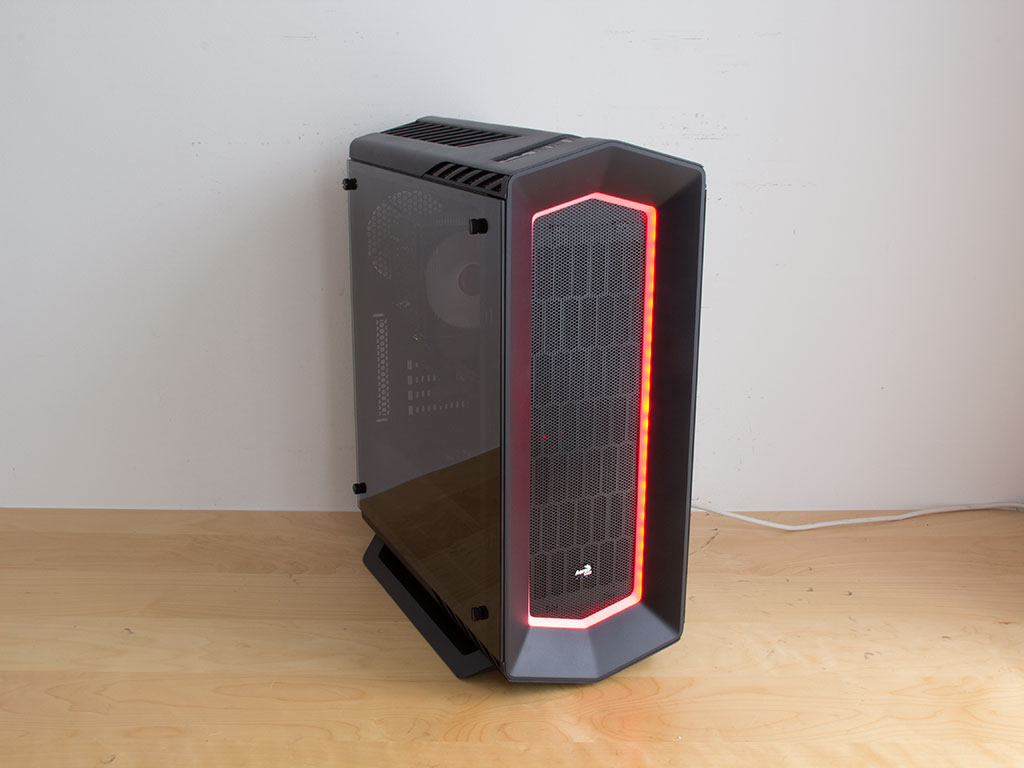
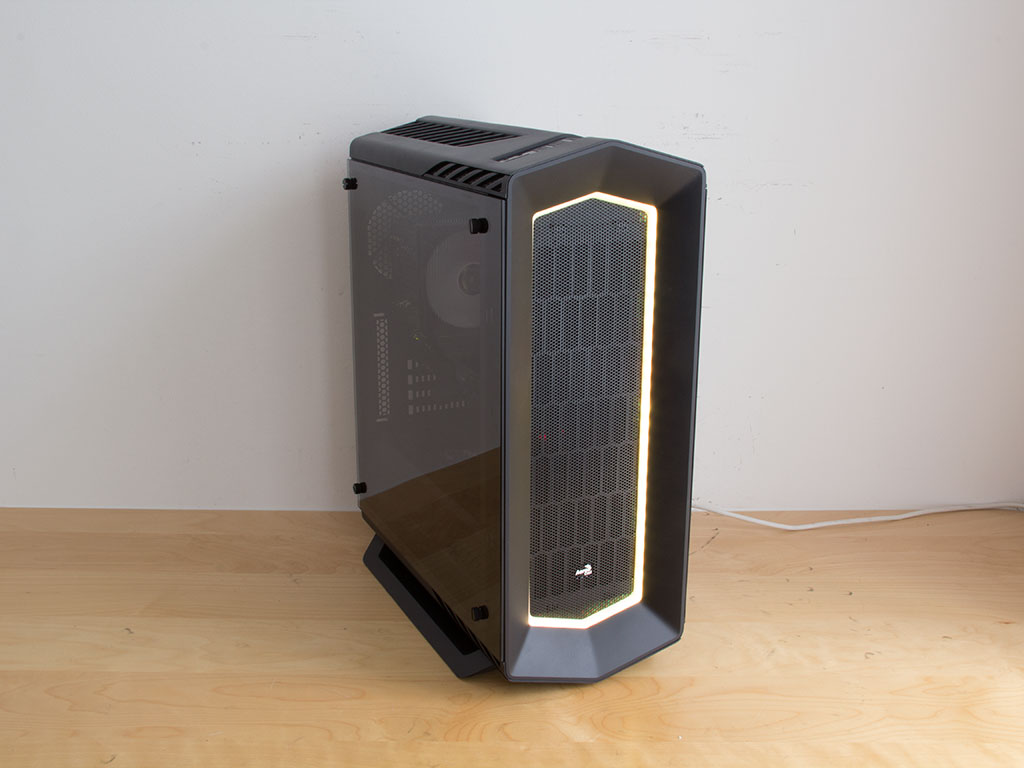
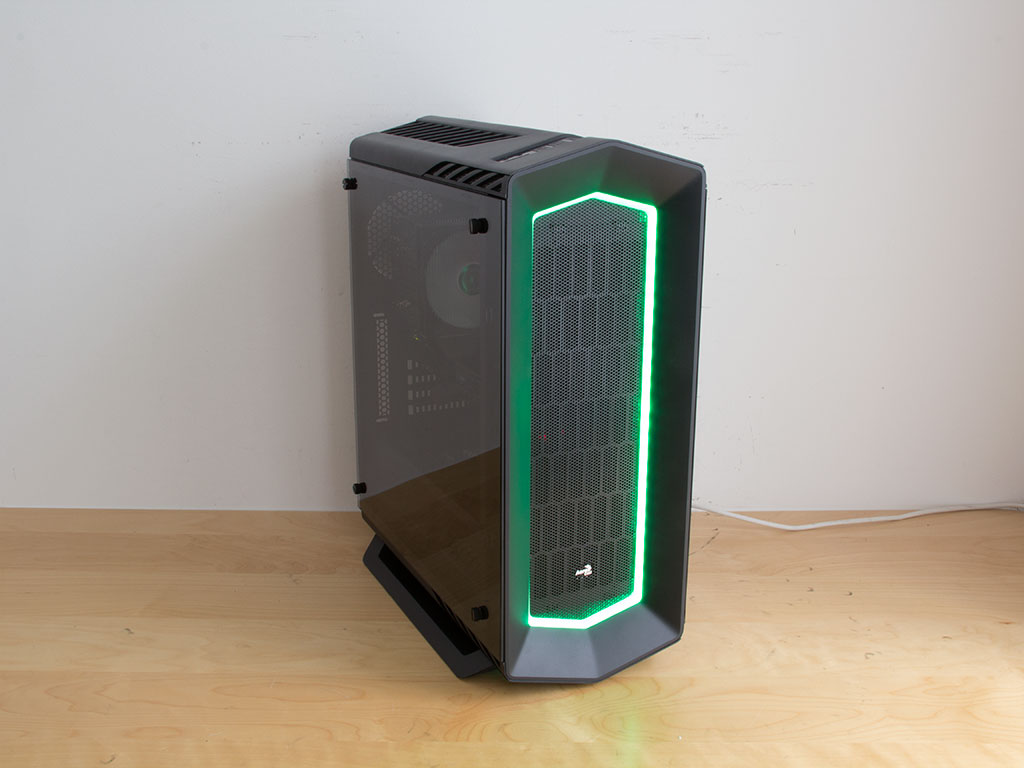
LED Colors Gallery
The Aerocool P7-C1 comes with an RGB lighting element in front. You may cycle through the colors by pressing the button next to the power switch at the top of the chassis. The gallery below illustrates which colors you can pick from.


May 13th, 2024 19:51 EDT
change timezone
Latest GPU Drivers
New Forum Posts
- TPU's WCG/BOINC Team (34428)
- Air makes its way from the reservoir into the radiator. (45)
- Which Audio System Would you Choose and Why? (22)
- Last game you purchased? (289)
- Laptop i7 11800H Throttling Immediately (3)
- Which RAM for AMD 7950X3D (12)
- What are you playing? (20628)
- LOWER SSD PRICES (22)
- Sexy Hardware Close-Up Pic Clubhouse. (10241)
- Results and questions (7)
Popular Reviews
- ZMF Caldera Closed Planar Magnetic Headphones Review
- Homeworld 3 Performance Benchmark Review - 35 GPUs Tested
- Corsair MP700 Pro SE 4 TB Review
- Bykski CPU-XPR-C-I CPU Water Block Review - Amazing Value!
- ThundeRobot ML903 NearLink Review
- Upcoming Hardware Launches 2023 (Updated Feb 2024)
- AMD Ryzen 7 7800X3D Review - The Best Gaming CPU
- CHERRY XTRFY M64 Pro Review
- ASUS Radeon RX 7900 GRE TUF OC Review
- Corsair iCUE Link RX120 RGB 120 mm Fan Review
Controversial News Posts
- Intel Statement on Stability Issues: "Motherboard Makers to Blame" (266)
- AMD to Redesign Ray Tracing Hardware on RDNA 4 (227)
- Windows 11 Now Officially Adware as Microsoft Embeds Ads in the Start Menu (172)
- NVIDIA to Only Launch the Flagship GeForce RTX 5090 in 2024, Rest of the Series in 2025 (152)
- Sony PlayStation 5 Pro Specifications Confirmed, Console Arrives Before Holidays (119)
- AMD Hits Highest-Ever x86 CPU Market Share in Q1 2024 Across Desktop and Server (115)
- AMD's RDNA 4 GPUs Could Stick with 18 Gbps GDDR6 Memory (114)
- AMD Ryzen 9 7900X3D Now at a Mouth-watering $329 (104)