 12
12
be quiet! Silent Base 800 Review
Value & Conclusion »Assembly
Installing the motherboard is done by traditional means, with screws and a screwdriver. As you can see, there is plenty of space on three sides of the board, so you may use large components and still get to all the connectors along the PCB's edges easily.
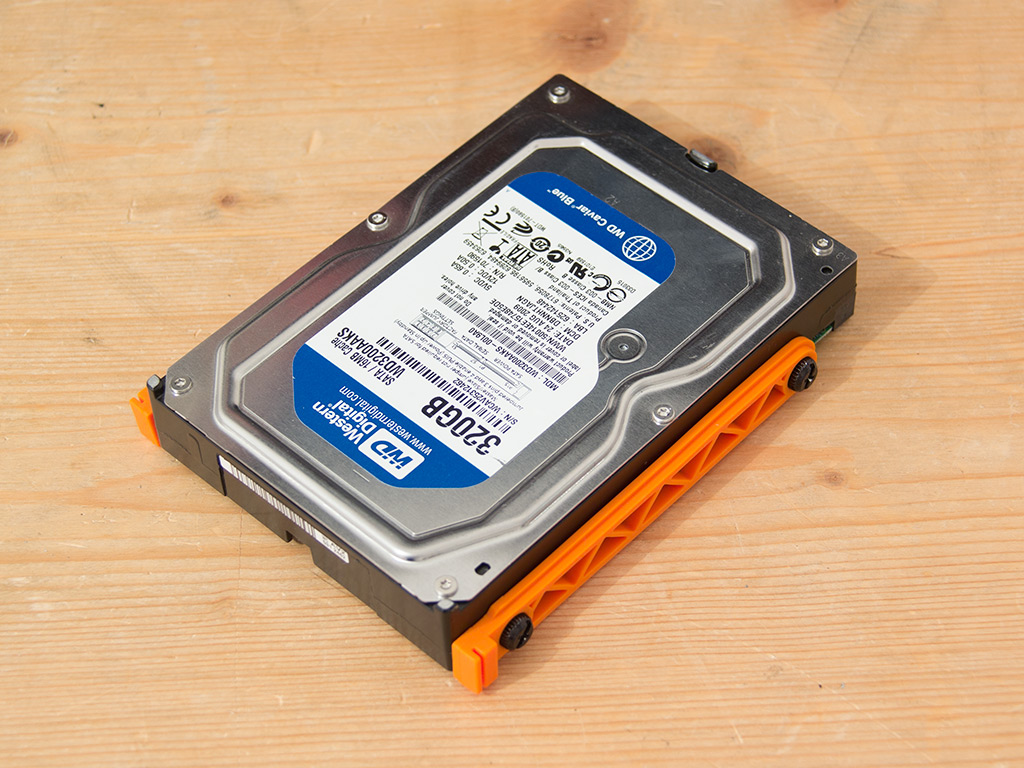
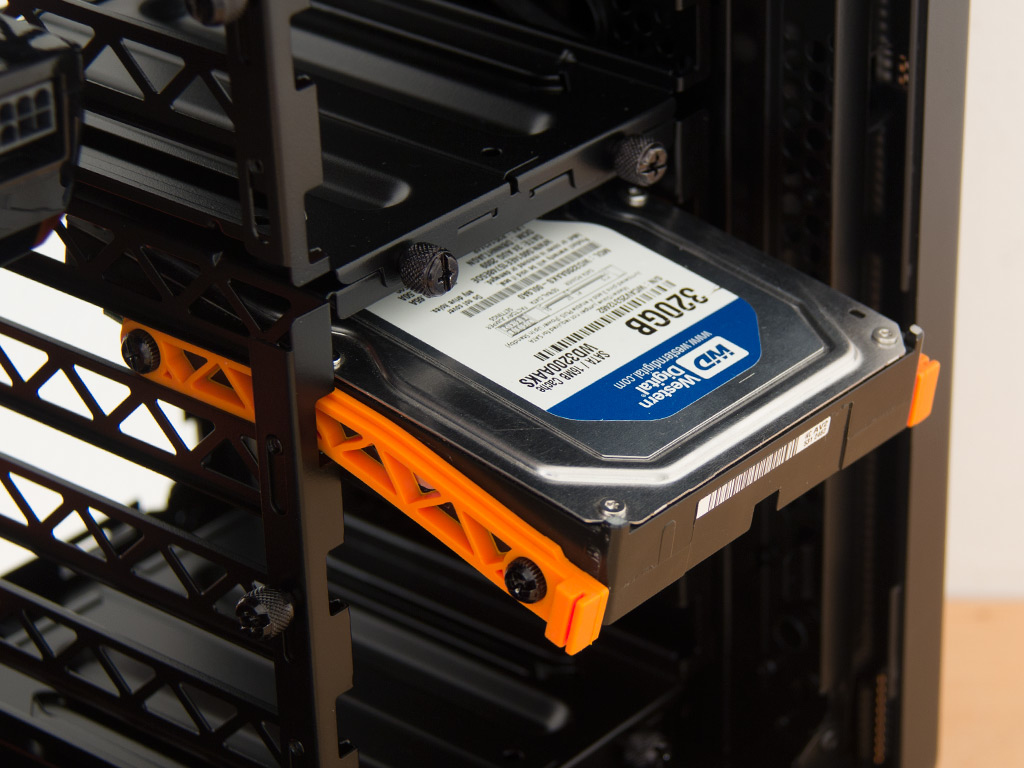

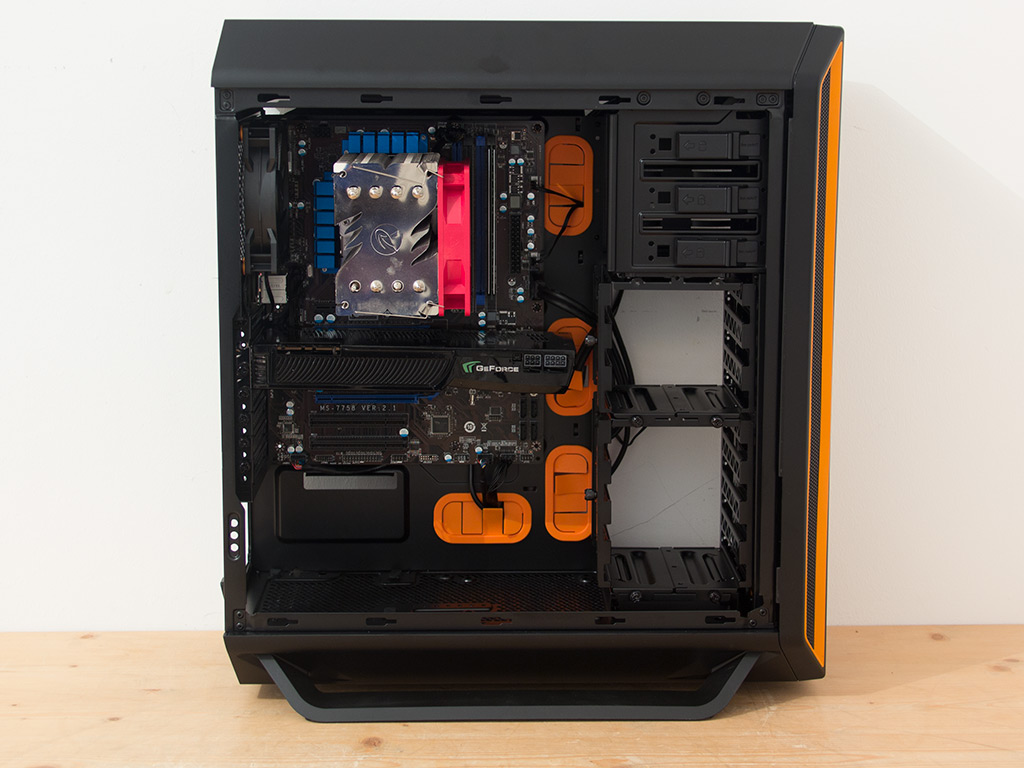
be quiet! designed their own way to install hard drives into the chassis. While the Silent Base 800 uses the same rail-and-lock method employed by some other case manufacturers, be quiet! replaced the plastic rail with a silicone strip two thumbscrews hold in place. You may simply slide the drive into place once two of those have been attached. Now, move the lock down to hold the contraption in place. As you can see, the silicone strips are rather soft, but everything, once locked, holds in place surprisingly well.


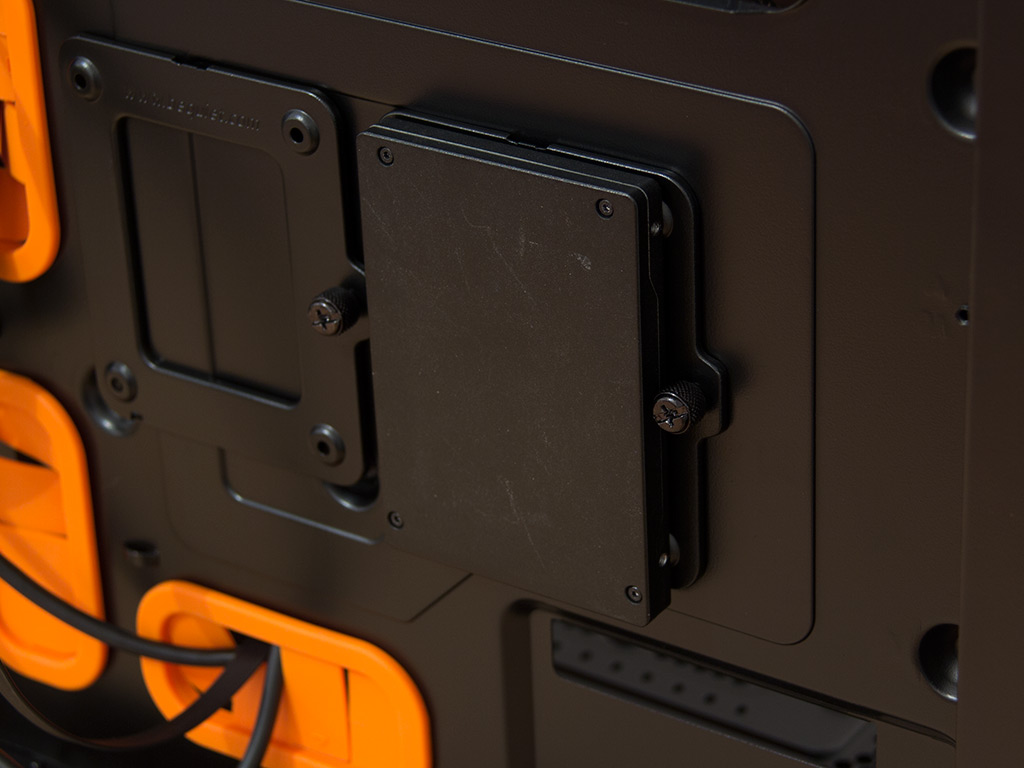
To install an SSD, put it into its individual tray. Each drive is held in place by screws, so you need tools at this point. The single thumbscrew holds the tray in place flawlessly, but is quite close to the actual drive itself, making it a bit difficult to tighten without a screwdriver once the tray has been filled.
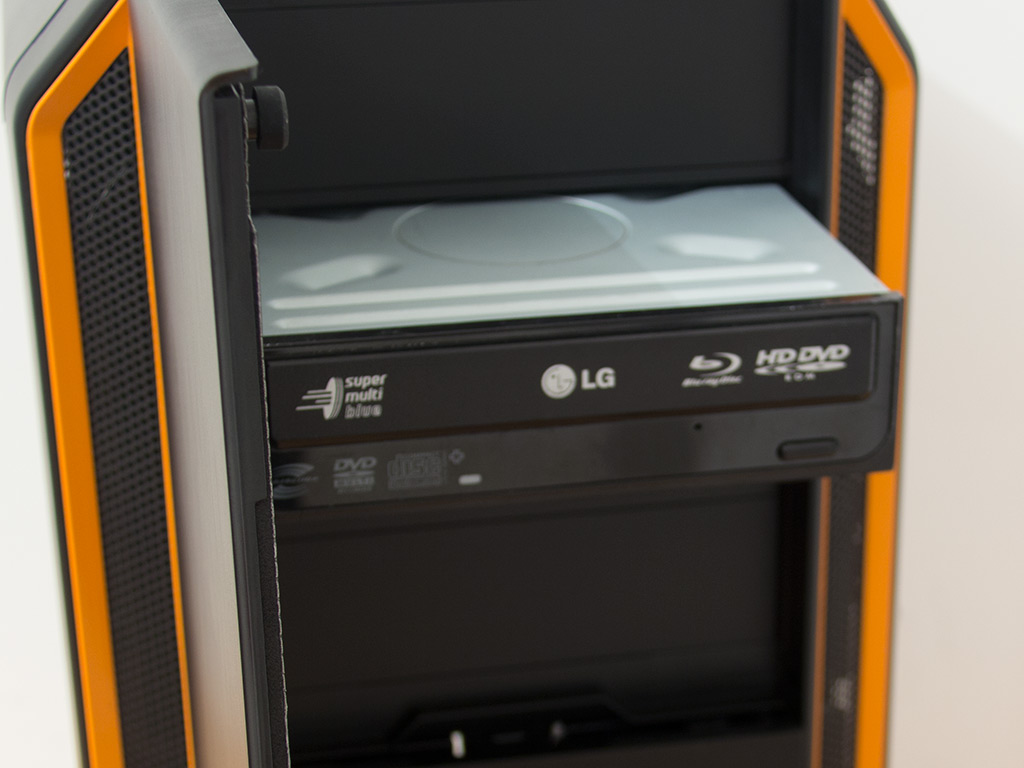

Inserting an optical drive is quite quick since taking out the cover to free the bay of your choice is a breeze. Now, simply slide the drive in and lock it in place. be quiet!'s locking mechanism actually works quite well, but you may also want to sink additional screws into the drive if need be.

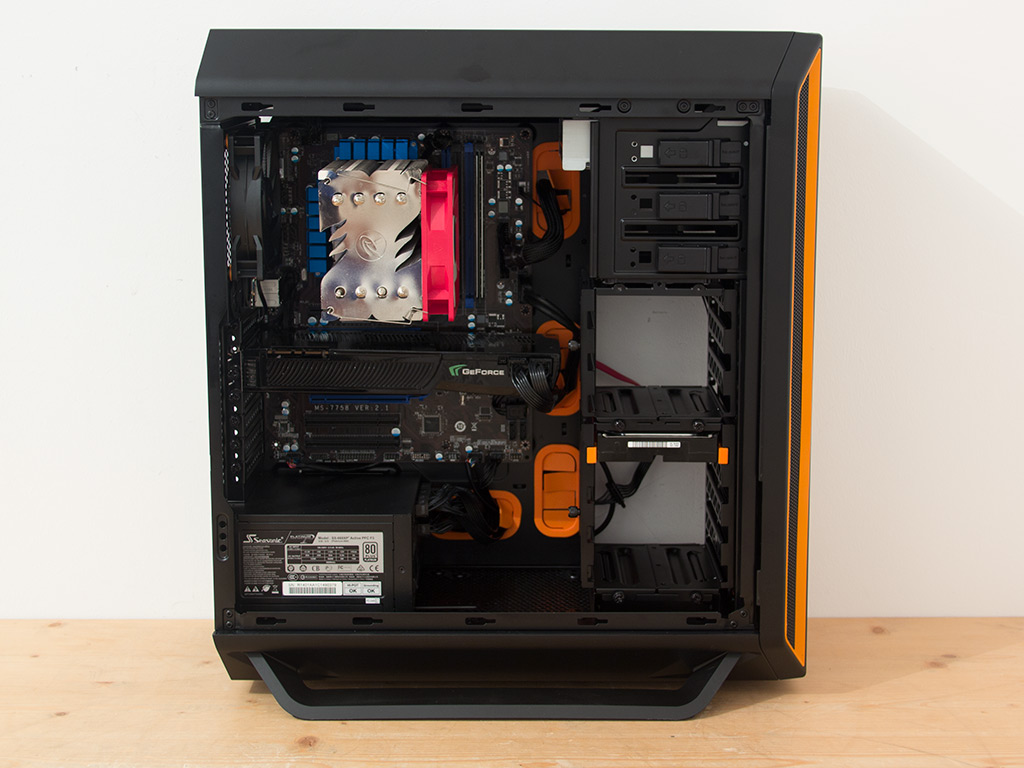
With everything in place, the Silent Base 800's interior is actually very clean since all the cables have been hidden away behind the motherboard tray, though I would have liked a few more hooks in the tray to increase the flexibility in routing everything evenly behind the tray.
Finished Looks

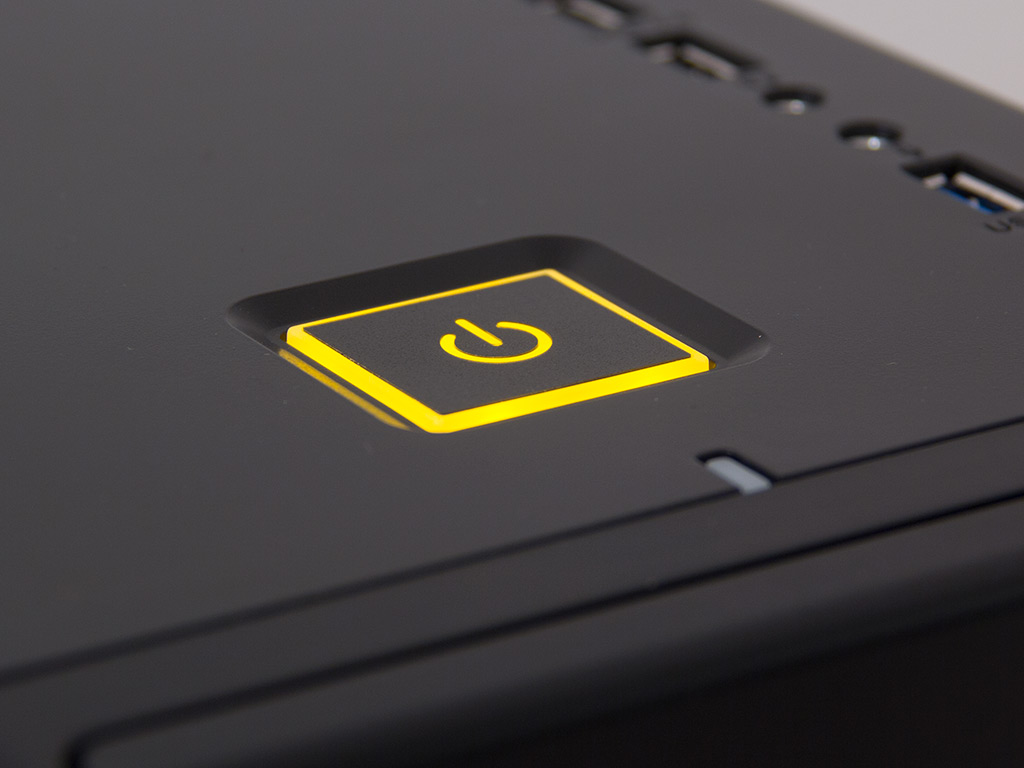
With the side panels back in place, the be quiet! Silent Base 800 makes a great impression. It does a great job of encapsulating sounds within and uses a timeless design its target audience should like nicely as well. Going well with the enclosure's overall look, even the LED under its power button lights up in orange.


The optical drive in the front is hidden well by the door, and the rear gives you readily available access to every connector. As the fan has been recessed into the rear, it should make finding the plugs even easier, though it somewhat cuts down on how much room there is on the inside.
Apr 25th, 2025 00:04 EDT
change timezone
Latest GPU Drivers
New Forum Posts
- Cracks in my cpu waterblock should I be concerned? (13)
- What's your latest tech purchase? (23595)
- Have you got pie today? (16677)
- Are the 8 GB cards worth it? (177)
- pc randomly blackscreening (0)
- What are you playing? (23462)
- I dont understand the phone OS world..... (49)
- New OLED monitor makes PC unresponsive sometimes (28)
- RTX 5070ti - Which MSRP model has the better/quieter cooler design, ASUS Prime, Gigabyte Windforce or PNY? (7)
- I tried to use AMD Auto Overclock, and now my PC has been freezing up sometimes. Afterwards, the screen goes black or displays artifacts. (29)
Popular Reviews
- NVIDIA GeForce RTX 5060 Ti 8 GB Review - So Many Compromises
- Crucial CUDIMM DDR5-6400 128 GB CL52 Review
- Colorful iGame B860M Ultra V20 Review
- ASUS GeForce RTX 5060 Ti TUF OC 16 GB Review
- Upcoming Hardware Launches 2025 (Updated Apr 2025)
- Sapphire Radeon RX 9070 XT Pulse Review
- Sapphire Radeon RX 9070 XT Nitro+ Review - Beating NVIDIA
- ASRock X870E Taichi Lite Review
- AMD Ryzen 7 9800X3D Review - The Best Gaming Processor
- ASUS GeForce RTX 5080 TUF OC Review
Controversial News Posts
- NVIDIA GeForce RTX 5060 Ti 16 GB SKU Likely Launching at $499, According to Supply Chain Leak (182)
- NVIDIA Sends MSRP Numbers to Partners: GeForce RTX 5060 Ti 8 GB at $379, RTX 5060 Ti 16 GB at $429 (127)
- NVIDIA Launches GeForce RTX 5060 Series, Beginning with RTX 5060 Ti This Week (115)
- Nintendo Confirms That Switch 2 Joy-Cons Will Not Utilize Hall Effect Stick Technology (105)
- Nintendo Switch 2 Launches June 5 at $449.99 with New Hardware and Games (99)
- Sony Increases the PS5 Pricing in EMEA and ANZ by Around 25 Percent (84)
- NVIDIA PhysX and Flow Made Fully Open-Source (77)
- Windows Notepad Gets Microsoft Copilot Integration (75)