 18
Razer Viper V4 Pro Review
Sensor & Performance »Build Quality
Overall build quality is very solid. There is no rattle when shaking the mouse. When applying lateral pressure, no creaking or flexing of the shell can be observed. Activating the side buttons by squeezing the sides is impossible. Lastly, accidental clicks when slamming down the mouse do not occur.Buttons

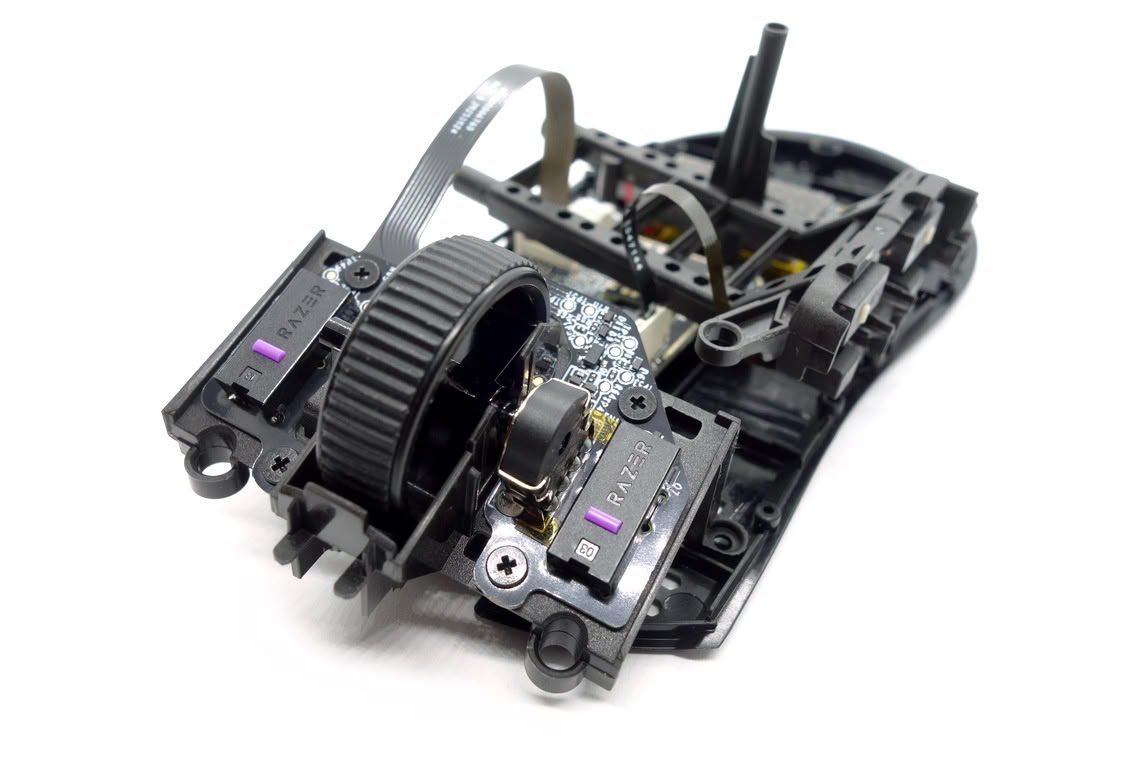
Main buttons on the Viper V4 Pro are very good. Pre-travel is low on the left button and moderate on the right one, and post-travel is moderate, resulting in a firm and snappy button response. However, feedback differs slightly between the left and right main buttons, though above else, both are louder than average. Being visually separated from the shell, button movement is moderate when provoked. Button stiffness is medium. A pair of Razer-branded fourth-generation optical switches are used.
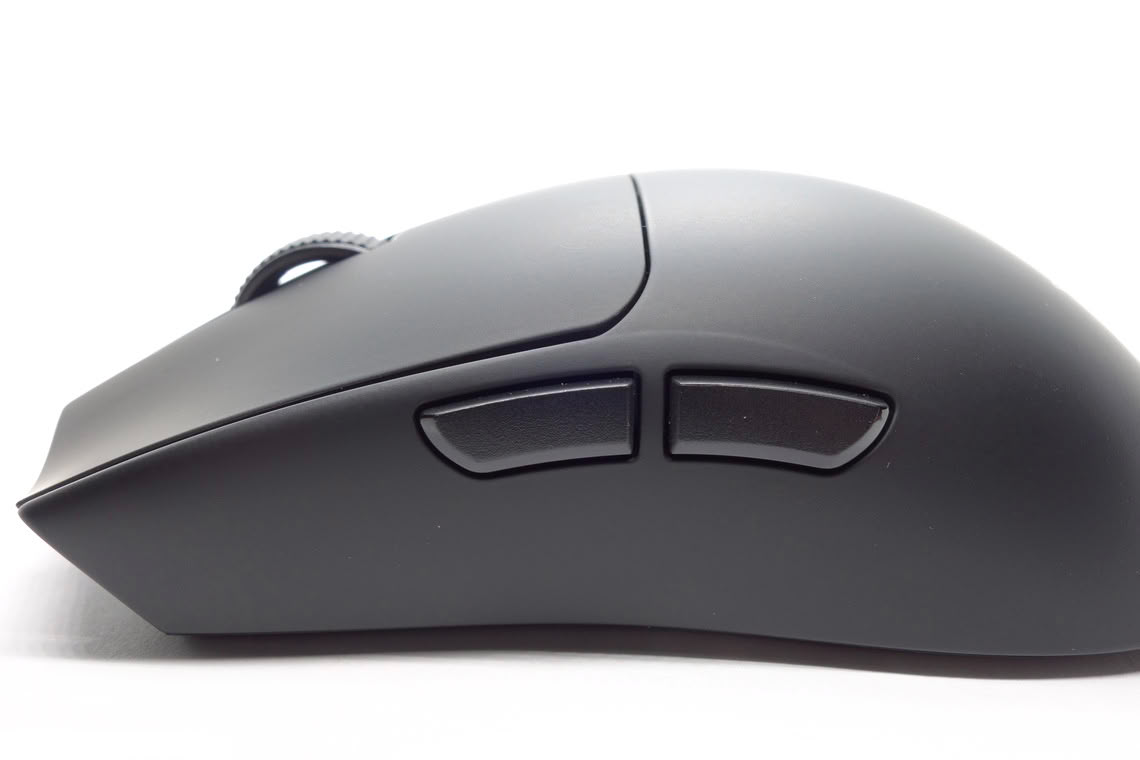
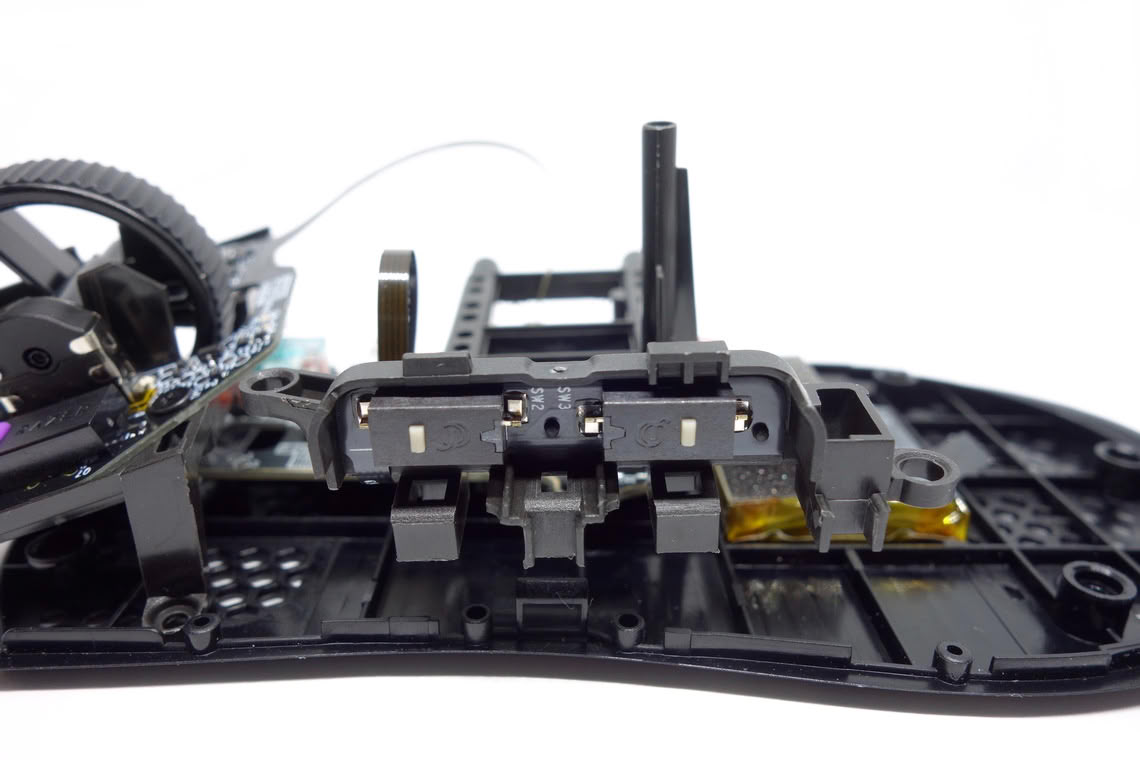
Side buttons are very good to excellent. Pre- and post-travel are very low, leading to pleasant actuation, though feedback is somewhat dull. The actuation point is even across the entirety of these. Button placement is good as actuation is possible very easily by rolling one's thumb across. A set of surface-mounted switches (beige plunger) from CF (ChangFeng) are used for these.
Underneath the mouse is a single button which either cycles through the set CPI levels if pressed briefly or turns the mouse on or off if pressed and held, which works well. A seemingly unbranded tactile switch is used for this one.
Scroll Wheel
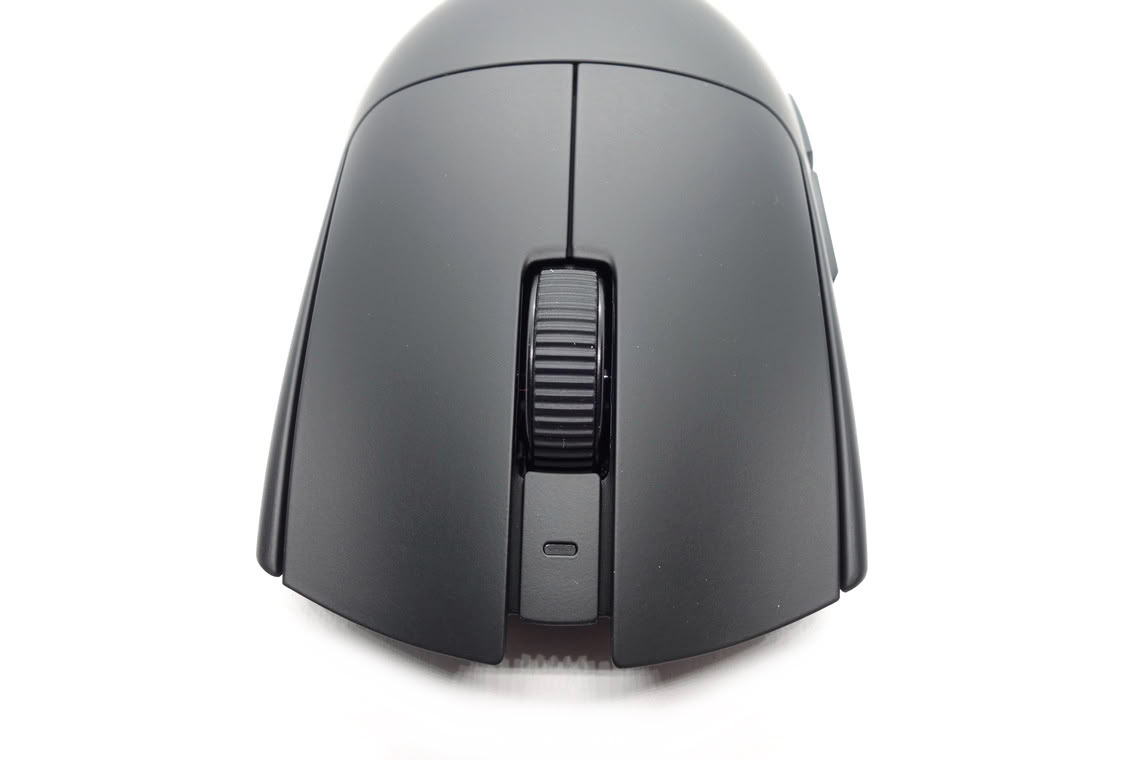

The scroll wheel is excellent. Noise levels are mostly under control, and tactility is great, with clearly defined steps allowing for controlled scrolling. The optical encoder comes from Razer (black) and has a height of 6 mm. The middle (scroll wheel) click requires medium to high force for actuation. A 2-pin TTC switch is used for this one.
Surface
The Viper V4 Pro has a matte surface all over. Grip is fine, and it doesn't attract fingerprints or dirt too much. It is easy to clean, and there are barely any signs of wear left after doing so. All in all, very good materials.Button Sound Test
Disassembly
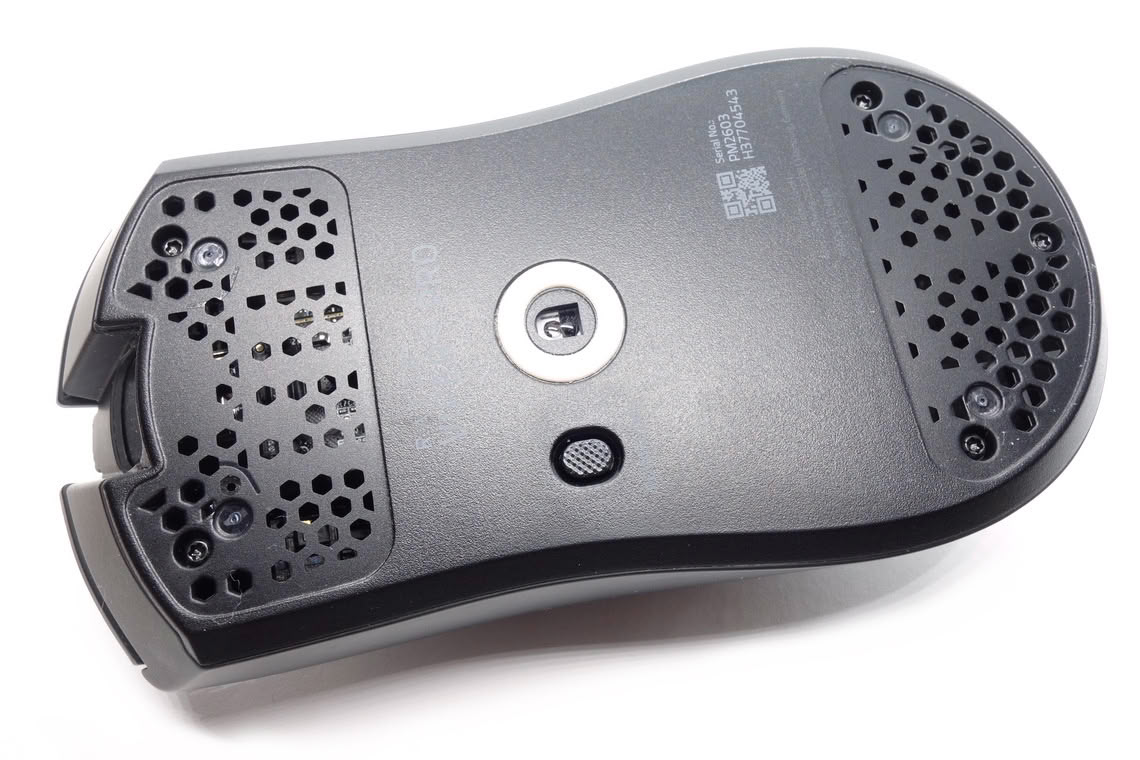
Disassembling the Viper V4 Pro is easy. Torx T6 screws are found beneath the front and rear skates. After removing those, two additional clips at the sides need to be dislodged, which is easily done. When separating top and bottom shell, make sure not to rip the cables connecting the two.
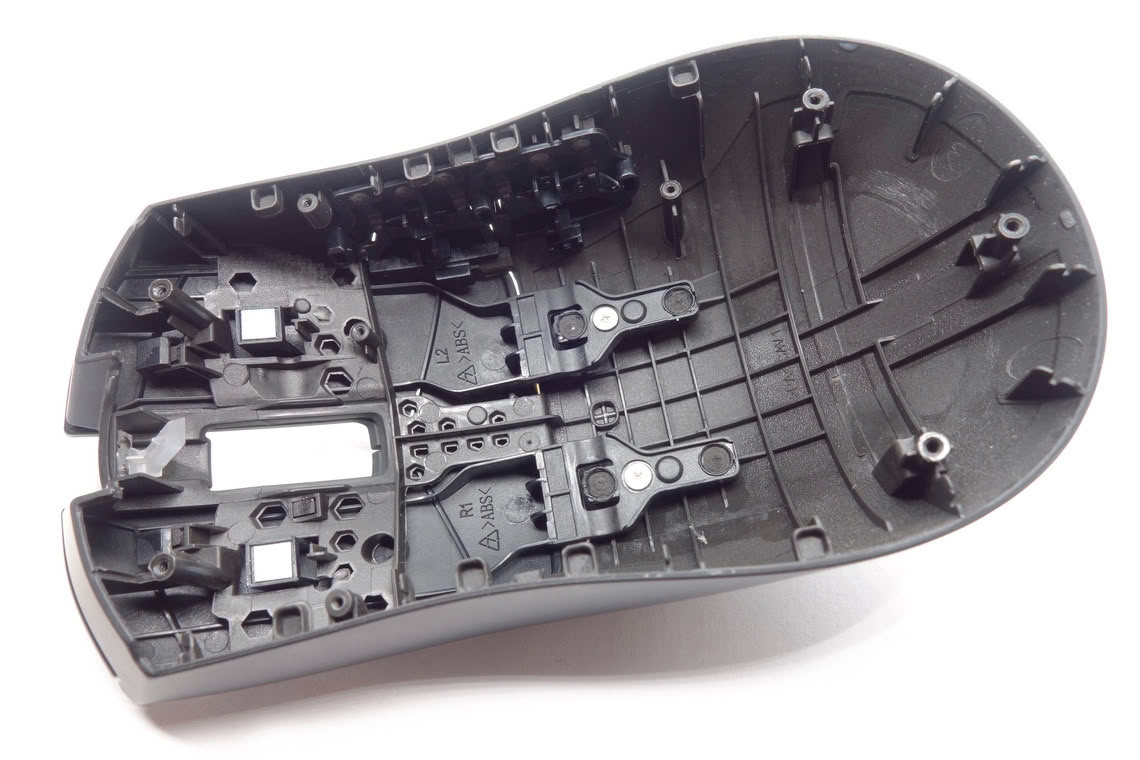
The internal design is iterated from the Viper V3 Pro. The main-button PCB as well as the side-button PCB are screwed to separate plastic assemblies, each screwed to the top shell with two screws, and both of which are connected through an FPC to the main PCB. The latter plastic assembly mainly consists of two horizontal bars, which are jammed across the width of the top shell such to provide structural support. The main PCB is highly compact and populated on both sides, and affixed to the bottom with three screws. The battery is stuck to the bottom at the rear. Of particular note is the antenna construction. The MCU is an Airoha AB1623MN along with a Nordic nPM1300, which is a PMIC. The production date of the main PCB is the 50th week of 2025.
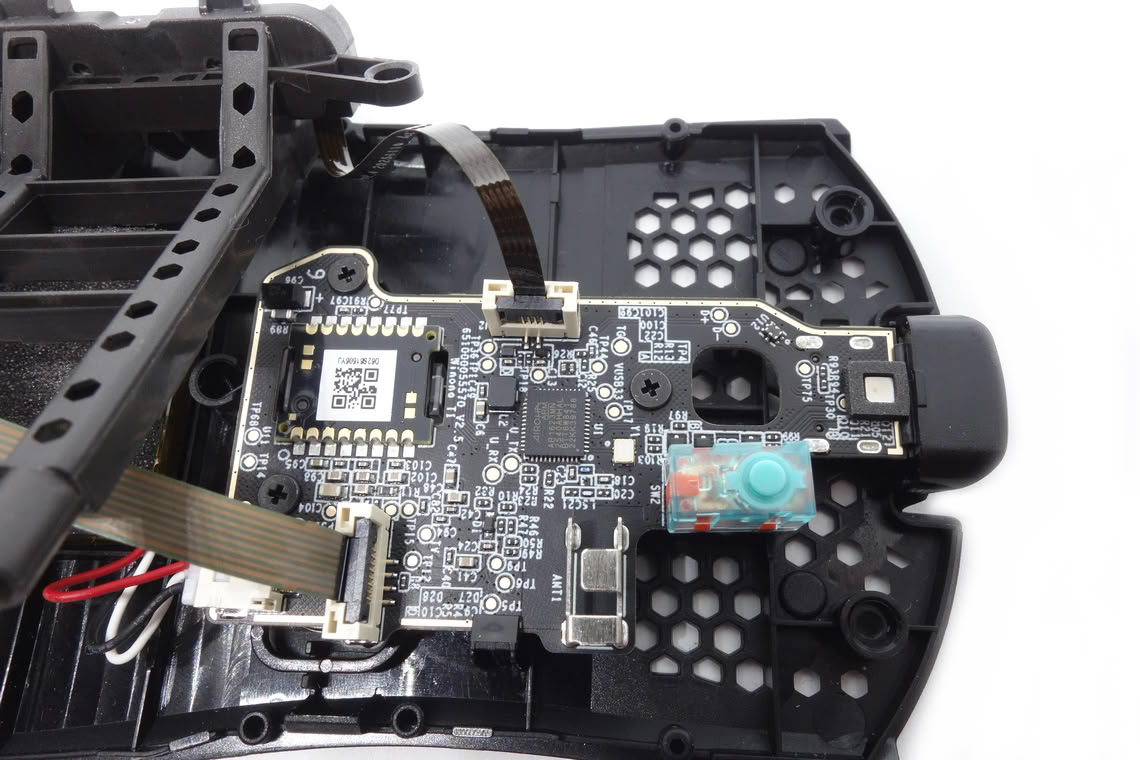

As for the soldering and general quality of the PCB, I'm unable to find any noteworthy flaws.
Nov 14th, 2026 20:53 CST
change timezone
Latest GPU Drivers
New Forum Posts
- Planning for Prolonged High Prices and Maintaining What You Already Have (68)
- WarpCoreBench scores! (37)
- What can the FX 8320 do today? Here is the answer. (44)
- Recommendations Wanted - Affordable Enterprise SSD for Boot (1)
- [INTEL]-How To Update Your Microcode for Intel HX 13/14th Gen. CPUs Laptops/Mobile Easily. (260)
- [Intel AX1xx/AX2xx/AX4xx/AX16xx/BE2xx/BE17xx] Intel Modded Wi-Fi Driver with Intel® Killer™ Features (632)
- Optical Disc Drive owners club (208)
- Game Soundtracks You Love (1287)
- Tell me about your favourite graphics card (80)
- 9070 GRE 3.9ghz validation reached. (11)
Popular Reviews
- AMD Zen 6 Technical Deep Dive
- ASUS ROG Strix B850-I Gaming Wi-Fi7 W Review
- Corsair HX1000i Shift Crystal Review
- Upcoming Hardware Launches 2027 (Updated Nov 2026)
- Montech King 95 3D PRO Review
- NZXT C1200 Platinum Review
- NZXT H7 RGB+ Review
- NZXT H5 Review
- Phantom Blade Zero Performance Benchmark Review - 35 GPUs Tested
- AMD Ryzen 7 9800X3D Review - The Best Gaming Processor
TPU on YouTube
Controversial News Posts
- NVIDIA Co-Founder and CEO Jensen Huang Officially Resigns (407)
- OpenAI CEO Argues Home PCs Waste the World's Limited DRAM Supply (152)
- NVIDIA Launches Investigation Into Jensen Huang's Relationship With Suspected Chinese Spy (136)
- Intel "Raptor Lake Next" 16-Core and 20-Core CPUs Surface (130)
- Legendary Game Studio BioWare Shuts Down Following EA Layoffs (104)
- Dell CEO Says the Memory Shortage Will Get Worse in 2027 (95)
- NVIDIA GeForce RTX 50-Series Scheduled for up to $500 Price Hike This Week (89)
- Modder Fits RTX 5090 With Four 8-Pin Connectors, Halving Current per Wire (80)