 3
3
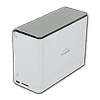
Shuttle OMNINAS KD20 Review
Software & Initial Setup »A Look Inside
It's time now to strip down the NAS and discover what components it hides inside its casing. Cracking open the KD20 isn't an easy task, but everything looks easy if you are able to fully dismantle PSUs only to reassemble them back into working order later.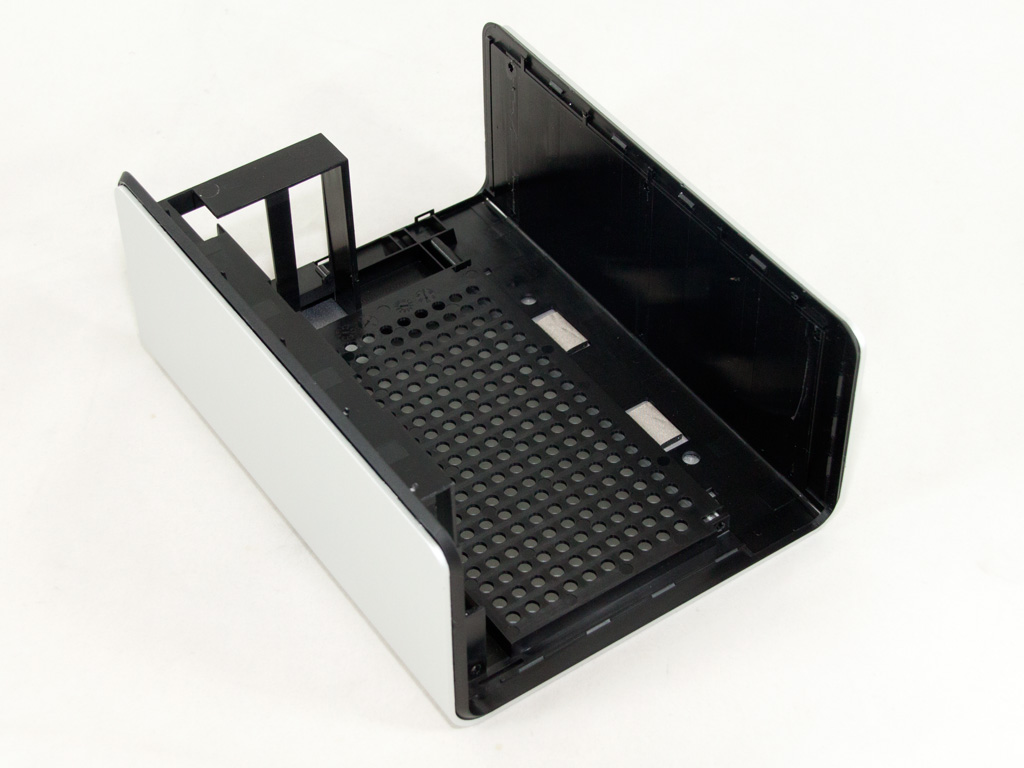


The housing of the KD20 consists of two parts: a plastic and aluminum one. Its chassis is also made out of aluminum.

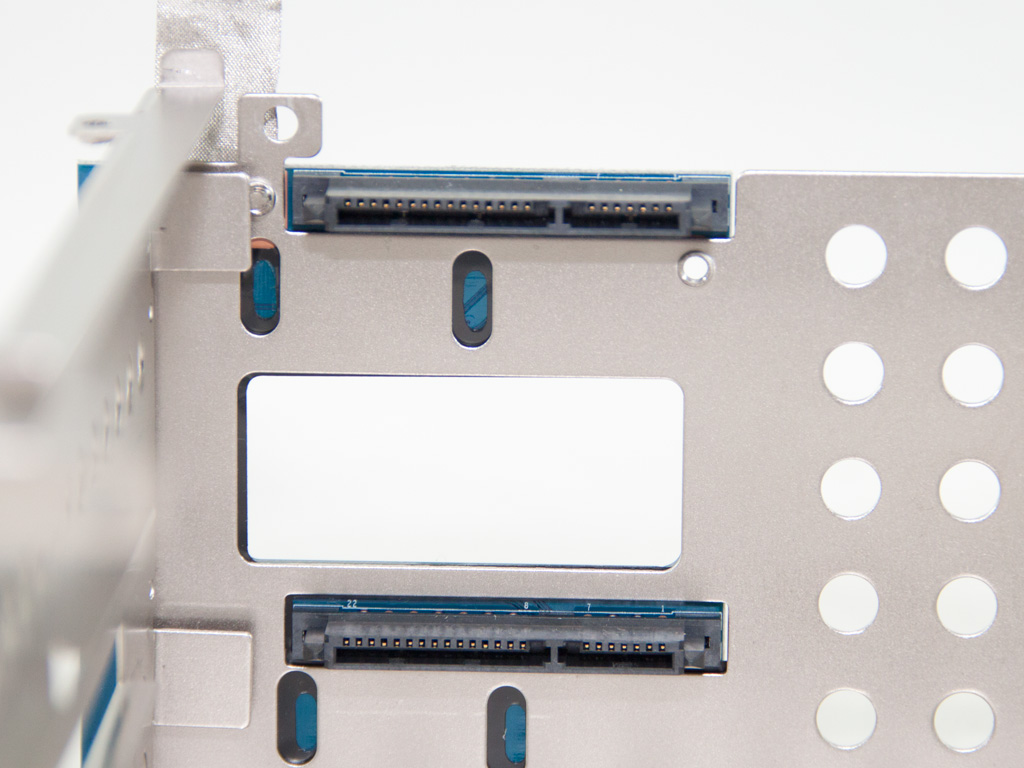
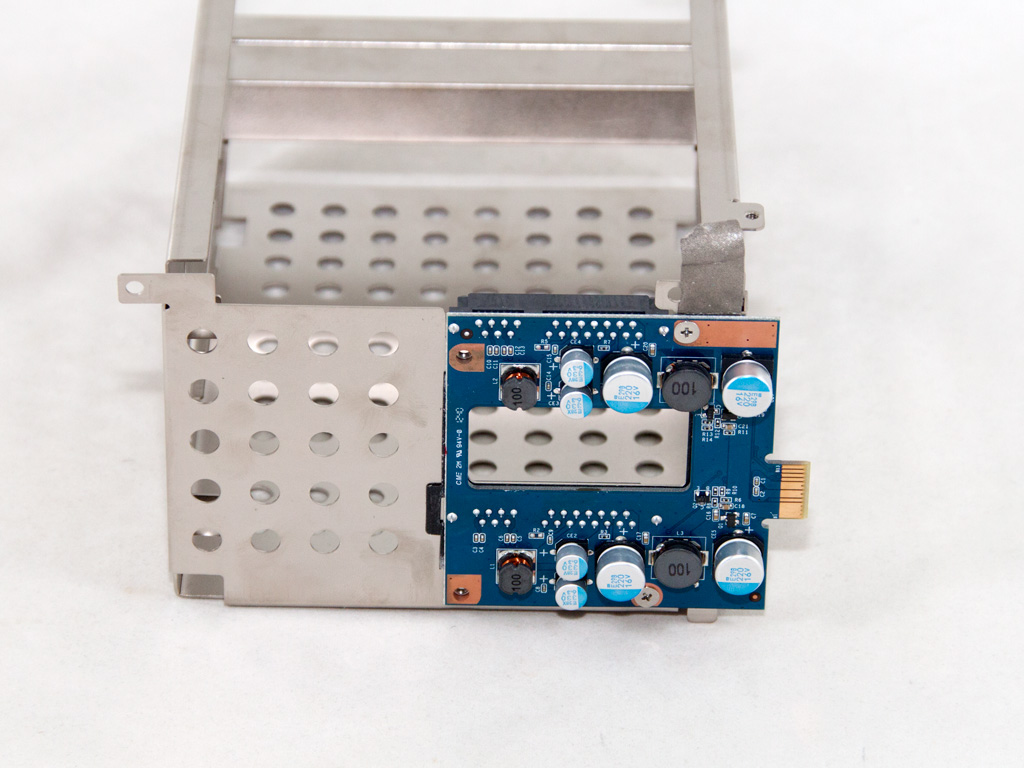
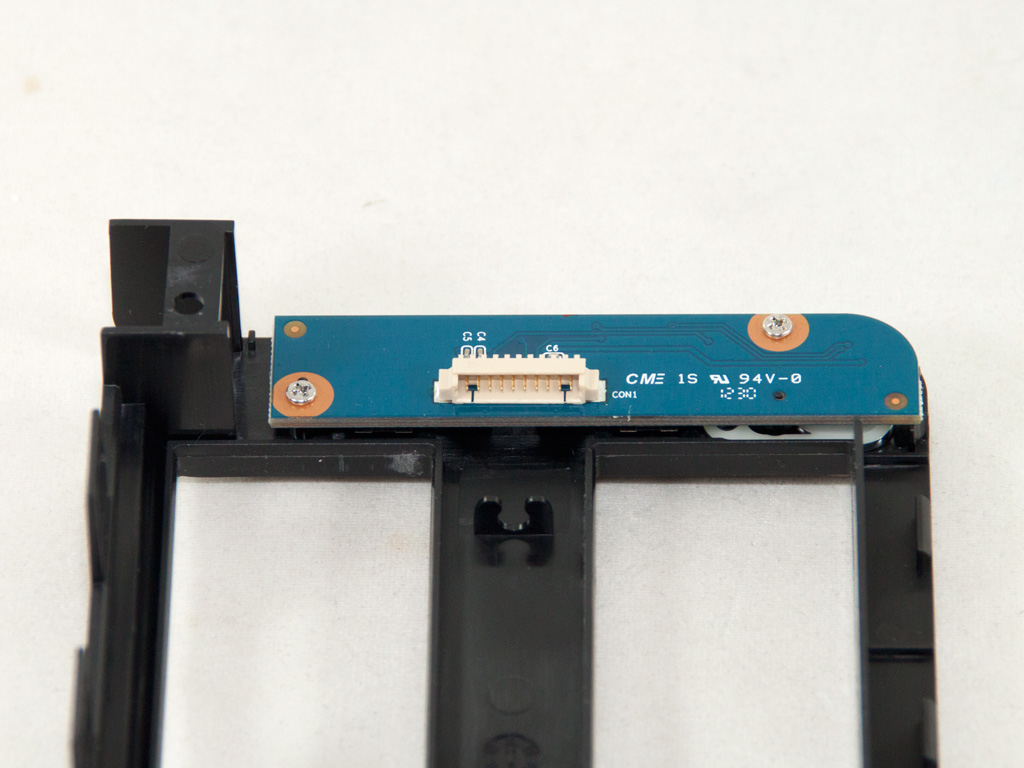
A close view of the PCIe expansion card that holds the two SATA connectors for the HDDs.
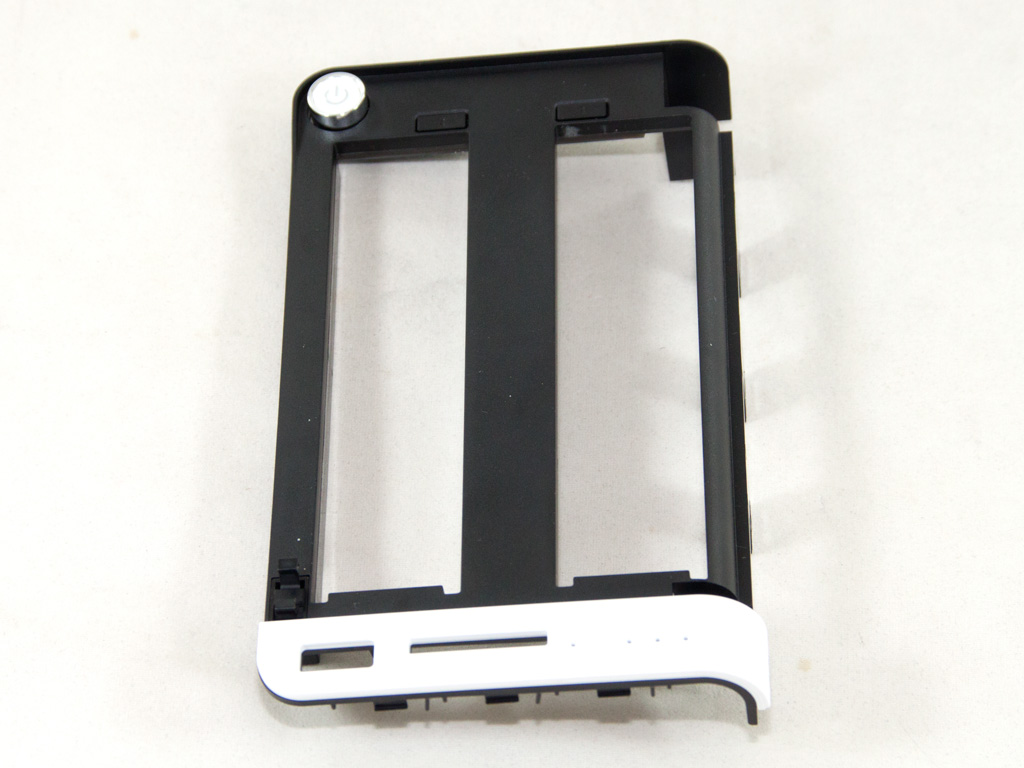

The front panel of the KD20 is made of plastic and includes the power on/off switch.
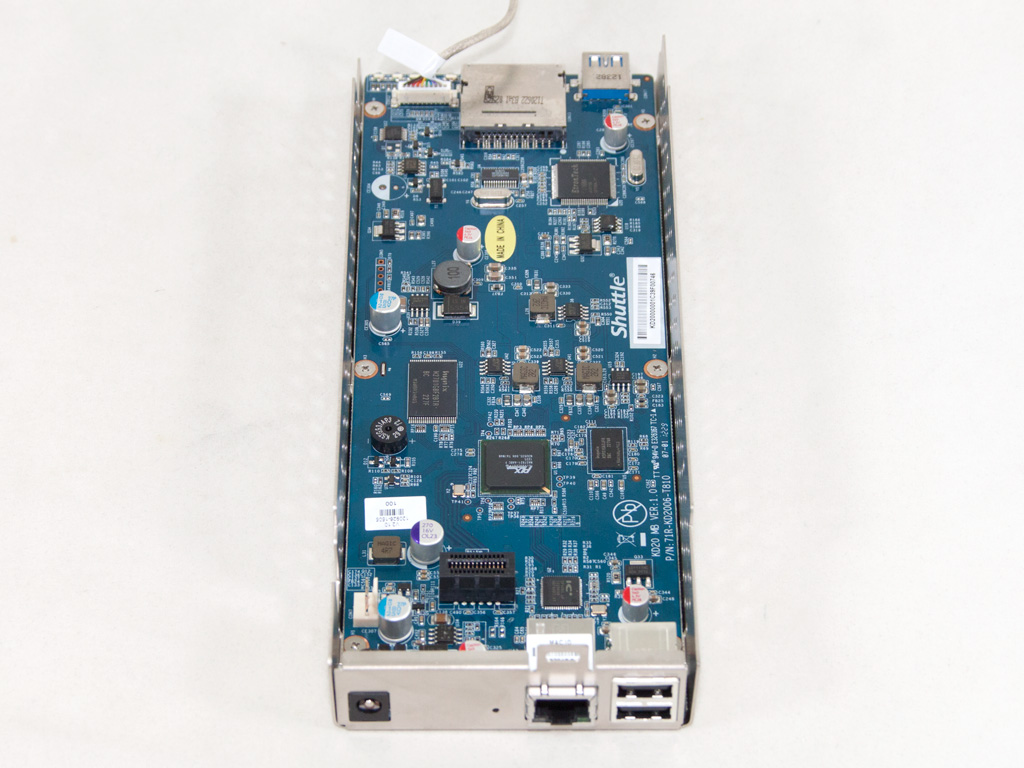
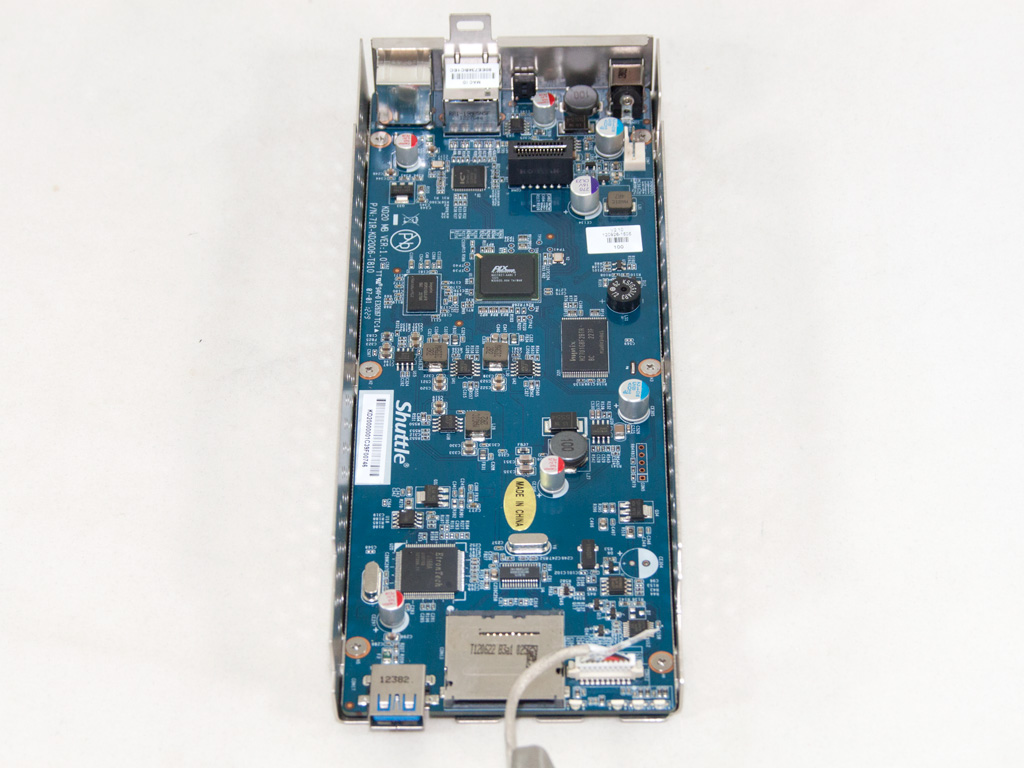
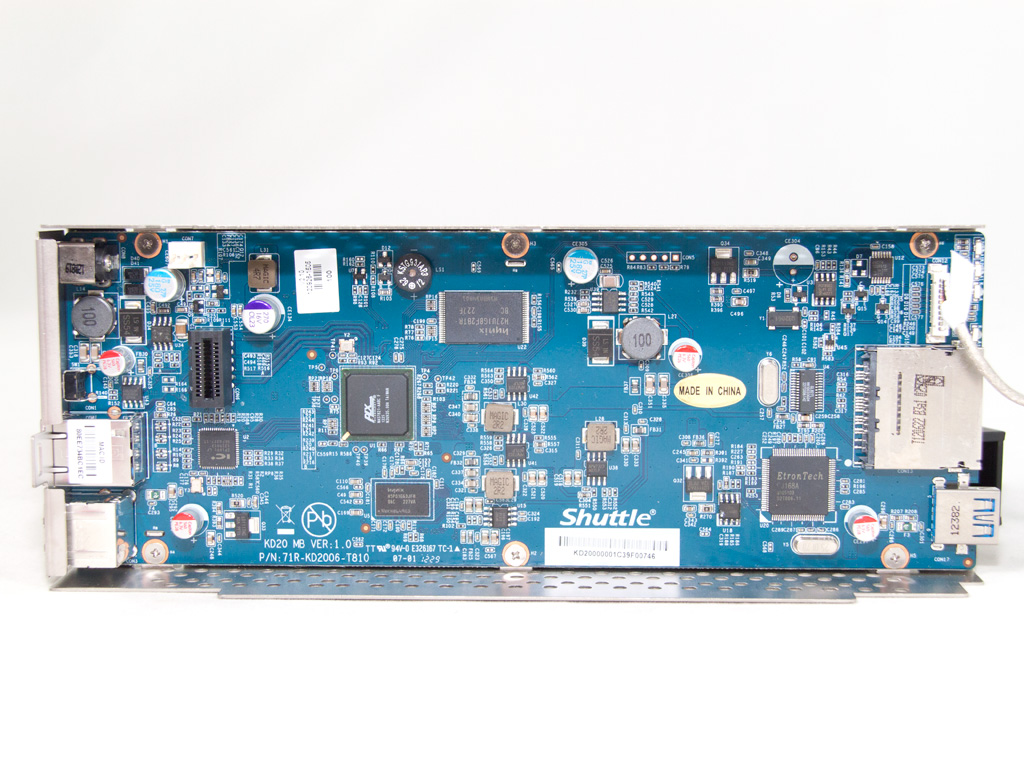
The main PCB is very small, but includes all the necessary components to provide the KD20 with all the basic functions of a decent NAS server.
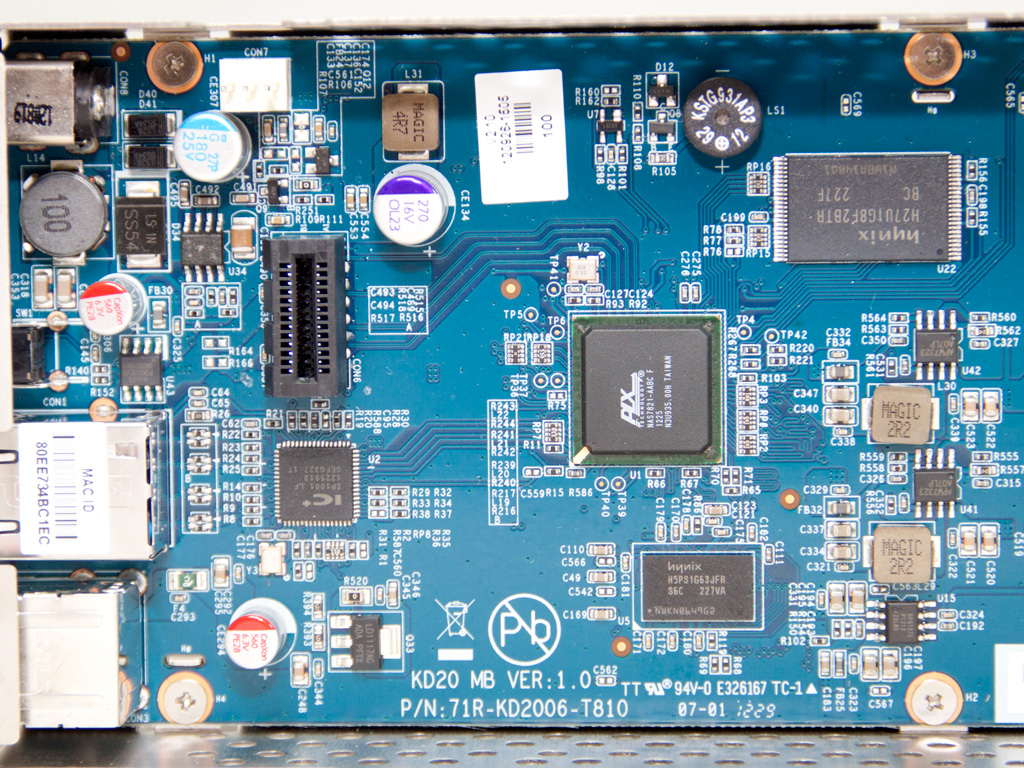
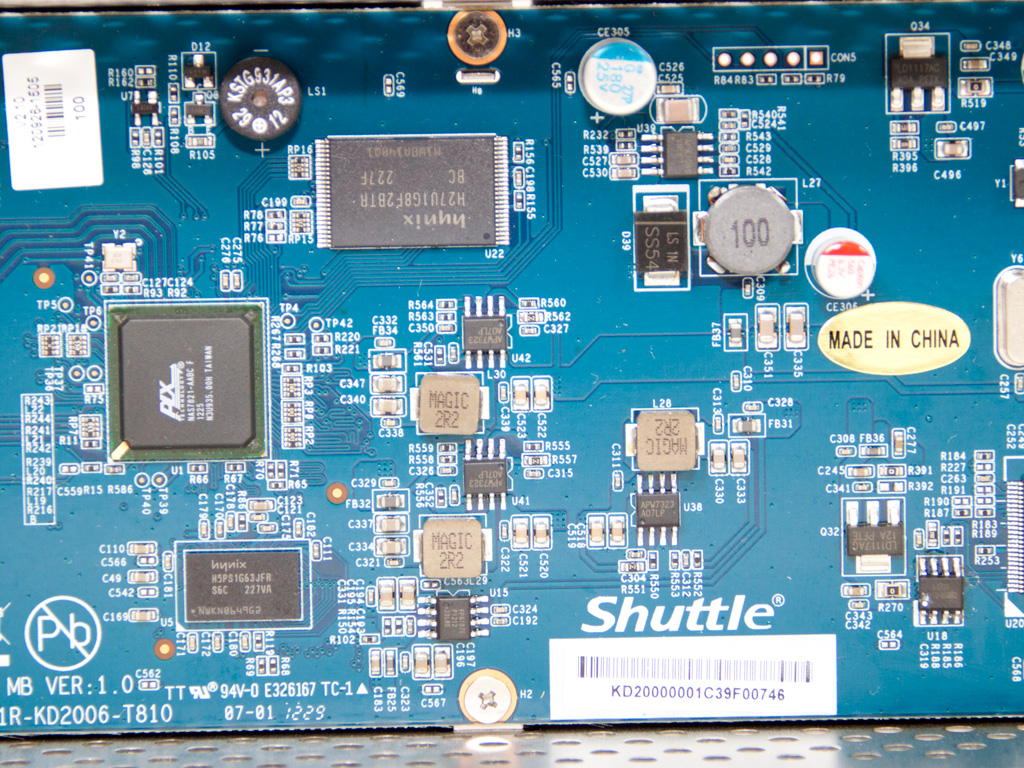

Some close shots of the main PCB. We will mention the most crucial components in the following paragraphs.
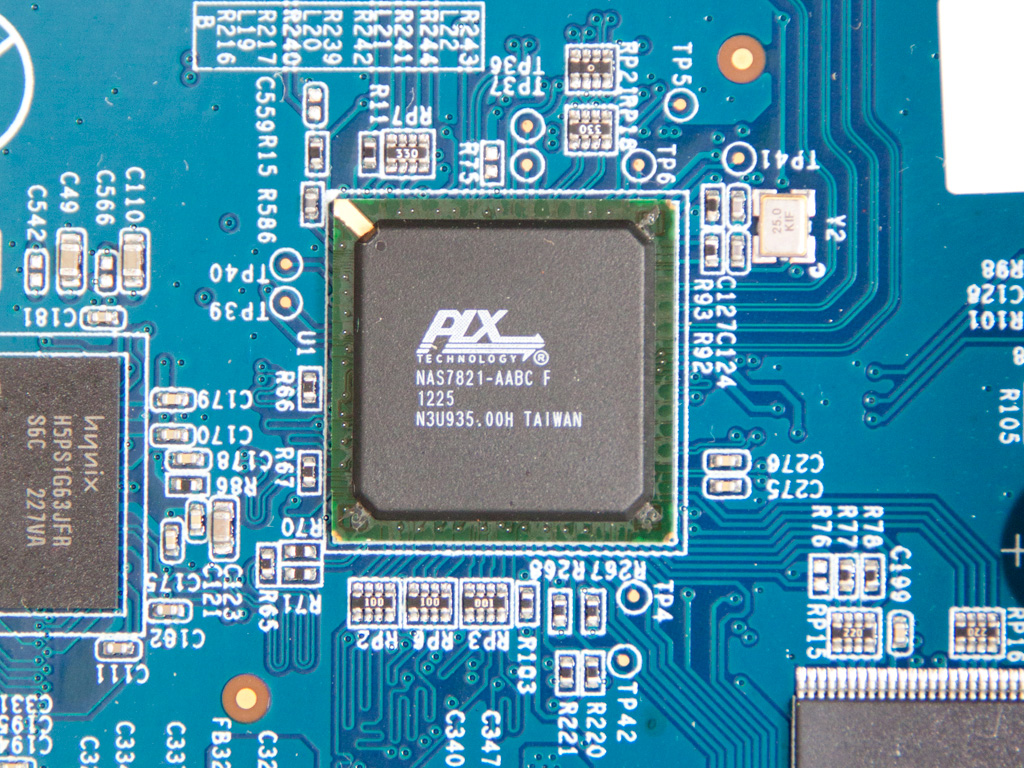
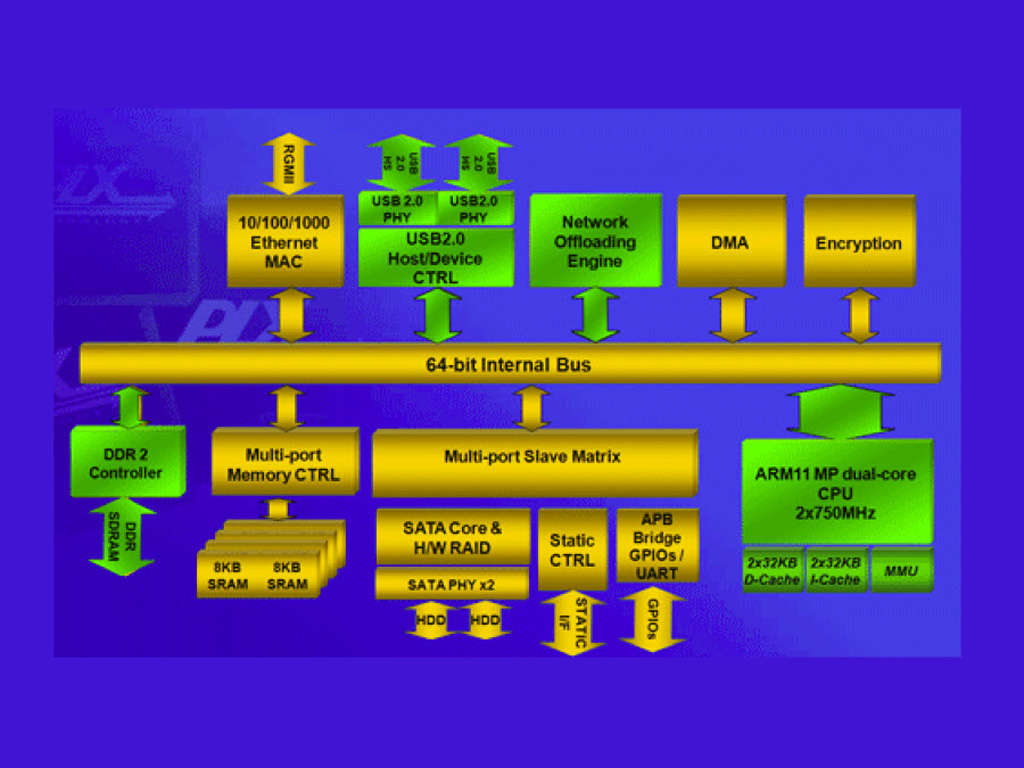

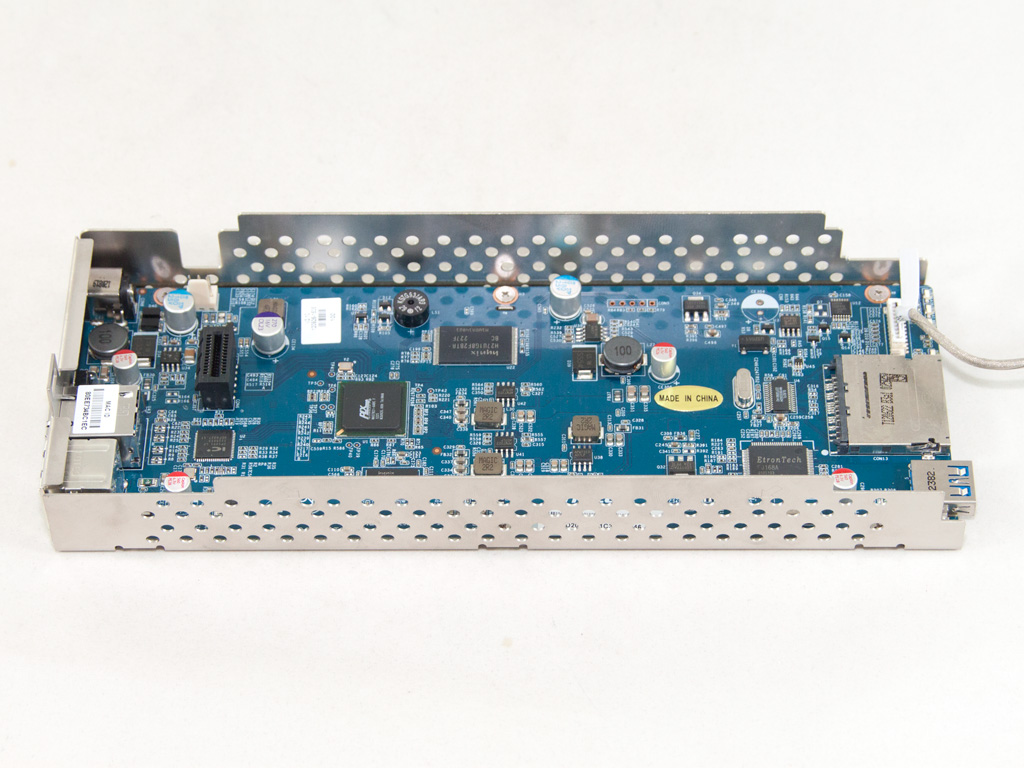
The brain of the KD20 is a dual-core PLX NAS 7821 CPU with each core clocked at 750 MHz. It is accompanied by 256 MB of DDR2 RAM (Hynix H5PS1G63JFR).
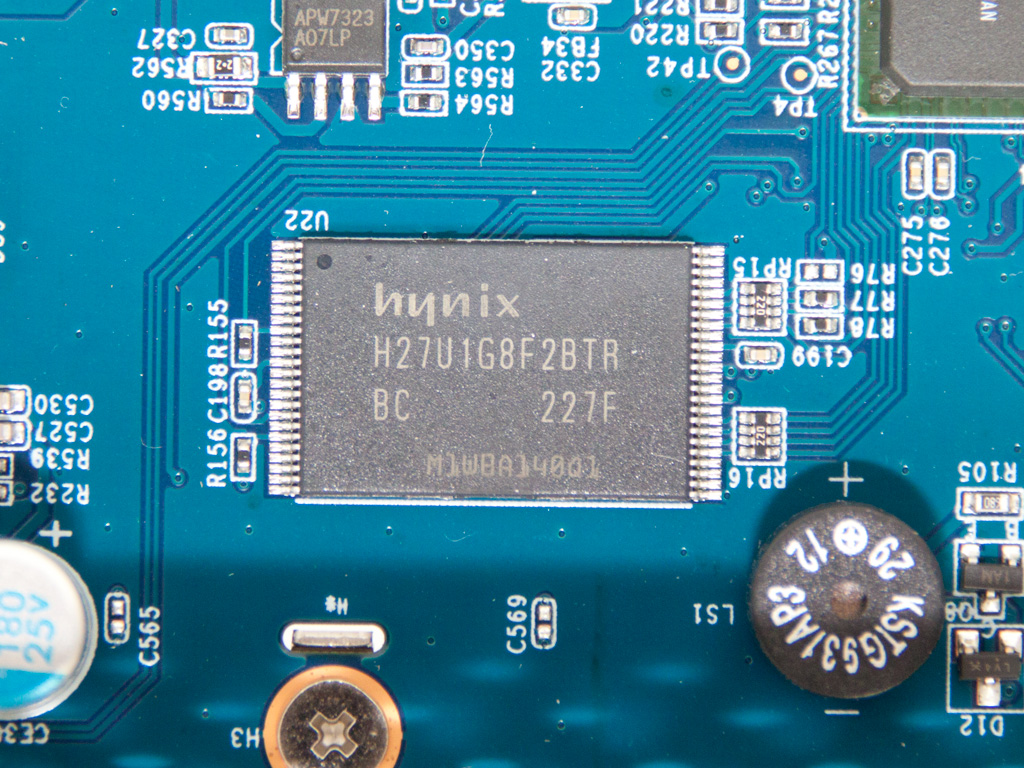
This is the 1 Gbit NAND flash module of the NAS. It is a Hynix H27U1G8F2BTR IC.
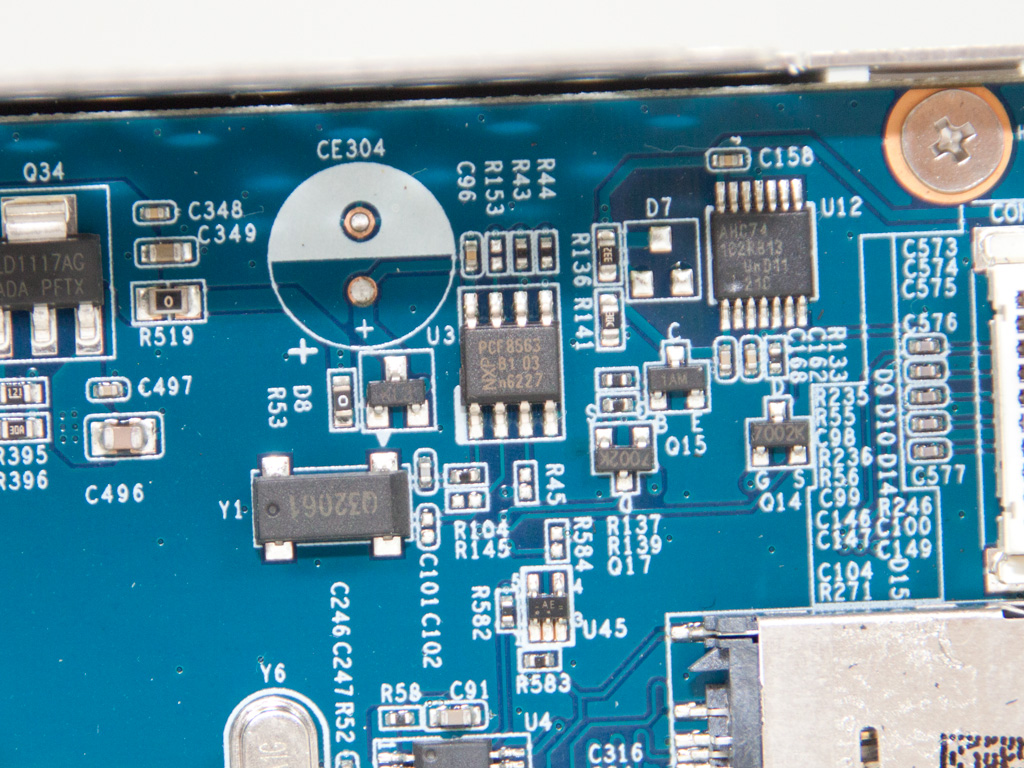
The IC in the middle of the above photo is a PCF8563, a CMOS Real-Time Clock (RTC) IC. Next to it we find some mosfet drivers.
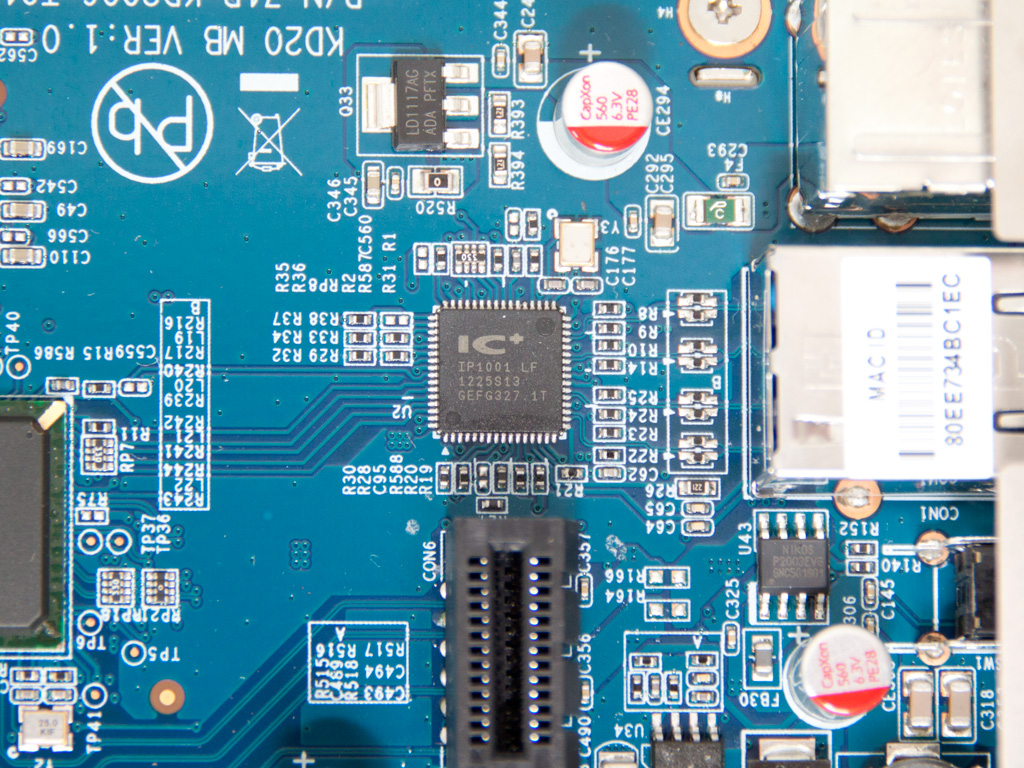
The Gigabit Ethernet controller, an IP1001 IC, has been installed next to the PCIE port.
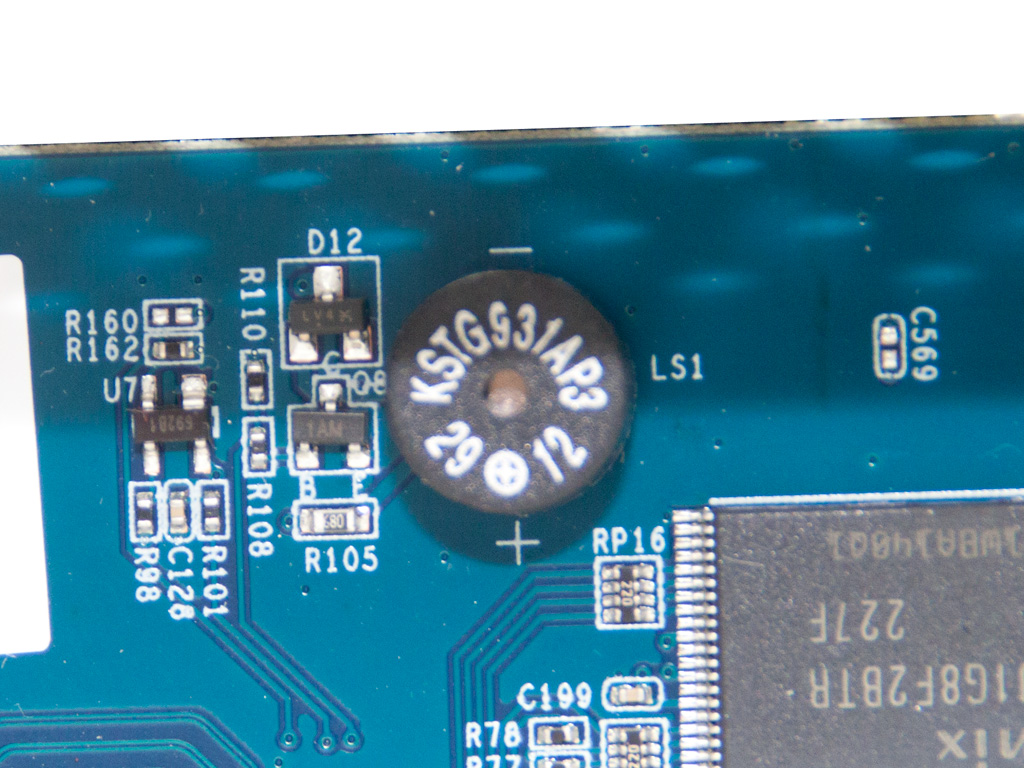
The buzzer of the KD20. It is small but effective.

A Genesys Logic GL827L IC handles both USB 2.0 ports and the SD-card reader.


The USB 3.0 controller, an EtronTech EJ168A IC.
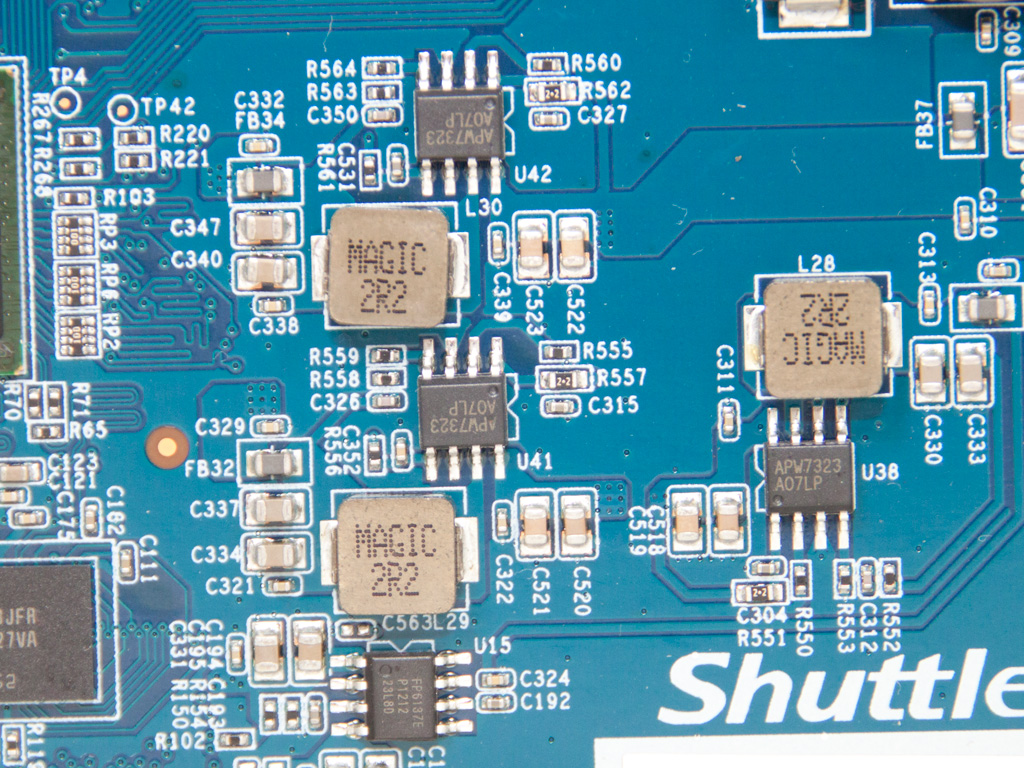
In this photo, we see several ANPEC APW7323 buck converters along with the corresponding coils. These are used to provide power to the CPU.

A ball-bearings ADDA fan of good quality (AD0712DB-D76; 70 mm; 12 V ; 0.11 A; 2500 RPM; 26.3 dBA; 20 CFM) equips the unit.
Aug 1st, 2025 21:28 CDT
change timezone
Latest GPU Drivers
New Forum Posts
- 9800x3d apart from gaming (21)
- Ubiquiti Networks users!!! (2)
- Free Games Thread (4836)
- memory used for store firmware in adapters wifi usb (2)
- Inside a wifi antenna (0)
- ASUS SBW-06D2X-U BR Drive not being detected in Linux (0)
- Technical Issues - TPU Main Site & Forum (2025) (295)
- The Official Thermal Interface Material thread (1814)
- What's your latest tech purchase? (24425)
- My UPS keep sending alarm when I game (37)
Popular Reviews
- ASUS ROG Crosshair X870E Apex Review
- MSI Claw 8 AI+ A2VM Review
- Montech X5 Review
- Orbital Pathfinder Review
- Herman Miller Logitech G Embody Review - No Pain, No Gain
- Lenovo Legion 5i (15IRX10) Review - Feature-Rich and Wallet Friendly
- Upcoming Hardware Launches 2025 (Updated May 2025)
- Lian Li HydroShift II LCD-C 360TL Review
- Noctua NF-A12x25 G2 PWM Fan Review
- Lian Li O11 Dynamic Mini V2 Review
TPU on YouTube
Controversial News Posts
- AMD's Upcoming UDNA / RDNA 5 GPU Could Feature 96 CUs and 384-bit Memory Bus (137)
- AMD Radeon RX 9070 XT Gains 9% Performance at 1440p with Latest Driver, Beats RTX 5070 Ti (131)
- Intel "Nova Lake-S" Core Ultra 3, Ultra 5, Ultra 7, and Ultra 9 Core Configurations Surface (110)
- DDR6 Memory Arrives in 2027 with 8,800-17,600 MT/s Speeds (102)
- NVIDIA to Debut GeForce RTX 50-series SUPER GPUs by Christmas (101)
- AMD Sampling Next-Gen Ryzen Desktop "Medusa Ridge," Sees Incremental IPC Upgrade, New cIOD (97)
- Intel CEO Confirms SMT To Return to Future CPUs (95)
- NVIDIA Becomes First Company Ever to Hit $4 Trillion Market-Cap (94)